Welcome readers, in this tutorial, we will implement the Route Guards in an angular application.
1. Introduction
- Angular is a Typescript-based open-source framework that helps developers build single page applications
- Offers Object-oriented features and supports the dynamic loading of the pages
- Supports Two-way data-binding, Property (
[]), and Event (()) binding techniques - Supports command-line-interface to easily initiate and manage the angular projects from the command line
1.1 Routing in Angular
Routing in angular is an essential part of the angular framework contained in the @angular/router package. It,
- Helps developers build single page applications with multiple states and views using routes and components
- Allows client-side navigation and routing between various components
- Allows lazy loading of modules
- Add router guards for client-side protection and allow or disallow access to the components or modules
- Various path matching strategies (i.e. prefix and full) to tell the router how to match a specific path to a component
- Easy access to route and query parameters
1.1.1 Route Guards in Angular
Route Guarding in angular is a mechanism of protecting a route. Angular provides the following set of guards and their purpose.
- CanActivate: Provides guard navigation to a route
- CanDeactivate: Provides guard navigation away from the current route
- CanActivateChild: Provides guard navigation to a child route
- Resolve: Perform route data retrieval before the route activation
- CanLoad: Provides guard navigation to an asynchronously loaded feature module
Now open the visual studio code and let us see how to implement this tutorial in angular 6 frameworks.
2. Angular Route Guards Example
Here is a systematic guide for implementing this tutorial.
2.1 Tools Used
We are using Visual Studio Code and Node Terminal to compile and execute the angular code on a browser.
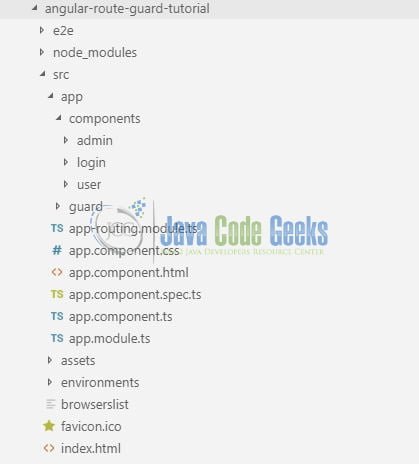
2.2 Project Structure
In case you are confused about where you should create the corresponding files or folder, let us review the project structure of the angular application.
3. Creating Angular application
Run the ng new angular-route-guard-tutorial command in the npm console to create a new angular project. Once the new project is created, following the below steps.
3.1 Creating a Routing module
Run the ng g m routing command in the npm console to create a routing module. In here we’ll add the common routes and protect the admin route i.e. as soon as the administrator route is clicked, the login guard will come in picture and shall ask the user to authenticate first. Add the following code to the src/app/app-routing.module.ts file.
app-routing.module.ts
|
01
02
03
04
05
06
07
08
09
10
11
12
13
14
15
16
17
18
19
20
21
22
23
24
25
26
|
import { NgModule } from '@angular/core';import { Routes, RouterModule } from '@angular/router';// Application components.import { UserComponent } from './components/user/user.component';import { AdminComponent } from './components/admin/admin.component';import { LoginComponent } from './components/login/login.component';// Authentication guard.// Will display the login component if the admin component is clicked!import { LoginGuard } from './guard/login.guard';// Routes definition.const routes: Routes = [ { path: '', redirectTo: '/home', pathMatch: 'full' }, { path: 'home', component: UserComponent }, { path: 'admin', component: AdminComponent, canActivate: [LoginGuard] }, { path: 'login', component: LoginComponent } // Will be activated by the login-guard to check user is authorised to access admin page.];@NgModule({ imports: [RouterModule.forRoot(routes)], exports: [RouterModule]})export class AppRoutingModule { } |
3.2 Import Routing module
To start working with angular routing we’ll need to import the RoutingModule module in src/app/app.module.ts file.
app.module.ts
|
1
2
3
4
5
6
7
|
// Injecting the routing module.import { AppRoutingModule } from './app-routing.module';// Declaring the routing module in the imports section of NgModule decorator.imports: [ BrowserModule, AppRoutingModule ], |
3.3 Injecting Router Outlet in the Application module
To activate routing in the angular application, inject the routing outlet in the src/app/app.component.html file.
app.component.html
|
1
2
3
4
5
6
7
|
<div class="container"> <h2 align="center" class="text-info">{{ title }}</h2> <hr /> <!-- To activate the routing in the angular application. --> <router-outlet></router-outlet></div> |
3.4 Creating Components
To understand route guarding in angular we will create some components. Execute the following commands in the npm console.
|
1
2
3
4
5
6
7
8
|
// Administrator component.ng generate component components/admin// Login component.ng generate component components/login// User component.ng generate component components/user |
Following commands will generate the sample components to better understand the guarding in angular. If developers have any confusion regarding the project structure, they can refer to Fig. 1.
3.5 Creating a Routing Guard
Run the ng g g guard/login command in the npm console to create a guard module. Add the following code to the src/app/guard/login.guard.ts file.
login.guard.ts
|
01
02
03
04
05
06
07
08
09
10
11
12
13
14
15
16
17
18
19
20
21
22
23
24
25
26
|
import { Injectable, OnInit } from '@angular/core';import { CanActivate, ActivatedRouteSnapshot, RouterStateSnapshot } from '@angular/router';import { Observable } from 'rxjs';import { Router } from '@angular/router';@Injectable({ providedIn: 'root'})export class LoginGuard implements OnInit, CanActivate { constructor(private router: Router) { } ngOnInit() { console.log('Login guard activated!'); } // If the administration component is clicked angular will activate the guard // to check if the user is authorized user or not. canActivate( next: ActivatedRouteSnapshot, state: RouterStateSnapshot): Observable | Promise | boolean { // TODO - Add the authentication and authorization mechanism. return this.router.navigate(['/login']); }} |
4. Run the Application
As we are ready with all the changes, let us compile and run the angular application with ng serve command. Once the projects are successfully compiled and deployed, open the browser to test it.
5. Project Demo
Open your favorite browser and hit the angular application url (http://localhost:4200/) to display the index page of the application.

User can access the secure page and they will be shown the login guard as the administration is protected.

That is all for this tutorial and I hope the article served you whatever you were expecting for. Happy Learning and do not forget to share!
6. Conclusion
In this section, we learned how to include a simple guard control in the angular application. Developers can download the sample application as an Eclipse project in the Downloads section.
7. Download the Eclipse Project
This was a tutorial of route guarding in an angular application.
You can download the full source code of this example here: Angular Route Guards Example
