Welcome readers, in this tutorial, we will learn the basic of Reactive Forms in angular and perform some validations on the form.
1. Introduction
In a web application, a form is a common approach that allows users to submit input and interact with the application. Frequently used for user login, information search, and feedback submission. The angular framework provides Template-driven and Reactive-driven forms to communicate with the users.
- The template-driven forms use the in-built directives (such as
ngModel,ngModelGroup, andngForm) available in the Forms module - The reactive driven forms use the
FormControl,FormGroup, andFormBuilderclasses available in the Reactive Forms module- Offer predictability and synchronous access to the data model
- Offer reactive patterns, testing, and validation
To work with reactive forms, open the visual studio code and let us see how to implement this tutorial in angular 6 frameworks.
2. Angular 6 Reactive Form Example
Here is a systematic guide for implementing this tutorial.
2.1 Tools Used
We are using Visual Studio Code and Node Terminal to compile and execute the angular code on a browser.
2.2 Project Structure
In case you are confused about where you should create the corresponding files or folder, let us review the project structure of the angular application.

3. Creating Angular application
Run the ng new angular-assignment-reactiveforms-example command in the npm console to create a new angular project. Once the new project is created, following the below steps.
3.1 Import Reactive forms module
To start working with the reactive forms we will need to import the ReactiveFormsModule module in src/app/app.module.ts file.
app.module.ts
// Importing the reactive forms module.
import { ReactiveFormsModule } from '@angular/forms';

// Declaring the reactive forms module in the imports section of NgModule decorator.
imports: [
    BrowserModule, ReactiveFormsModule
  ],
3.2 Building the Form Template
To create a form we will use the different reactive form property tags introduced in the angular framework. We will,
- Use the
formGroupproperty to bind our form with a name (i.e.myform). This will bind the form with aFormGroupobject declared in the component class - Use the
formControlNameproperty to bind the input fields to the individual form controls - Use the
ngSubmitproperty to submit the form and display the values on successful validation
Add the following code the src/app/app.component.html file.
app.component.html
<div class="container myWidth">
  <div class="row">
    <div class="col-md-6 offset-md-3">
      <h2 class="text-center">{{ title }}</h2>
      <hr />
      <form [formGroup]="myForm" (ngSubmit)="_formSubmit()">
        <!-- NAME FIELD -->
        <div class="form-group">
          <input type="text" formControlName="name" class="form-control" placeholder="Enter name" />
          <div *ngIf="myForm.controls.name.invalid && myForm.controls.name.touched" class="text-danger">
            <small *ngIf="myForm.controls.name.errors.required">Firstname is required.</small>
            <small *ngIf="myForm.controls.name.errors.pattern">Only alphabets are allowed.</small>
          </div>
        </div>
        <!-- EMAIL ADDRESS FIELD -->
        <div class="form-group">
          <input type="text" formControlName="email" class="form-control" placeholder="Enter email" />
          <div *ngIf="myForm.controls.email.invalid && myForm.controls.email.touched" class="text-danger">
            <small *ngIf="myForm.controls.email.errors.required">Email address is required.</small>
            <small *ngIf="myForm.controls.email.errors.email">Email must be a valid email address.</small>
          </div>
        </div>
        <!-- PHONE FIELD -->
        <div class="form-group">
          <input type="text" formControlName="phone" class="form-control" placeholder="Enter phone" />
          <div *ngIf="myForm.controls.phone.invalid && myForm.controls.phone.touched" class="text-danger">
            <small *ngIf="myForm.controls.phone.errors.required">Phone number is required.</small>
            <small *ngIf="myForm.controls.phone.errors.pattern">Phone number is not valid.</small>
          </div>
        </div>
        <!-- COUNTRY LIST DROPDOWN -->
        <div class="form-group">
          <select class="form-control" id="contry" formControlName="country">
            <option value="-1" disabled>Select country</option>
            <option *ngFor="let country of countries" [value]="country.name">{{country.name}}</option>
          </select>
        </div>
        <!-- SUBMIT BUTTON -->
        <div class="form-group">
          <input type="submit" value="Submit" [disabled]="myForm.invalid" class="btn btn-success" />
        </div>
      </form>

      <div *ngIf="formData">
        <strong>Form Value</strong>: {{formData |json}}
      </div>
    </div>
  </div>
</div>
3.3 Initialize Form data and Validations
In the component class, we will initialize the form with default values and add some basic validations. In addition, we will define our form group, individual form controls within the form group, and the validator class to set the validation properties for each control. Add the following code the src/app/app.component.ts file
app.component.ts
import { Component, OnInit } from '@angular/core';

// Importing the reactive form module classes.
import { FormGroup, FormBuilder, Validators } from '@angular/forms';

@Component({
  selector: 'app-root',
  templateUrl: './app.component.html',
  styleUrls: ['./app.component.css']
})

export class AppComponent implements OnInit {
  title = 'Angular6 Reactive forms example';

  myForm: FormGroup;
  formData: any;
  countries = [];

  constructor(private fb: FormBuilder) {
	 // Initializing the countries drodpwn with dummy data.
    this.countries = [
      { 'id': 1, 'name': 'India', 'code': 'IN' },
      { 'id': 2, 'name': 'Nepal', 'code': 'NP' },
      { 'id': 3, 'name': 'United Kingdom', 'code': 'GB' },
      { 'id': 4, 'name': 'United States', 'code': 'US' },
    ];
  }

  _formValidate() {
	// Here we have used a form builder and an array to allow for multiple validation rules on a form.
    this.myForm = this.fb.group(
      {
        name: ['', Validators.compose([Validators.required, Validators.pattern('[a-zA-Z]+')])],
        email: ['', Validators.compose([Validators.required, Validators.email])],
        phone: ['', Validators.compose([Validators.required, Validators.pattern('[0-9]+')])],
        country: ['-1']
      }
    );
  }

  // To initialize the form group and validations in the 'ngOnInit' lifecycle hook.
  ngOnInit() {
    this._formValidate();
  }

  // To show how developers can access the form control values.
  _formSubmit() {
    this.formData = this.myForm.getRawValue();
    console.log(this.formData);
  }
}
4. Run the Application
As we are ready with all the changes, let us compile and run the angular application with ng serve command. Once the projects are successfully compiled and deployed, open the browser to test it.
5. Project Demo
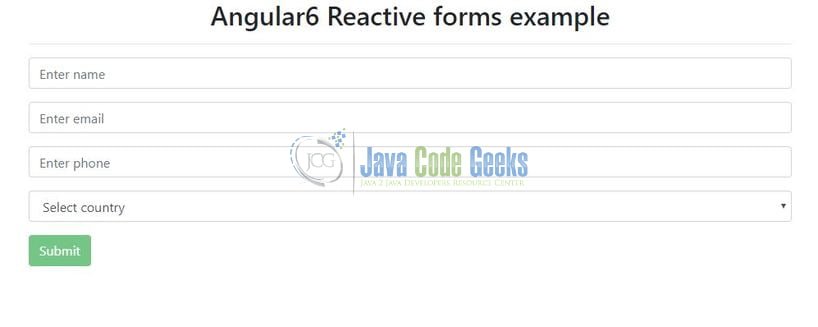
Open your favorite browser and hit the angular application url (http://localhost:4200/) to display the index page of the application.
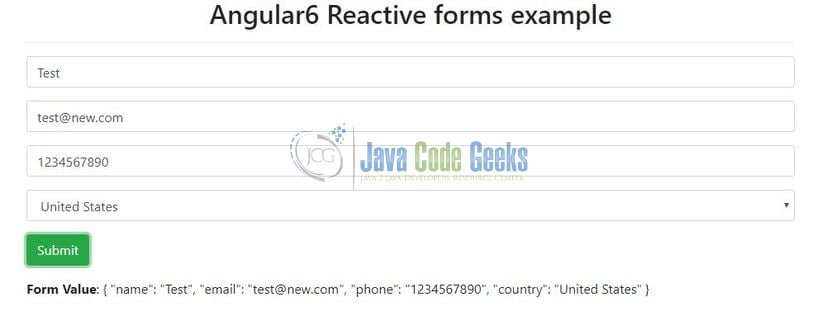
A user can enter the form details and click Submit. If the form is successfully accepted and status is valid, he/she will be able to see the form values.
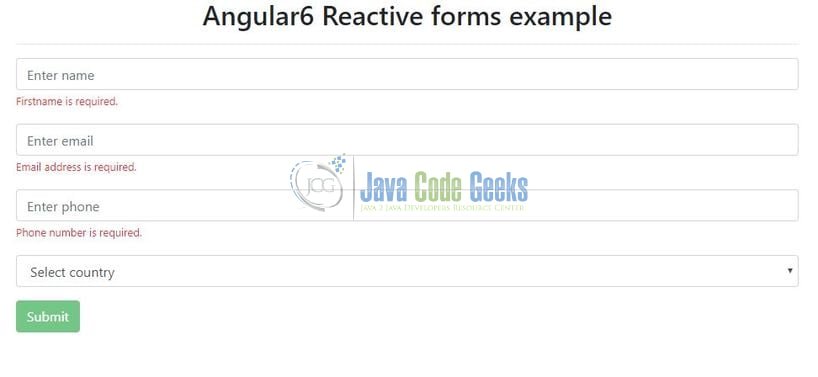
If a user has touched or blurs the input field but doesn’t enter the value, the form status is invalidated and the error messages are displayed.
That is all for this tutorial and I hope the article served you whatever you were expecting for. Happy Learning and do not forget to share!
6. Conclusion
In this section, we learned how to create a simple form model and bind it to the HTML form using reactive form classes. Developers can download the sample application as an Eclipse project in the Downloads section.
7. Download the Eclipse Project
This was a tutorial of Reactive Form in the angular framework.
You can download the full source code of this example here: Angular 6 Reactive Form Example
