In this article, we go about creating or setting up a Full Stack JavaScript application. We use NodeJS for the server-side API and ReactJS for the Front-end of the application. To start off, we use express-generator to scaffold the server-side code and structure. And then proceed with the create-react-app package to generate the client-side of our application. So let’s get started and build our application and configure it.
1. Tools and Frameworks
We use the below list of tools and frameworks as we work through this article. Some of these tools are necessary whilst others are optional and can be replaced with ones of your choice.
Node.js, in essence, is JavaScript on the server-side ReactJS is a front end library from Facebook. And the express-generator is a command-line tool to generate an express application. Express is a package to build a Web Server in Node.js. We use it here to build a rudimentary API to test out our Full Stack Application. Visual Studio Code IDE is my editor of choice but you are free to use one of your own choices to follow along.
2. Server-side Setup
We start off with setting up our Server-side code first. To do this, we run the express-generator as below.
>npx express-generator my-app
What the above command does is that it downloads a temporary copy of the express-generator and executes it with the parameters provided. On completion of the above our server-side application is built. Now we just need to install the dependencies using the below command after switching to the my-app directory.
/my-app> npm install
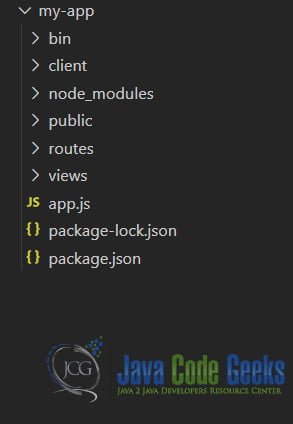
Once the above complete we should have an application ready that uses Express as a Web Server. The structure of the project should look like below:
We need to add one final dependency to our project called concurrently. We do so using the below command:
/my-app>npm i concurrently
In addition to adding this dependency, we will also remove one that we do not need, Jade view engine. We do so using the command below:
/my-app>npm uninstall jade
Now let us move on and generate the client-side application structure.
3. Client-side Setup
To set up our client-side code we create a folder called client. We switch to this folder from the command line and run the below command to set things up.
/my-app/client>npx create-react-app .
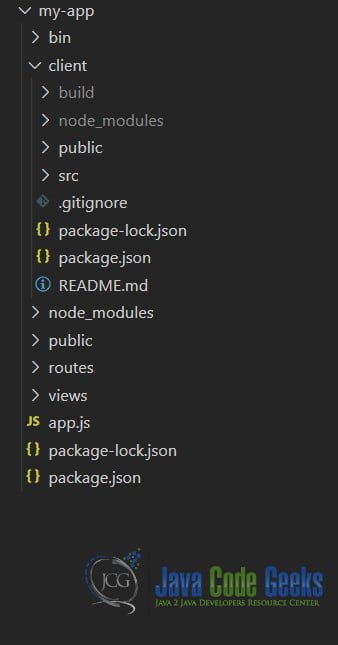
This downloads a temporary copy of the create-react-app package and runs it with the parameters provided. Once this command finishes our client-side application structure should be ready and look like below:
So far we have generated the Server-side half and then the client-side of our application. Let us now dive into configuring this application for development.
4. Development Configuration
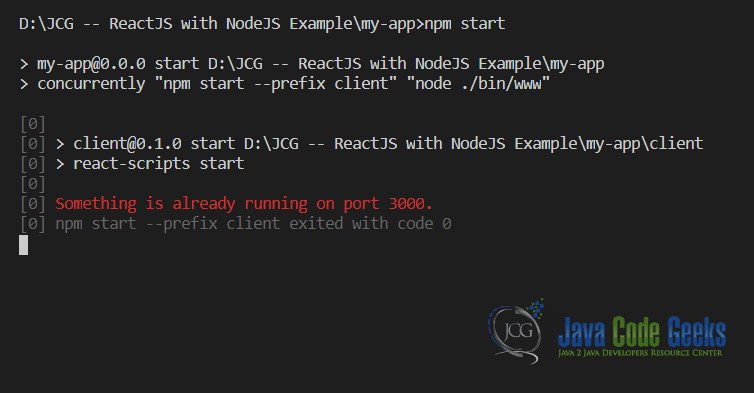
Since both our server-side and client-side code needs to run in parallel we use concurrently. But there is an issue both the dev server for Reactjs and our Express app use the same port, i.e. 3000. And this will create a conflict and throw an error if we run them concurrently as below:
This issue is pertinent only whilst in development, still, we need to get around this to proceed further. Since in production we would probably be running the Server-side code and serving the static production build of our front end from the same URL. But when developing we need not have to create a production build every time we want to run our code to test it.
To get around this issue let us edit the file which sets the port for our server-side code. This detail is managed by the file named www under the bin folder of our server-side code. The interesting bit looks like below:
www
...
/**
 * Get port from environment and store in Express.
 */

var port = normalizePort(process.env.PORT || '3000');
app.set('port', port);

/**
 * Create HTTP server.
 */

var server = http.createServer(app);
...
As you can see it defaults to the port 3000, let us edit this bit of the file to look like below:
www
...
/**
 * Get port from environment and store in Express.
 */

var port = normalizePort(process.env.PORT || '3010');
app.set('port', port);

/**
 * Create HTTP server.
 */

var server = http.createServer(app);
...
This should resolve the error we saw before. But now when we want to call the server-side API we run aground again since the URL is different. We cannot use relative URLs like “/api/whatever” and would instead need to use fully qualified ones. Those will create CORS issues but wait there is one last bit of configuration which saves the day for us. This time we will edit the client-side configuration.
We add a key called proxy to the package.json file of our client-side code. And set its value to the URL of our Server-side API in development. Let us see this in action.
package.json
{
  "name": "client",
  "version": "0.1.0",
  "private": true,
  "dependencies": {
    "@testing-library/jest-dom": "^4.2.4",
    "@testing-library/react": "^9.5.0",
    "@testing-library/user-event": "^7.2.1",
    "react": "^16.13.0",
    "react-dom": "^16.13.0",
    "react-scripts": "3.4.0"
  },
  "scripts": {
    "start": "react-scripts start",
    "build": "react-scripts build",
    "test": "react-scripts test",
    "eject": "react-scripts eject"
  },
  "eslintConfig": {
    "extends": "react-app"
  },
  "browserslist": {
    "production": [
      ">0.2%",
      "not dead",
      "not op_mini all"
    ],
    "development": [
      "last 1 chrome version",
      "last 1 firefox version",
      "last 1 safari version"
    ]
  },
  "proxy": "http://localhost:3010"
}
This helps us circumvent CORS warnings and having to write code that switches URLs based on the environment. With everything set up let us write the npm command to take the application for a test ride. To do this let us edit our package.json for the Server-side code and add the below command.
package.json
...
 "scripts": {
    "start:dev": "concurrently \"npm start --prefix client\"
                 \"node ./bin/www\"",
    "start": "npm run build --prefix client && node ./bin/www"
  },
...
5. Running in Dev Mode
Now we are all set so let us run the below command and look at the results.
/my-app>npm run start:dev
6. API in Action
Now that we have set up our application to run correctly. Let us create a rudimentary API to test out our setup. We will return a greeting from our API in response to a greeting from the front end of the application. Then display the greeting from the server-side API in our React component. So let’s get to it.
6.1 Server-side Greeting API
We will add a router called greeting to the routes folder and the code for it would look like below:
greeting.js
var express = require('express');
var router = express.Router();

/* GET users listing. */
router.get('/hello', function (req, res, next) {
    res.json('Greetings from API!');
});

module.exports = router;
And now let us modify the app.js file to make the express web server use this router. Our code for the app.js file should look like below:
app.js
var createError = require('http-errors');
var express = require('express');
var path = require('path');
var cookieParser = require('cookie-parser');
var logger = require('morgan');

/* var indexRouter = require('./routes/index');
var usersRouter = require('./routes/users'); */
var greetingRouter = require('./routes/greeting');
var app = express();

// view engine setup
/* app.set('views', path.join(__dirname, 'views'));
app.set('view engine', 'jade'); */

app.use(logger('dev'));
app.use(express.json());
app.use(express.urlencoded({ extended: false }));
app.use(cookieParser());
app.use(express.static(path.join(__dirname, 'public/public/')));

/* app.use('/', indexRouter); */
app.use('/greeting', greetingRouter);

// catch 404 and forward to error handler
app.use(function (req, res, next) {
  next(createError(404));
});

// error handler
app.use(function (err, req, res, next) {
  // set locals, only providing error in development
  res.locals.message = err.message;
  res.locals.error = req.app.get('env') === 'development' ? err : {};

  // render the error page
  res.status(err.status || 500);
  res.render('error');
});

module.exports = app;
Let us now set up our front end to call this API.
6.2 Front end set up
Let us add a component to our front end called Greeting. This component would render a button on click of which we make a call to the API. Once the API returns it will display the return value.
Greeting.js
import React, { useState } from 'react';

function Greeting(props) {
    const [greeting, setGreeting] = useState("");

    const sendGreetings = () => {
        window.fetch('/greeting/hello')
            .then(response => response.json())
            .then(resp => setGreeting(resp))
            .catch(err => console.log(err));
    }
    return <>
        <div
            style={{ flexDirection: 'column', height: '100vh',
display: 'flex', alignItems: 'center',
justifyContent: 'center' }}>
            <div><button onClick={sendGreetings}>
Send Greetings</button></div>
            {greeting && <div>{`${greeting}`}</div>}
        </div>
    </>
}
export default Greeting;
Also, let us modify our index.js file to render this component.
index.js
import React from 'react';
import ReactDOM from 'react-dom';
import './index.css';
import Greeting from './Greeting';
import * as serviceWorker from './serviceWorker';

ReactDOM.render(<Greeting />, document.getElementById('root'));

// If you want your app to work offline and load faster, you can change
// unregister() to register() below. Note this comes with some pitfalls.
// Learn more about service workers: https://bit.ly/CRA-PWA
serviceWorker.unregister();
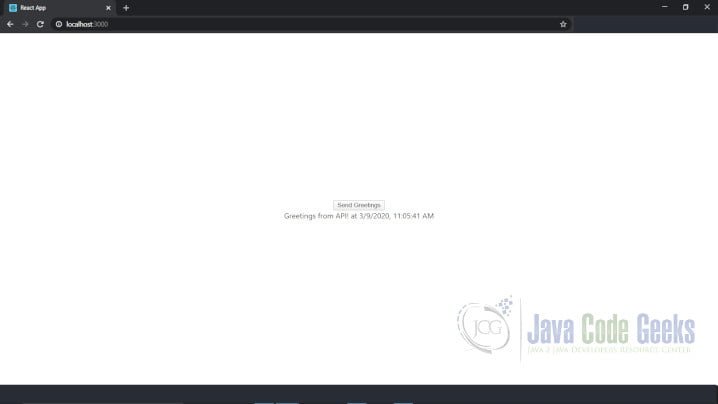
To see this in action run the below command:
/my-app>npm run start:dev
7. Download the Source Code
This was an example of Reactjs with Nodejs. To run the source code you need to run npm install at the root of the application as well as inside the client folder of the application. After this just execute the command npm run start:dev at the root of the application to start the application.
You can download the full source code of this example here: ReactJS with NodeJS Example
