Welcome readers, in this tutorial, we will understand form handling in a React-js application.
1. Introduction
React is a flexible javascript library responsible for building reusable UI components. It is an open-source component-based frontend library responsible only for the view part of an application and works in a virtual document object model. But before that let us take a look at the differences between Angular and React –
| Angular | React |
| Complete framework | Library |
| Object-oriented programming | Extension to the javascript library and its internal architecture is based on jsx |
| Based on the model view controller and real document object model | Based on the virtual document object model |
1.1 Setting up dependencies
To play with React let us set up some of the required dependencies.
1.2.1 Setting up Node.js
To set up Node.js on windows you will need to download the installer from this link. Click on the installer (also include the NPM package manager) for your platform and run the installer to start with the Node.js setup wizard. Follow the wizard steps and click on Finish when it is done. If everything goes well you can navigate to the command prompt to verify if the installation was successful as shown in Fig. 1.

1.2.2 Setting up React-js project
Once the Nodejs setup is successful we will use the below command to install the React library and set up the project. Do note that the npx package is available with the npm 5.2 version and above.
Create project structure
$ npx create-react-app formhandling
The above command will take some time to install the React library and create a new project named – formhandling as shown below.

2. Form handling in React-js
To set up the application, we will need to navigate to a path where our project will reside and I will be using Visual Studio Code as my preferred IDE.
2.1 Setting up the React code
To understand a practical implementation let us go through some hands-on exercises.
2.1.1 Creating User component
Create a folder named components in the src folder. Add the following code to the user/User.js file. The file will be responsible to handle the User form input interactions with the help of useState(…) hook and submitting the form for further work. The user form also caters to the CSS and the file – User.module.css can be downloaded from the Downloads section.
User.js
import React, { useState } from "react";
import classes from "./User.module.css";

const DUMMY_HOBBIES = [
  "swimming",
  "cricket",
  "football",
  "hockey",
  "tennis",
  "squash",
  "golf",
  "archery"
];

const User = () => {
  // defaults
  const [enteredUsername, setEnteredUsername] = useState("");
  const [enteredAge, setEnteredAge] = useState("");
  const [selectedHobby, setSelectedHobby] = useState("archery");

  // event handlers for each form field
  const usernameChangeHandler = (event) => {
    setEnteredUsername(event.target.value);
  };
  const ageChangeHandler = (event) => {
    setEnteredAge(event.target.value);
  };
  const hobbydropdownhandler = (event) => {
    setSelectedHobby(event.target.value);
  };

  // form submission
  const submitHandler = (event) => {
    event.preventDefault();
    // entered details user object
    const user = {
      username: enteredUsername,
      age: enteredAge,
      hobby: selectedHobby
    };
    // fixme - remove the alert with proper implementation
    alert(JSON.stringify(user));
  };

  return (
    <div className={classes.input}>
      <form onSubmit={submitHandler}>
        {/* username input field */}
        <label htmlFor="username">Username</label>
        <input
          id="username"
          type="text"
          value={enteredUsername}
          onChange={usernameChangeHandler}
        ></input>

        {/* age input field */}
        <label htmlFor="age">Age (years)</label>
        <input
          id="age"
          type="number"
          value={enteredAge}
          onChange={ageChangeHandler}
        ></input>

        {/* hobbies dropdown */}
        <label htmlFor="hobbies">Hobbies</label>
        <select
          id="hobbies"
          value={selectedHobby}
          onChange={hobbydropdownhandler}
        >
          {DUMMY_HOBBIES.map((item, idx) => (
            <option key={idx} value={item}>
              {item}
            </option>
          ))}
        </select>

        {/* form submit button */}
        <button type="Submit">Add user</button>
      </form>
    </div>
  );
};

export default User;
2.1.2 Creating implementation file
In the App.js component we will include the User component.
App.js
import "./App.css";
import User from "./components/user/User";

function App() {
  return (
    <div className="App">
      <h2>Form handling in React</h2>
      <small>Handling form inputs through useState(..) react hook</small>
      <User></User>
    </div>
  );
}

export default App;
3. Run the setup
To run the application navigate to the project directory and enter the following command as shown below in the terminal.
Run command
$ npm run start
The application will be started on the default port. In case the application does not get started on the default port you can change the port number as per your requirement. I have changed the default port to 2001.

4. Demo
The application will be started in the default browser as shown below and a welcome page with the form fields will be shown.
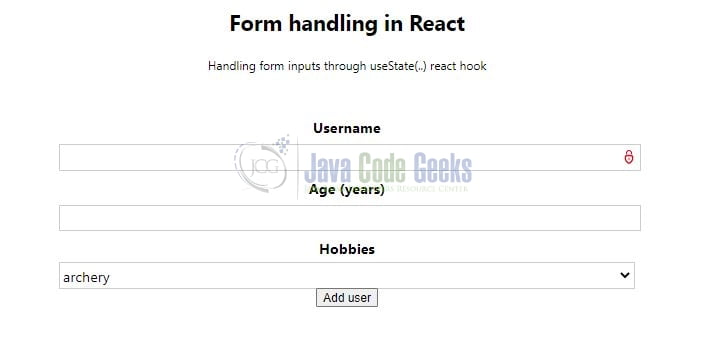
You can fill in the form fields and click on the Add user button to submit the details and an alert pop-up will be shown with the results.

That is all for this tutorial and I hope the article served you with whatever you were looking for. Happy Learning and do not forget to share!
5. Summary
In this tutorial, we created a React application and form handling. You can download the source code from the Downloads section.
6. Download the Project
This was a tutorial to understand form handling in a React application.
You can download the full source code of this example here: Form handling in React-js
