Note: This article is several months obsolete; after all, these days, who would want to deploy a serverless webhook from Google Cloud dashboard, when you can do the same with just a few clicks – on the world’s best serverless IDE?!
Often you need to set up a HTTP/S endpoint (webhook) for accepting data posted from another application or service; such as GitHub webhooks. Here is a quick way to set one up one, without having to run, pay for, or maintain a server of your own. (And hence the term “serverless webhook”.)
We’ll stick to Google Cloud Platform; it’s quick to register if you already have a Google account (which I guess you do ;)), and is totally free. You do have to provide a credit/debit card (all cloud platforms do); but unless your endpoint receives a huge traffic, you would be completely covered by the free tier. Plus, you receive $300 free credits to try out any of the other cool Google Cloud Platform services.
Let’s assume you want a webhook that accepts POST requests on the path /webhook.
We need two main things:
- a HTTP endpoint that accepts the data, and
- a compute entity (Google Cloud Function) to consume and process the data
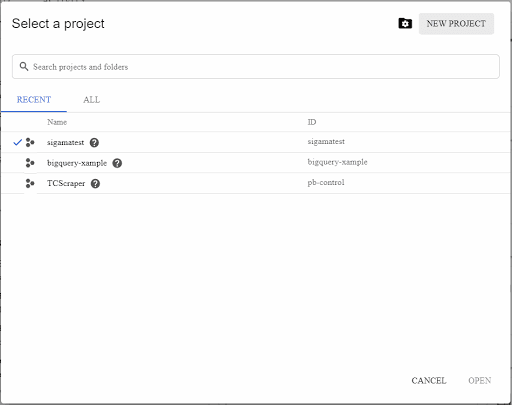
Create a new Cloud Plaform Project
If you haven’t already done so,
- Click on the project name drop-down on the header, and then New Project.
- Provide a name for your project (or let Google auto-generate one for you).
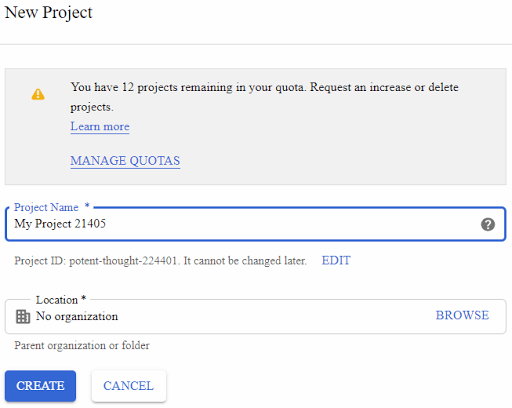
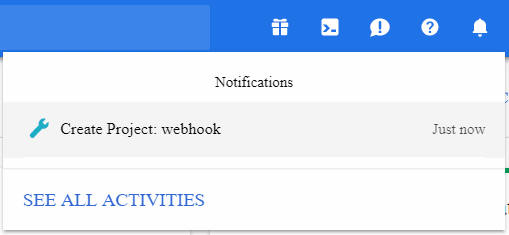
- Click Create. Google will start creating your project; it could take a few seconds. You can check the status via the notification drop-down (bell icon) on the page header.
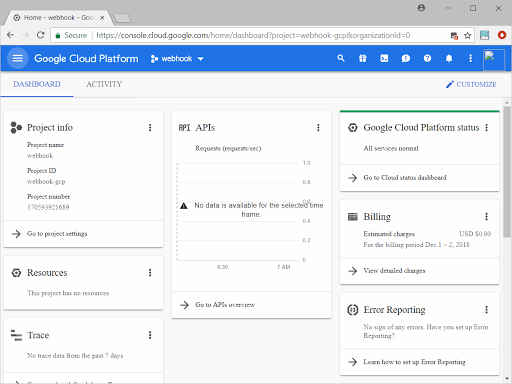
- When the project is ready, you will be taken to the project dashboard.
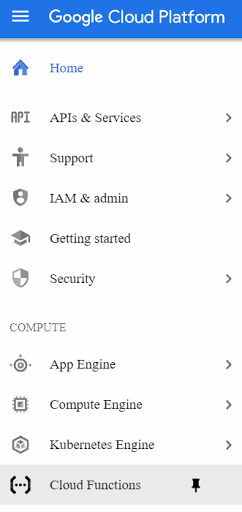
Sign up for Google Cloud Functions
- Open up the Cloud Functions dashboard. You can also chooose Cloud Functions from the side menu.
- Since you are probably new to Cloud Functions, the dashboard will first ask you to enable the Cloud Functions API. (If not, you can skip the next few steps.)
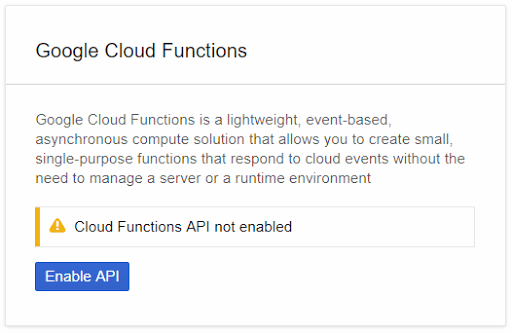
- Click Enable API. This will take you to the Billing page.
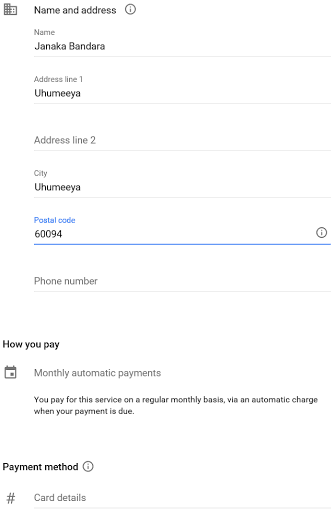
If you already have a billing account configured, you can simply select it and proceed. Otherwise, add your card details here and proceed. (Repeat: this is mostly a formality, and your project would be totally free.)
- Once your card is confirmed, you’ll end up back on the Cloud Functions dashboard.
Create a new function
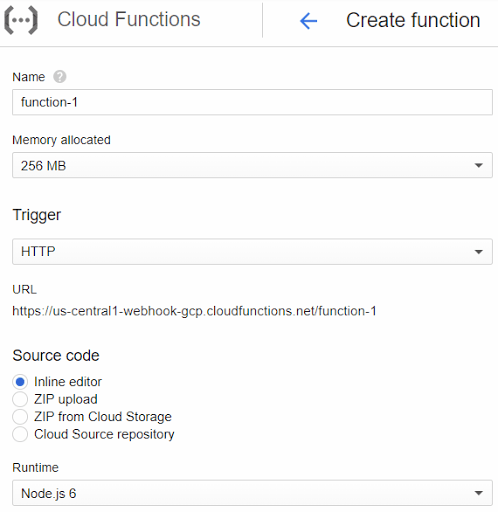
- Click Create Function. The Create Function page will open up.

- Provide a name for your function; this will also be the pathname of the webhook URL, so I will choose
webhook. You also need to select a runtime. I chose NodeJS 6. - Pick HTTP as the Trigger Type.
Write the code
- Click Next. You’ll be taken to a page where you can edit the function code.
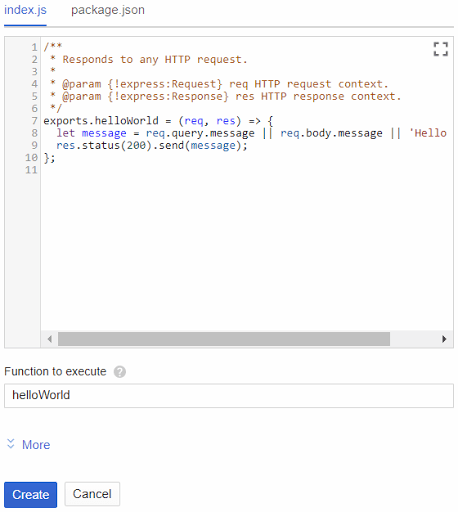
- Now you can write the custom logic for handling the webhook request. The request will be available via the
reqparameter as an Express.jsRequestobject.
After handling, you can respond via the res parameter which is an Express.js Response object:
1 | res.send("success!"); |
If you want to use external (NPM) dependencies, switch to the package.json tab and define them under a dependencies entry, as usual.
Deploy it
- When done, click Create. You’ll be taken back to the dashboard.

You’ll see your function listed in the previously-empty list, with a spinner in front. Wait till it changes to a green check mark – indicating that the function is live.
Once the function is live, your webhook is ready!
Test it
To test what you just built,
To test what you just built,
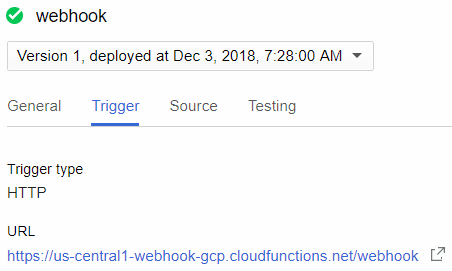
- Open a HTTP client (e.g. Postman), and set the URL to
https://<region>.<project-name>.cloudfunctions.net/<function-name>(e.g.https://us-east-1.myscellanius.cloudfunctions.net/webhook). You can also find the URL through the Trigger tab:
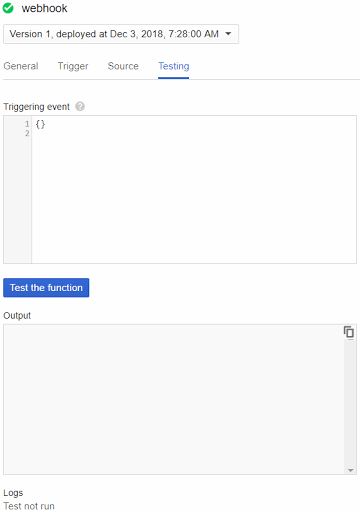
You can also use the built-in testing feature of the Cloud Functions dashboard to directly invoke your function with a suitable payload:
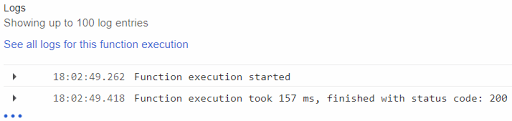
Checking the logs
If you receive an error, or would like to see any logs generated by the function, you can use the View Logs command on the ellipsis drop-down of the dashboard entry to visit the full-blown StackDriver logging dashboard.
For test invocations, the logs are displayed right below the Output pane:
What’s next?
This was quick and easy; but it could become a headache to switch between dashboards and manually upload code bundles whenever there’s a change to your handler logic.
Using a proper deployment tool would save you time, and also allow you to keep your cloud resources grouped together. For example, you may need to incorporate a Cloud Storage bucket or a Pub/Sub topic into your logic; in that case it would be quite easy to deploy them automatically as one unit, instead of manually doing each via the different dashboards.
And in case you didn’t know, that tool is already here: create function, write code, add dependencies; and save, build and deploy with one button click!
Published on Java Code Geeks with permission by Janaka Bandara, partner at our JCG program. See the original article here: Set Up Your Free Serverless Webhook – in Minutes! Opinions expressed by Java Code Geeks contributors are their own. |
