Welcome to my new Git series. Since I use Git all the time, I figured I could start documenting some of my tips and tricks. For instance, today I want to talk about how to create a Git repo from scratch.
If you need an answer fast, try navigating to the folder you want to start a Git repo in and run the command git init. Alternatively, you can always leverage GUI-based tools like GitHub Desktop. If all else fails, keep reading!
Problem Description
When I was first learning Git, I was very confused. After all, there’s a lot of terminology to grasp. For instance, what’s a repository? How about a branch? How are Git and GitHub different? What’s a merge conflict, and how do I fix one? These were all questions that kept me up at night.
That said, when I finally got around to learning the ropes, I often found myself Googling the same questions over and over. For instance, what’s the command to add a description to a commit? Likewise, what’s the command for switching branches? Ultimately, I caved and started using a graphical user interface (GUI) like GitHub Desktop.
Even after throwing in the towel, I still find myself asking questions like “How do you create a Git repo from scratch?” As a result, I figured I could do myself a favor by documenting the answer. In this article, we’ll learn a few ways to do exactly that. Then, in the future, we’ll start tackling other questions together.
Solution
Today, we’ll look at a few different ways to create a Git repository. First, we’ll look at a command line solution which takes advantage of the git init command. Then, we’ll explore a few tools that will abstract away the command line. Sound good? Let’s dive in!
Create a Git Repo Using the Command Line
One way to create a Git repo is to use the git init command in the appropriate folder:
1 2 | cd /path/to/repogit init |
In this example, we open our command line and change to the directory that we want to convert to a git repository. Then, we run the git init command. Here’s what that might look like:
01 02 03 04 05 06 07 08 09 10 11 12 13 | E:\>cd ProjectsE:\Projects>cd git-projectE:\Projects\git-project>git initInitialized empty Git repository in E:/Projects/git-project/.git/E:\Projects\git-project>git statusOn branch masterNo commits yetnothing to commit (create/copy files and use "git add" to track) |
Now, I have an empty git repository on my machine. Just to be sure, I ran git status which let me know the current state of the repo.
At this point, we might try creating a file. In my case, I created a simple README and placed it in the root of my new repo:
1 2 3 | # Project READMECheck out this cool new project! |
Now, when I run git status, I’ll get a different result:
01 02 03 04 05 06 07 08 09 10 11 | E:\Projects\git-project>git statusOn branch masterNo commits yetUntracked files: (use "git add <file>..." to include in what will be committed) README.mdnothing added to commit but untracked files present (use "git add" to track) |
If we follow the directions, we can add our README to the repo with git add README.md. Then, we can make our first commit:
01 02 03 04 05 06 07 08 09 10 11 12 13 14 15 16 17 | E:\Projects\git-project>git add README.mdE:\Projects\git-project>git statusOn branch masterNo commits yetChanges to be committed: (use "git rm --cached <file>..." to unstage) new file: README.mdE:\Projects\git-project>git commit -m "Created README"[master (root-commit) 0ee160c] Created README 1 file changed, 0 insertions(+), 0 deletions(-) create mode 100644 README.md |
And, there we have it—a brand new Git repo created from scratch!
Create a Git Repo Using GitHub Desktop
If you’d prefer to avoid the command line, there are tons of GUI-based tools you can use. For instance, I like to use GitHub Desktop since I host all my projects there. That said, you can use pretty much any IDE (e.g. Eclipse, PyCharm, VS Code, etc.) with a Git plugin.
When we open GitHub desktop, we’re greeted with a window that looks like this (could be different in the future):
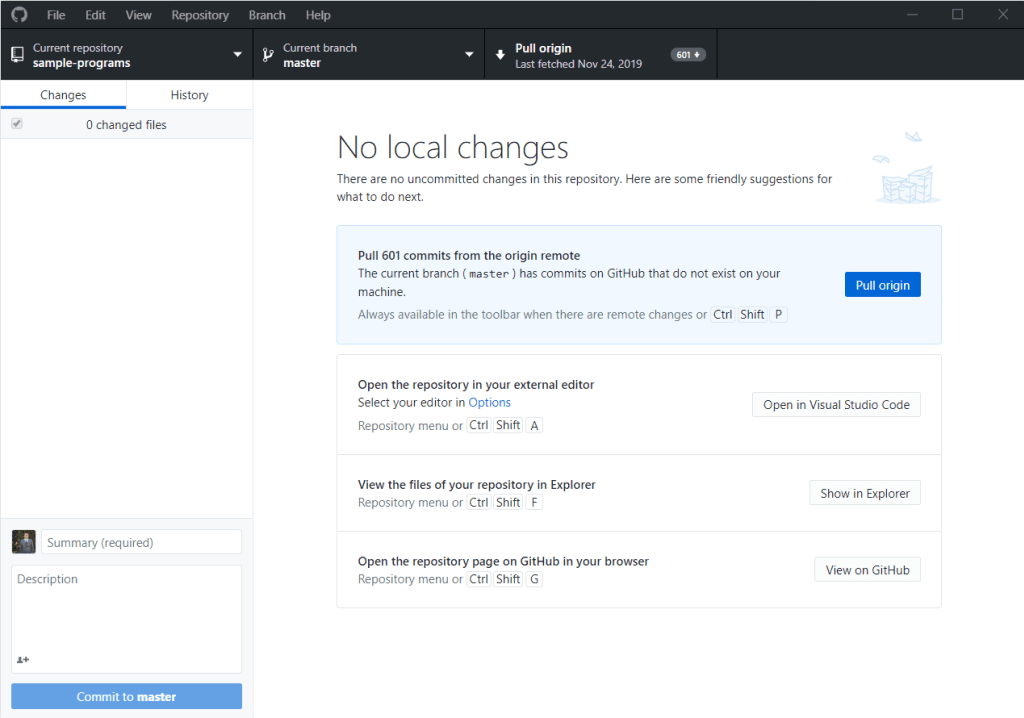
If we want to create a new repository, we can go to “File” and select “New repository”. Alternatively, we can press Ctrl + N. That pops up the following prompt:
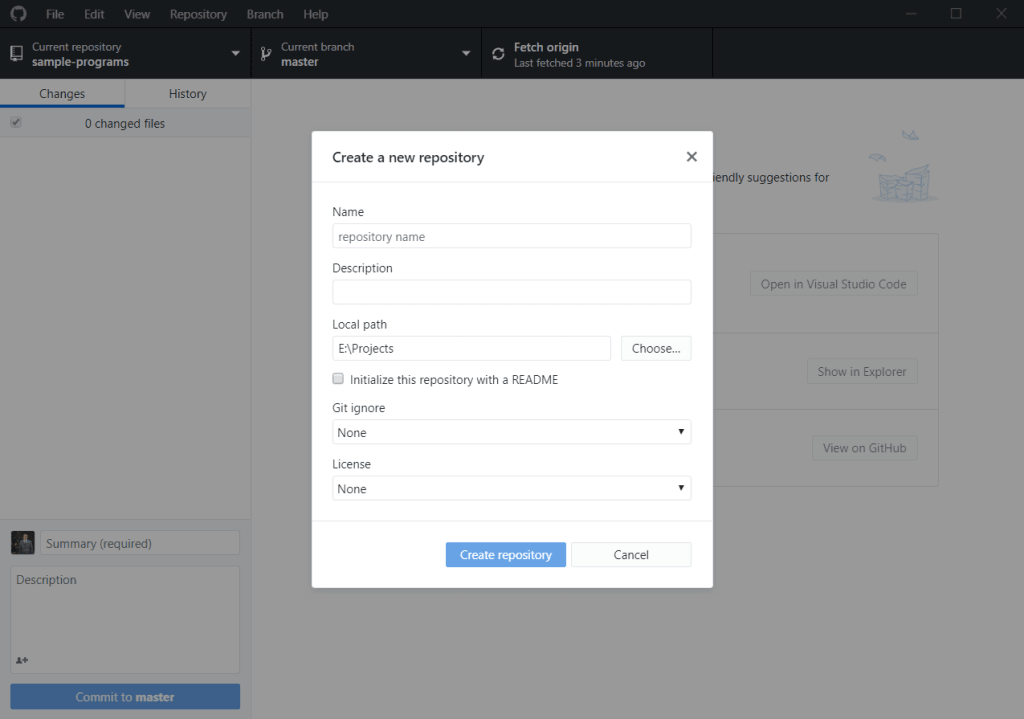
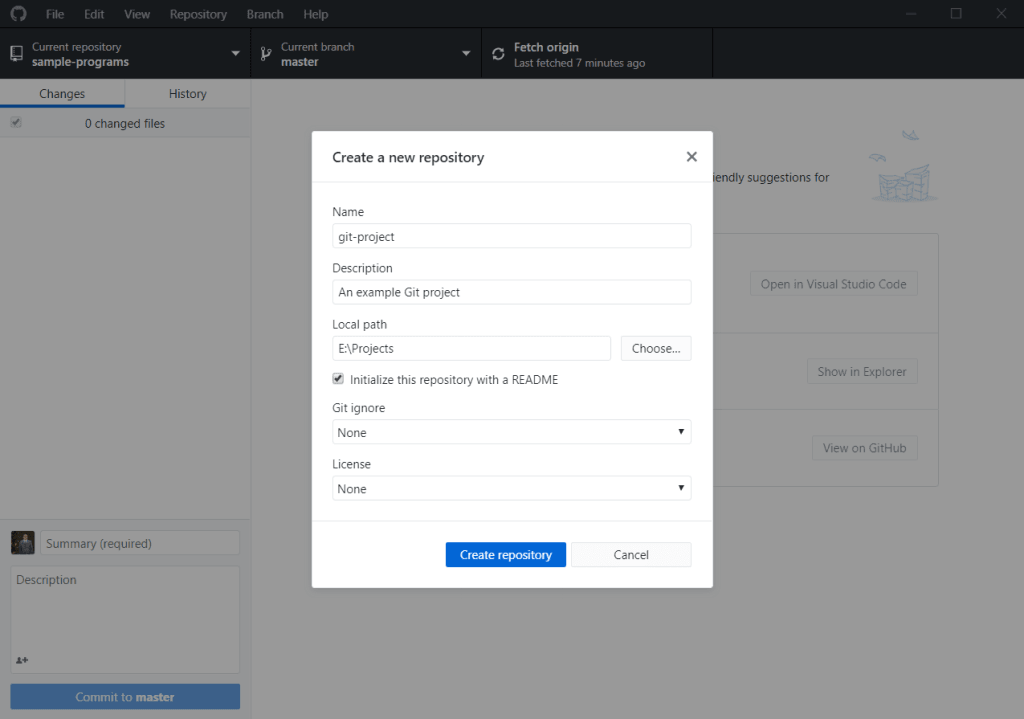
Unlike Git, GitHub Desktop has a few more options for customization. For instance, we can create a repository with a name, a description, a README, a Git ignore, and a license. Naturally, we’ll keep this one simple:
When that’s finished, we’re greeted with a window that looks like this:
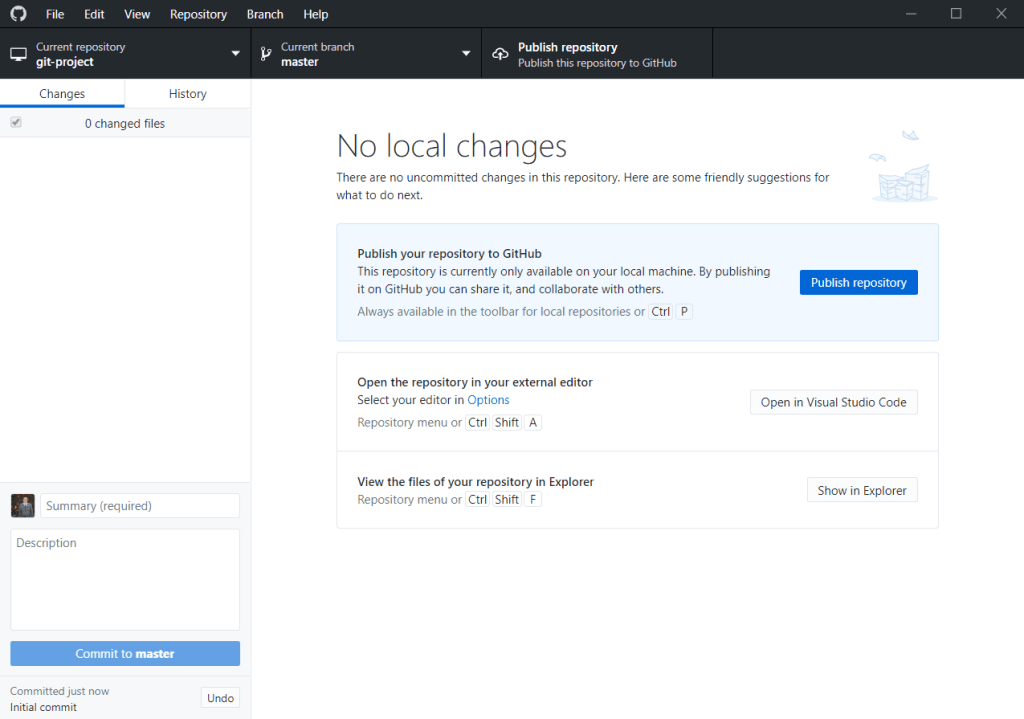
Say hello to our brand new Git repo! Now, we can make changes like any other repo.
Create a Git Repo Using the GitHub Website
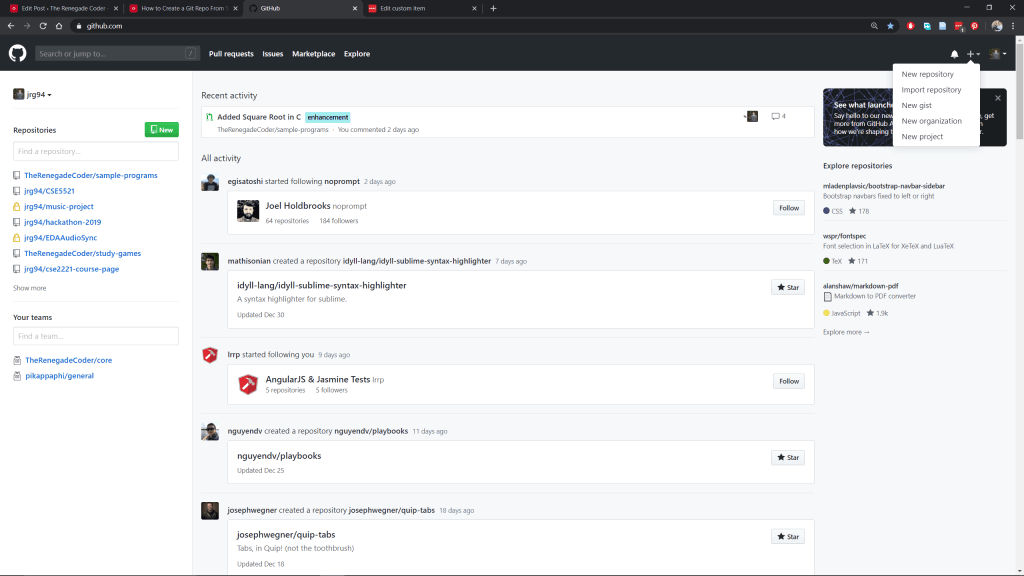
If you’d prefer something completely centralized and web-based, look no further than GitHub’s website. If you have an account, it’s possible to create a repository right from the homepage:

In the upper righthand corner, we’ll see a bell, a plus sign, and a profile picture. If we click the plus sign, we’ll be greeted with a few options:
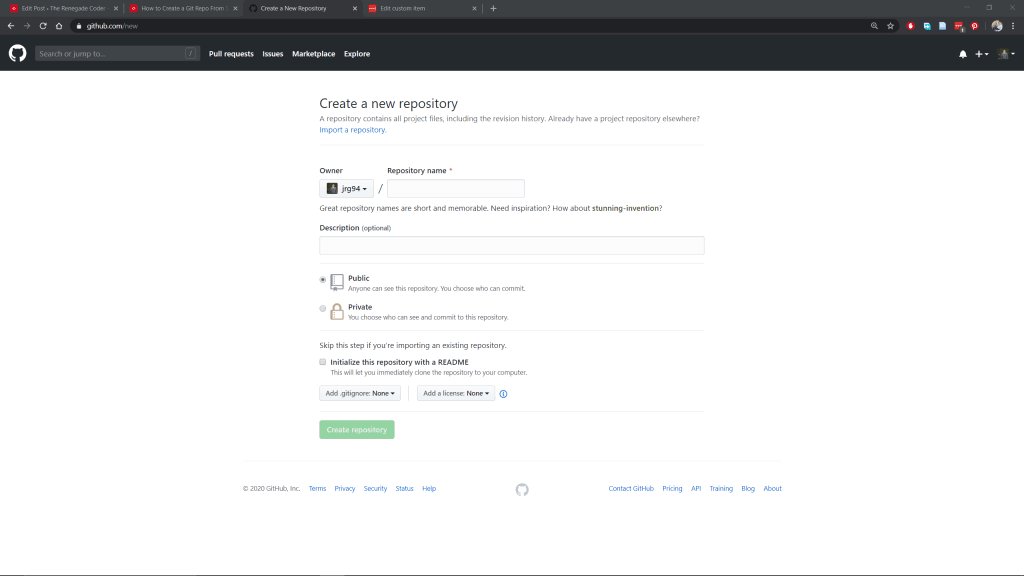
If we click the “New repository” option, we’ll be taken to a new page which begins the repository creation process:

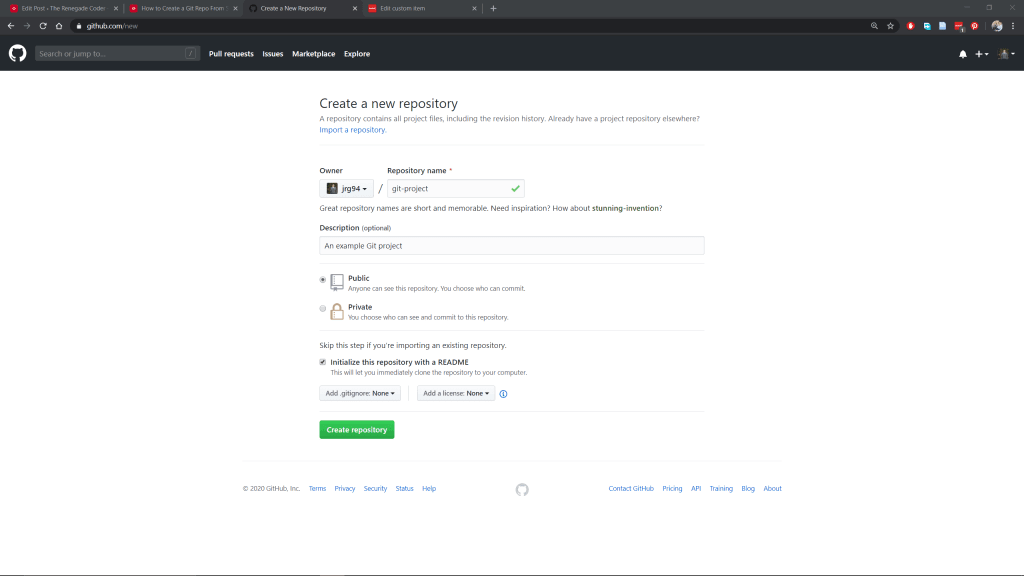
If this looks familiar, it’s because this is the same prompt GitHub desktop gives. In other words, we can fill it out the same way:
Once we hit “Create repository”, we’ll be greeted with the repository homepage:
At this point, we’ve created our repo, but it’s on GitHub’s servers instead of our computer. To get it on our computer, we’ll need to clone the repo. To do that, we can hit the “Clone or download” button:
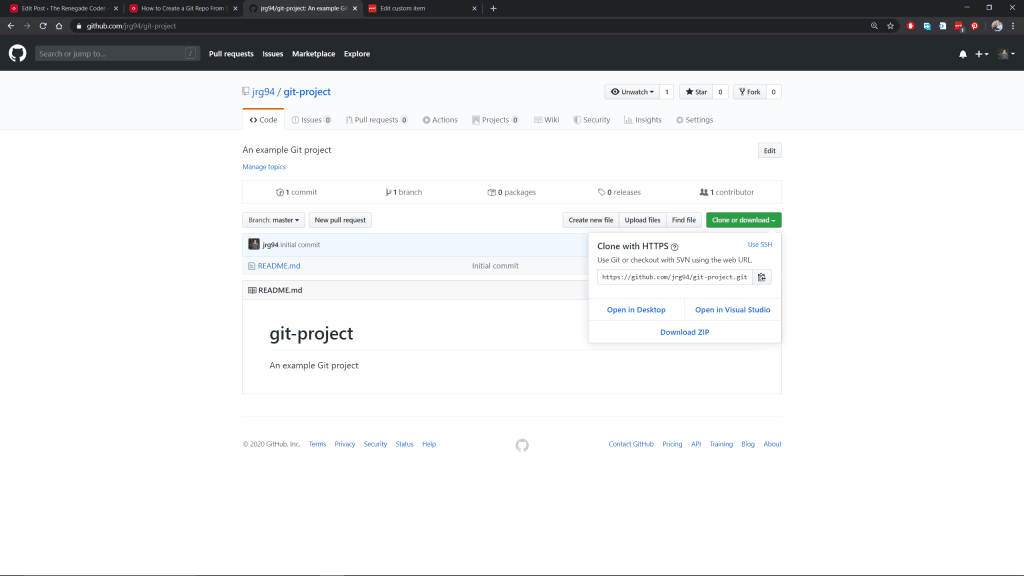
In a future article, we’ll talk about cloning repositories, so I won’t dwell on it here. That said, feel free to select “Open in Desktop” for ultimate convenience. That should open up the GitHub Desktop application which will prompt you to clone the project on your system. Otherwise, you might want to get familiar with the git clone command.
A Little Recap
With all that out of the way, here’s a quick recap of the solutions we saw today:
git init- GitHub Desktop
- GitHub Website
If you have a preferred solution that wasn’t listed here, feel free to drop it in the comments. Otherwise, help support this website by joining the mailing list, becoming a patron, or browsing the shop.
If you want to stick around, here are some related articles:
Likewise, here are some Git resources from Amazon (ad):
If nothing else, thanks for stopping by! I appreciate it.
Published on Java Code Geeks with permission by Jeremy Grifski, partner at our JCG program. See the original article here: How to Create a Git Repo From Scratch: Git Init, GitHub Desktop, and More Opinions expressed by Java Code Geeks contributors are their own. |
