In my previous post I set up a network of two nodes running a private blockchain. In this post I use it to create accounts, mine some ether and browse the blockchain with the Mist browser on my Mac.
First I make sure the nodes are up and running. Then I go to the ‘geth’ console that runs on node1.
![]()
When I enter the command web3.eth.accounts in the console to show all available accounts on this node the result will be an empty array: [].
To create an account I run in the console:
personal.newAccount("Write here a good, randomly generated, passphrase!")
The string returned is the address of the newly created account. When I now run web3.eth.accounts I see the address of my created account. I do the same action on the other node so I have two accounts, one on each node.
Next step is to create some ether by performing some mining. In the ‘main’ ethereum network it will take days to get some (depending on the amount of compute power that is available to the job) but in this case it takes a few minutes to get some (of course it can’t be used in the ‘real’ ethereum blockchain.
On node1 I run the following command in the geth console
miner.setEtherbase(address)
to set the address where the mining reward will be sent to. Then I start the miner process with
miner.start().
This generates output like the following:
> web3.eth.accounts
["0x30aa499b853d422b7e38bdb885fd9dfa2d964715"]
> miner.setEtherbase("0x30aa499b853d422b7e38bdb885fd9dfa2d964715")
true
> miner.start(2)
INFO [10-28|13:38:16] Updated mining threads                   threads=2
INFO [10-28|13:38:16] Transaction pool price threshold updated price=18000000000
null
> INFO [10-28|13:38:16] Starting mining operation
INFO [10-28|13:38:16] Commit new mining work                   number=103 txs=0 uncles=0 elapsed=559.051µs
INFO [10-28|13:38:20] Generating DAG in progress               epoch=0 percentage=0 elapsed=3.828s
INFO [10-28|13:38:24] Generating DAG in progress               epoch=0 percentage=1 elapsed=7.784s
INFO [10-28|13:38:28] Generating DAG in progress               epoch=0 percentage=2 elapsed=11.732s
....
INFO [10-28|13:42:58] Generating DAG in progress               epoch=0 percentage=98 elapsed=4m41.664s
INFO [10-28|13:43:01] Generating DAG in progress               epoch=0 percentage=99 elapsed=4m44.566s
INFO [10-28|13:43:01] Generated ethash verification cache      epoch=0 elapsed=4m44.572s
INFO [10-28|13:43:11] Generating DAG in progress               epoch=1 percentage=0  elapsed=7.485s
INFO [10-28|13:43:16] Successfully sealed new block            number=103 hash=75997d…82ee18
INFO [10-28|13:43:16] �� mined potential block                  number=103 hash=75997d…82ee18
INFO [10-28|13:43:16] Commit new mining work                   number=104 txs=0 uncles=0 elapsed=1.215ms
INFO [10-28|13:43:20] Generating DAG in progress               epoch=1 percentage=1  elapsed=16.233s
INFO [10-28|13:43:28] Generating DAG in progress               epoch=1 percentage=2  elapsed=24.327s
INFO [10-28|13:43:30] Successfully sealed new block            number=104 hash=7401b3…44addf
INFO [10-28|13:43:30] �� mined potential block                  number=104 hash=7401b3…44addf
INFO [10-28|13:43:30] Commit new mining work                   number=105 txs=0 uncles=0 elapsed=399.337µs
INFO [10-28|13:43:31] Successfully sealed new block            number=105 hash=2bfca8…23f9c1
INFO [10-28|13:43:31] �� mined potential block                  number=105 hash=2bfca8…23f9c1
The output shows the DAG being created first and when that is done (takes few minutes) it starts mining blocks. After a few minutes I run miner.stop() in the console.
By the way, in the console of the other node you should also see activity while mining; it will receive the mined blocks from the connected node:
INFO [10-28|13:43:30] Imported new chain segment               blocks=2 txs=0 mgas=0.000 elapsed=13.597ms  mgasps=0.000 number=104 hash=7401b3…44addf ignored=102
INFO [10-28|13:43:31] Imported new chain segment               blocks=1 txs=0 mgas=0.000 elapsed=7.794ms   mgasps=0.000 number=105 hash=2bfca8…23f9c1
INFO [10-28|13:43:32] Imported new chain segment               blocks=1 txs=0 mgas=0.000 elapsed=5.089ms   mgasps=0.000 number=106 hash=d1e49c…656c2e
INFO [10-28|13:43:34] Imported new chain segment               blocks=1 txs=0 mgas=0.000 elapsed=26.729ms  mgasps=0.000 number=107 hash=72f2fb…16a495
With the command ‘web3.eth.getBalance()’ in the ‘geth’ console I get the current amount of ether (expressed in Wei) that is achieved:
web3.eth.accounts
["0x30aa499b853d422b7e38bdb885fd9dfa2d964715"]
> web3.eth.getBalance("0x30aa499b853d422b7e38bdb885fd9dfa2d964715")
40000000000000000000
>
So at this point I have two accounts with both some ether assigned to it (I ran the mining process on both nodes). Now it is time to start up my Mist browser and connect it to my private blockchain. Mist application can be downloaded here. I chose the MacOs version and ran the installer. Normally when you run Mist browser it will start its own version of ‘geth’ and connect to the ‘main’ Ethereum network. In this case I want to connect to my own blockchain so with the default installation I achieve that by starting the browser in a Terminal window with the following command:
/Applications/Mist.app/Contents/MacOS/Mist  \
  --rpc http://localhost:8545 \
  --swarmurl="http://swarm-gateways.net"
This works because when I started the Docker instance for node1 I exposed the port 8545 to my localhost at 8545. And when I started ‘geth’ on the Docker container I passed the ‘rpc’ parameters so it accepts connections from all IPs (0.0.0.0). The ‘swarmurl’ part is a workaround for this issue.
After starting the Mist browser it gives a warning about insecure RPC connection but in this case it is safe to ignore (all nodes running local on my machine) and click ‘OK’. I first get the splash screen of the browser like this:
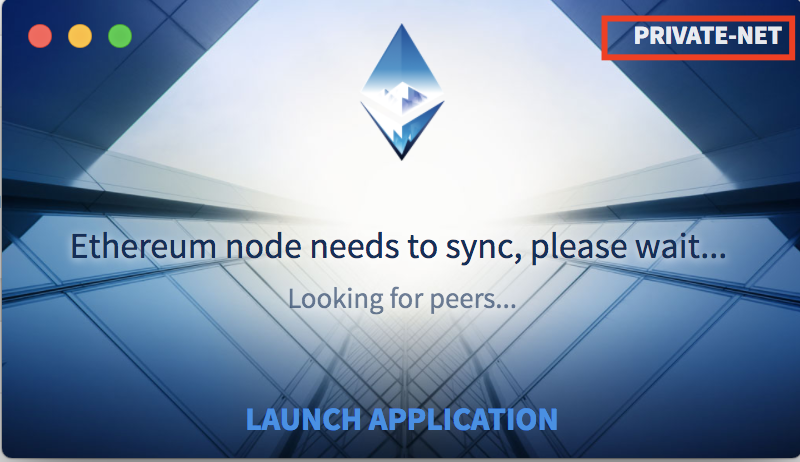
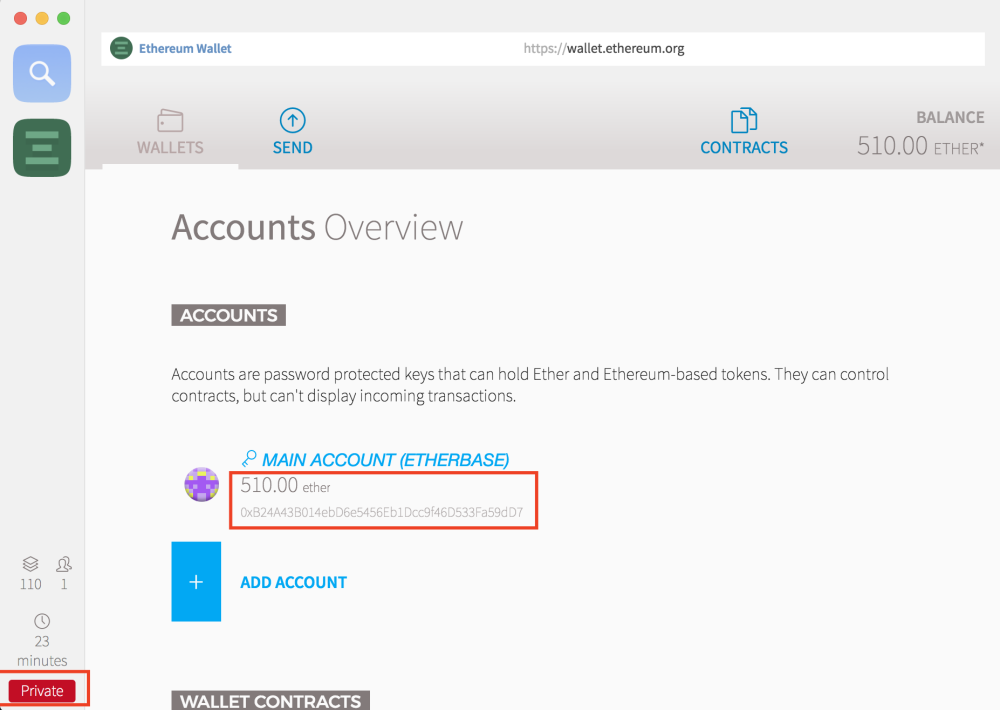
Sometimes I had to restart my Docker Engine on my Mac before Mist was able to connect to my local machine at port 8545 and after I click ‘Launch Application’ I get the browser window showing the one account I created at node1 with the amount of ether that I mined:
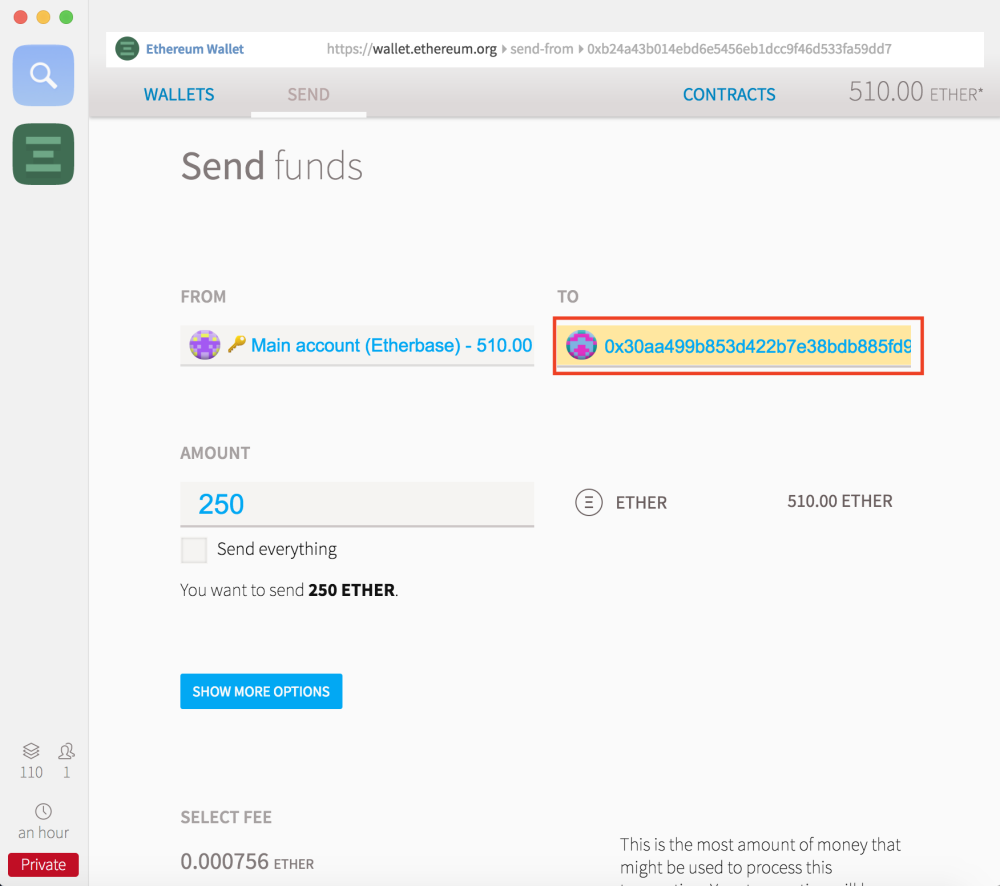
Final thing I want to show is to send some ether from one account (created on node1) to another (created on node2). To do this I open the ‘Send Funds’ page in the Mist browser and fill in the address of the account created in node2 and assign an amount of ether:
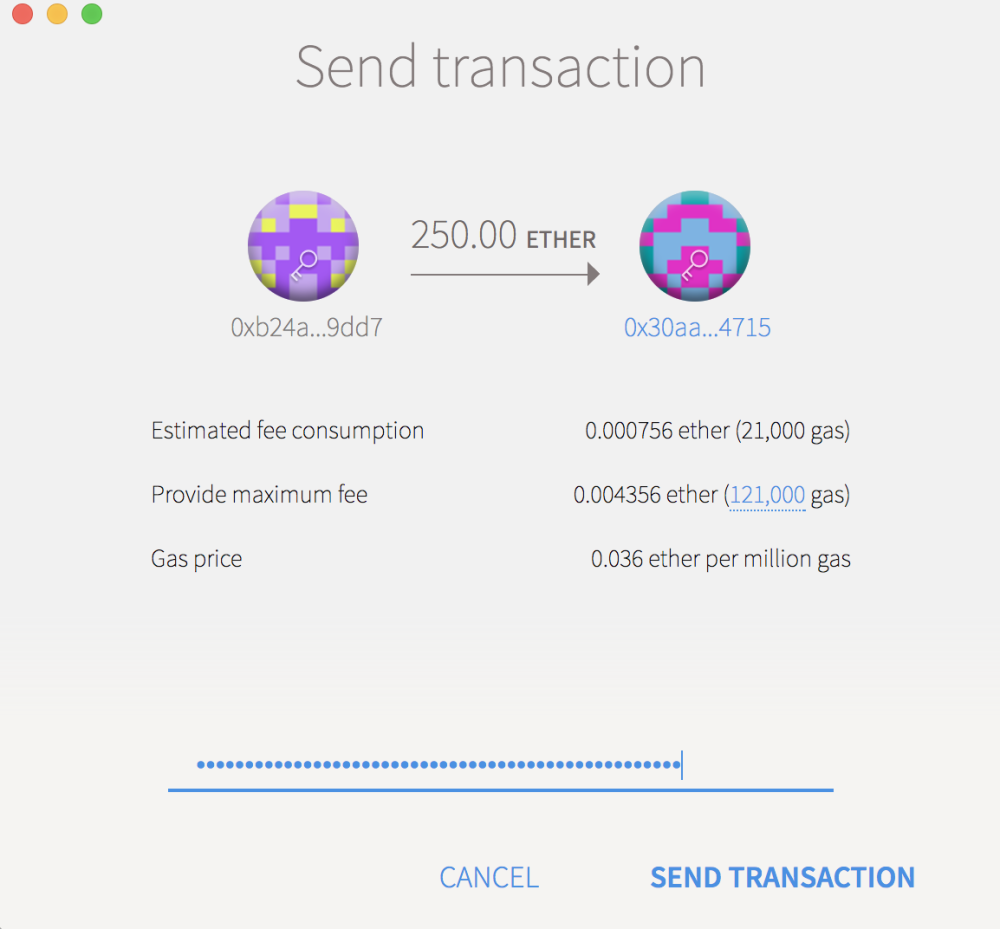
When I click ‘Send Transaction’ I have to enter the passphrase of the sending account (in this case it is ‘Write here a good, randomly generated, passphrase!’):
After sending the transaction nothing happens in the blockchain with the accounts. The transaction is created but not yet validated/verified. So now when I start mining on one of the nodes the transaction(/block) will be confirmed and the amounts of ether in the accounts will be modified:
> web3.eth.getBalance("0x30aa499b853d422b7e38bdb885fd9dfa2d964715")
375000378000000000000
> miner.start(2)
INFO [10-28|17:45:13] Updated mining threads                   threads=2
INFO [10-28|17:45:13] Transaction pool price threshold updated price=18000000000
null
> INFO [10-28|17:45:13] Starting mining operation
INFO [10-28|17:45:13] Commit new mining work                   number=128 txs=1 uncles=0 elapsed=1.070ms
INFO [10-28|17:45:19] Successfully sealed new block            number=128 hash=7fa8ab…8dc486
INFO [10-28|17:45:19] �� block reached canonical chain          number=123 hash=779286…8d1f45
...
INFO [10-28|17:45:34] Commit new mining work                   number=137 txs=0 uncles=0 elapsed=245.115µs
> miner.stop()
INFO [10-28|17:45:40] Successfully sealed new block            number=137 hash=51d2c7…6533e1
...
INFO [10-28|17:45:44] Successfully sealed new block            number=140 hash=0bac45…26b5e0
INFO [10-28|17:45:44] �� block reached canonical chain          number=135 hash=93d2ad…a16e19
INFO [10-28|17:45:44] Commit new mining work                   number=141 txs=0 uncles=0 elapsed=160.114µs
INFO [10-28|17:45:44] �� mined potential block                  number=140 hash=0bac45…26b5e0

true
> INFO [10-28|17:59:20] Regenerated local transaction journal    transactions=0 accounts=0

> web3.eth.getBalance("0x30aa499b853d422b7e38bdb885fd9dfa2d964715")
540000756000000000000
>
And in Mist browser you see the number of confirmations increase for the transaction while the mining is processing:

After short time of mining the block is validated and approved, the amount of the main account is modified.
That is it for this post. I showed how to create accounts, mine some ether and perform transactions with it. In the next post (last one in this serie) I will create a SmartContract, deploy it to the private blockchain and show how to use it.
| Published on Java Code Geeks with permission by Pascal Alma, partner at our JCG program. See the original article here: Set up private blockchain with Ethereum (part 2) Opinions expressed by Java Code Geeks contributors are their own. |
