I don’t think it needs introduction about the current hype that is going on with Blockchain, bitcoin, Ethereum and other initiatives. To get more feeling about what it is and how it works I decided to have a go with Ethereum as it promises to be a possible disruptive solution for lots of different use cases. Without going into the theoretical background of Blockchain or Ethereum (there are already lots of docs written about it) this post will focus on how I set up a private Ethereum network on my MacBook. I will use Docker containers as Ethereum nodes and use Mist browser on my Mac to ‘connect’ to the private network.
Please note that this is just a possible setup that works for me. There might be better/easier alternatives for other use cases.
I perform the following steps to create a private Ethereum network:
- Set up infrastructure
- create directory to keep your Dockerfile sources and Ethereum data
- Set up infrastructure
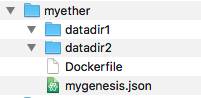
I created a directory called ‘myether’. In this directory I created two subdirectories: ‘datadir1’ and ‘datadir2’.
- create ‘mygenesis.json’ file
To setup a new Ethereum network I use the file ‘mygenesis.json’ to initiate a new block chain. This file will be used for input of the first block in the chain. To read more about it see here.
Here is the content of my file which I created in my new directory created in the previous step:
{
  "alloc": {},
  "coinbase"   : "0x0000000000000000000000000000000000000000",
  "difficulty" : "0x20000",
  "extraData"  : "",
  "gasLimit"   : "0x2fefd8",
  "nonce"      : "0x0000000000000042",
  "mixhash"    : "0x0000000000000000000000000000000000000000000000000000000000000000",
  "parentHash" : "0x0000000000000000000000000000000000000000000000000000000000000000",
  "timestamp"  : "0x00",
  "config":{
    "chainId": 13
  }
}- create Dockerfile
Also in the new directory I created a ‘Dockerfile’ that will initiate a Ubuntu image and start installing Ethereum and necessary dependencies on it.
The file contains the following content:
FROM ubuntu:16.04
RUN apt-get update && apt-get install -y software-properties-common net-tools
RUN add-apt-repository -y ppa:ethereum/ethereum && apt-get update
RUN apt-get -y install ethereum
ADD ./mygenesis.json /root/mygenesis.json
EXPOSE 8545 8546 30303 30303/udp
RUN mkdir -p /root/datadir
ENTRYPOINT "bash"
The complete folder structure on my MacBook now looks like this:
- create Docker image
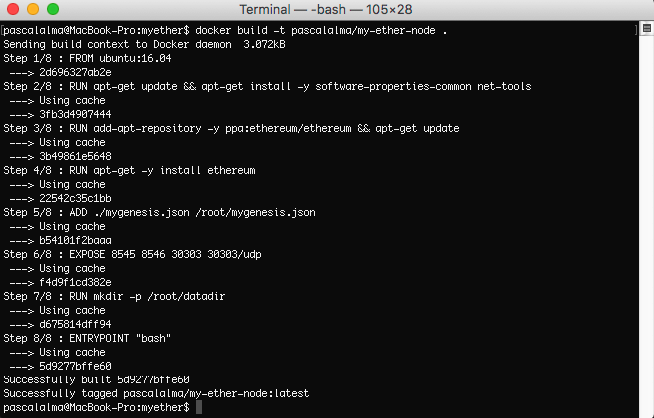
With the Dockerfile and genesis file in place I can create the Docker image by running:
docker build -t pascalalma/my-ether-node .
The output is like this:
- start first node
With the image created I can start my first node. I need to open up some ports and will use a custom data directory for my node (to keep data between runs of the Docker container). The command to start the first node is:
docker run -it -p 8545:8545 -p 30303:30303 -v /Users/pascalalma/develop/myether/datadir1:/root/datadir pascalalma/my-ether-node /bin/bash
- start second node
In another Terminal I run the following command:
docker run -it -p 8546:8545 -p 30304:30303 -v /Users/pascalalma/develop/myether/datadir2:/root/datadir pascalalma/my-ether-node /bin/bash
- note IP address of first node
I wrote down the IP address of the Docker container of node1 so I can use it later to connect node2 with node1. I ran the command ‘ifconfig eth0’ like this:
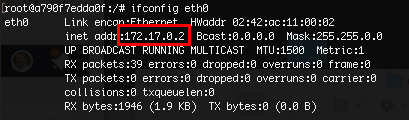
So in this example the IP to note is ‘172.17.0.2’.
- initiate private network
Now I have two Linux nodes running on my MacBook. Next I initiate a new blockchain with ‘geth‘. On both nodes I run the following command:
geth --datadir=/root/datadir/ init /root/mygenesis.json
The output looks like this:

The initial block is created (block chain is set up) and I am ready for the next step.
- start private network
With the initial block created I can start the block chain by running ‘geth’ on both nodes and point node2 to the node1 address.
- start geth on node1
I run the following command to start ‘geth’ on node1:
geth --datadir /root/datadir/ --networkid 1234 --port 30303 --rpcport 8545 --rpc --rpcapi eth,web3,personal,net --rpcaddr 0.0.0.0 console
- start geth on node2
I run the same command to start ‘geth’ on node2:
geth --datadir /root/datadir/ --networkid 1234 --port 30303 --rpcport 8545 -rpc --rpcapi eth,web3,personal,net --rpcaddr 0.0.0.0 console
- connect node2 to private network of node1
To get the address of node1 run the following command on node1 in the geth console:
'admin.nodeInfo.enode' like this:
> admin.nodeInfo.enode
"enode://8fd1e8b6941cd96030580082cabd0758cf274ac7a74493c942120191b4447e49489e3961eb55ce666db172e2fe177ef9bf03f1685d4d81afb364ab9b5ed4aec9@[::]:30303"
The output is the address of node1 in enode-url-format.
Now I run the following command on node2:
admin.addPeer("enode://8fd1e8b6941cd96030580082cabd0758cf274ac7a74493c942120191b4f77e49489e3961eb55ce666db172e2fe177ef9bf03f1685d4d81afb364ab9b5ed4aec9@172.17.0.2:30303")Where the ‘enode’ string is the one returned in the previous command and the IP address is the IP noted earlier for node1.
The result of the command should be ‘true’.
To check the connection is created between node1 and node2 I run:
net.peerCount
which should return ‘1’
or I can run admin.peers which should return something like:
>> admin.peers
[{
    caps: ["eth/63"],
    id: "8fd1e8b6941cd96030580082cabd0758cf274ac7a74493c942120191b4447e49489e3961eb55ce666db172e2fe177ef9bf03f1685d4d81afb364ab9b5ed4aec9",
    name: "Geth/v1.7.2-stable-1db4ecdc/linux-amd64/go1.9",
    network: {
      localAddress: "172.17.0.3:37666",
      remoteAddress: "172.17.0.2:30303"
    },
    protocols: {
      eth: {
        difficulty: 131072,
        head: "0x5e1fc79cb4ffa4739177b5408045cd5d51c6cf766133f23f7cd72ee1f8d790e0",
        version: 63
      }
    }
}]
Summary
So now I have a private Ethereum network consisting of two nodes. In the next post I will show you how to use ‘geth’ console at one of the nodes to create accounts and do some mining to create ether for the account. I will also show how to connect your Mist browser to this private network. Stay tuned!
| Published on Java Code Geeks with permission by Pascal Alma, partner at our JCG program. See the original article here: Set up private blockchain with Ethereum (part 1) Opinions expressed by Java Code Geeks contributors are their own. |
