In this post, we will cover how to build an IoT system that monitors the soil moisture and send an alert when it gets too dry. This project uses IoT cloud platform to manage the alert system and to store data coming from sensors. As you know already, Internet of things is one of the most important topics nowadays, that promises to shape our future and the way we live. One interesting aspect about IoT is the fact we can experiment an IoT system building it by ourselves. There are several prototyping boards available in the market and we can build amazing IoT projects without spending too much.
Building an IoT system project overview
To build this project we need:
- Arduino MKR1000
- Moisture sensor
- Carriots free account (use this link to create a free account)
- IFFT account (to know more click here)
The idea that stands behind this project is building an IoT system that monitors the soil moisture detecting when it gets too dry. The Arduino MKR1000 controls the sensor sending the data to the Carriots IoT platform. This platform, in turn, stores the data coming from the sensor and detects when the values stored are under a threshold level. We will see later how to analyze the data. By now, we can assume that the Carriots IoT platform is able somehow to invoke an IFFT service that will send a short message to the user alerting him. Building this IoT system we can explore how to use several components of the IoT ecosystem. Moreover, this project displays the humidity soil status using a LEDs matrix. Let us see how to build it.
Retrieving data from sensor
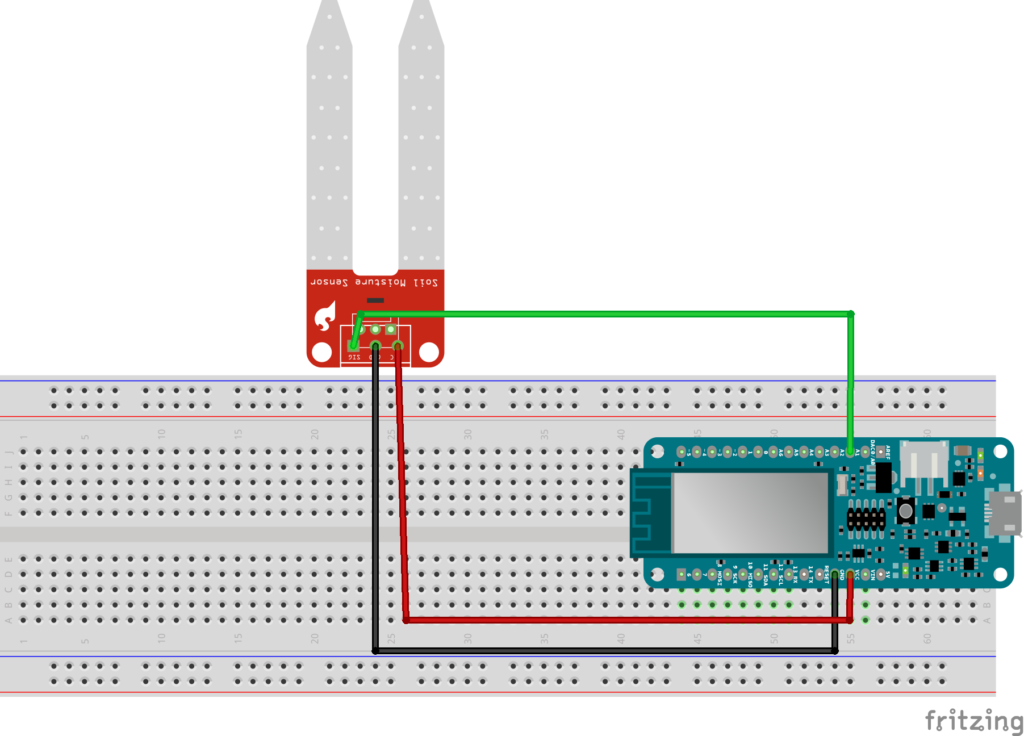
In this first step, we have to read the sensor data. This IoT project uses YL-38 + YL-69 sensor. This is an analog sensor that can be inserted into the soil we want to check. The picture below shows how to connect the sensor to Arduino:
The code is very simple, we read data from the A1 pin and then we calculate the humidity:
float moistureHum = analogRead(A1);
moistureHum = (1023 - moistureHum) * 100 /1023;
This is very simple, not much to explain about it. This is the value we will send to IoT cloud platform. Moreover, we have to connect the Arduino MKR1000 to internet so that it can sends data:
#include "WiFi101.h"
WiFiClient client;
void setup() {
  Serial.begin(9600);
  Serial.print("Starting...");

  if (WiFi.status() == WL_NO_SHIELD) {
    Serial.println("WiFi shield not present");
    while (true);
  }
  connectToWifi();
}
where the connectToWifi() is:
void connectToWifi() {
  while ( status != WL_CONNECTED) {
   Serial.print("Attempting to connect to WPA SSID: ");
   Serial.println(ssid);
   // Connect to WPA/WPA2 network:
   status = WiFi.begin(ssid, pass);
   // wait 10 seconds for connection:
  delay(10000);
 }
}
That’s all. We can manage in this sketch the LEDs matrix showing the humidity level as described in the code attached to this article. Now we can focus our attention on the IoT cloud platform.
Connecting to the IoT cloud platform
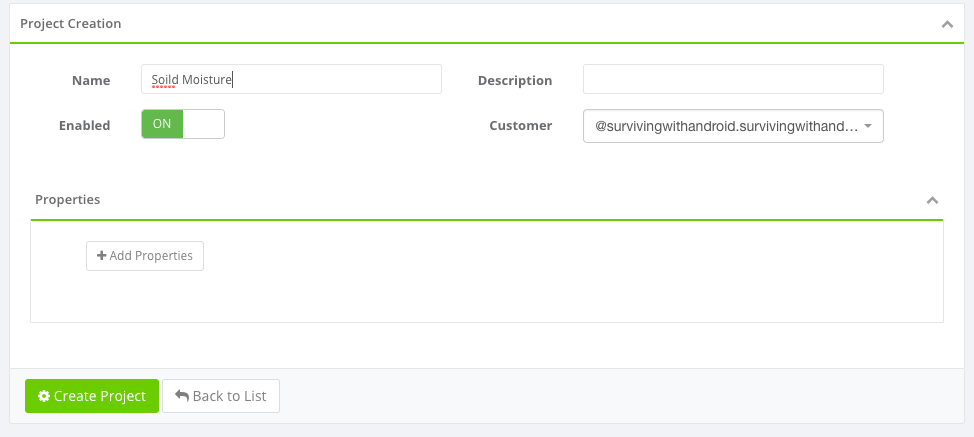
Before sending data to the cloud, we have to configure our Carriots platform in order to manage the data. Carriots uses a hierarchical structure to group and manage devices. Therefore, we have to create this structure before using our device. At the top of this structure, there is the Project. Once you are logged in, you have to click on Hierarchy and then Project filling the data required:
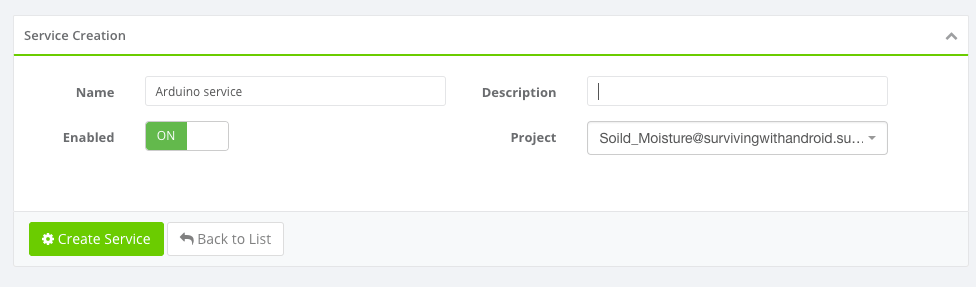
The next step is creating the service filling the data required:
Finally, you have to create the group:
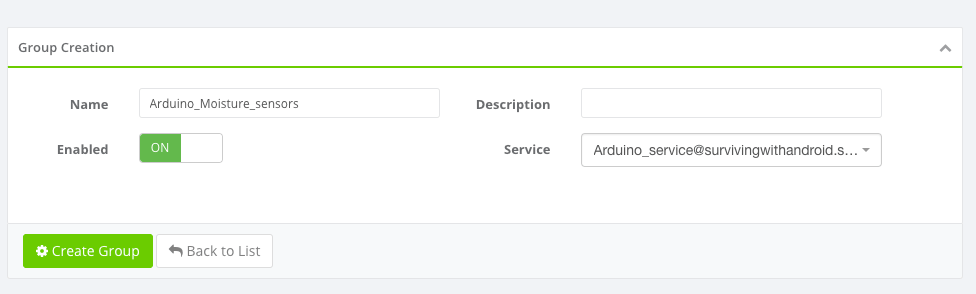
The steps are very fast and you do it only once. The last step is configuring our device. It represents the physical device we are using to send data. This device belongs to the group created in the last step, that in turn belongs to the service. The service belongs to the project. The configuration step is very easy as shown in the picture below:
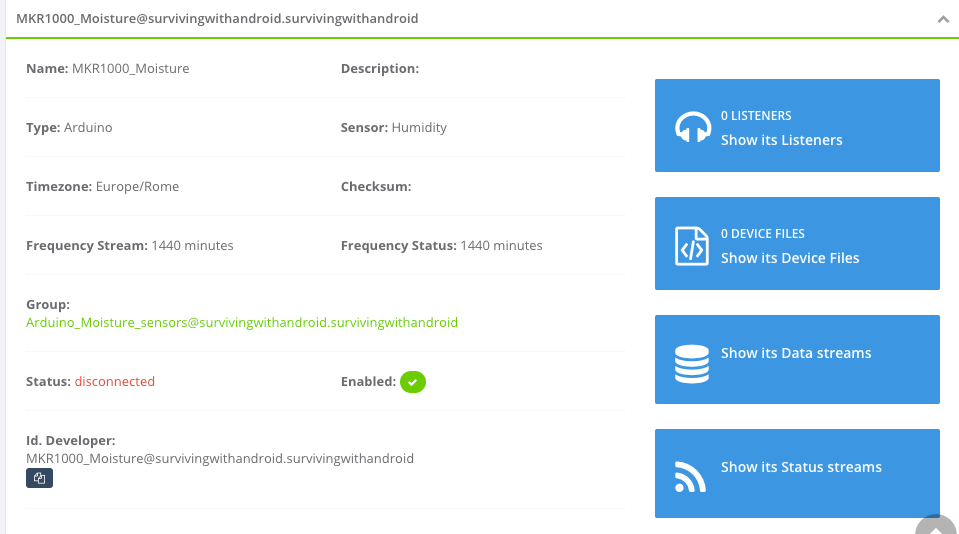
That’s all. The configuration steps are completed. We have to connect the Arduino device to Carriots and start sending data. In this step, it is important the developer id shown in the picture above, it represents the unique device identifier we will use to bind the data coming from our Arduino device to the Carriots device. Another important parameter is your API Key. You can find it in Settings -> Api key menu. In order to send data, let us add this function to the sketch shown above:
void sendData(float data) {
if (client.connect(server,80)) {
Serial.println("Connected to the server....");
String jsonData = "{\"protocol\":\"v2\",\"device\":\""+DEVICE_ID+
"\",\"at\":\"now\",\"data\":{\"soil\":\""+
String(data)+"\"}}"; // Make a HTTP request
client.println("POST /streams HTTP/1.1");
client.println("Host: api.carriots.com");
client.println("Accept: application/json");
client.println("User-Agent: Arduino-Carriots");
client.println("Content-Type: application/json");
client.print("carriots.apikey: ");
client.println(API_KEY);
client.print("Content-Length: ");
int thisLength = jsonData.length();
client.println(thisLength);
client.println("Connection: close");
client.println();
client.println(jsonData);
}
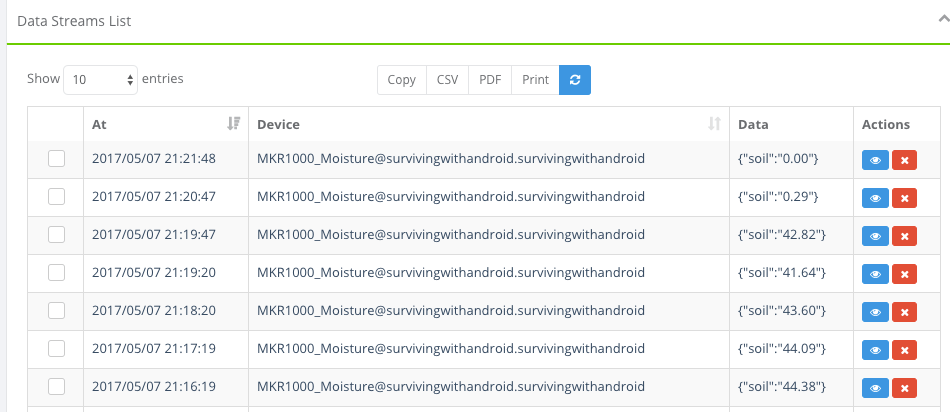
}Notice that the function sends a JSON payload containing the data read from the sensor. This function must be invoked in the loop() method. Running the sketch, we can notice that the device sends data to the Carriots as shown below:
Monitoring the IoT sensor data
The next step is monitoring the data. Usually, in an IoT system, we are not only interested in acquiring data from the sensor but we want to monitor such information to take corrective actions when the values are out of a specific interval. There are several actions we can take, in this example we want to inform the user alerting him/her. Even if Carriots has a built-in email system, we prefer to integrate with Carriots another useful and interesting platforms called IFFT. This platform provides several integration services we can use and integrate into our IoT projects.
In order to alert the user we need two components:
- a monitoring data system
- alerting system
As monitoring data system, this IoT system uses Carriots listener. A listener is a process that analyzes the incoming values and applies a specific rule. When the rule is verified then it invokes a script. The interesting aspect about Carriots is that we can use Groovy as a scripting language to invoke external services.
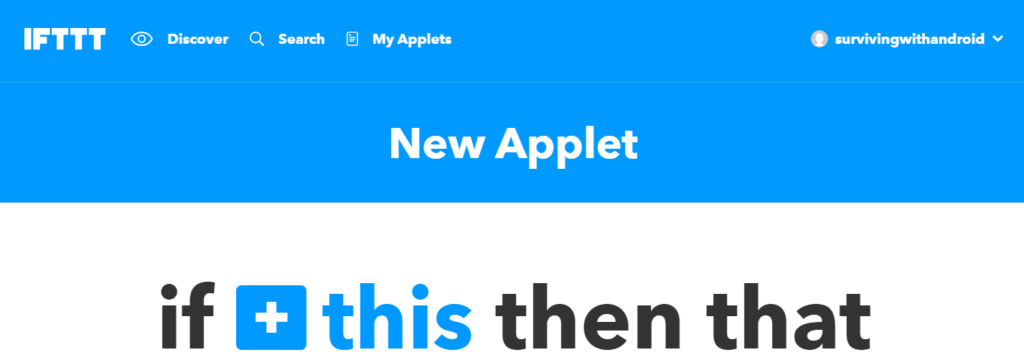
The alerting system is built on IFFT. Before completing the work on Carriots, it is useful to configure the IFFT. As stated before, we want to send a short message when the humidity hits a threshold level. In order to achieve it, we configure a short message service in IFFT. It is required you have a free account in order to complete this task. As a first step, let us create a new Applet:
Now click on plus sign to add the service and search for Maker service:
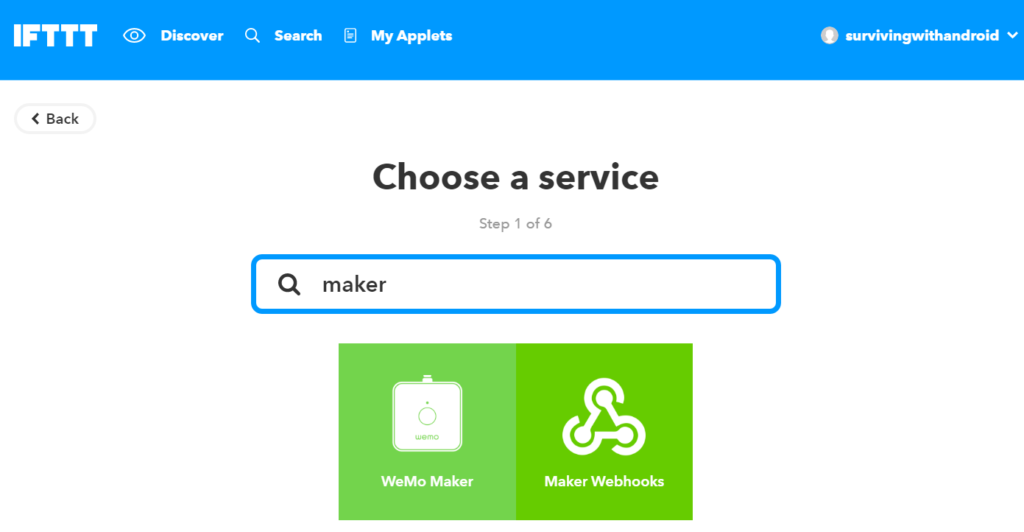
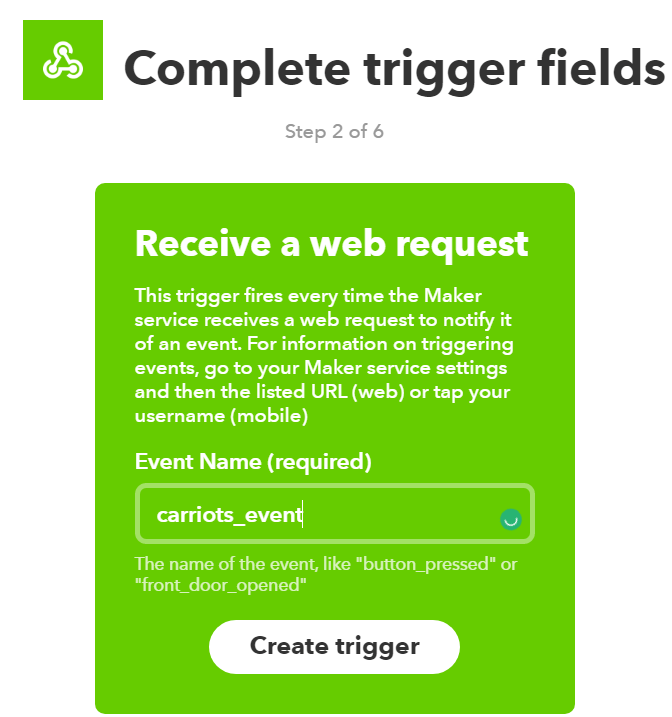
Select Maker webhooks to enable IoT maker. Now we have to configure the maker service adding the event name that triggers the sending message process:
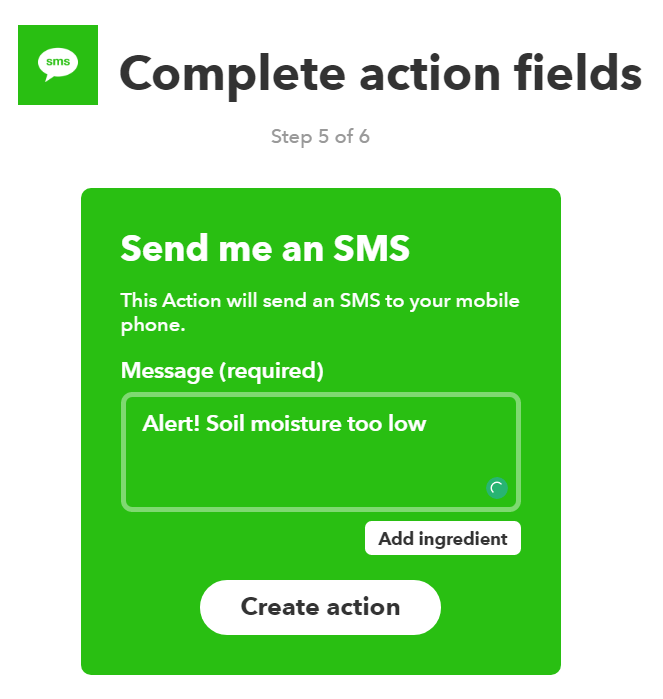
Finally, let us enable the sending message service configuring all the required parameters like the destination number and the message body:
That’s all. Now we can focus our attention on the listener in Carriots platform. Let us create a new listener that invoke the url related to the applet we have just created. When the listener invokes the url, IFFT sends a short message. The picture below shows how to configure the listener:
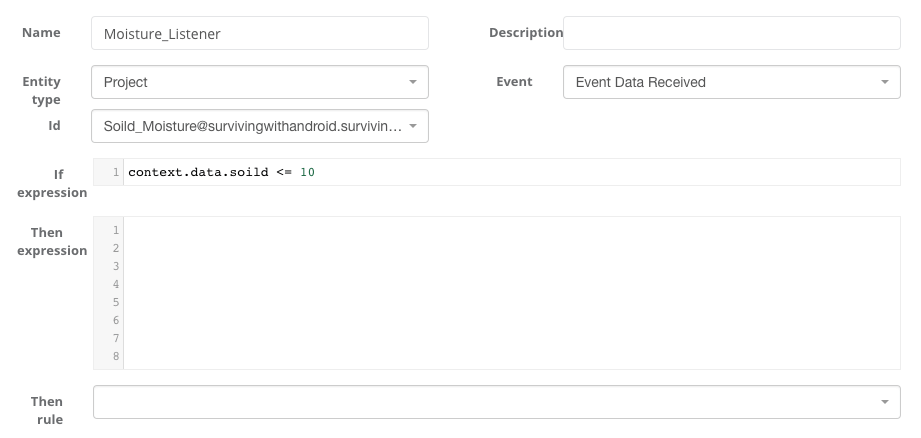
The last step is configuring the expression. We can write it using Groovy as described in this example.
That’s all, now you can test the project verifying that when the soil moisture is lower than the threshold level, we will get a short message on our mobile.
Summary
At the end of this article, you have learned how to build an IoT system using sensors, arduino and IoT cloud platforms. As you have noticed during this tutorial, we can integrate exisisting platforms and services building an IoT system.
| Reference: | Building an IoT system using Arduino and IoT cloud platform from our JCG partner Francesco Azzola at the Surviving w/ Android blog. |

Why use a relatively expensive MKR1000 when you can do that using the same tools (ie Arduino IDE) with a ESP8266 board, which is 3 times cheaper?