This article is part of our Academy Course titled Redis a NoSQL key-value store.
This is a crash course on Redis. You will learn how to install Redis and start up the server. Additionally, you will mess around with the Redis command line. More advanced topics follow, such as replication, sharding and clustering, while the integration of Redis with Spring Data is also explained. Check it out here!
Table Of Contents
- 1. Introduction
- 2. Prerequisites
- 3. Picking Redis Java client
- 4. Java application dependencies and Eclipse
- 5. Configuring Standalone Redis Over Spring Data Redis
- 6. Configuring Connection to Sharded (partitioned) Redis
- 7. Configuring Connection to Redis Cluster
- 8. Accessing Redis using Spring Data Redis
- 9. Transactions Using Spring Data Redis
- 10. Pipelining Using Spring Data Redis
- 11. Publish/Subscribe Using Spring Data Redis
- 12. Conclusions
1. Introduction
Redis was created to solve real problems of real software systems. So far we have explored a very rich set of Redis features but we have not actually used any of them in real-world applications. To fill this gap, the last part of the tutorial is dedicated to present this topic. We are going to build a simple Java application which uses Redis and excellent Spring Data Redis (http://projects.spring.io/spring-data-redis/) project together with Spring Framework (http://projects.spring.io/spring-framework/) from Spring projects portfolio (http://spring.io/). The latest released versions of Spring Data Redis and Spring Framework at the moment of writing are 1.2.0 and 4.0.2 respectively.
Before diving into the details it worth mentioning that Redis supports wide variety of the application frameworks and programming languages. The complete list of the clients is available here: http://redis.io/clients.
The rest of this tutorial assumes that a reader is able to program in Java and has basic familiarity Spring Framework (http://projects.spring.io/spring-framework/).
2. Prerequisites
The usual toolset of Java developer includes JDK (Java Development Kit) and an IDE like Eclipse or Intellij IDEA to facilitate application development process. The latest version of JDK we will be using is 1.7_51 and can be downloaded from http://www.oracle.com/technetwork/java/javase/downloads/index.html.
The choice of IDE would be Eclipse, the latest version of it is 4.3.2 and could be downloaded from https://www.eclipse.org/downloads/ (any of Eclipse IDE for Java Developers, Eclipse IDE for Java EE Developers or Spring Tool Suite editions are good).
3. Picking Redis Java client
There are several Java clients available for use to access Redis from Java applications (all listed below are supported by Spring Data Redis as well):
- Jedis: https://github.com/xetorthio/jedis
- JRedis: https://github.com/alphazero/jredis
- lettuce: https://github.com/wg/lettuce
From functionality prospective, all of them are quite similar but Jedis has gained more popularity and is widely used. That being said, Jedis would be a choice for our application as well.
4. Java application dependencies and Eclipse
The project we are going to build will introduce all the important Redis features we have discussed so far but from application developer prospective. We will start with basic example assuming there is a single standalone Redis instance up and running somewhere (let us refer to it as redis-host). Most of the scenarios are going to be presented as a small JUnit (http://junit.org/) test snippets.
The de facto building and dependency management tool in Java world is still Apache Maven (http://maven.apache.org/) and the version we are going to use is 3.1.1, downloadable from http://maven.apache.org/docs/3.1.1/release-notes.html. We will not actually use Apache Maven too much letting Eclipse do this work on our behalf but we are going to look on basic dependency description file which by convention is called pom.xml.
<project
    xmlns="http://maven.apache.org/POM/4.0.0"
    xmlns:xsi="http://www.w3.org/2001/XMLSchema-instance"
    xsi:schemaLocation="
        http://maven.apache.org/POM/4.0.0
        http://maven.apache.org/xsd/maven-4.0.0.xsd">
    <modelVersion>4.0.0</modelVersion>

    <groupId>com.javacodegeeks</groupId>
    <artifactId>redis</artifactId>
    <version>0.0.1-SNAPSHOT</version>
    <packaging>jar</packaging>

    <properties>
        <project.build.sourceEncoding>UTF-8</project.build.sourceEncoding>
        <spring.version>4.0.2.RELEASE</spring.version>
    </properties>

    <dependencies>
        <dependency>
            <groupId>org.springframework.data</groupId>
            <artifactId>spring-data-redis</artifactId>
            <version>1.2.0.RELEASE</version>
        </dependency>

        <dependency>
            <groupId>redis.clients</groupId>
            <artifactId>jedis</artifactId>
            <version>2.4.1</version>
        </dependency>

        <dependency>
            <groupId>org.springframework</groupId>
            <artifactId>spring-core</artifactId>
            <version>${spring.version}</version>
        </dependency>

        <dependency>
            <groupId>org.springframework</groupId>
            <artifactId>spring-tx</artifactId>
            <version>${spring.version}</version>
        </dependency>

        <dependency>
            <groupId>org.springframework</groupId>
            <artifactId>spring-context</artifactId>
            <version>${spring.version}</version>
        </dependency>

        <dependency>
            <groupId>ch.qos.logback</groupId>
            <artifactId>logback-classic</artifactId>
            <version>1.0.13</version>
        </dependency>

        <dependency>
            <groupId>org.springframework</groupId>
            <artifactId>spring-test</artifactId>
            <version>${spring.version}</version>
            <scope>test</scope>
        </dependency>

        <dependency>
            <groupId>org.hamcrest</groupId>
            <artifactId>hamcrest-all</artifactId>
            <version>1.3</version>
            <scope>test</scope>
        </dependency>

        <dependency>
              <groupId>com.jayway.awaitility</groupId>
              <artifactId>awaitility</artifactId>
              <version>1.5.0</version>
              <scope>test</scope>
        </dependency>

        <dependency>
            <groupId>junit</groupId>
            <artifactId>junit</artifactId>
            <version>4.11</version>
            <scope>test</scope>
        </dependency>
    </dependencies>

    <build>
        <plugins>
            <plugin>
                <groupId>org.apache.maven.plugins</groupId>
                <artifactId>maven-compiler-plugin</artifactId>
                <configuration>
                    <source>1.7</source>
                    <target>1.7</target>
                </configuration>
            </plugin>
        </plugins>
    </build>
</project>
If you are seasoned Java developer, pom.xml files should be very familiar for you. But for newcomers a few comments may be helpful. Basically, we declare that our project named com.javacodegeeks.redis depends on:
- Jedis (
redis.clients.jedis) - Spring Data Redis (
org.springframework.data.spring-data-redis) - Spring Framework (
org.springframework.spring-core,org.springframework.spring-context,org.springframework.spring-tx,org.springframework.spring-test) - JUnit and accompanied test scaffolding (
junit.junit,org.hamcrest.hamcrest-all,com.jayway.awaitility.awaitility)
At this point we are able to import this pom.xml into Eclipse using Import (menu File -> Import …) from Existing Maven Project feature.
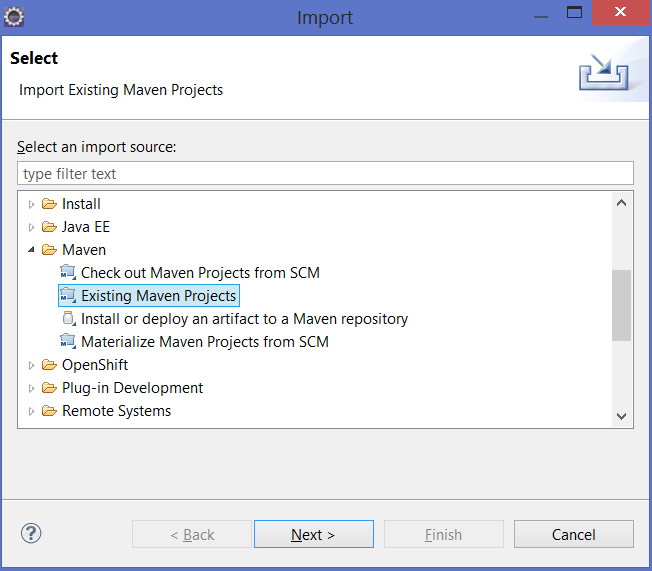
When import is completed, the project called com.javacodegeeks.redis (or just redis, depending on your import settings) should appear inside Eclipse Project Explorer view.
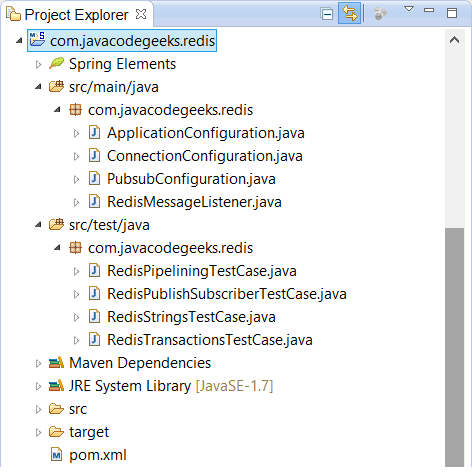
com.javacodegeeks.redis inside Eclipse Project view
5. Configuring Standalone Redis Over Spring Data Redis
Redis configuration with Jedis starts from defining JedisConnectionFactory. By default, Jedis uses connection pool (http://en.wikipedia.org/wiki/Connection_pool) in order not to create connections to the Redis server every time but rather borrow them from the pool of available connections. Overall it is considered as a good practice because the process of creating network connections is a relatively expensive operation.
Let us define connection pool and connection factory as a separate Spring configuration bean so it could be imported by different application configurations independently.
package com.javacodegeeks.redis;

import org.springframework.context.annotation.Bean;
import org.springframework.context.annotation.Configuration;
import org.springframework.data.redis.connection.jedis.JedisConnectionFactory;

import redis.clients.jedis.JedisPoolConfig;
import redis.clients.jedis.Protocol;

@Configuration
public class ConnectionConfiguration  {
    @Bean
    public JedisPoolConfig poolConfig() {
        final JedisPoolConfig jedisPoolConfig =  new JedisPoolConfig();
        jedisPoolConfig.setTestOnBorrow( true );
        jedisPoolConfig.setMaxTotal( 10 );
        return jedisPoolConfig;
    }

    @Bean
    public JedisConnectionFactory connectionFactory() {
        final JedisConnectionFactory connectionFactory =
            new JedisConnectionFactory( poolConfig() );
        connectionFactory.setHostName( "redis-host" );
        connectionFactory.setDatabase( Protocol.DEFAULT_DATABASE );
        connectionFactory.setPort( Protocol.DEFAULT_PORT );
        return connectionFactory;
    }
}
In this code snippet we are configuring the connection factory to Redis instance running on redis-host with a pool of maximum 10 connections. The test on borrow setting actually ensures that connection borrowed from the pool is still valid and can be used (otherwise the connection will be recreated).
6. Configuring Connection to Sharded (partitioned) Redis
In the part 4, Redis Sharding, we talked about client-side partitioning. As a matter of fact, Jedis provides this capability but unfortunately Spring Data Redis does not support this functionality yet.
7. Configuring Connection to Redis Cluster
In the part 5, Redis Clustering, we discovered the clustering capability of Redis and mentioned that clients should support and recognize the changes in Redis protocol in order to issue the commands to right nodes. Jedis already provides support for Redis Cluster but unfortunately Spring Data Redis does not support this functionality yet.
8. Accessing Redis using Spring Data Redis
Spring Data Redis provides consistent and concise programming abstraction over different Redis clients (see please Picking Redis Java client). The core of this abstraction is the concept of the template: the simplest way to provide the access to the required functionality without spending a lot of time writing boiler-plate code. In case of Redis, it is a RedisTemplate.
From previous parts of this tutorial we know that Redis supports multiple primitive data types: strings and numbers. But Java type system is much richer than that and that is why RedisTemplate requires the type of the key and type of the value to operate on (and respectively serializers for those types). We will start with simple example where keys and values are just strings (in fact Spring Data Redis already includes such a class called StringRedisTemplate but let us look on a general concept nonetheless).
package com.javacodegeeks.redis;

import org.springframework.beans.factory.annotation.Autowired;
import org.springframework.context.annotation.Bean;
import org.springframework.context.annotation.Configuration;
import org.springframework.context.annotation.Import;
import org.springframework.data.redis.connection.jedis.JedisConnectionFactory;
import org.springframework.data.redis.core.RedisTemplate;
import org.springframework.data.redis.serializer.StringRedisSerializer;

@Configuration
@Import( value = ConnectionConfiguration.class )
public class ApplicationConfiguration {
    @Bean @Autowired
    public RedisTemplate< String, String > redisTemplate(
            final JedisConnectionFactory connectionFactory ) {
        final RedisTemplate< String, String > template =
            new RedisTemplate< String, String >();
        template.setConnectionFactory( connectionFactory );
        template.setKeySerializer( new StringRedisSerializer() );
        template.setHashValueSerializer( new StringRedisSerializer() );
        template.setHashKeySerializer( new StringRedisSerializer() );
        template.setValueSerializer( new StringRedisSerializer() );
        template.setStringSerializer( new StringRedisSerializer() );
        return template;
    }
}
With that we are ready to write our first tests. The container for all test cases we are going to create is a class called RedisStringsTestCase which heavily uses the testing capabilities provided by Spring Test scaffolding.
package com.javacodegeeks.redis;

import static org.hamcrest.Matchers.equalTo;
import static org.junit.Assert.assertThat;

import org.junit.runner.RunWith;
import org.springframework.beans.factory.annotation.Autowired;
import org.springframework.data.redis.core.RedisTemplate;
import org.springframework.test.context.ContextConfiguration;
import org.springframework.test.context.junit4.SpringJUnit4ClassRunner;

@RunWith( SpringJUnit4ClassRunner.class )
@ContextConfiguration( classes = ApplicationConfiguration.class )
public class RedisStringsTestCase {
    @Autowired private RedisTemplate< String, String > template;

    // Out tests are going to be there
}
Mostly for every category of Redis commands (see please part 2, Redis Commands – Using Redis Command Line), RedisTemplate has the façade method which starts from ‘ops’ (opsForValue, opsForList, opsForHash, …) which literally returns a one-to-one mapping of category-specific commands to Java method calls. The first test uses a SET command to store some key / value and immediately uses GET command to verify it is stored properly.
@Test
public void testSetAndGet() {
    template.opsForValue().set( "mykey", "myvalue" );
    assertThat( template.opsForValue().get( "mykey"), equalTo( "myvalue" ) );
}
To make sure test does not lie, we can check that mykey has value “myvalue” using redis-cli tool and connecting to redis-host instance.

mykey was really stored on redis-host instance
Before moving to the next test cases, there is one issue to take into account: once the previous test finishes execution, the mykey will stay in Redis till someone deletes it. Such a behavior may cause other test cases to fail and usually is considered a bad practice. It would be nice to start every test with clean database and in fact we are going to make it work like that. The command which cleans current Redis database is FLUSHDB. It is not exposed by RedisTemplate directly but could be easily accessed and triggered by using execute() method and calling flushDb() on the underlying RedisConnection.
@Before
public void setUp() {
    template.execute( new RedisCallback< Void >() {
        @Override
        public Void doInRedis( RedisConnection connection ) throws DataAccessException {
            connection.flushDb();
            return null;
        }
    } );
}
Next operation we are going to explore is INCREMENT command which demonstrates how transparent operations between strings and strings containing numbers are.
@Test
public void testSetAndIncrementAndGet() {
    template.opsForValue().set( "mykey", "10" );
    template.opsForValue().increment( "mykey", 5 );
    assertThat( template.opsForValue().get( "mykey"), equalTo( "15" ) );
}
Simple enough, let us move on to more complex data structures: lists, sets and sorted sets. The first test case creates a list of values “a”, “b”, “c”, “d” (using RPUSH command). Then it checks the size of the list (LLEN command), asks for last element of the list by index (LINDEX command), and finally pops the first element from the list (LPOP command).
@Test
public void testPushToListAndGetElementByIndexAndPopFirstElement() {
    template.opsForList().rightPushAll( "mykey", "a", "b", "c", "d" );
    assertThat( template.opsForList().size( "mykey" ), equalTo( 4L ) );
    assertThat( template.opsForList().index( "mykey", 3 ), equalTo( "d" ) );
    assertThat( template.opsForList().leftPop( "mykey" ), equalTo( "a" ) );
    assertThat( template.opsForList().size( "mykey"), equalTo( 3L ) );
}
The code looks very compact and readable. Let us turn from lists to sets and the next test case creates a set of values “a”, “b”, “c”, “d” (using SADD command). Then it checks the size of the set (using SCARD command) and asks if “c” and “e” are the members of this set or not (using SISMEMBER command).
@Test
public void testAddToSetAndCheckElementExists() {
    template.opsForSet().add( "mykey", "a", "b", "c", "d" );
    assertThat( template.opsForSet().size( "mykey" ), equalTo( 4L ) );
    assertThat( template.opsForSet().isMember( "mykey", "c" ), equalTo( true ) );
    assertThat( template.opsForSet().isMember( "mykey", "e" ), equalTo( false ) );
}
The full power of sets shows up in inter-set operations: intersection (SINTER command), union (SUNION command) and difference (SDIFF command). The following test case demonstrates that in action by applying these operations to two sets.
@Test
public void testIntersetOperations() {
    template.opsForSet().add( "mykey1", "a", "b", "c", "d" );
    template.opsForSet().add( "mykey2", "c", "d", "e", "f" );

    assertThat( template.opsForSet().intersect( "mykey1", "mykey2" ),
         equalTo( set( "c", "d" ) ) );

    assertThat( template.opsForSet().union( "mykey1", "mykey2" ),
        equalTo( set( "a", "b", "c", "d",  "e", "f" ) ) );

    assertThat( template.opsForSet().difference( "mykey1", "mykey2" ),
        equalTo( set( "a", "b" ) ) );
}
To finish up with the data collection types, we are going to cover sorted sets which are referred by Spring Data Redis as ZSets. The test case below creates a sorted set (ZADD command) and then asks Redis to return all the members sorted by scores from high to low (ZREVRANGEBYSCORE command with WITHSCORE option).
@Test
public void testAddToSortedSetAndCheckElementsAreSortedByScore() {
    template.opsForZSet().add( "mykey", "a", 6.15d );
    template.opsForZSet().add( "mykey", "b", 9.95d );
    template.opsForZSet().add( "mykey", "c", 8.45d );

    assertThat( template.opsForZSet().reverseRangeByScoreWithScores( "mykey", 0d, 10d ),
        equalTo(
           set(
                ( TypedTuple< String > )new DefaultTypedTuple< String >( "b", 9.95d ),
                ( TypedTuple< String > )new DefaultTypedTuple< String >( "a", 6.15d ),
                ( TypedTuple< String > )new DefaultTypedTuple< String >( "c", 8.45d )
           )
        )
     );
}
The code is a bit verbose due to required generic type conversions but generally is also simple and readable enough.
Lastly, we are going to switch our attention to hashes. Redis hashes could be thought as a data objects in Java: a container of properties (or fields) and their values. The next test case creates a hash (using HSET command) with two properties (or fields), “prop1” and “prop2”. Then it verifies that all properties and their values are stored properly (using HGETALL command), deletes all properties (fields) from the hash (using HDEL command) and checks they are really deleted (using HGET command).
@Test
public void testHashOperations() {
    template.opsForHash().put( "mykey", "prop1", "value1"  );
    template.opsForHash().put( "mykey", "prop2", "value2" );

    assertThat( template.opsForHash().entries( "mykey" ),
        equalTo( map( "prop1", "value1", "prop2", "value2" ) ) );

    assertThat( template.opsForHash().get( "mykey", "prop1" ),
        equalTo( ( Object )"value1" ) );

    template.opsForHash().delete( "mykey", "prop1", "prop2" );
    assertThat( template.opsForHash().get( "mykey", "prop1" ),
        equalTo( null ) );
}
In this section we went over some basics of Spring Data Redis and got a good understanding how Redis commands are mapped to its API. The number of test cases we have developed just glanced over the rich set of Spring Data Redis features. In the next three sections we are going to look on advanced API patterns: transactions, pipelining and publish/subscribe.
9. Transactions Using Spring Data Redis
Though Redis transactions support is somewhat limited, it is still a very useful feature to have when you need it. To show off how Spring Data Redis supports Redis transaction semantics, we are going to create a test cases which:
- assigns some values to two keys:
mykey1(SETcommand) andmykey2(SADDcommand) - verifies that member “a” is not in
mykey2set (SISMEMBERcommand) - starts watching for a key
mykey1(WATCHcommand) - initiates a transaction (
MULTIcommand) - increments
mykey1(INCREMENTcommand) - adds new member “b” to the set
mykey2(SADDcommand) - completes the transaction by issuing the
EXECcommand
@Test
public void testTransaction() {
    template.opsForValue().set( "mykey1", "10" );

    template.opsForSet().add( "mykey2", "a" );
    assertThat( template.opsForSet().isMember( "mykey2", "b"), equalTo( false ) );

    template.execute( new SessionCallback< List< Object > >() {
        @SuppressWarnings("unchecked")
        @Override
        public< K, V > List<Object> execute( final RedisOperations< K, V > operations )
                throws DataAccessException {

            operations.watch( ( K )"mykey1" );
            operations.multi();

            operations.opsForValue().increment( ( K )"mykey1", 5 );
            operations.opsForSet().add( ( K )"mykey2", ( V )"b" );

            return operations.exec();
        }
    } );

    assertThat( template.opsForValue().get( "mykey1"), equalTo( "15" ) );
    assertThat( template.opsForSet().isMember( "mykey2", "b"), equalTo( true ) );
}
However we ignored the return value of template.execute() method call, it returns the result of each individual command. In our test case it would be 15 as the result of INCREMENT and 1 as the result of SADD.
10. Pipelining Using Spring Data Redis
The way we access Redis mostly all the time is single command / response sequence: in order to send a new command, the client should wait for result of previous command to be returned by the Redis server. But there is way to send multiple commands to the server without waiting for the response at all and finally read all the responses in a single step. This technique is called pipelining.
Redis supports pipelining since the very early releases, so whatever version you are running, it is possible to use pipelining with Redis (for more details please look at http://redis.io/topics/pipelining).
Pipelining can significantly increase the performance of your application by reducing the network latency. But there is a catch: while any client sends commands using pipelining technique, the server will be forced to queue the responses in memory. If there is a need to pipeline a huge amount of commands, it is better to send these commands up to a given reasonable number (so to split them to multiple pipelines). The performance will be nearly the same but the additional memory used will be limited.
The following test case demonstrates pipelining using Spring Data Redis. We are going to send 100 commands using pipelining and verify that all the commands have been sent off and processed by comparing the value of the counter with expected one.
@Test
public void testPipelining() {
    template.opsForValue().set( "mykey1", "10" );

    template.executePipelined( new RedisCallback< Object >() {
        @Override
        public Object doInRedis(RedisConnection connection) throws DataAccessException {
            for( int i = 0; i < 100; ++i ) {
                template.opsForValue().increment( "mykey1", 1 );
            }
            return null;
        }
    } );

    assertThat( template.opsForValue().get( "mykey1"), equalTo( "110" ) );
}
As with Redis transaction test case, we ignored the return value of template.executePipelined() method call but it returns the result of each individual command (in total of 100 results). Also, if you are wondering why we return null from RedisCallback, there is reason: this return value will be overridden by actual value from the response (when received) and as such the callback it not allowed to return non-null value (please refer to http://docs.spring.io/spring-data/data-redis/docs/1.2.0.RELEASE/reference/html/redis.html#pipeline for more details).
11. Publish/Subscribe Using Spring Data Redis
Redis supports publish/subscribe messaging paradigm and Spring Data Redis provides a full support for this feature as well.
By nature, publish/subscribe messaging involves at least two participants: publisher who publish the messages and subscriber who listens for a messages from the publisher (usually it is a many-to-many relationship but we have simplified it to single publisher / subscriber model).
Developing a robust test case for that might look a bit tricky. Publishing is the easy part, but listening for a message on a particular channel (or pattern) requires some work to be done. We start with defining the subscriber class called RedisMessageListener. It will not do much but count all the messages it has received so far.
package com.javacodegeeks.redis;

import java.util.concurrent.atomic.AtomicInteger;

import org.springframework.data.redis.connection.Message;
import org.springframework.data.redis.connection.MessageListener;

public class RedisMessageListener implements MessageListener {
    private AtomicInteger count = new AtomicInteger( 0 );

    @Override
    public void onMessage(Message message, byte[] pattern) {
        count.incrementAndGet();
    }

    public int getCount() {
        return count.get();
    }
}
Next, we should extend our configuration with additional beans for RedisMessageListener and RedisMessageListenerContainer. The role of the latter one is very important: it glues together listeners and the channels they are listening on. Here is the minimal configuration (PubsubConfiguration) required to let us get started (please notice that we are importing the ApplicationConfiguration created previously).
package com.javacodegeeks.redis;

import org.springframework.beans.factory.annotation.Autowired;
import org.springframework.context.annotation.Bean;
import org.springframework.context.annotation.Configuration;
import org.springframework.context.annotation.Import;
import org.springframework.data.redis.connection.MessageListener;
import org.springframework.data.redis.connection.jedis.JedisConnectionFactory;
import org.springframework.data.redis.listener.ChannelTopic;
import org.springframework.data.redis.listener.RedisMessageListenerContainer;

@Configuration
@Import( value = ApplicationConfiguration.class )
public class PubsubConfiguration  {
    @Bean @Autowired
    public RedisMessageListenerContainer container(
            final JedisConnectionFactory connectionFactory ) {

        final RedisMessageListenerContainer container =
            new RedisMessageListenerContainer();

        container.setConnectionFactory( connectionFactory );
        container.addMessageListener( listener(), new ChannelTopic( "test-channel" ) );

        return container;
    }

    @Bean
    public MessageListener listener() {
        return new RedisMessageListener();
    }
}
To give a bit of context, we are attaching our listener to the channel called “test-channel” and that is the channel we are going to publish messages to.
Publish / Subscribe messaging communications are inherently asynchronous and this is yet another complication in developing the test cases for such a feature. The subscribers will not receive messages immediately but with some delay. If you are connecting to the Redis server running on your local machine, it may take milliseconds but if you are accessing some instance on the cloud, it could take a while. One of the possible approaches to handle that is to introduce some kind of reasonable delay so to give the subscriber some time to receive all the messages (and this is the trick we are using in our test case as well).
package com.javacodegeeks.redis;

import static com.jayway.awaitility.Awaitility.await;
import static java.util.concurrent.TimeUnit.SECONDS;
import static org.hamcrest.Matchers.equalTo;
import static org.junit.Assert.assertThat;


import java.util.concurrent.Callable;

import org.junit.Test;
import org.junit.runner.RunWith;
import org.springframework.beans.factory.annotation.Autowired;
import org.springframework.data.redis.core.RedisTemplate;
import org.springframework.test.context.ContextConfiguration;
import org.springframework.test.context.junit4.SpringJUnit4ClassRunner;

@RunWith( SpringJUnit4ClassRunner.class )
@ContextConfiguration( classes = PubsubConfiguration.class )
public class RedisPublishSubscriberTestCase {
    @Autowired private RedisTemplate< String, String > template;
    @Autowired private RedisMessageListener listener;

    @Test
    public void testPublishSubscribe() {
        assertThat( listener.getCount(), equalTo( 0 ) );

        template.convertAndSend( "test-channel", "Test Message 1!" );
        template.convertAndSend( "test-channel", "Test Message 2!" );
        template.convertAndSend( "test-channel", "Test Message 3!" );

        await().atMost( 1, SECONDS ).until(
            new Callable< Integer >() {
                @Override
                public Integer call() throws Exception {
                    return listener.getCount();
                }
            },
            equalTo( 3 )
        );
    }
}
This new test cases is using our PubsubConfiguration class to instantiate the Spring test context. In the test case itself we are publishing three messages to the channel “test-channel” on the Redis server. Then we are giving some time (but no more than one second) to message listener to consume all the messages published on a channel. After that we are expecting the listener to receive all 3 messages and that is what we are validating at the end.
12. Conclusions
Redis is evolving at a great pace. It is very hard to keep up with all its new features and commands. As such, you may find out that Spring Data Redis does not yet support some of the recent functionality available in latest Redis releases (even Java clients need some time to add the support for it). The good example is Redis Cluster which is not yet supported by Spring Data Redis.
This is the last part of Redis tutorial but it it just a beginning of the journey to Redis world. If you would like to keep an eye on latest development happening in Redis, there are a couple of resources you may check out:
- http://antirez.com/: the blog of Salvatore Sanfilippo, the creator of Redis
- http://aphyr.com/posts/283-call-me-maybe-redis: very useful insights about Redis Cluster availability

Seems like there is a bug here in the pipeline implementation with the Spring Data Redis. The code uses the template function within the pipeline callback – this actually sends the commands each on their own connection and there is no difference between this and simply looping over the keys with the template set command.
Hi! You are very right, there should be another flavor of the executePipelined method being used, the one with accepts SessionCallback (so the single connection will be used):
template.executePipelined( new SessionCallback() {
@Override
public Object execute(RedisOperations operations) throws DataAccessException {
for( int i = 0; i < 100; ++i ) {
operations.opsForValue().increment( "mykey1", 1 );
}
return null;
}
} );
Thank you!
Best Regards,
Andriy Redko