This article is part of our Academy Course titled MongoDB – A Scalable NoSQL DB.
In this course, you will get introduced to MongoDB. You will learn how to install it and how to operate it via its shell. Moreover, you will learn how to programmatically access it via Java and how to leverage Map Reduce with it. Finally, more advanced concepts like sharding and replication will be explained. Check it out here!
Table Of Contents
1. Introduction
In this final part of the tutorial we are going to take a look on MongoDB security model, different types of indexes, query plans and profiling, server-side cursors and bulk operations.
2. Security
MongoDB security features include authentication, authorization and auditing. Its foundation is a role-based access control with flexible set of privileges. It is worth mentioning that MongoDB provides a basis for user-defined roles by defining a set of build-in roles (for more details please refer to official documentation). As always, MongoDB shell provides rich set of command helpers to deal with security configuration.
| Command | createUser |
| Parameters |
{
    createUser: <username>,
    pwd: <password>,
    customData: { <any information> },
    roles: [
        { role: <role>, db: <database> } | <role>,
        ...
    ],
    writeConcern: { <write concern> }
}
|
| Wrapper | db.createUser(user, writeConcern) |
| Description | The command creates a new user with name username on the current database. If the user with such a username already exists, an error will be raised. |
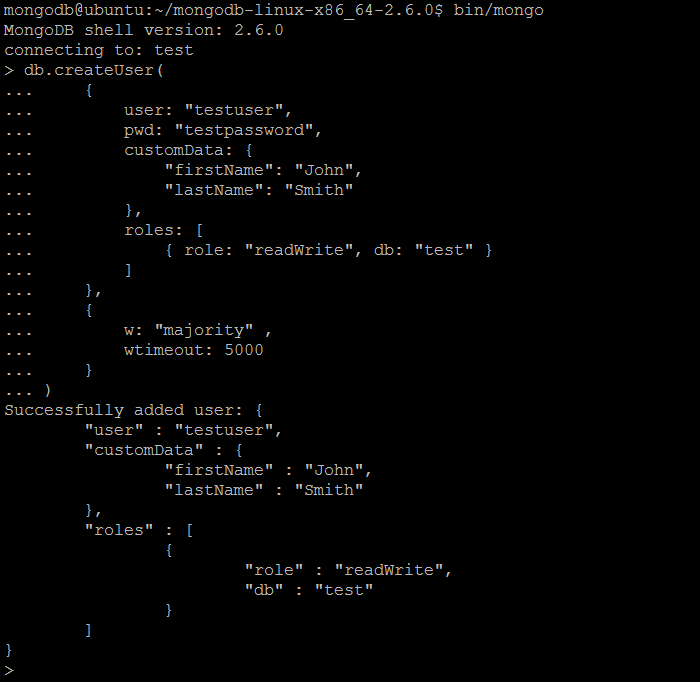
| Example | In MongoDB shell, let us issue the command:
db.createUser(
    {
        user: "testuser",
        pwd: "testpassword",
        customData: {
            "firstName": "John",
            "lastName": "Smith"
        },
        roles: [
            { role: "readWrite", db: "test" }
        ]
    },
    {
        w: "majority" ,
        wtimeout: 5000
    }
)
|
| Reference | http://docs.mongodb.org/manual/reference/command/createUser/
http://docs.mongodb.org/manual/reference/method/db.createUser/ |
createUser
| Command | updateUser |
| Parameters |
{
    updateUser: <username>,
    pwd: <password>,
    customData: { <any information> },
    roles: [
        { role: <role>, db: <database> } | <role>,
        ...
    ],
    writeConcern: { <write concern> }
}
|
| Wrapper | db.updateUser(username, update, writeConcern) |
| Description | The command updates user’s data with name username on the current database. Please notice that an update to a property completely replaces the previous property values (including updates to the user’s roles). |
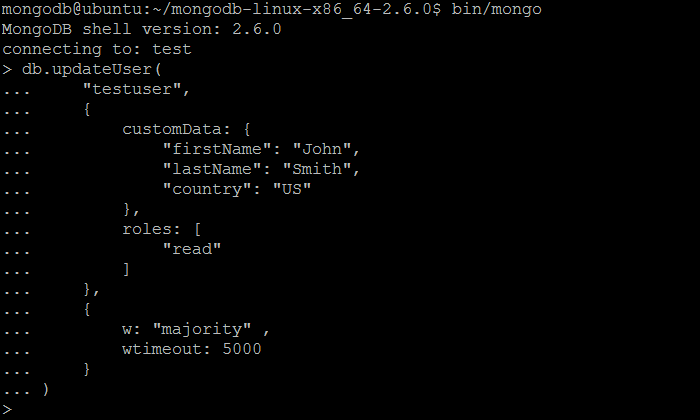
| Example | In MongoDB shell, let us issue the command (to update the user created previously by createUser command):
createUser command):

db.updateUser(
    "testuser",
    {
        customData: {
            "firstName": "John",
            "lastName": "Smith",
            "country": "US"
        },
        roles: [
            "read"
        ]
    },
    {
        w: "majority" ,
        wtimeout: 5000
    }
)
|
| Reference | http://docs.mongodb.org/manual/reference/command/updateUser/
http://docs.mongodb.org/manual/reference/method/db.updateUser/ |
updateUser
| Command | dropUser |
| Parameters |
{
    dropUser: <username>,
    writeConcern: { <write concern> }
}
|
| Wrapper | db.dropUser(username, writeConcern) |
| Description | The command removes the user with name username from the current database. |
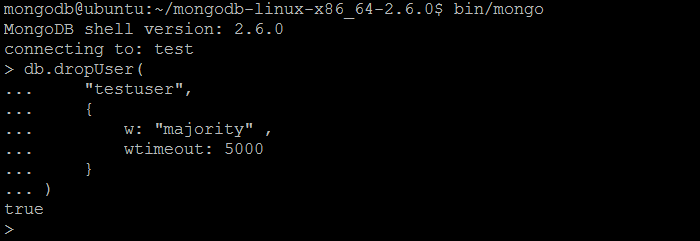
| Example | In MongoDB shell, let us issue the command (to drop the user created previously by createUser command):
db.dropUser(
    "testuser",
    {
        w: "majority" ,
        wtimeout: 5000
    }
)
|
| Reference | http://docs.mongodb.org/manual/reference/command/dropUser/
http://docs.mongodb.org/manual/reference/method/db.dropUser/ |
dropUser
| Command | db.changeUserPassword(username, password) |
| Description | The command updates the password for the existing user with name username. |
| Example | In MongoDB shell, let us issue the command (to drop the user created previously by createUser command): db.changeUserPassword("testuser", "newpassword")
|
| Reference | http://docs.mongodb.org/manual/reference/method/db.changeUserPassword/ |

db.changeUserPassword
| Command | dropAllUsersFromDatabase |
| Parameters |
{
    dropAllUsersFromDatabase: 1,
    writeConcern: { <write concern> }
}
|
| Wrapper | db.dropAllUsers(writeConcern) |
| Description | The command removes all users from the current database. It returns a number of users removed. |
| Example | In MongoDB shell, let us issue the command: db.dropAllUsers()
|
| Reference | http://docs.mongodb.org/manual/reference/command/dropAllUsersFromDatabase/
http://docs.mongodb.org/manual/reference/method/db.dropAllUsers/ |

dropAllUsersFromDatabase
| Command | grantRolesToUser |
| Parameters |
{
    grantRolesToUser: <username>,
    roles: [
        { role: <role>, db: <database> } | <role>,
        ...
    ],
    writeConcern: { <write concern> }
}
|
| Wrapper | db.grantRolesToUser(username, roles, writeConcern) |
| Description | The command grants additional roles to a user with name username. |
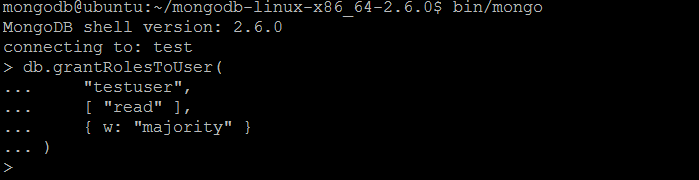
| Example | In MongoDB shell, let us issue the command (to grant roles to the user created previously by createUser command):
db.grantRolesToUser(
    "testuser",
    [ "read" ],
    { w: "majority" }
)
|
| Reference | http://docs.mongodb.org/manual/reference/command/grantRolesToUser/
http://docs.mongodb.org/manual/reference/method/db.grantRolesToUser/ |
grantRolesToUser
| Command | revokeRolesFromUser |
| Parameters |
{
    revokeRolesFromUser: <username>,
    roles: [
        { role: <role>, db: <database> } | <role>,
        ...
    ],
    writeConcern: { <write concern> }
}
|
| Wrapper | db.revokeRolesFromUser(username, roles, writeConcern) |
| Description | The command removes a one or more roles from a user with name username on the current database. |
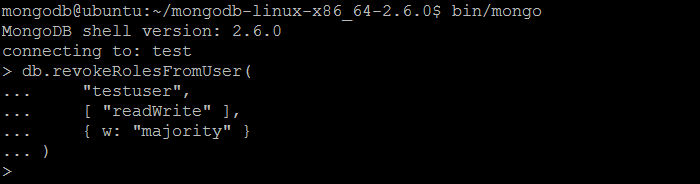
| Example | In MongoDB shell, let us issue the command (to revoke roles to the user created previously by createUser command):
db.revokeRolesFromUser(
    "testuser",
    [ "readWrite" ],
    { w: "majority" }
)
|
| Reference | http://docs.mongodb.org/manual/reference/command/revokeRolesFromUser/
http://docs.mongodb.org/manual/reference/method/db.revokeRolesFromUser/ |
revokeRolesFromUser
| Command | usersInfo |
| Parameters |
{
    usersInfo: { user: <username>, db: <db> } | <name> | 1,
    showCredentials: <true|false>,
    showPrivileges: <true|false>
}
|
| Wrapper | db.getUser(username)
db.getUsers() |
| Description | The command returns information about one or more users on the database. |
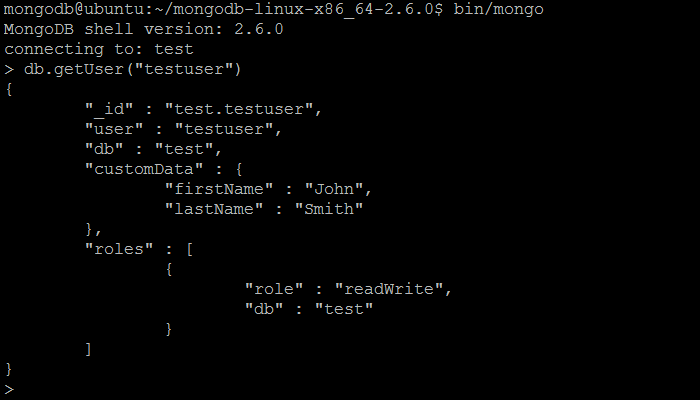
| Example | In MongoDB shell, let us issue the command (to get the information about the user created previously by createUser command): db.getUser("testuser") (or alternatively, db.getUsers())
|
| Reference | http://docs.mongodb.org/manual/reference/command/usersInfo/
http://docs.mongodb.org/manual/reference/method/db.getUser/ http://docs.mongodb.org/manual/reference/method/db.getUsers/ |
usersInfo
| Command | createRole |
| Parameters |
{
    createRole: <rolename>,
    privileges: [
        { resource: { <resource> }, actions: [<action>, ... ] },
        ...
    ],
    roles: [
        { role: <role>, db: <database> } | <role>,
        ...
    ],
    writeConcern: { <write concern> }
}
|
| Wrapper | db.createRole(role, writeConcern) |
| Description | The command creates a user-defined role with a name rolename and particular set of privileges. The role will be applicable to the current database. |
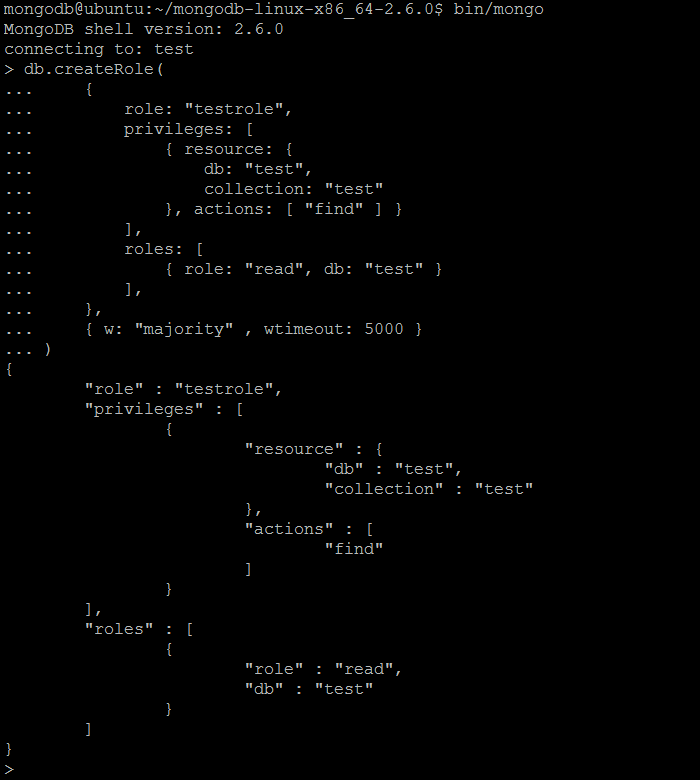
| Example | In MongoDB shell, let us issue the command:
db.createRole(
    {
        role: "testrole",
        privileges: [
            { resource: {
                db: "test",
                collection: "test"
            }, actions: [ "find" ] }
        ],
        roles: [
            { role: "read", db: "test" }
        ],
    },
    { w: "majority" , wtimeout: 5000 }
)
|
| Reference | http://docs.mongodb.org/manual/reference/command/createRole/
http://docs.mongodb.org/manual/reference/method/db.createRole/ |
createRole
| Command | updateRole |
| Parameters |
{
    updateRole: <rolename>,
    privileges: [
        { resource: { <resource> }, actions: [<action>, ... ] },
        ...
    ],
    roles: [
        { role: <role>, db: <database> } | <role>,
        ...
    ],
    writeConcern: { <write concern> }
}
|
| Wrapper | db.updateRole(rolename, update, writeConcern) |
| Description | The command updates user-defined role with name rolename on the current database. Please notice that an update to a property completely replaces the previous property values (including updates to the roles and privileges). |
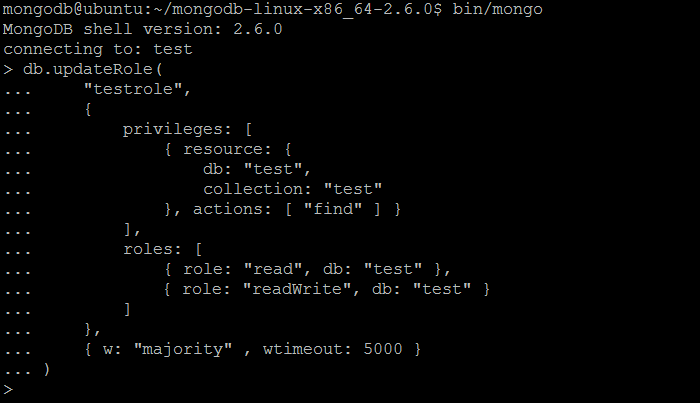
| Example | In MongoDB shell, let us issue the command (to update the role created previously by createRole command):
db.updateRole(
    "testrole",
    {
        privileges: [
            { resource: {
                db: "test",
                collection: "test"
            }, actions: [ "find" ] }
        ],
        roles: [
            { role: "read", db: "test" },
            { role: "readWrite", db: "test" }
        ]
    },
    { w: "majority" , wtimeout: 5000 }
)
|
| Reference | http://docs.mongodb.org/manual/reference/command/updateRole/
http://docs.mongodb.org/manual/reference/method/db.updateRole/ |
updateRole
| Command | dropRole |
| Parameters |
{
    dropRole: <rolename>,
    writeConcern: { <write concern> }
}
|
| Wrapper | db.dropRole(rolename, writeConcern) |
| Description | The command deletes a user-defined role with name rolename from the current database. |
| Example | In MongoDB shell, let us issue the command (to drop the role created previously by createRole command): db.dropRole( "testrole" )
|
| Reference | http://docs.mongodb.org/manual/reference/command/dropRole/
http://docs.mongodb.org/manual/reference/method/db.dropRole/ |

dropRole
| Command | dropAllRolesFromDatabase |
| Parameters |
{
    dropAllRolesFromDatabase: 1,
    writeConcern: { <write concern> }
}
|
| Wrapper | db.dropAllRoles(writeConcern) |
| Description | The command deletes all user-defined roles from the current database. It returns a number of roles removed. |
| Example | In MongoDB shell, let us issue the command: db.dropAllRoles()
|
| Reference | http://docs.mongodb.org/manual/reference/command/dropAllRolesFromDatabase/
http://docs.mongodb.org/manual/reference/method/db.dropAllRoles/ |

dropAllRolesFromDatabase
| Command | grantPrivilegesToRole |
| Parameters |
{
    grantPrivilegesToRole: <rolename>,
    privileges: [
        { resource: { <resource> }, actions: [<action>, ... ] },
        ...
    ],
    writeConcern: { <write concern> }
}
|
| Wrapper | db.grantPrivilegesToRole(rolename, privileges, writeConcern) |
| Description | The command assigns additional privileges to a user-defined role with name rolename defined on the current database. |
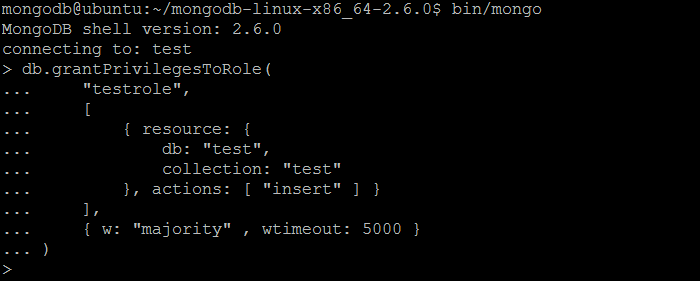
| Example | In MongoDB shell, let us issue the command (to grant more privileges to the role created previously by createRole command):
db.grantPrivilegesToRole(
    "testrole",
    [
        { resource: {
            db: "test",
            collection: "test"
        }, actions: [ "insert" ] }
    ],
    { w: "majority" , wtimeout: 5000 }
)
|
| Reference | http://docs.mongodb.org/manual/reference/command/grantPrivilegesToRole/
http://docs.mongodb.org/manual/reference/method/db.grantPrivilegesToRole/ |
grantPrivilegesToRole
| Command | revokePrivilegesFromRole |
| Parameters |
{
    revokePrivilegesFromRole: <rolename>,
    privileges: [
        { resource: { <resource> }, actions: [<action>, ... ] },
        ...
    ],
    writeConcern: { <write concern> }
}
|
| Wrapper | db.revokePrivilegesFromRole(rolename, privileges, writeConcern) |
| Description | The command removes the specified privileges from a user-defined role with name rolename defined on the current database. |
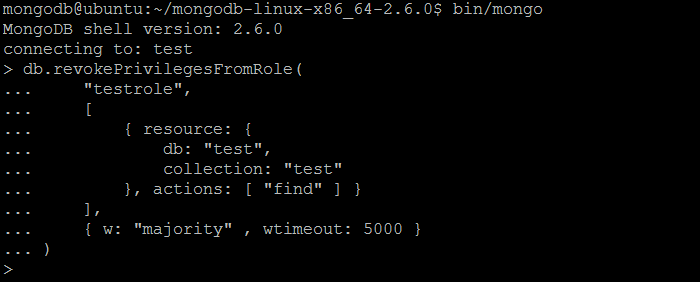
| Example | In MongoDB shell, let us issue the command (to revoke privileges from the role created previously by createRole command):
db.revokePrivilegesFromRole(
    "testrole",
    [
        { resource: {
            db: "test",
            collection: "test"
        }, actions: [ "find" ] }
    ],
    { w: "majority" , wtimeout: 5000 }
)
|
| Reference | http://docs.mongodb.org/manual/reference/command/revokePrivilegesFromRole/
http://docs.mongodb.org/manual/reference/method/db.revokePrivilegesFromRole/ |
revokePrivilegesFromRole
| Command | grantRolesToRole |
| Parameters |
{
    grantRolesToRole: <rolename>,
    roles: [
        { role: <role>, db: <database> } | <role>,
        ...
    ],
    writeConcern: { <write concern> }
}
|
| Wrapper | db.grantRolesToRole(rolename, roles, writeConcern) |
| Description | The command assigns additional roles to a user-defined role with name rolename defined on the current database. |
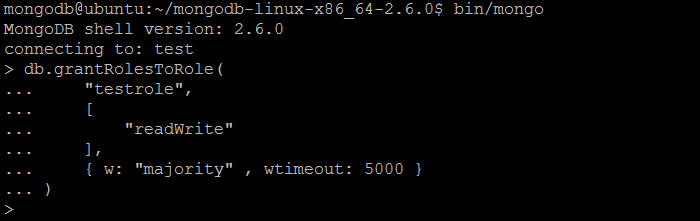
| Example | In MongoDB shell, let us issue the command (to assign more roles to the role created previously by createRole command):
db.grantRolesToRole(
    "testrole",
    [
        "readWrite"
    ],
    { w: "majority" , wtimeout: 5000 }
)
|
| Reference | http://docs.mongodb.org/manual/reference/command/grantRolesToRole/
http://docs.mongodb.org/manual/reference/method/db.grantRolesToRole/ |
grantRolesToRole
| Command | revokeRolesFromRole |
| Parameters |
{
    revokeRolesFromRole: <rolename>,
    roles: [
        { role: <role>, db: <database> } | <role>,
        ...
    ],
    writeConcern: { <write concern> }
}
|
| Wrapper | db.revokeRolesFromRole(rolename, roles, writeConcern) |
| Description | The command removes specified roles from a user-defined role with name rolename defined on the current database. |
| Example | In MongoDB shell, let us issue the command (to remove some roles from the role created previously by createRole command):
db.revokeRolesFromRole(
    "testrole",
    [
        { role: "read", db: "test" }
    ],
    { w: "majority" , wtimeout: 5000 }
)
|
| Reference | http://docs.mongodb.org/manual/reference/command/revokeRolesFromRole/
http://docs.mongodb.org/manual/reference/method/db.revokeRolesFromRole/ |

revokeRolesFromRole
| Command | rolesInfo |
| Parameters |
{
    rolesInfo: <rolename> | { role: <rolename>, db: <database> },
    showPrivileges: <true|false>,
    showBuiltinRoles: <true|false>
}
|
| Wrapper | db.getRole(rolename, showPrivileges)
db.getRoles() |
| Description | The command returns inheritance and privilege information for specified roles (including both user-defined roles and built-in roles). |
| Example | In MongoDB shell, let us issue the command (to get the information for the role created previously by createRole command): db.getRole( "testrole" )
|
| Reference | http://docs.mongodb.org/manual/reference/command/rolesInfo/
http://docs.mongodb.org/manual/reference/method/db.getRole/ http://docs.mongodb.org/manual/reference/method/db.getRoles/ |

rolesInfo
| Command | invalidateUserCache |
| Description | The command immediately flushes user information from in-memory cache, including removal of each user’s credentials and roles. |
| Example | In MongoDB shell, let us issue the command: db.runCommand( { invalidateUserCache: 1 } )
|
| Reference | http://docs.mongodb.org/manual/reference/command/invalidateUserCache/ |

invalidateUserCache
| Command | authenticate |
| Parameters |
{
    authenticate : 1,
    user : <username>,
    nonce : <nonce>,
    key : <digest>
}
|
| Wrapper | db.auth(username, password) |
| Description | The command allows a user to authenticate to the database from within the MongoDB shell or client session. |
| Example | In MongoDB shell, let us issue the command (to authenticate session using the user created previously by createUser command): db.auth( "testuser", "testpassword" )
|
| Reference | http://docs.mongodb.org/manual/reference/command/authenticate/ |

authenticate
| Command | logout |
| Wrapper | db.logout() |
| Description | The command terminates the current authenticated session (if current session is not using authentication, the command has no effect). |
| Example | In MongoDB shell, let us issue the command: db.logout() |
| Reference | http://docs.mongodb.org/manual/reference/command/logout/ |
logout
2.1. Additional Resources
- MongoDB Security Part I: Design and Configuration http://blog.mongodb.org/post/86408399868/mongodb-security-part-1-design-and-configuration
- MongoDB Security Part II: 10 mistakes that can compromise your database http://blog.mongodb.org/post/87691901392/mongodb-security-part-ii-10-mistakes-that-can
3. Indexing
Choosing the right indexes may boost your query performance (and consequently applications performance) in most times. MongoDB supports different types of indexes to pick from:
- _id: all collections have an index on the _id field that exists by default
- single field: indexes on a single field of a document, f.e. { “title”: 1 }
- compound index: indexes on multiple fields, f.e. { “title”: 1, “price”: 1 }
- multikey index: indexes on content stored in arrays, f.e. { “categories”: 1 }
- geospatial index: 2d/2sphere indexes to support efficient geospatial queries, f.e. { “location”: “2d” }
- text indexes: indexes on string content to support full-text search, f.e. { “title”: “text” }
- hashed indexes: indexes to support hash-based sharding (please refer to Part 4. MongoDB Sharding Guide of the tutorial for more details)
Additionally, each index may be defined as:
- unique: duplicate values for the indexed field will be rejected
- sparse: index only contain entries for documents that have the indexed field
For indexed collections, the values for the indexed fields have a maximum index key length limit: the total size of an index entry must be less than 1024 bytes (please refer to limits and thresholds section of the official documentation).
For more details about indexing, please refer to official documentation.
4. Profiling
MongoDB provides a very useful tool to collect server performance data: the database profiler. It collects fine grained data about queries, write operations, cursors, and other database commands on a running server instance. The profiling can be enabled on a per-database or per-server instance level.
| Command | Profile |
| Parameters |
{
    profile: <level>
}
|
| Wrapper | db.setProfilingLevel(level, slowms) |
| Description | The command modifies the current profiler level used by the database profiling system to capture data about performance. The level parameter has the following meaning:
-1 – No change. Returns the current profile level. 0 – Off. No profiling. 1 – On. Only includes slow operations. 2 – On. Includes all operations. |
| Example | In MongoDB shell, let us issue the command: db.setProfilingLevel(2)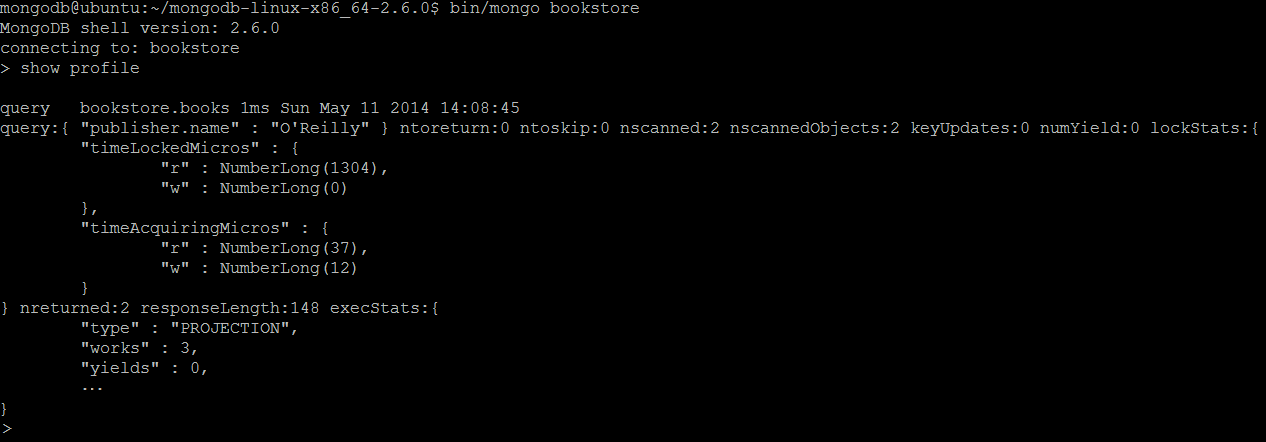 |
| Reference | http://docs.mongodb.org/manual/reference/command/profile/
http://docs.mongodb.org/manual/reference/method/db.setProfilingLevel/ |
Profile
| Command | db.getProfilingLevel() |
| Description | The command returns the current profiling level for database operations. |
| Example | In MongoDB shell, let us issue the command: db.getProfilingLevel()
|
| Reference | http://docs.mongodb.org/manual/reference/method/db.getProfilingLevel/ |
| Command | db.getProfilingStatus() |
| Description | The command returns a document that reflects the current profiling level and the profiling threshold. |
| Example | In MongoDB shell, let us issue the command: db.getProfilingStatus() |
| Reference | http://docs.mongodb.org/manual/reference/method/db.getProfilingStatus/ |

db.getProfilingLevel
| Command | show profile |
| Description | Outputs the five most recent operations that took 1 millisecond or more. |
| Example | In MongoDB shell, let us issue the command: show profile
Note: Only a fragment of the output is shown. |
| Reference | http://docs.mongodb.org/manual/reference/mongo-shell/#command-helpers |
show profile
To get more insights about analyzing the performance of database operations please refer to official documentation.
5. Query Cache
Among many other new features, MongoDB 2.6 supports a new set of commands to view and manipulate the query cache:
- list all known query shapes
- display cached plans for a query shape
- remove a query shape from the cache
- clear the whole cache
The query optimizer executes queries and picks the most efficient query plan for a query given the defined indexes. Later on, this query plan is used each time the query (with such a shape) runs. The query optimizer only caches the plans for those query shapes that can have more than one viable plan and occasionally reevaluates query plans as the content of the collection changes.
To experiment with query plans, we need a small dataset and the example from Part 3. MongoDB and Java Tutorial is going to be handy again. Let us switch to books collection in bookstore database, create couple of indexes and insert a few documents into it using MongoDB shell.
use bookstore
db.books.ensureIndex( { "publisher.name": 1 } )
db.books.ensureIndex( { "publisher.name": 1, "price": 1 } )

db.books.insert( {
    "title" : "MongoDB: The Definitive Guide",
    "publisher" : { "name" : "O'Reilly" },
    "price" : 32.99
} );

db.books.insert( {
    "title" : "MongoDB Applied Design Patterns",
    "publisher" : { "name" : "O'Reilly" },
    "price" : 32.99
} );

db.books.insert( {
    "title" : "MongoDB in Action, 2nd Edition",
    "publisher" : { "name" : "Manning" },
    "price" : 26.66
} );
Once the preparation is done, let us run simple query which will trigger the query plans evaluation: db.books.find( { "publisher.name": "O'Reilly" }, { "title": 1 } )
| Command | db.<collection>.getPlanCache().help() |
| Description | The command displays the methods available for a collection’s query plan cache with brief description. |
| Example | In MongoDB shell, let us issue the command: db.books.getPlanCache().help()
|
| Reference | http://docs.mongodb.org/manual/reference/method/PlanCache.help/ |

db.<collection>.getPlanCache
| Command | planCacheListFilters |
| Parameters |
{
    planCacheListFilters: <collection>
}
|
| Description | The command lists the index filters associated with query shapes for a collection collection. |
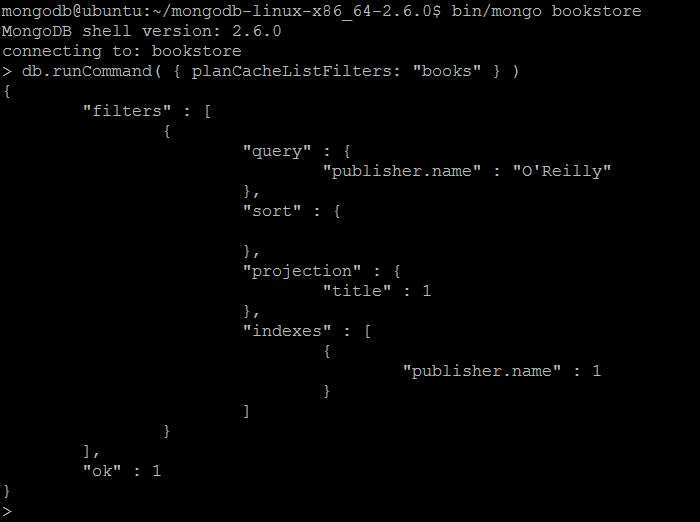
| Example | In MongoDB shell, let us issue the command (to list the filters set by planCacheSetFilter before): db.runCommand( { planCacheListFilters: "books" } )
|
| Reference | http://docs.mongodb.org/manual/reference/command/planCacheListFilters/ |
planCacheListFilters
| Command | planCacheSetFilter |
| Parameters |
{
    planCacheSetFilter: <collection>,
    query: <query>,
    sort: <sort>,
    projection: <projection>,
    indexes: [ <index1>, <index2>, ...]
}
|
| Description | The command set an index filter for a collection collection. If an index filter already exists for the query shape, it will be overridden. |
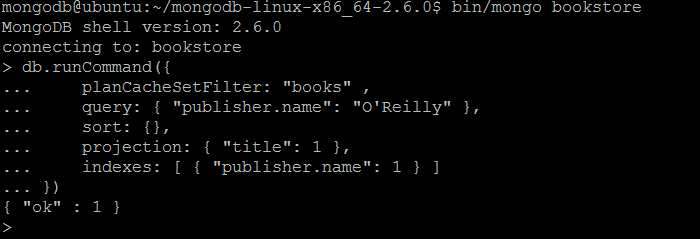
| Example | In MongoDB shell, let us issue the command:
db.runCommand({
    planCacheSetFilter: "books" ,
    query: { "publisher.name": "O'Reilly" },
    sort: {},
    projection: { "title": 1 },
    indexes: [ { "publisher.name": 1 } ]
})
|
| Reference | http://docs.mongodb.org/manual/reference/command/planCacheSetFilter/ |
planCacheSetFilter
| Command | planCacheClearFilters |
| Parameters |
{
    planCacheClearFilters: <collection>,
    query: <query>,
    sort: <sort>,
    projection: <projection>
}
|
| Description | The command clears index filter(s) for a collection collection. |
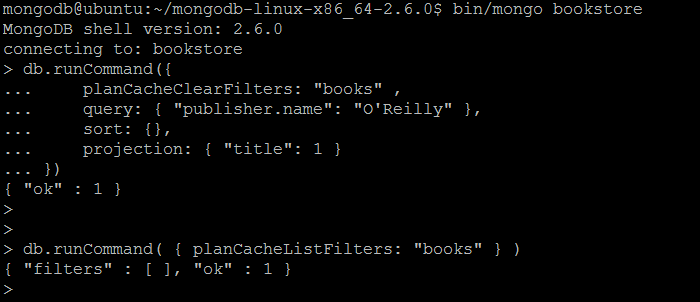
| Example | In MongoDB shell, let us issue the command:
db.runCommand({
    planCacheClearFilters: "books" ,
    query: { "publisher.name": "O'Reilly" },
    sort: {},
    projection: { "title": 1 }
})
|
| Reference | http://docs.mongodb.org/manual/reference/command/planCacheClearFilters/ |
planCacheClearFilters
| Command | planCacheListQueryShapes |
| Parameters |
{
    planCacheListQueryShapes: <collection>
}
|
| Wrapper | db.<collection>.getPlanCache().listQueryShapes() |
| Description | The command displays the query shapes for which cached query plans exist for collection collection. |
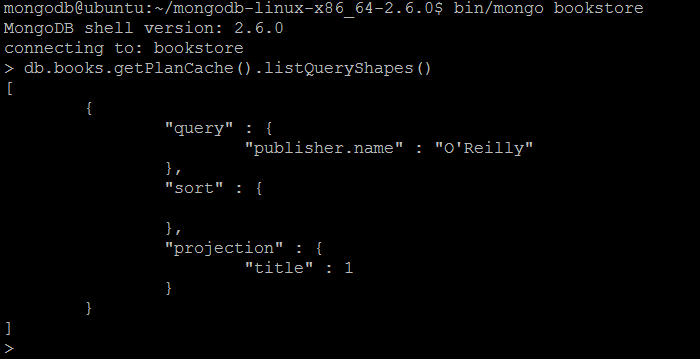
| Example | In MongoDB shell, let us issue the command: db.books.getPlanCache().listQueryShapes()
|
| Reference | http://docs.mongodb.org/manual/reference/command/planCacheListQueryShapes/
http://docs.mongodb.org/manual/reference/method/PlanCache.listQueryShapes/ |
planCacheListQueryShapes
| Command | planCacheListPlans |
| Parameters |
{
    planCacheListPlans: <collection>,
    query: <query>,
    sort: <sort>,
    projection: <projection>
}
|
| Wrapper | db.<collection>.getPlanCache().getPlansByQuery( <query>, <projection>, <sort> ) |
| Description | The command displays the cached query plans for the specified query shape for collection collection. |
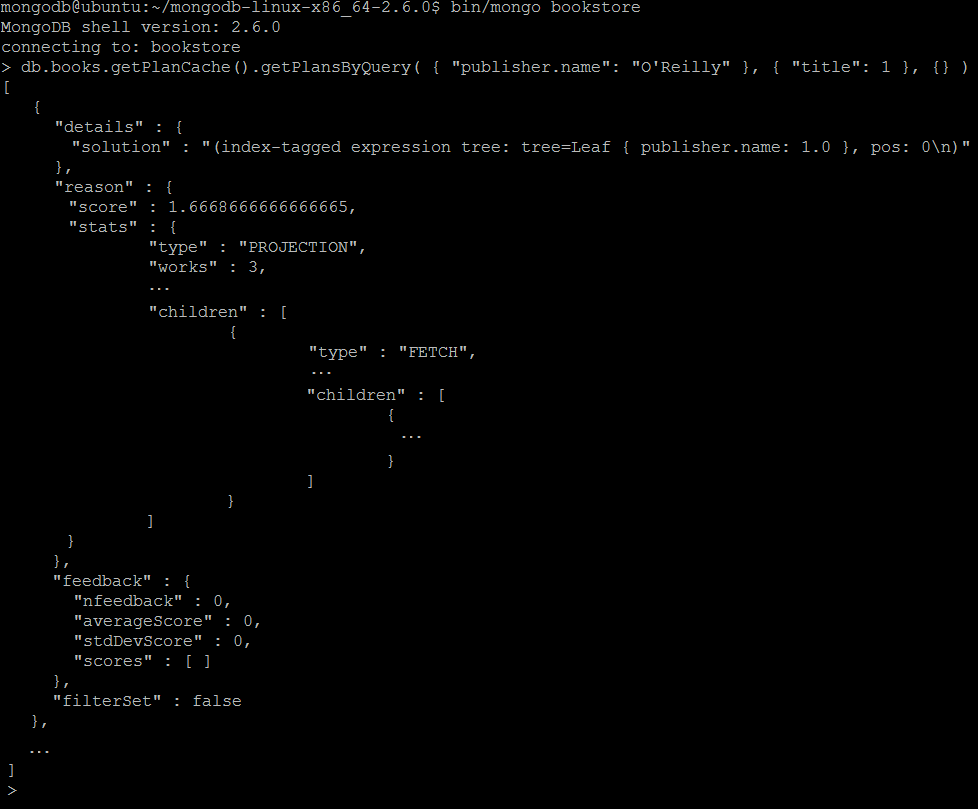
| Example | In MongoDB shell, let us issue the command: db.books.getPlanCache().getPlansByQuery( { "publisher.name": "O'Reilly" }, { "title": 1 }, {} )
Note: Only a fragment of the output is shown. |
| Reference | http://docs.mongodb.org/manual/reference/command/planCacheListPlans/
http://docs.mongodb.org/manual/reference/method/PlanCache.getPlansByQuery/ |
planCacheListPlans
| Command | planCacheClear |
| Parameters |
{
    planCacheClear: <collection>,
    query: <query>,
    sort: <sort>,
    projection: <projection>
}
|
| Wrapper | db.<collection>.getPlanCache().clearPlansByQuery( <query>, <projection>, <sort> )
db.<collection>.getPlanCache().clear() |
| Description | The command clears the cached query plans for the specified query shape for collection collection. If the query shape is omitted, all cached query plans will be cleared. |
| Example | In MongoDB shell, let us issue the command: db.books.getPlanCache().clear()
|
| Reference | http://docs.mongodb.org/manual/reference/command/planCacheClear/
http://docs.mongodb.org/manual/reference/method/PlanCache.clearPlansByQuery/ |
planCacheClear
With log level set to 1 or greater MongoDB will log plan cache changes. The log level could be set using the following command (please notice that it should be run in context of admin database): db.adminCommand( { setParameter: 1, logLevel: 1 } )
6. Cursors
Cursors are the basic way to access documents returned by read operations, f.e. db.<collection>.find(). In MongoDB shell, if the returned cursor is not assigned to a variable, then only first 20 documents are taken from the cursor and shown as the result. However, cursors are very powerful and provide a lot of useful methods.
| Method | cursor.addOption(flag) |
| Description | The method adds special wire protocol flags that modify the behavior of the query. |
| Reference | http://docs.mongodb.org/manual/reference/method/cursor.addOption/ |
cursor.addOption(flag)
| Method | cursor.batchSize(size) |
| Description | The method specifies the number of documents to return in each batch of the response from the server instance. |
| Reference | http://docs.mongodb.org/manual/reference/method/cursor.batchSize/ |
cursor.batchSize(size)
| Method | cursor.count() |
| Description | The method counts the number of documents referenced by a cursor. |
| Reference | http://docs.mongodb.org/manual/reference/method/cursor.count/ |
cursor.count()
| Method | cursor.explain(verbose) |
| Description | The method reports on the query execution plan (including indexes usages) for a cursor. |
| Reference | http://docs.mongodb.org/manual/reference/method/cursor.explain/ |
cursor.explain(verbose)
| Method | cursor.forEach(function) |
| Description | The method iterates over the cursor and applies a JavaScript function to each document. |
| Reference | http://docs.mongodb.org/manual/reference/method/cursor.forEach/ |
cursor.forEach(function)
| Method | cursor.hasNext() |
| Description | The method returns true if the cursor has more documents and can be iterated. |
| Reference | http://docs.mongodb.org/manual/reference/method/cursor.hasNext/ |
cursor.hasNext()
| Method | cursor.hint(index) |
| Description | The method forces server instance to use a specific index for a query. |
| Reference | http://docs.mongodb.org/manual/reference/method/cursor.hint/ |
cursor.hint(index)
| Method | cursor.limit(limit) |
| Description | The method limits the size of a cursor’s result set (returned documents). |
| Reference | http://docs.mongodb.org/manual/reference/method/cursor.limit/ |
cursor.limit(limit)
| Method | cursor.map(function) |
| Description | The method applies a JavaScript function to each document in a cursor and collects the return values in an array. |
| Reference | http://docs.mongodb.org/manual/reference/method/cursor.map/ |
cursor.map(function)
| Method | cursor.maxTimeMS(<milliseconds>) |
| Description | The method specifies a cumulative time limit in milliseconds for processing operations on a cursor. |
| Reference | http://docs.mongodb.org/manual/reference/method/cursor.maxTimeMS/ |
cursor.maxTimeMS(<milliseconds>)
| Method | cursor.max({ field1: <max value1>, field2: <max value2> … fieldN:<max valueN> }) |
| Description | The method specifies an exclusive upper index bound for a cursor. |
| Reference | http://docs.mongodb.org/manual/reference/method/cursor.max/ |
cursor.max
| Method | cursor.min({ field1: <min value1>, field2: <min value2> … fieldN:<min valueN> }) |
| Description | The method specifies an inclusive lower index bound for a cursor. |
| Reference | http://docs.mongodb.org/manual/reference/method/cursor.min/ |
cursor.min
| Method | cursor.next() |
| Description | The method returns the next document in a cursor. |
| Reference | http://docs.mongodb.org/manual/reference/method/cursor.next/ |
cursor.next()
| Method | cursor.objsLeftInBatch() |
| Description | The method returns the number of documents left in the current cursor batch. |
| Reference | http://docs.mongodb.org/manual/reference/method/cursor.objsLeftInBatch/ |
cursor.objsLeftInBatch()
| Method | cursor.readPref(mode, tagSet) |
| Description | The method specifies a read preference for the cursor to control how the clients direct queries to a replica set. |
| Reference | http://docs.mongodb.org/manual/reference/method/cursor.readPref/ |
cursor.readPref(mode, tagSet)
| Method | cursor.showDiskLoc() |
| Description | The method returns a cursor with modified documents that include the on-disk location of the document in the special $diskLoc property. |
| Reference | http://docs.mongodb.org/manual/reference/method/cursor.showDiskLoc/ |
cursor.showDiskLoc()
| Method | cursor.size() |
| Description | The method returns a count of the documents in the cursor after applying cursor.skip() and cursor.limit() methods. |
| Reference | http://docs.mongodb.org/manual/reference/method/cursor.size/ |
cursor.size()
| Method | cursor.skip(number) |
| Description | The method returns a cursor that begins returning results only after passing or skipping a number of documents. It should be called before retrieving any documents from the database. |
| Reference | http://docs.mongodb.org/manual/reference/method/cursor.skip/ |
cursor.skip(number)
| Method | cursor.snapshot() |
| Description | The method ensures that the query will not return a document multiple times, even if intervening write operations result in a move of the document due to the growth in document size. It should be called before retrieving any documents from the database and works with unsharded collections only. |
| Reference | http://docs.mongodb.org/manual/reference/method/cursor.snapshot/ |
cursor.snapshot()
| Method | cursor.sort(sort) |
| Description | The method returns the results ordered according to a sort specification. |
| Reference | http://docs.mongodb.org/manual/reference/method/cursor.sort/ |
cursor.sort(sort)
| Method | cursor.toArray() |
| Description | The method returns an array that contains all documents returned by the cursor |
| Reference | http://docs.mongodb.org/manual/reference/method/cursor.toArray/ |
cursor.toArray()
| Command | parallelCollectionScan |
| Parameters |
{
    parallelCollectionScan: <collection>,
    numCursors: <integer>
}
|
| Description | The command allows applications to use multiple parallel cursors when reading all the documents from a collection. It returns a document that contains an array of cursor information. |
| Example | In MongoDB shell, let us issue the command: db.runCommand( { parallelCollectionScan: “books”, numCursors: 1 } )
|
| Reference | http://docs.mongodb.org/manual/reference/command/parallelCollectionScan/ |
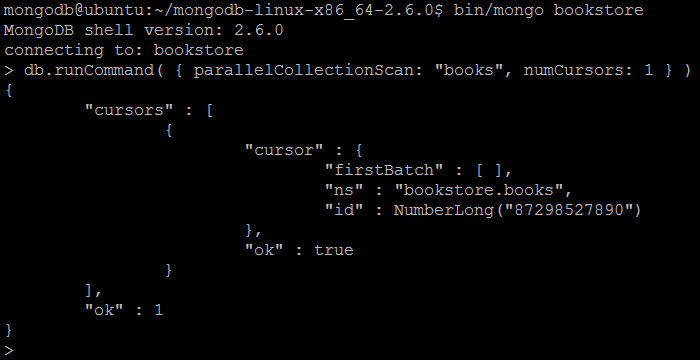
parallelCollectionScan
Armored with deeper knowledge about cursors, let us take a look on the example of different cursor methods in action using the books collection from section Query Cache.
[
    {
        "title" : "MongoDB in Action, 2nd Edition",
        "publisher" : {
            "name" : "Manning"
        },
        "price" : 26.66,
        "$diskLoc" : {
            "file" : 0,
            "offset" : 17072
        }
    },
    {
        "title" : "MongoDB: The Definitive Guide",
        "publisher" : {
            "name" : "O'Reilly"
        },
        "price" : 32.99,
        "$diskLoc" : {
            "file" : 0,
            "offset" : 16560
        }
    }
]
7. Bulk Operations
One of the coolest features of latest MongoDB 2.6 release is the introduction of bulk API. In a nutshell, this new API supports ordered and unordered bulk operations. In an ordered bulk operation, the execution of every operation follows the order it was added to the bulk operation. Consequently, in an unordered bulk operation the order of every operation is not guaranteed.
| Command | db.<collection>.initializeOrderedBulkOp() |
| Description | The command Initializes and returns a new ordered bulk operation builder for a collection collection. The builder constructs an ordered list of the operations to be executed in bulk. |
| Example | In MongoDB shell, let us issue the command: var bulk = db.testcollection.initializeOrderedBulkOp()  |
| Reference | http://docs.mongodb.org/manual/reference/method/db.collection.initializeOrderedBulkOp/ |
initializeOrderedBulkOp
| Command | db.<collection>.initializeUnorderedBulkOp() |
| Description | The command Initializes and returns a new unordered bulk operation builder for a collection collection. The builder constructs an unordered list of the operations to be executed in bulk. |
| Example | In MongoDB shell, let us issue the command:
var bulk = db.testcollection.initializeUnorderedBulkOp()
|
| Reference | http://docs.mongodb.org/manual/reference/method/db.collection.initializeUnorderedBulkOp/ |
initializeUnorderedBulkOp
Those two commands are the starting point to begin using the bulk API. They return bulk builder object (of type Bulk) which provides the fluent API to construct bulk operation.
| Method | Bulk.insert(<document>) |
| Description | The method adds an insert operation to a bulk operations list. |
| Reference | http://docs.mongodb.org/manual/reference/method/Bulk.insert/ |
Bulk.insert(<document>)
| Method | Bulk.find(<query>) |
| Description | The method specifies a query condition for an update or a remove operation. It could be used with following bulk operations:
– Bulk.find(<query>).removeOne() – Bulk.find(<query>).remove() – Bulk.find(<query>).replaceOne() – Bulk.find(<query>).updateOne() – Bulk.find(<query>).update() |
| Reference | http://docs.mongodb.org/manual/reference/method/Bulk.find/ |
Bulk.find(<query>)
| Method | Bulk.find(<query>).removeOne() |
| Description | The method adds a single document remove operation to a bulk operations list. |
| Reference | http://docs.mongodb.org/manual/reference/method/Bulk.find.removeOne/ |
Bulk.find(<query>).removeOne
| Method | Bulk.find(<query>).remove() |
| Description | The method adds a remove operation to a bulk operations list. |
| Reference | http://docs.mongodb.org/manual/reference/method/Bulk.find.remove/ |
Bulk.find(<query>).remove
| Method | Bulk.find(<query>).replaceOne() |
| Description | The method adds a single document replacement operation to a bulk operations list. |
| Reference | http://docs.mongodb.org/manual/reference/method/Bulk.find.replaceOne/ |
Bulk.find(<query>).replaceOne
| Method | Bulk.find(<query>).updateOne() |
| Description | The method adds a single document update operation to a bulk operations list. |
| Reference | http://docs.mongodb.org/manual/reference/method/Bulk.find.updateOne/ |
Bulk.find(<query>).updateOne
| Method | Bulk.find(<query>).update() |
| Description | The method adds a multi-update operation to a bulk operations list. |
| Reference | http://docs.mongodb.org/manual/reference/method/Bulk.find.update/ |
Bulk.find(<query>).update
| Method | Bulk.execute(writeConcern) |
| Description | The method executes the list of operations built by the bulk operations builder. |
| Reference | http://docs.mongodb.org/manual/reference/method/Bulk.execute/ |
Bulk.execute(writeConcern)
To finish with the bulk API, let us create and execute an example bulk operation using MongoDB shell and initialization commands. In the example we are going to bulk the following actions:
- insert 3 books into books collection
- update all books by setting the categories field
- update book’s (with title “MongoDB: The Definitive Guide”) categories with additional category
- remove all books published by Manning
var bulk = db.books.initializeOrderedBulkOp();
bulk.insert( {
    "title" : "MongoDB: The Definitive Guide",
    "publisher" : { "name" : "O'Reilly" },
    "price" : 32.99
} );
bulk.insert( {
    "title" : "MongoDB Applied Design Patterns",
    "publisher" : { "name" : "O'Reilly" },
    "price" : 32.99
} );
bulk.insert( {
    "title" : "MongoDB in Action, 2nd Edition",
    "publisher" : { "name" : "Manning" },
    "price" : 26.66
} );
bulk.find( { "publisher.name": "O'Reilly" } )
    .update( { $set: { "categories" : [ "Databases", "NoSQL" ] } } );
bulk.find( { "title": "MongoDB: The Definitive Guide" } )
    .updateOne( { $addToSet: { "categories" : "Programming" } } );
bulk.find( { "publisher.name": "Manning" } )
    .remove();
bulk.execute( { w: "majority" ,  wtimeout: 5000  } );
As you can see, each action within ordered bulk operation may rely on previous actions to succeed (for example, find/update depends on insert). This is not the case for unordered bulk operation. The execution of this bulk operation in MongoDB shell yields the following result document:
BulkWriteResult({
    "writeErrors" : [ ],
    "writeConcernErrors" : [ ],
    "nInserted" : 3,
    "nUpserted" : 0,
    "nMatched" : 3,
    "nModified" : 3,
    "nRemoved" : 1,
    "upserted" : [ ]
})
7.1. Additional Resources
- MongoDB’s New Bulk API: http://blog.mongodb.org/post/84922794768/mongodbs-new-bulk-api
8. What’s next
This section concludes the MongoDB tutorial. Hopefully, you have found this NoSQL document database fitting your current or future application demands and this tutorial has helped you to make the right decisions.
