Docker and WildFly Part 1 – Deployment via Volumes and Docker and WildFly Part 2 – Deployment over Management API shows two approaches of how JBoss Tools can be configured to run any application on WildFly server running as a Docker container.
The blogs provide detailed setup and the underlying background. This Tech Tip will provide a quick summary of how to deploy a Java EE 7 application to WildFly and Docker from Eclipse.
Lets get started!
Configure Docker
- Configure Docker on your machine using Docker Machine.
- Find the IP address as:
docker-machine ip
and add an entry in
/etc/hostsas:192.168.99.101 dockerhost
Deployment to WildFly Container using Docker Volumes
- Create a folder that will be mounted as volume in the WildFly Docker container. In this case, the folder is
/Users/arungupta/tmp/deployments.WildFly Docker container can be started as:docker run -it -p 8080:8080 -v /Users/arungupta /tmp/deployments:/opt/jboss/wildfly/standalone/deployments/:rw jboss/wildfly
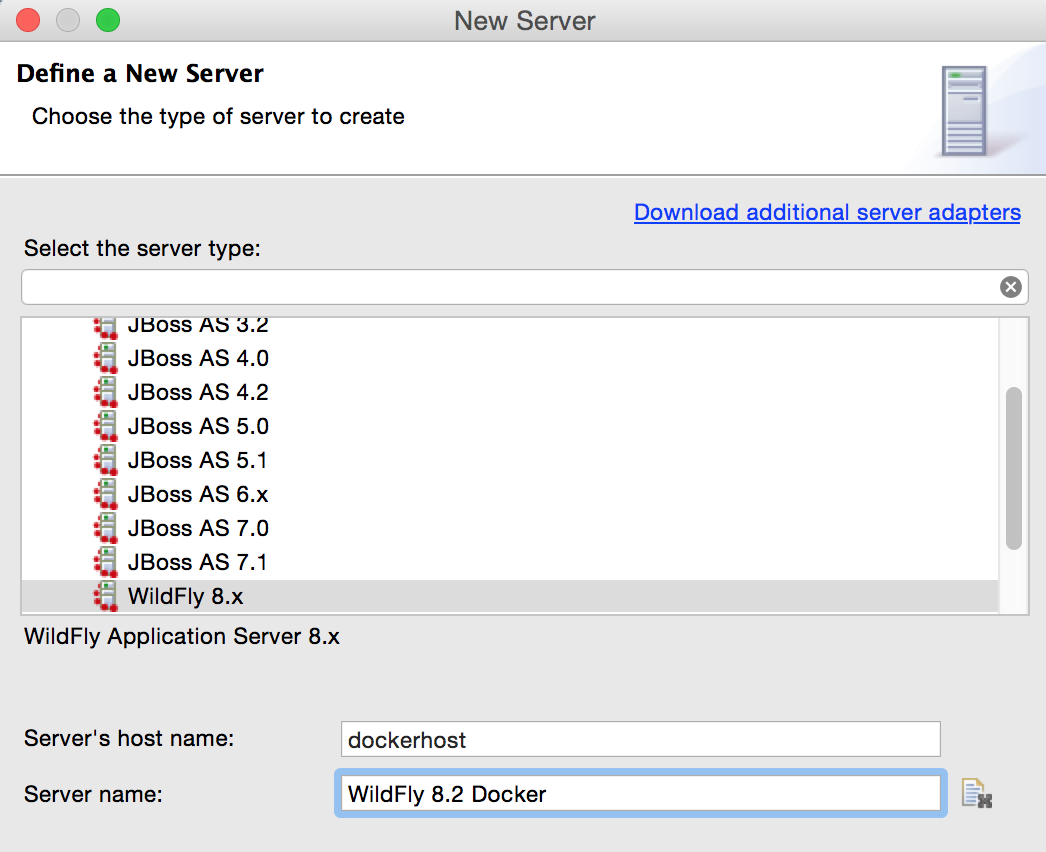
rwensures that the Docker container can write to it. - Create a new server adapter:

- Assign or create a WildFly 8.x runtime:
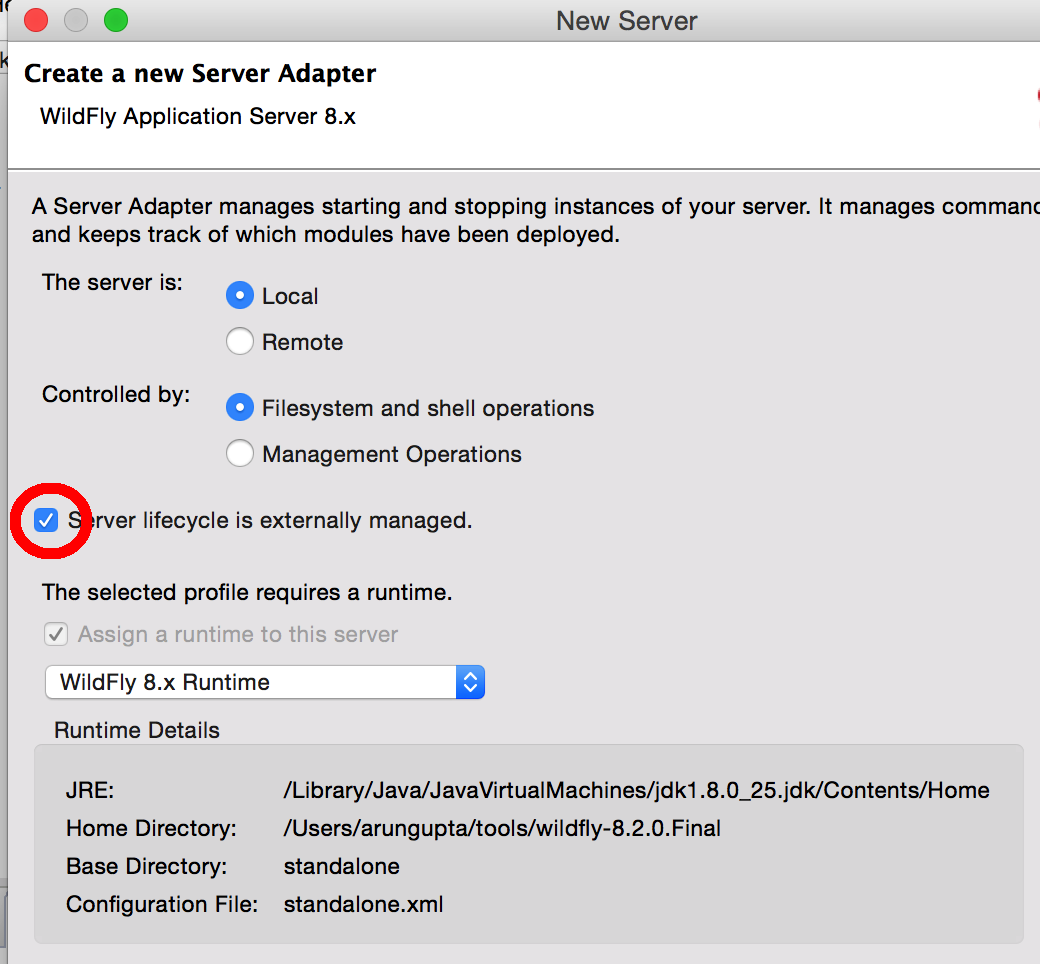
 Changed properties are highlighted.
 - Setup the server properties as:
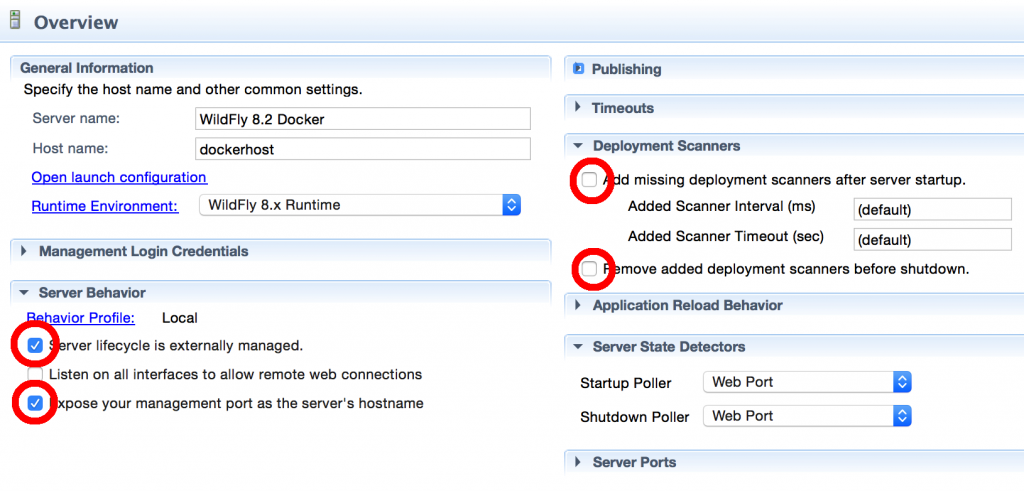
 Changed properties are highlighted. The two properties on the left are automatically propagated from the previous dialog. Additional two properties on the right side are required to disable to keep deployment scanners in sync with the server.
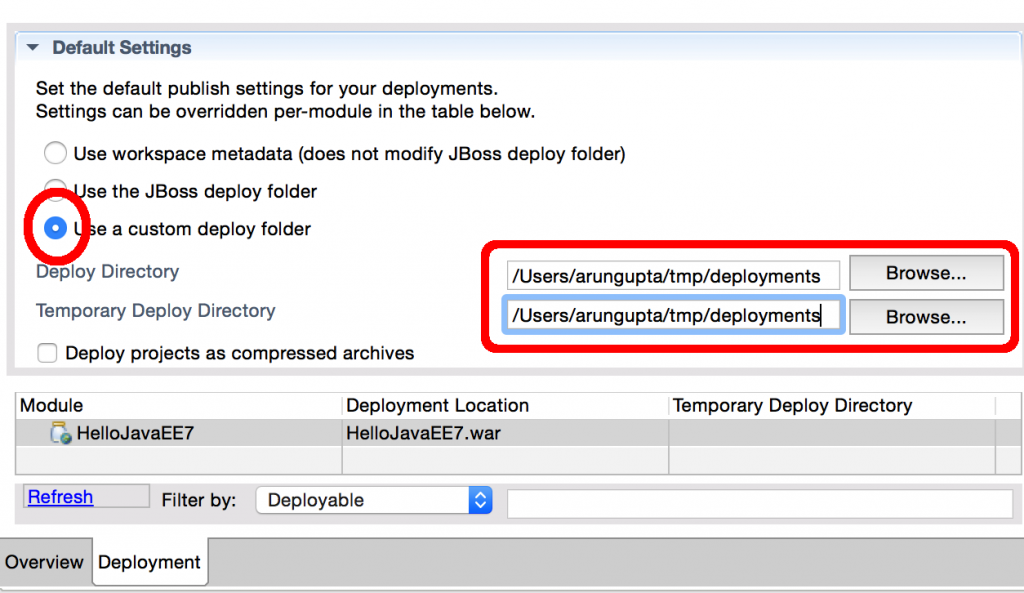
 - Specify a custom deployment folder on Deployment tab of Server Editor:

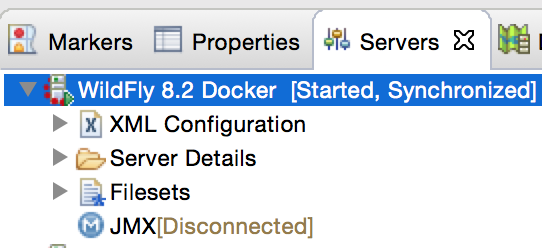
- Right-click on the newly created server adapter and click “Start”.

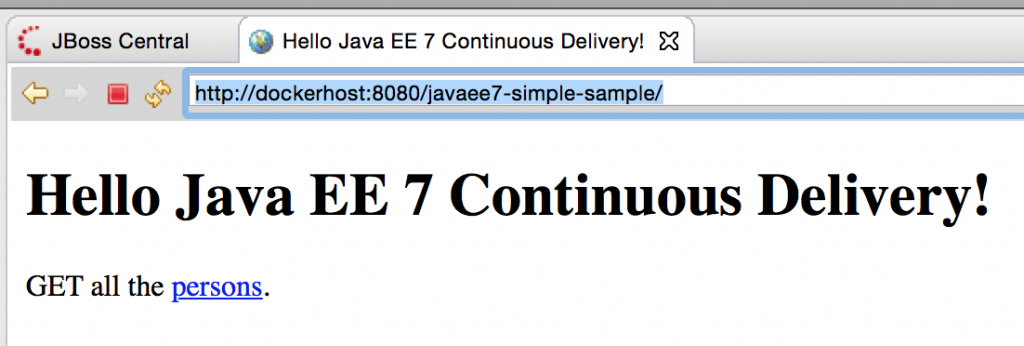
Status quickly changes to “Started, Synchronized” as shown. - Open up any Java EE 7 project (for example javaee7-simple-sample), right-click, Run on Server, and chose this server. The project runs and displays the page:

Deployment to WildFly Container using Management API
- Run WildFly management image as:
docker run -it -p 8080:8080 -p 9990:9990 arungupta/wildfly-management
This is only a convenience image to reduce the number of steps required to get started. Dockerfile for this image has more details, including admin credentials.
Volume mapping is not required in this case, instead additional management port is exposed.
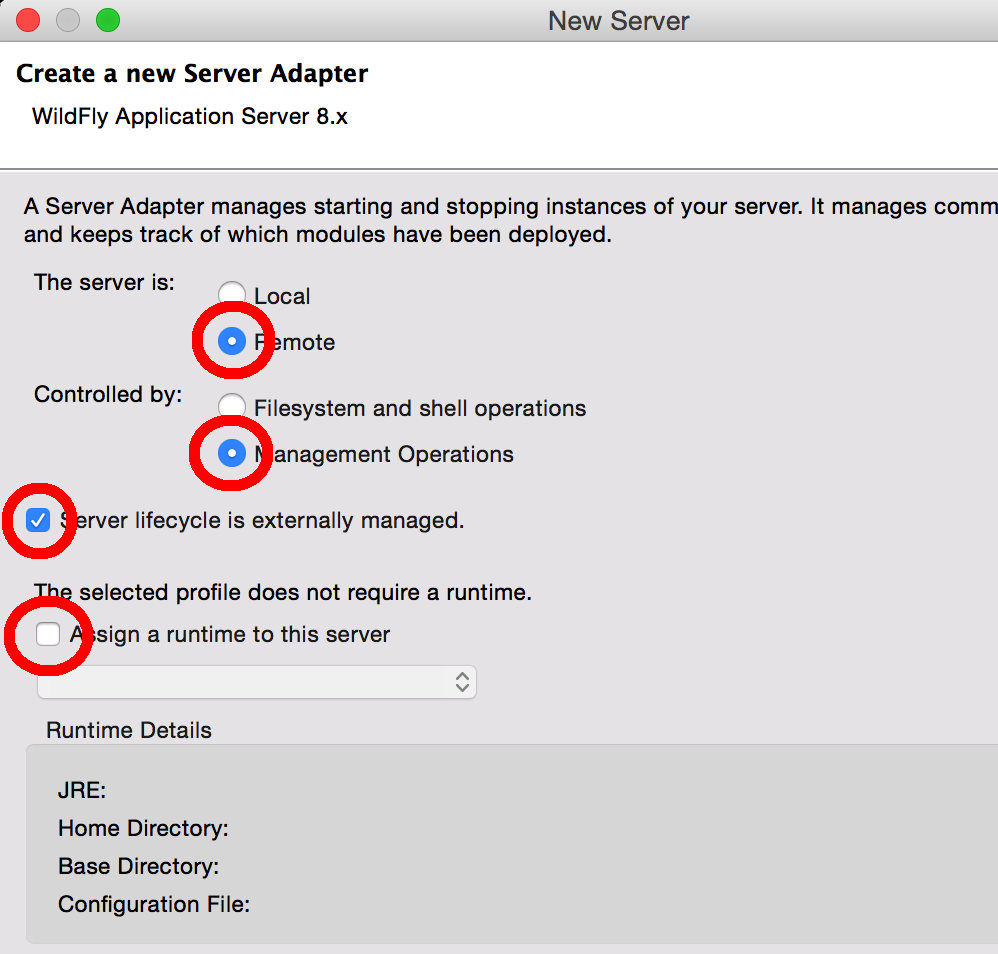
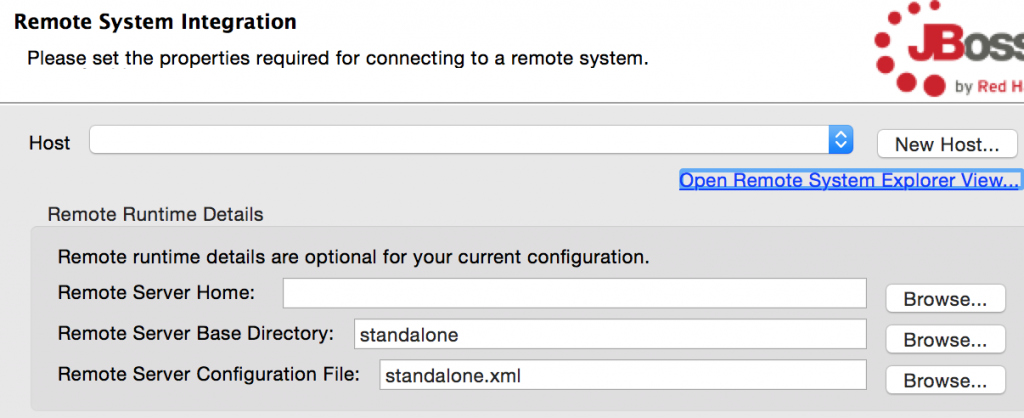
- Configure a remote server controlled by management operations:
 Changed properties are highlighted.
 - Take the defaults:

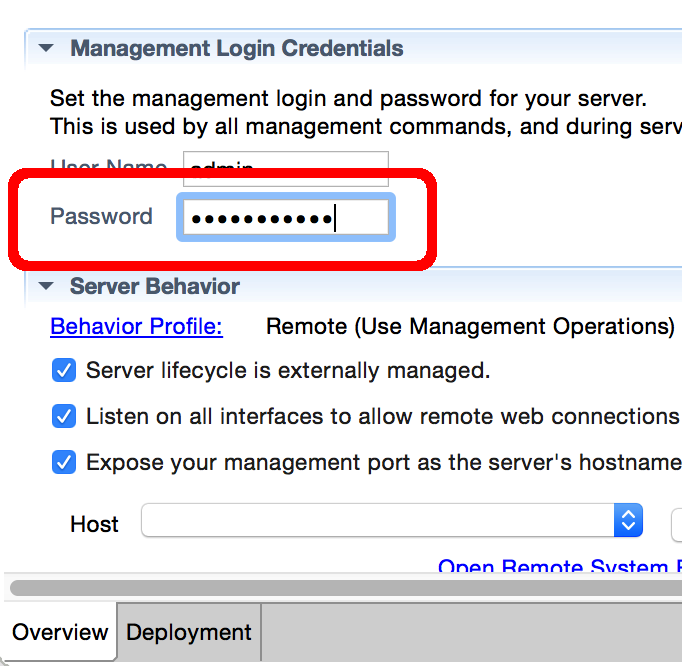
- Set up server properties by specifying the admin credentials (Admin#70365). Note, you need to delete the existing password and use this instead:

- Right-click on the newly created server adapter and click “Start”.Status quickly changes to “Started, Synchronized” as shown.
- Open up any Java EE 7 project (for example javaee7-simple-sample), right-click, Run on Server, and chose this server. The project runs and displays the page:
Enjoy!
This blog showed how how to deploy a Java EE 7 application to WildFly and Docker from Eclipse. Is there any other way that you deploy to WildFly Docker container from Eclipse?
| Reference: | Deploy to WildFly and Docker from Eclipse from our JCG partner Arun Gupta at the Miles to go 2.0 … blog. |
