Hello. In this tutorial, we will take a look at implementing the url shortener in the nodejs application with the help of mongodb. I will be using the mlab portal for creating and managing the mongodb.
1. Introduction
These days remembering the short urls is quote a trend as people do not like to remember the big long urls for navigating to their favorite site. The other benefit of url shortening is it helps to drive traffic back to your website.
1.1 Setting up Node.js
To set up Node.js on windows you will need to download the installer from this link. Click on the installer (also include the NPM package manager) for your platform and run the installer to start with the Node.js setup wizard. Follow the wizard steps and click on Finish when it is done. If everything goes well you can navigate to the command prompt to verify if the installation was successful as shown in Fig. 1.

2. Url shortener in nodejs
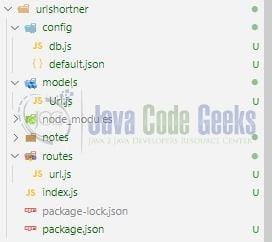
To set up the application, we will need to navigate to a path where our project will reside and I will be using Visual Studio Code as my preferred IDE. Let a take a quick peek at the project structure.
2.1 Setting up dependencies
Navigate to the project directory and run npm init -y to create a package.json file. This file holds the metadata relevant to the project and is used for managing the project dependencies, script, version, etc. Replace the generated file with the code given below –
package.json
{
  "name": "urlshortner",
  "version": "1.0.0",
  "description": "url shorten in nodejs application",
  "main": "index.js",
  "scripts": {
    "dev": "nodemon index.js",
    "start": "node index.js",
    "test": "echo \"Error: no test specified\" && exit 1"
  },
  "keywords": [
    "url shorten",
    "nodejs",
    "express",
    "nodemon",
    "url"
  ],
  "author": "geek",
  "license": "MIT",
  "dependencies": {
    "config": "^3.3.7",
    "express": "^4.18.0",
    "mongoose": "^6.3.1",
    "shortid": "^2.2.16",
    "valid-url": "^1.0.9"
  },
  "devDependencies": {
    "nodemon": "^2.0.15"
  }
}
Once the file is replaced trigger the below npm command in the terminal window to download the different packages required for this tutorial.
Downloading dependencies
npm install
2.2 Setting up the config json
Create a json file inside the config folder responsible to hold the configuration-related details for the application. You are free to change the values as per your requirement. Make note that the port number should be in sync with the one specified in the base url.
config/default.json
{
  "mongodbUrl": "MONGODB_ENDPOINT",
  "port": 3005,
  "baseUrl": "http://localhost:3005"
}
2.3 Setting up the db config
Create a js file inside the config folder responsible to make a connection with the mongodb with the help of the mongoose npm package. If the connection with the mongodb could not be established the application will crash and exit with a status code of -1.
config/db.js
const mongoose = require("mongoose");
const config = require("config");

const db = config.get("mongodbUrl");

const connectDb = async () => {
  try {
    await mongoose.connect(db, {
      useNewUrlParser: true
    });

    console.log("Mongodb connected...");
  } catch (err) {
    console.error("Cannot cannot be mongodb. Existing application startup.");
    console.error(err.message);
    process.exit(-1);
  }
};

module.exports = connectDb;
2.4 Create a model
Create a js file inside the models folder responsible to make the schema in the mongodb once the db connection is established.
models/Url.js
const mongoose = require("mongoose");

const urlSchema = new mongoose.Schema({
  urlCode: String,
  longUrl: String,
  shortUrl: String,
  date: { type: String, default: Date.now }
});

module.exports = mongoose.model("Url", urlSchema);
2.5 Creating the routes
Create a js file inside the routes folder responsible to handle the application endpoints. The file consists of three endpoints i.e.
/health: Returns the application health/shorten: Responsible to generate the short url for the long url coming in the request body and persist it in the mongodb. The endpoint also performs some basic sanity/:code: Responsible to validate the short url coming in the request and redirecting the user to the long url if found
routes/url.js
const express = require("express");
const validUrl = require("valid-url");
const shortId = require("shortid");
const config = require("config");
const Url = require("../models/Url");

const router = express.Router();

// @route   GET /health
// @desc    Get application health
router.get("/health", (req, res) => {
  return res.status(200).json({ message: "Application is healthy" });
});

// @route   POST /shorten
// @desc    Create short URL
router.post("/shorten", async (req, res) => {
  const { longUrl } = req.body;
  const baseUrl = config.get("baseUrl");

  // check base url
  if (!validUrl.isUri(baseUrl)) {
    return res.status(400).json({ message: "Invalid base url" });
  }

  // check long url
  if (validUrl.isUri(longUrl)) {
    try {
      let url = await Url.findOne({ longUrl });
      if (url) {
        console.log("Already exists...");
        return res.status(201).json({ data: url });
      } else {
        // create url code
        let urlCode = shortId.generate();
        let shortUrl = baseUrl + "/" + urlCode;

        url = new Url({
          longUrl,
          shortUrl,
          urlCode,
          date: new Date()
        });

        console.log("Saving new record...");
        await url.save();
        return res.status(201).json({ data: url });
      }
    } catch (error) {
      console.error(error);
      return res.status(500).json({ message: "Some error has occurred" });
    }
  } else {
    return res.status(400).json({ message: "Invalid long url" });
  }
});

// @route     GET /:code
// @desc      Redirect to long/original URL
router.get("/:code", async (req, res) => {
  try {
    const url = await Url.findOne({ urlCode: req.params.code });

    if (url) {
      console.log("Long url found for short url. Redirecting...");
      return res.redirect(url.longUrl);
    } else {
      return res.status(404).json({ message: "No url found" });
    }
  } catch (error) {
    console.error(error);
    return res.status(500).json({ message: "Some error has occurred" });
  }
});

module.exports = router;
2.6 Setting up the implementation
Create a file in the root directory responsible to handle the application startup, connecting to mongodb, and maintaining routes. This file acts as an entry point and will be started on port number – 3005.
index.js
const express = require("express");
const connectDb = require("./config/db");
const config = require("config");

const app = express();

// connect to database
connectDb();

app.use(express.json({ extended: false }));

// define routes
app.use("/", require("./routes/url"));

// driver code
const port = config.get("port");
app.listen(port, () => {
  console.log(`Service endpoint http://localhost:${port}`);
});
3. Run the Application
To run the application navigate to the project directory and enter the following command as shown below in the terminal.
Run command
$ npm run dev
If everything goes well the application will be started successfully at the service endpoint – http://localhost:3005
4. Demo
Open the postman or any tool of your choice and hit the /shorten endpoint with a request body as shown below.
Request
(http post) - http://localhost:3005/shorten

request body -
{
    "longUrl": "ANY_LONG_ENDPOINT"
}
If everything goes well the corresponding short url will be generated and persisted in the mongodb. The api will also return a response as shown below.
Api response
{
    "urlCode": "Nd7drt9Ru",
    "longUrl": "ANY_LONG_ENDPOINT",
    "shortUrl": "http://localhost:3005/Nd7drt9Ru",
    "date": "Wed Apr 27 2022 13:58:46 GMT+0530 (India Standard Time)",
    "_id": "6268febef324c7ae588e1497",
    "__v": 0
}
You can then copy the shortUrl and hit in the browser and the application will redirect you to the original long url. That is all for this tutorial and I hope the article served you with whatever you were looking for. Happy Learning and do not forget to share!
5. Summary
In this tutorial, we saw the implementation of url shorten with the help of nodejs and persisting the result in the mongodb. You can download the source code from the Downloads section.
6. Download the Project
This was a tutorial to implement url shortening in the nodejs.
You can download the full source code of this example here: Url shortener in nodejs
