With Java 18 came the introduction of the convenient Simple Web Server (JEP 408), a valuable tool for testing, prototyping, and educational contexts. Let’s explore how to utilize this feature, examine its capabilities, and understand its ideal use cases. Note that the server supports HTTP/1.1, HTTP HEAD, and GET verbs.
1. Why the Java’s Simple Web Server?
Before Java 18, setting up a web server, even a basic one, required external dependencies. Java’s Simple Web Server provides a solution that’s lightweight, portable, and immediately accessible within the standard Java Development Kit (JDK). The Simple Web Server is derived from the web server implementation within the com.sun.net.httpserver package, and offers a minimalist approach to serving a singular directory hierarchy via HTTP.
1.1 Key Features
- Serves Static Files: The server’s primary role is to deliver static files, such as HTML, CSS, JavaScript, and images, from a specified directory.
- Command-Line Simplicity: Starting the server is as easy as executing a single command.
- Programmatic Control: A robust API allows for customized configuration.
2. Directory Organization and Structure
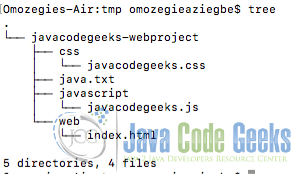
The Simple Web Server serves content from the directory specified when starting the server (or the current directory by default). In this article, we will be working with a directory called javacodegeeks-webproject in a /tmp folder as shown in the screenshot below. This directory has the following structure and content.
3. Starting the Server from the command line
First, Verify Java 18, and ensure you have Java 18 or later by running java -version in your terminal.
3.1 Start the Server
From within your project directory, start the server by running the following command from a terminal:
jwebserver
The above command starts the server and by default binds it to the loopback address (127.0.0.1) and port 8000 and serves the current working directory.
The output is:
Binding to loopback by default. For all interfaces use "-b 0.0.0.0" or "-b ::".
Serving /Users/omozegieaziegbe/tmp/javacodegeeks-webproject and subdirectories on 127.0.0.1 port 8000
URL http://127.0.0.1:8000/
3.2. Changing the port
We can change the default configuration of the server. The server by default is set to run on port 8000. To specify a different port, use the -p or --port option. For example, here is how to run the simple web server on port 8080:
jwebserver -p 8080
Output is:
Binding to loopback by default. For all interfaces use "-b 0.0.0.0" or "-b ::".
Serving /Users/omozegieaziegbe/tmp/javacodegeeks-webproject and subdirectories on 127.0.0.1 port 8080
URL http://127.0.0.1:8080/
3.3 Changing the Address
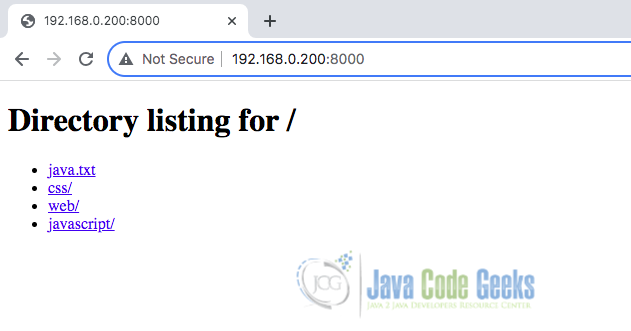
We can also change the simple web server to bind to all interfaces by passing -b option with 0.0.0.0. This will allow the server to listen on all available interfaces as shown below:
jwebserver -b 0.0.0.0
Output of running the above command is:
Serving /Users/omozegieaziegbe/tmp/javacodegeeks-webproject and subdirectories on 0.0.0.0 (all interfaces) port 8000
URL http://192.168.0.200:8000/
The most common basic usage options:
jwebserver [-b bind address] [-p port] [-d directory]
-b addr: Specifies the address to bind to. Default:127.0.0.1or::1(loopback). For all interfaces use-b 0.0.0.0or-b ::.-d dir: Specifies the directory to serve. Default is current directory.-p port: Specifies the port to listen on. Default is 8000.-versionor--version: Prints the version information and exits.
To stop the server, press Ctrl + C.
4. Access the Web Server and Resource Content
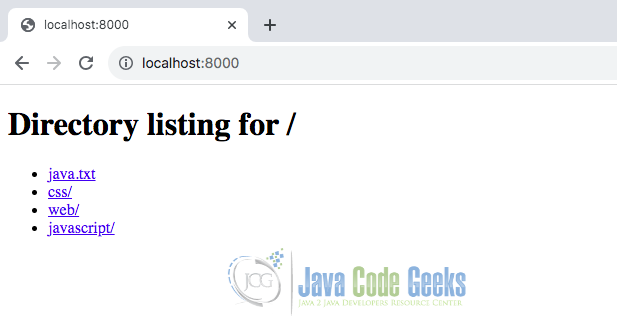
Once the server is running, we can access our web content using a web browser. To access the served content, simply navigate to http://127.0.0.1:8000 or http://localhost:8000 (or the port indicated in the command-line output) in your browser. This displays the current directory’s contents as shown below:
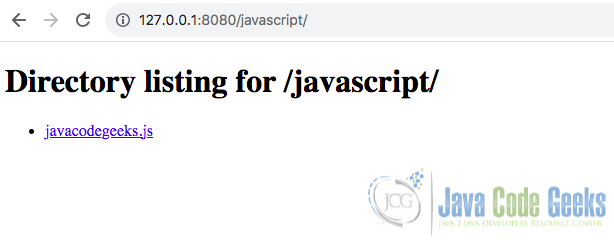
Files and directories are accessible via the browser through direct clicks. For instance, selecting a folder navigates into it, revealing its contents. Clicking on the javascript folder directs to http://localhost:8000/javascript, displaying its content. Also, selecting java.txt leads to http://localhost:8000/java.txt displaying its contents:
5. Logging and Monitoring
Understanding server activity is crucial for troubleshooting and monitoring purposes. The Simple Web Server provides basic logging capabilities.
5.1 Default Logging
Whenever we access some resource or path on the server, it logs the request with some information on the console. By default, the server logs basic information to the console, including:
- Start-up messages
- Incoming requests (method, path, HTTP version)
- Response status codes
127.0.0.1 - - [04/Mar/2024:18:05:01 +0100] "GET / HTTP/1.1" 200 -
127.0.0.1 - - [04/Mar/2024:18:05:03 +0100] "GET /favicon.ico HTTP/1.1" 404 -
127.0.0.1 - - [04/Mar/2024:18:05:05 +0100] "GET /javascript/ HTTP/1.1" 200 -
127.0.0.1 - - [04/Mar/2024:18:05:37 +0100] "GET /java.txt HTTP/1.1" 200 -
5.2 Configuring Logging
We can control the logging level using the -o option when starting the server from the command line:
-o none: Disables logging (not recommended)-o info: Default level (basic information)-o verbose: Provides additional details, including request and response headers, and absolute paths
jwebserver -o verbose
6. Programmatic Usage: API in Action
While the Simple Web Server excels at serving static files from the local filesystem, Google Java offers a powerful tool for creating in-memory file systems: Jimfs (Java in-memory file system). This combination allows us to build and serve content entirely within memory, making it ideal for testing, prototyping, and lightweight embedded systems. Visit the following link for more information and examples on Working with the Simple Web Server.
6.1 Leveraging Jimfs with the Simple Web Server API
6.1.1 Project SetUp
Create a new project directory and initialize a new Maven project using your preferred method (e.g., mvn archetype:generate). Next, add Google Jimfs dependencies to the Java Maven project pom.xml as shown below:
    <dependencies>
        <dependency>
            <groupId>com.google.jimfs</groupId>
            <artifactId>jimfs</artifactId>
            <version>1.3.0</version>
        </dependency>
    </dependencies>
6.1.2 Java Code
import com.google.common.jimfs.Configuration;
import com.google.common.jimfs.Jimfs;
import com.sun.net.httpserver.SimpleFileServer;
import com.sun.net.httpserver.SimpleFileServer.OutputLevel;
import java.io.IOException;
import java.net.InetAddress;
import java.net.InetSocketAddress;
import java.nio.file.FileSystem;
import java.nio.file.Files;
import java.nio.file.Path;
/**
*
* @author omozegieaziegbe
*/
public class SimpleWebServerApi {
private static final InetSocketAddress LOOPBACK_ADDR =
new InetSocketAddress(InetAddress.getLoopbackAddress(), 8000);
// Creates an in-memory directory hierarchy and starts a Simple Web Server to serve it.
public static void main( String[] args ) throws Exception {
Path root = createDirectoryHierarchy();
var server = SimpleFileServer.createFileServer(LOOPBACK_ADDR, root, OutputLevel.VERBOSE);
server.start();
}
private static Path createDirectoryHierarchy() throws IOException {
FileSystem fs = Jimfs.newFileSystem(Configuration.unix());
Path root = fs.getPath("/");
// Populate the in-memory file system with files and directories
// Create directory hierarchy:
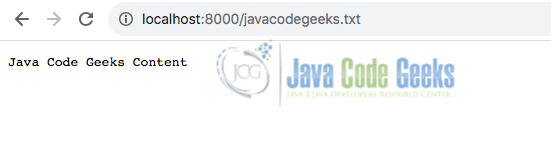
Files.write(root.resolve("javacodegeeks.txt"), "Java Code Geeks Content".getBytes());
Files.createDirectories(root.resolve("tmp"));
Files.createDirectory(root.resolve("tmp/googleguava"));
return root;
}
}
To try this out, we can execute the server using:
mvn clean install exec:java -Dexec.mainClass="com.jcg.simplewebserverapi.SimpleWebServerApi"
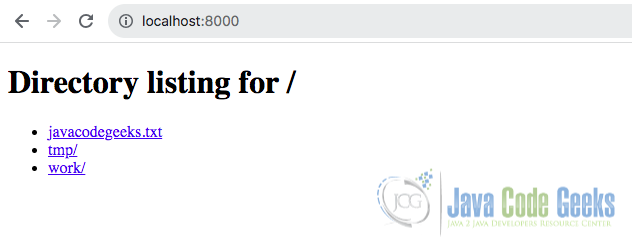
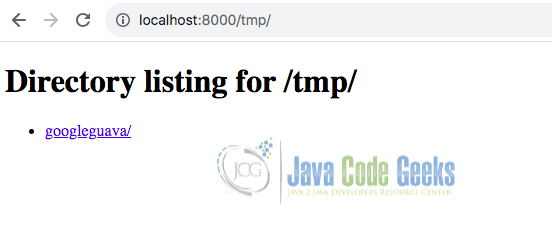
Now, when we navigate to localhost:8000/ in our browser to inspect the file listings, we will encounter the newly added javacodegeeks.txt and /tmp folder. We can click on them to view their contents, as illustrated in the screenshot below.
7. Important Notes
- The Simple Web Server is not intended for production environments; it lacks security, performance, and scalability features.
- It focuses solely on static files; dynamic content generation requires other frameworks.
8. Conclusion
In conclusion, the Java 18 Simple Web Server, despite its limitations, offers a valuable and accessible tool for specific situations. By understanding its core functionalities and venturing into some advanced options, you can leverage it effectively for your needs.
