Jakarta Faces, formerly known as JavaServer Faces (JSF), is a powerful framework for building user interfaces for Java web applications. It simplifies the development process by providing a component-based model for building UIs, along with a set of standard components and lifecycle management. If you are new to Jakarta Faces and want to explore its capabilities, this guide will help you get started.
1. Understanding Jakarta Faces
Jakarta Faces is a framework that simplifies the creation of user interfaces for Java web applications. It follows the MVC (Model-View-Controller) architecture, where views represent the UI components, and the application logic resides in the controller and model layers.
A Jakarta Faces application typically consists of the following components:
- UI Components: These are the visual elements used to create the user interface of the application, such as buttons, input fields, tables, and dropdown menus.
- Managed Beans: These are Java classes that manage the application’s business logic and interact with the UI components. Managed beans are responsible for handling user input, processing data, and controlling navigation within the application.
- Navigation Rules: These define how users navigate between different views or pages within the application.
- Facelets Templates: Facelets is a templating language used in Jakarta Faces to define the layout and structure of web pages. Facelet templates provide a reusable way to define the structure of multiple pages within the application.
- Configuration Files (Optional): Jakarta Faces applications may include configuration files such as
faces-config.xmlwhich contain metadata about the application’s managed beans, navigation rules, and resource mappings. - Validators and Converters: Jakarta Faces provides built-in validators and converters to validate user input and convert data between different formats.
- Application Deployment Descriptor (Optional): This is a configuration file (
web.xml) that specifies deployment settings and servlet mappings for the Jakarta Faces application. It defines how the application should be deployed and accessed within an application server environment.
1.1 Setting Up Jakarta Faces
We need to set up our development environment. Make sure you have the following installed:
- Java Development Kit (JDK) 8+.
- An IDE (Integrated Development Environment) such as IntelliJ IDEA, Eclipse, or NetBeans.
- Jakarta Faces libraries or
jakarta.jakartaee-web-apimaven dependency.
1.2 Getting Started
- Access Eclipse Starter For Jakarta EE: Start by visiting start.jakarta.ee in your web browser. You will be greeted by a simple and intuitive user interface.
- Customize Your Project: On the homepage, you will find various options to customize your project. You can specify the Jakarta EE version, Jakarta EE profile, Java SE version and runtimes (GlassFish, WildFly, Payara, TomEE, OpenLiberty).
- Generate Your Project: Once you have configured your project, hit the “Generate” button. This will create a downloadable ZIP file containing your project structure.
- Set Up Your Project: Extract the downloaded ZIP file to your desired location on your local machine. You will find a Maven project with some dependencies depending on your choice during customization.
- Import into Your IDE: Open your preferred Integrated Development Environment (IDE) such as IntelliJ IDEA, Eclipse, or Netbeans and import the project.
- Start Coding: With the project imported into the IDE, you are set to start coding! You will find a basic project structure with the dependencies you selected, allowing you to focus on implementing your application logic without worrying about boilerplate setup.

The project’s pom.xml file should look like this:
<?xml version="1.0" encoding="UTF-8"?>
<project xmlns="http://maven.apache.org/POM/4.0.0" xmlns:xsi="http://www.w3.org/2001/XMLSchema-instance" xsi:schemaLocation="http://maven.apache.org/POM/4.0.0 http://maven.apache.org/xsd/maven-4.0.0.xsd">
	<modelVersion>4.0.0</modelVersion>

	<groupId>org.eclipse</groupId>
	<artifactId>my-faces-app</artifactId>
	<version>0.1-SNAPSHOT</version>
	<packaging>war</packaging>

	<name>my-faces-app</name>
	<description>
		This is a very simple Jakarta EE application generated by the official Eclipse Starter.
	</description>

	<properties>
		<project.build.sourceEncoding>UTF-8</project.build.sourceEncoding>
		<project.report.sourceEncoding>UTF-8</project.report.sourceEncoding>
		<maven.compiler.release>11</maven.compiler.release>
		<jakartaee-api.version>10.0.0</jakartaee-api.version>
		<compiler-plugin.version>3.11.0</compiler-plugin.version>
		<war-plugin.version>3.4.0</war-plugin.version>
		<cargo.version>1.10.11</cargo.version>
	</properties>

	<dependencies>
		<dependency>
			<groupId>jakarta.platform</groupId>
			<artifactId>jakarta.jakartaee-web-api</artifactId>
			<version>${jakartaee-api.version}</version>
			<scope>provided</scope>
		</dependency>
	</dependencies>

	<build>
		<finalName>my-faces-app</finalName>
		<plugins>
			<plugin>
				<groupId>org.apache.maven.plugins</groupId>
				<artifactId>maven-compiler-plugin</artifactId>
				<version>${compiler-plugin.version}</version>
			</plugin>
			<plugin>
				<artifactId>maven-war-plugin</artifactId>
				<version>${war-plugin.version}</version>
				<configuration>
					<failOnMissingWebXml>false</failOnMissingWebXml>
				</configuration>
			</plugin>

			<!-- Execute 'mvn clean package cargo:run' to run the application. -->
			<plugin>
				<groupId>org.codehaus.cargo</groupId>
				<artifactId>cargo-maven3-plugin</artifactId>
				<version>${cargo.version}</version>
				<configuration>
					<container>
						<containerId>glassfish7x</containerId>
						<zipUrlInstaller>
							<url>https://repo.maven.apache.org/maven2/org/glassfish/main/distributions/web/7.0.12/web-7.0.12.zip</url>
                                                </zipUrlInstaller>
					</container>
				</configuration>
			</plugin>
		</plugins>
	</build>
</project>
1.3 Enable/Activate Faces
The Faces Servlet acts as the entry point for processing JSF requests. Create a Java Class and add the following code. Having the @FacesConfig annotation on a class utilized within an application ensures the activation of Jakarta Faces and its CDI-specific functionalities.
import jakarta.enterprise.context.ApplicationScoped;
import jakarta.faces.annotation.FacesConfig;

@FacesConfig()
@ApplicationScoped
public class FacesActivator {

}
1.4 Using web.xml
We can also rely on the web.xml descriptor for configuration. Locate the <servlet> element within web.xml and add the following:
    <servlet>
        <servlet-name>Faces Servlet</servlet-name>
        <servlet-class>jakarta.faces.webapp.FacesServlet</servlet-class>
        <load-on-startup>1</load-on-startup>
    </servlet>
<servlet-name> defines a name for the servlet. <servlet-class> specifies the FacesServlet class that handles JSF requests. <load-on-startup>1</load-on-startup> ensures the servlet loads during application startup.
1.4 Servlet Mapping
Jakarta Faces uses the Faces Servlet to handle specific URL patterns. Add a <servlet-mapping> element after the <servlet> definition like this:
<servlet-mapping>
    <servlet-name>Faces Servlet</servlet-name>
    <url-pattern>*.xhtml</url-pattern>
</servlet-mapping>
This configuration instructs the servlet to handle requests ending with .xhtml extension, commonly used for JSF views. We can adjust the pattern based on our view naming convention.
1.5 Extensionless Mapping
JSF 4.0 introduces extensionless mapping, allowing us to access views without the .xhtml extension. To enable this, add the following context parameter to the web.xml file:
<context-param>
    <param-name>jakarta.faces.AUTOMATIC_EXTENSIONLESS_MAPPING</param-name>
    <param-value>true</param-value>
</context-param>
1.6 Add beans.xml File
Create a beans.xml file and place the file within the src/main/webapp/WEB-INF directory.
<?xml version="1.0" encoding="UTF-8"?>
<beans xmlns="https://jakarta.ee/xml/ns/jakartaee"
       xmlns:xsi="http://www.w3.org/2001/XMLSchema-instance"
       xsi:schemaLocation="https://jakarta.ee/xml/ns/jakartaee https://jakarta.ee/xml/ns/jakartaee/beans_4_0.xsd"
       bean-discovery-mode="annotated"
       version="4.0">
</beans>
1.7 Add PrimeFaces
PrimeFaces is a popular open-source UI component library for JavaServer Faces (JSF) applications, providing a rich set of components for building modern web applications. Integrating PrimeFaces into the project is a straightforward process, and with the ability to apply themes, we can enhance the visual appeal of our web application effortlessly.
1.7.1 Adding PrimeFaces Dependencies
To add PrimeFaces dependencies to the pom.xml file, open the pom.xml file located at the root of the project directory and add the following dependencies:
        <dependency>
            <groupId>org.primefaces</groupId>
            <artifactId>primefaces</artifactId>
            <version>10.0.0</version>
        </dependency>
1.7.2 Apply PrimeFaces Themes
PrimeFaces provides a variety of built-in themes that we can apply to our web application to customize its appearance. To apply a theme, we need to configure the web.xml file of the project.
Open the web.xml file located in the src/main/webapp/WEB-INF directory and add the following context parameter:
    <context-param>
        <param-name>primefaces.THEME</param-name>
        <param-value>saga</param-value>
    </context-param>
2. Facelets in Jakarta Faces
Facelets is a powerful templating language used in Jakarta Faces for defining the structure and layout of web pages. It allows developers to create reusable templates and compose dynamic web pages by including components and expressions.
Facelets templates typically have a .xhtml extension and consist of XHTML markup combined with Jakarta Faces component tags and expressions. These templates can include static content as well as dynamic content generated by Jakarta Faces components and managed beans.
2.1 Standard Tag Libraries Supported by Facelets
The table below shows the standard libraries supported by Facelets in Faces 4.0
| Prefix | URN | Examples |
|---|---|---|
xmlns:h | jakarta.faces.html | h:head, h:inputText |
xmlns:f | jakarta.faces.core | f:facet, f:actionListener |
xmlns:faces | jakarta.faces | faces:id, faces:value |
xmlns:fn | jakarta.tags.function | fn:toLowerCase, fn:contains |
xmlns:ui | jakarta.faces.facelets | ui:component, ui:include |
xmlns:c | jakarta.tags.core | c:forEach, c:if |
xmlns:pt | jakarta.faces.passthrough | pt:type, pt:placeholder |
xmlns:cc | jakarta.faces.composite |
2.2 Create View (Jakarta Faces Page)
Now, let’s create a simple Faces page to test our setup. Create a new XHTML file named index.xhtml in the src/main/webapp directory with the following content:
<!DOCTYPE html>
<html lang="en"
      xmlns="http://www.w3.org/1999/xhtml"
      xmlns:f="jakarta.faces.core"
      xmlns:jsf="jakarta.faces"
      xmlns:h="jakarta.faces.html">

    <f:view>
        <h:head>
            <title>Facelets Example</title>
        </h:head>
        <h:body>
            <h1>Welcome to Jakarta Faces!</h1>
            <h:form>
                <h:inputText value="#{userBean.username}" />
                <h:commandButton value="Submit" action="#{userBean.submit}" />
            </h:form>
            <h:outputText value="Welcome, #{userBean.username}" rendered="#{userBean.submitted}" />
        </h:body>
    </f:view>
</html>
In this example:
- We define a simple XHTML document structure.
- We include Jakarta Faces component tags (e.g.,
<h:form>,<h:inputText>,<h:commandButton>) to create form elements. - We use EL (Expression Language) expressions (e.g.,
#{userBean.username},#{userBean.submit},#{userBean.submitted}) to bind components to managed bean properties and methods. - The
userBeanis a CDI bean responsible for handling user input and processing form submissions.
2.3 Create Backing Bean
Below is an example of a backing bean (CDI bean) in Jakarta Faces, which corresponds to the Facelets example provided above:
import jakarta.enterprise.context.RequestScoped;
import jakarta.inject.Named;

@Named
@RequestScoped
public class UserBean {

    private String username;
    private boolean submitted;

    public String getUsername() {
        return username;
    }

    public void setUsername(String username) {
        this.username = username;
    }

    public boolean isSubmitted() {
        return submitted;
    }

    public void setSubmitted(boolean submitted) {
        this.submitted = submitted;
    }

    public String submit() {
        // Process user input or perform any necessary actions
        submitted = true;
        return null; // Navigate to the same page (refresh)
    }
}
In this backing bean:
@Namedannotation marks this class as a CDI bean that will be managed by the Jakarta Faces framework.@RequestScopedannotation specifies that a new instance of the managed bean will be created for each HTTP request made by the client to the server.- The
usernameproperty represents the value entered by the user in the input field. - The
submittedproperty indicates whether the form has been submitted. - The
submit()method is invoked when the form is submitted. It updates thesubmittedflag and can perform any necessary actions, such as processing user input or navigating to another page.
3. Start and Run the Application
Starting the application is straightforward.
- Navigate to Project Directory: Open your terminal or command prompt and navigate to the root directory of your project.
- Run Maven Command: Use the following Maven command to start GlassFish (chosen runtime for this article) and run the application:
./mvnw clean package cargo:run
This command will compile your project, package it into a WAR file, and deploy it to the GlassFish server.
[INFO] --- cargo:1.10.11:run (default-cli) @ my-faces-app ---
[INFO] Resolved container artifact org.codehaus.cargo:cargo-core-container-glassfish:jar:1.10.11 for container glassfish7x
[INFO] Parsed GlassFish version = [7.0.12]
[INFO] GlassFish 7.0.12 starting...
[INFO] Waiting for cargo-domain to start .........................
[INFO] Waiting finished after 24,673 ms.
[INFO] Successfully started the domain : cargo-domain
[INFO] domain  Location: /Users/omozegieaziegbe/Downloads/jakartaee-hello-world/target/cargo/configurations/glassfish7x/cargo-domain
[INFO] Log File: /Users/omozegieaziegbe/Downloads/jakartaee-hello-world/target/cargo/configurations/glassfish7x/cargo-domain/logs/server.log
[INFO] Admin Port: 4,848
[INFO] Command start-domain executed successfully.
[INFO] GlassFish 7.0.12 started on port [8080]
[INFO] Press Ctrl-C to stop the container...
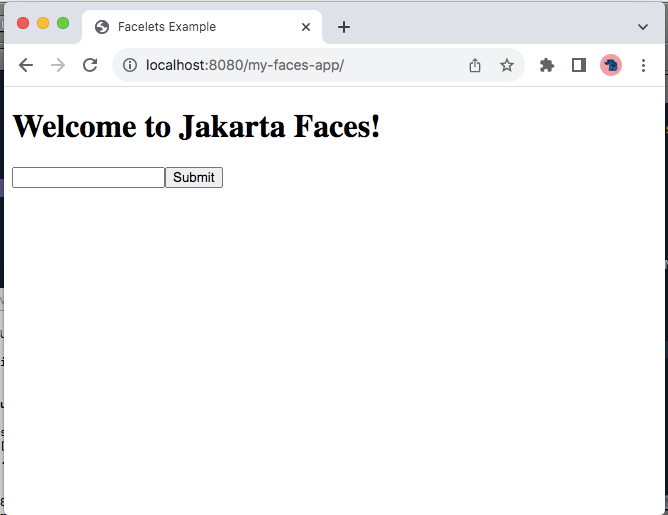
Once the server is up and running, open your web browser and navigate to http://localhost:8080/my-faces-app/ to see the Faces application in action.
4. Conclusion
In conclusion, Jakarta Faces offers a robust framework for building dynamic and interactive web applications with Java. By leveraging components, navigation rules, and managed beans, developers can create rich user interfaces while abstracting away much of the complexity involved in web development.
