“I love writing authentication and authorization code.” ~ No Java Developer Ever. Tired of building the same login screens over and over? Try the Okta API for hosted authentication, authorization, and multi-factor auth.
Building a microservices architecture is possible with minimal code if you use Spring Boot, Spring Cloud, and Spring Cloud Config. Package everything up in Docker containers and you can run everything using Docker Compose. If you’re communicating between services, you can ensure your services are somewhat secure by not exposing their ports in your docker-compose.yml file.
But what happens if someone accidentally exposes the ports of your microservice apps? Will they still be secure or can anyone access their data?
In this post, I’ll show you how to use HTTPS and OAuth 2.0 to secure service-to-service communication.
Develop a Microservices Stack with Spring Boot, Spring Cloud, and Spring Cloud Config
I’m going to shortcut the process of building a full microservices stack with Spring Boot, Spring Cloud, and Spring Cloud Config. My buddy, Raphael, wrote a post on how to build Spring microservices and Dockerize them for production. You can use his example app as a starting point. Clone the okta-spring-microservices-docker-example project:
git clone https://github.com/oktadeveloper/okta-spring-microservices-docker-example.git spring-microservices-security
cd spring-microservices-security
This project requires two OpenID Connect apps on Okta, one for development and one for production. You’ll need to create each app on Okta if you didn’t run through the aforementioned tutorial.
Create OpenID Connect Apps on Okta
You can register for a free developer account that will allow you to have up to 1000 monthly active users for $0. That should be plenty for this example.
Why Okta? Because authentication is no fun to write. Okta has Authentication and User Management APIs that allow you to develop your apps faster. Our API and SDKs make it easy for you to authenticate, manage, and secure your users in minutes.
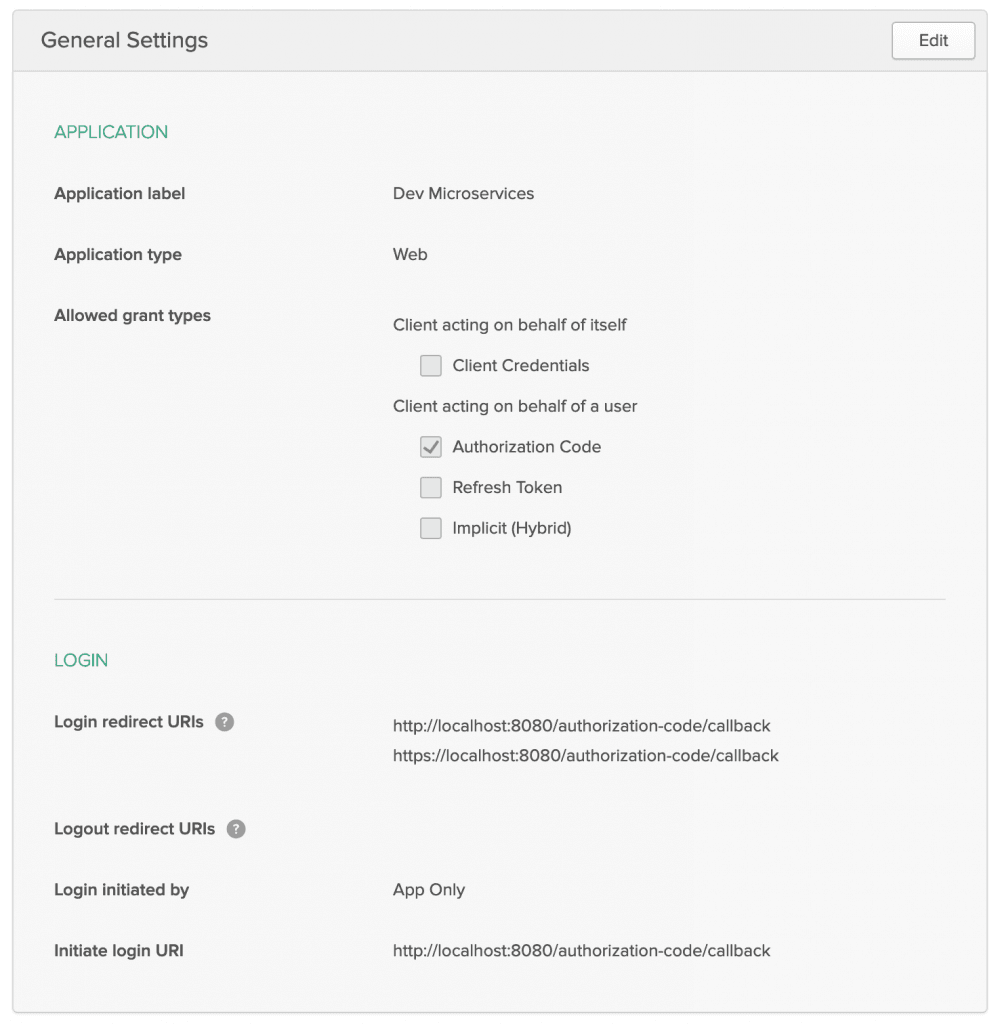
After creating your account, create a new Web Application in Okta’s dashboard (Applications > Add Application). Give the app a name you’ll remember, duplicate the existing Login redirect URI and make it use HTTPS. Click Done.
The result should look similar to the screenshot below.
Create another app for production. I called mineProd Microservices.
In the project you cloned, modifyconfig/school-ui.properties to have the settings from your dev app.
okta.oauth2.issuer=https://{yourOktaDomain}/oauth2/default
okta.oauth2.clientId={devClientId}
okta.oauth2.clientSecret={devClientId}
These settings will be used when running your apps individually using Maven. The production settings are used when running with Docker Compose. Modifyconfig-data/school-ui-production.propertiesto have the settings from your production app.
okta.oauth2.clientId={prodClientId}
okta.oauth2.clientSecret={prodClientId}
You can see thatspring.profiles.activeturns on the production profile indocker-compose.yml:
school-ui:
  image: developer.okta.com/microservice-docker-school-ui:0.0.1-SNAPSHOT
  environment:
    - JAVA_OPTS=
      -DEUREKA_SERVER=http://discovery:8761/eureka
      -Dspring.profiles.active=production
  restart: on-failure
  depends_on:
    - discovery
    - config
  ports:
    - 8080:8080
Docker Compose runs from a directory above the apps, and it reads its data from aconfig-data directory. For this reason, you’ll need to copy these properties files into this directory. Run the following commands from the root of this project.
cp config/*.properties config-data/.
Start Your Spring Microservices Stack with Docker Compose
This project has an aggregatorpom.xml in its root directory that will allow you to build all the projects with one command. Run the following Maven commands to build, test, and build Docker images for each project.
mvn clean install
If you don’t have Maven installed, you can install it with SDKMAN!
sdk install maven
When the process completes, start all the apps { config, discovery, school-service, and school-ui } with Docker Compose. See Install Docker Compose if you don’t have it installed.
docker-compose up -d
You can use Kitematic to watch the logs of each app as it starts up.
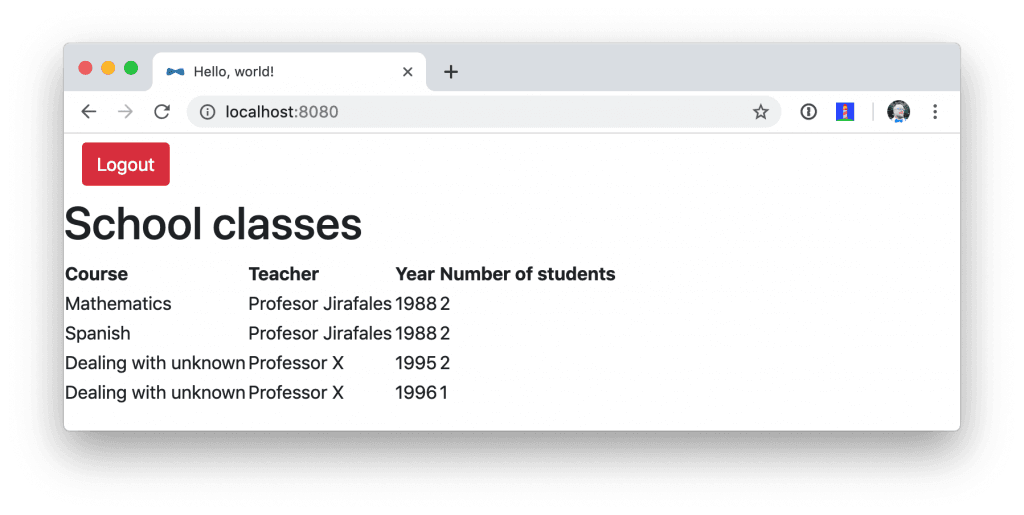
Navigate tohttp://localhost:8080 in your favorite browser. You should be able to log in and see a list of school classes after doing so.
Spring Security and OAuth 2.0
This example uses Okta’s Spring Boot Starter, which is a thin layer on top of Spring Security. The Okta starter simplifies configuration and does audience validation in the access token. It also allows you to specify the claim that will be used to create Spring Security authorities.
Thedocker-compose.yml file doesn’t expose theschool-service to the outside world. It does this by not specifyingports.
Theschool-ui project has aSchoolController class that talks to theschool-service using Spring’sRestTemplate.
@GetMapping("/classes")
@PreAuthorize("hasAuthority('SCOPE_profile')")
public ResponseEntity<List<TeachingClassDto>> listClasses() {

    return restTemplate
            .exchange("http://school-service/class", HttpMethod.GET, null,
                    new ParameterizedTypeReference<List<TeachingClassDto>>() {});
}
You’ll notice there is security on this class’s endpoint, but no security exists between the services. I’ll show you how to solve that in the steps below.
First, expose the port ofschool-service to simulate someone fat-fingering the configuration. Change theschool-serviceconfiguration indocker-compose.yml to expose its port.
school-service:
  image: developer.okta.com/microservice-docker-school-service:0.0.1-SNAPSHOT
  environment:
    - JAVA_OPTS=
      -DEUREKA_SERVER=http://discovery:8761/eureka
  depends_on:
    - discovery
    - config
  ports:
    - 8081:8081
Restart everything with Docker Compose:
docker-compose down
docker-compose up -d
You’ll see that you don’t need to authenticate to see data at http://localhost:8081. Yikes! 😱
Make sure to shut down all your Docker containers before proceeding to the next section.
docker-compose down
HTTPS Everywhere!
HTTPS stands for “Secure” HTTP. HTTPS connections are encrypted and its contents are vastly more difficult to read than HTTP connections. There’s been a big movement in recent years to use HTTPS everywhere, even when developing. There are issues you might run into when running with HTTPS, and it’s good to catch them early.
Let’s Encrypt is a certificate authority that offers free HTTPS certificates. It also has APIs to automate their renewal. In short, it makes HTTPS so easy, there’s no reason not to use it! See Add Social Login to Your JHipster App for instructions on how to usecertbotwith Let’s Encrypt to generate certificates.
I also encourage you to checkout Spring Boot Starter ACME. This is a Spring Boot module that simplifies generating certificates using Let’s Encrypt and the Automatic Certificate Management Environment (ACME) protocol.
Make Local TLS Easy with mkcert
I recently found a tool called mkcert that allows creatinglocalhost certificates. You can install it using Homebrew on macOS
brew install mkcert
brew install nss # Needed for Firefox
If you’re on Linux, you’ll need to installcertutil first:
sudo apt install libnss3-tools
Then run thebrew install mkcert command using Linuxbrew. Windows users can use Chocolately or Scoop.
Execute the followingmkcert commands to generate a certificate forlocalhost,127.0.0.1, your machine’s name, and thediscovery host (as referenced indocker-compose.yml).
mkcert -install
mkcert localhost 127.0.0.1 ::1 `hostname` discovery
If this generates files with a number in them, rename the files so they don’t have a number.
mv localhost+2.pem localhost.pem
mv localhost+2-key.pem localhost-key.pem
HTTPS with Spring Boot
Spring Boot doesn’t support certificates with the PEM extension, but you can convert it to aPKCS12 extension, which Spring Boot does support. You can use OpenSSL to convert the certificate and private key to PKCS12. This will be necessary for Let’s Encrypt generated certificates too.
Runopenssl to convert the certificate:
openssl pkcs12 -export -in localhost.pem -inkey \
localhost-key.pem -out keystore.p12 -name bootifulsecurity
Specify a password when prompted.
Create anhttps.env file at the root of your project and specify the following properties to enable HTTPS.
export SERVER_SSL_ENABLED=true
export SERVER_SSL_KEY_STORE=../keystore.p12
export SERVER_SSL_KEY_STORE_PASSWORD={yourPassword}
export SERVER_SSL_KEY_ALIAS=bootifulsecurity
export SERVER_SSL_KEY_STORE_TYPE=PKCS12
Update the.gitignore file to exclude.env files so the keystore password doesn’t end up in source control.
*.env
Runsource https.env to set these environment variables. Or, even better, add this like to your.bashrc or.zshrc file so these variables are set for every new shell. Yes, you can also include them in each app’sapplication.properties, but then you’re storing secrets in source control. If you’re not checking this example into source control, here are the settings you can copy/paste.
server.ssl.enabled=true
server.ssl.key-store=../keystore.p12
server.ssl.key-store-password: {yourPassword}
server.ssl.key-store-type: PKCS12
server.ssl.key-alias: bootifulsecurity
Start thediscovery app:
cd discovery
source ../https.env
mvn spring-boot:run
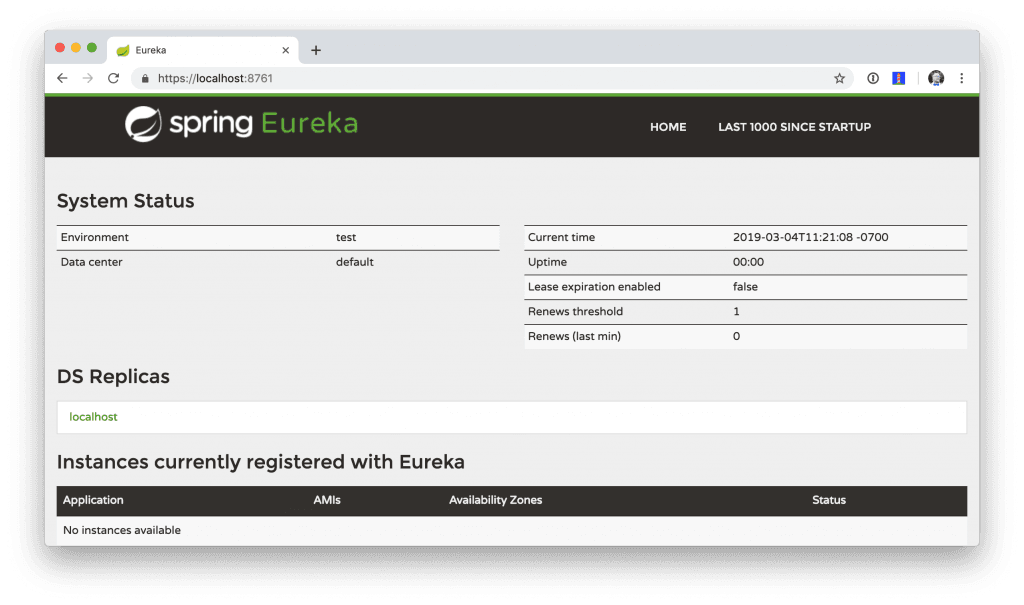
Then confirm you can access it athttps://localhost:8761.
Opendocker-compose.yml and change all instances ofhttp tohttps. Editschool-ui/src/main/java/…/ui/controller/SchoolController.java to change the call toschool-service to use HTTPS.
return restTemplate
        .exchange("https://school-service/class", HttpMethod.GET, null,
                new ParameterizedTypeReference<List<TeachingClassDto>>() {});
Update{config,school-service,school-ui}/src/main/resources/application.properties to add properties that cause each instance to register as a secure application.
eureka.instance.secure-port-enabled=true
eureka.instance.secure-port=${server.port}
eureka.instance.status-page-url=https://${eureka.hostname}:${server.port}/actuator/info
eureka.instance.health-check-url=https://${eureka.hostname}:${server.port}/actuator/health
eureka.instance.home-page-url=https://${eureka.hostname}${server.port}/
Also, change the Eureka address in eachapplication.properties (and inbootstrap.yml) to behttps://localhost:8761/eureka.
The
application.propertiesin theschool-uiproject doesn’t have a port specified. You’ll need to addserver.port=8080.
At this point, you should be able to start all your apps by running the following in each project (in separate terminal windows).
source ../https.env
./mvnw spring-boot:start
Confirm it all works athttps://localhost:8080. Then kill everything withkillall java.
Using HTTPS with Docker Compose
Docker doesn’t read from environment variables, it doesn’t know about your local CA (Certificate Authority), and you can’t add files from a parent directory to an image.
To fix this, you’ll need to copykeystore.p12 andlocalhost.pem into each project’s directory. The first will be used for Spring Boot, and the second will be added to the Java Keystore on each image.
cp localhost.pem keystore.p12 config/.
cp localhost.pem keystore.p12 discovery/.
cp localhost.pem keystore.p12 school-service/.
cp localhost.pem keystore.p12 school-ui/.
Then modify each project’s Dockerfile to copy the certificate and add it to its trust store.
FROM openjdk:8-jdk-alpine
VOLUME /tmp
ADD target/*.jar app.jar
ADD keystore.p12 keystore.p12
USER root
COPY localhost.pem $JAVA_HOME/jre/lib/security
RUN \
    cd $JAVA_HOME/jre/lib/security \
    && keytool -keystore cacerts -storepass changeit -noprompt \
    -trustcacerts -importcert -alias bootifulsecurity -file localhost.pem
ENV JAVA_OPTS=""
ENTRYPOINT [ "sh", "-c", "java $JAVA_OPTS -Djava.security.egd=file:/dev/./urandom -jar /app.jar" ]
Then create a .env file with environment variables for Spring Boot and HTTPS.
SERVER_SSL_ENABLED=true
SERVER_SSL_KEY_STORE=keystore.p12
SERVER_SSL_KEY_STORE_PASSWORD={yourPassword}
SERVER_SSL_KEY_ALIAS=bootifulsecurity
SERVER_SSL_KEY_STORE_TYPE=PKCS12
EUREKA_INSTANCE_HOSTNAME={yourHostname}
You can get the value for{yourHostname} by runninghostname.
Docker Compose has an “env_file” configuration option that allows you to read this file for environment variables. Updatedocker-compose.yml to specify anenv_file for each application.
version: '3'
services:
  discovery:
    env_file:
      - .env
    ...
  config:
    env_file:
      - .env
    ...
  school-service:
    env_file:
      - .env
    ...
  school-ui:
    env_file:
      - .env
    ...
You can make sure it’s working by runningdocker-compose config from your root directory.
Runmvn clean install to rebuild all your Docker images with HTTPS enabled for Eureka registration. Then start all everything.
docker-compose up -d
Now all your apps are running in Docker with HTTPS! Prove it athttps://localhost:8080.
If your apps do not start up or can’t talk to each other, make sure your hostname matches what you have in
.env.
You can make one more security improvement: use OAuth 2.0 to secure your school-service API.
API Security with OAuth 2.0
Add the Okta Spring Boot Starter and Spring Cloud Config toschool-service/pom.xml:
<dependency>
    <groupId>com.okta.spring</groupId>
    <artifactId>okta-spring-boot-starter</artifactId>
    <version>1.1.0</version>
</dependency>
<dependency>
    <groupId>org.springframework.cloud</groupId>
    <artifactId>spring-cloud-starter-config</artifactId>
</dependency>
Then create aSecurityConfiguration.java class inschool-service/src/main/java/…/service/configuration:
package com.okta.developer.docker_microservices.service.configuration;

import org.springframework.context.annotation.Configuration;
import org.springframework.security.config.annotation.web.builders.HttpSecurity;
import org.springframework.security.config.annotation.web.configuration.WebSecurityConfigurerAdapter;

@Configuration
public class SecurityConfiguration extends WebSecurityConfigurerAdapter {

    @Override
    protected void configure(HttpSecurity http) throws Exception {
        http
            .authorizeRequests().anyRequest().authenticated()
            .and()
            .oauth2ResourceServer().jwt();
    }
}
Create aschool-service/src/test/resources/test.properties file and add properties so Okta’s config passes, and it doesn’t use discovery or the config server when testing.
okta.oauth2.issuer=https://{yourOktaDomain}/oauth2/default
okta.oauth2.clientId=TEST
spring.cloud.discovery.enabled=false
spring.cloud.config.discovery.enabled=false
spring.cloud.config.enabled=false
Then modifyServiceApplicationTests.java to load this file for test properties:
import org.springframework.test.context.TestPropertySource;

...
@TestPropertySource(locations="classpath:test.properties")
public class ServiceApplicationTests {
    ...
}
Add aschool-service/src/main/resources/bootstrap.yml file that allows this instance to read its configuration from Spring Cloud Config.
eureka:
  client:
    serviceUrl:
      defaultZone: ${EUREKA_SERVER:https://localhost:8761/eureka}
spring:
  application:
    name: school-service
  cloud:
    config:
      discovery:
        enabled: true
        serviceId: CONFIGSERVER
      failFast: true
Then copyconfig/school-ui.properties to have aschool-service equivalent.
cp config/school-ui.properties config/school-service.properties
For Docker Compose, you’ll also need to create aconfig-data/school-service.properties with the following settings:
okta.oauth2.issuer=https://{yourOktaDomain}/oauth2/default
okta.oauth2.clientId={prodClientId}
okta.oauth2.clientSecret={prodClientId}
You’ll also need to modifydocker-compose.yml so theschool-service restarts on failure.
school-service:
  ...
  restart: on-failure
You could create a service app on Okta that uses client credentials, but this post is already complex enough. See Secure Server-to-Server Communication with Spring Boot and OAuth 2.0 for more information on that approach.
The last step you’ll need to do is modify SchoolController (in the school-ui project) to add an OAuth 2.0 access token to the request it makes to school-server.
package com.okta.developer.docker_microservices.ui.controller;

import com.okta.developer.docker_microservices.ui.dto.TeachingClassDto;
import org.springframework.core.ParameterizedTypeReference;
import org.springframework.http.HttpMethod;
import org.springframework.http.HttpRequest;
import org.springframework.http.ResponseEntity;
import org.springframework.http.client.ClientHttpRequestExecution;
import org.springframework.http.client.ClientHttpRequestInterceptor;
import org.springframework.http.client.ClientHttpResponse;
import org.springframework.security.access.prepost.PreAuthorize;
import org.springframework.security.core.annotation.AuthenticationPrincipal;
import org.springframework.security.oauth2.client.OAuth2AuthorizedClient;
import org.springframework.security.oauth2.client.OAuth2AuthorizedClientService;
import org.springframework.security.oauth2.client.authentication.OAuth2AuthenticationToken;
import org.springframework.security.oauth2.core.OAuth2AccessToken;
import org.springframework.stereotype.Controller;
import org.springframework.web.bind.annotation.GetMapping;
import org.springframework.web.bind.annotation.RequestMapping;
import org.springframework.web.client.RestTemplate;
import org.springframework.web.servlet.ModelAndView;

import java.io.IOException;
import java.util.List;

@Controller
@RequestMapping("/")
public class SchoolController {

    private final OAuth2AuthorizedClientService authorizedClientService;
    private final RestTemplate restTemplate;

    public SchoolController(OAuth2AuthorizedClientService clientService,
                            RestTemplate restTemplate) { (1)
        this.authorizedClientService = clientService;
        this.restTemplate = restTemplate;
    }

    @RequestMapping("")
    public ModelAndView index() {
        return new ModelAndView("index");
    }

    @GetMapping("/classes")
    @PreAuthorize("hasAuthority('SCOPE_profile')")
    public ResponseEntity<List<TeachingClassDto>> listClasses(
            @AuthenticationPrincipal OAuth2AuthenticationToken authentication) { (2)

        OAuth2AuthorizedClient authorizedClient =
                this.authorizedClientService.loadAuthorizedClient(
                        authentication.getAuthorizedClientRegistrationId(),
                        authentication.getName()); (3)

        OAuth2AccessToken accessToken = authorizedClient.getAccessToken(); (4)
        restTemplate.getInterceptors().add(getBearerTokenInterceptor(accessToken.getTokenValue())); (5)

        return restTemplate
                .exchange("https://school-service/class", HttpMethod.GET, null,
                        new ParameterizedTypeReference<List<TeachingClassDto>>() {});
    }

    private ClientHttpRequestInterceptor getBearerTokenInterceptor(String accessToken) {
        return (request, bytes, execution) -> {
            request.getHeaders().add("Authorization", "Bearer " + accessToken);
            return execution.execute(request, bytes);
        };
    }
}
- Add an
OAuth2AuthorizedClientServicedependency to the constructor - Inject an
OAuth2AuthenticationTokeninto thelistClasses()method - Create an
OAuth2AuthorizedClientfrom theauthentication - Get the access token from the authorized client
- Add the access token to the
Authorizationheader
That’s it! Since theschool-ui and theschool-service use the same OIDC app settings, the server will recognize and validate the access token (which is also a JWT), and allow access.
At this point, you can choose to run all your apps individually with./mvnw spring-boot:run or with Docker Compose. The latter method requires just a few commands.
mvn clean install
docker-compose down
docker-compose up -d
Use HTTP Basic Auth for Secure Microservice Communication with Eureka and Spring Cloud Config
To improve security between your microservices, Eureka Server, and Spring Cloud Config, even more, you can add HTTP Basic Authentication. To do this, you’ll need to addspring-boot-starter-security as a dependency in both theconfig anddiscovery projects. Then you’ll need to specify aspring.security.user.password for each and encrypt it. You can learn more about how to do this in Spring Cloud Config’s security docs.
Once you have Spring Security configured in both projects, you can adjust the URLs to include a username and password in them. For example, here’s what the setting will look like in theschool-ui project’sbootstrap.yml:
eureka:
  client:
    serviceUrl:
      defaultZone: ${EUREKA_SERVER:https://username:password@localhost:8761/eureka}
You’ll need to make a similar adjustment to the URLs in docker-compose.yml.
Enhance Your Knowledge about Spring Microservices, Docker, and OAuth 2.0
This tutorial showed you how to make sure your service-to-service communications are secure in a microservices architecture. You learned how to use HTTPS everywhere and lock down your API with OAuth 2.0 and JWTs.
You can find the source code for this example on GitHub at oktadeveloper/okta-spring-microservices-https-example.
If you’d like to explore these topics a bit more, I think you’ll like the following blog posts:
- Build Spring Microservices and Dockerize Them for Production
- Build a Microservices Architecture for Microbrews with Spring Boot
- Build and Secure Microservices with Spring Boot 2.0 and OAuth 2.0
- Develop a Microservices Architecture with OAuth 2.0 and JHipster
- Secure Server-to-Server Communication with Spring Boot and OAuth 2.0
These blog posts were helpful in getting everything to work in this post:
Got questions? Ask them in the comments below! If your question doesn’t relate to this post, please post them to our Developer Forums.
To get notifications of more of our tech-heavy blog posts, follow us @oktadev on Twitter, or subscribe to our YouTube Channel.
“Secure Service-to-Service Spring Microservices with HTTPS and OAuth 2.0” was originally published on the Okta developer blog on March 07, 2019.
“I love writing authentication and authorization code.” ~ No Java Developer Ever. Tired of building the same login screens over and over? Try the Okta API for hosted authentication, authorization, and multi-factor auth.
