Discover faster, more efficient performance monitoring with an enterprise APM product learning from your apps. Take the AppDynamics APM Guided Tour!
The growth of the AppDynamics Demo Platform resulted in infrastructure that had become larger and more difficult to manage without a real orchestration tool. We will look at the steps involved in converting one of our Docker Compose to Kubernetes applications and what we gained by it.

The AppDynamics Demo Platform never sleeps. It is a cloud-based system that hosts a number of applications designed to help our global sales team demonstrate the many value propositions of AppDynamics.
Last fall, we added several new, larger applications to our demo platform. With these additions, our team started to see some performance challenges with our standard Docker Compose application deployment model on a single host. Specifically, we wanted to support multiple host machines as opposed to being limited to a single host machine like Docker Compose. We had been talking about migrating to Kubernetes for several months before this and so we knew it was time to take the leap.
Before this I had extensive experience with dockerized applications and even with some Kubernetes-managed applications. However, I had never taken part in the actual migration of an application from Docker Compose to Kubernetes.
For our first attempt at migrating to Kubernetes, we chose an application that was relatively small, but which contained a variety of different elements—Java, NodeJS, GoLang, MySQL and MongoDB. The application used Docker Compose for container deployment and “orchestration.” I use the term orchestration loosely, because Docker Compose is pretty light when compared to Kubernetes.
Docker Compose
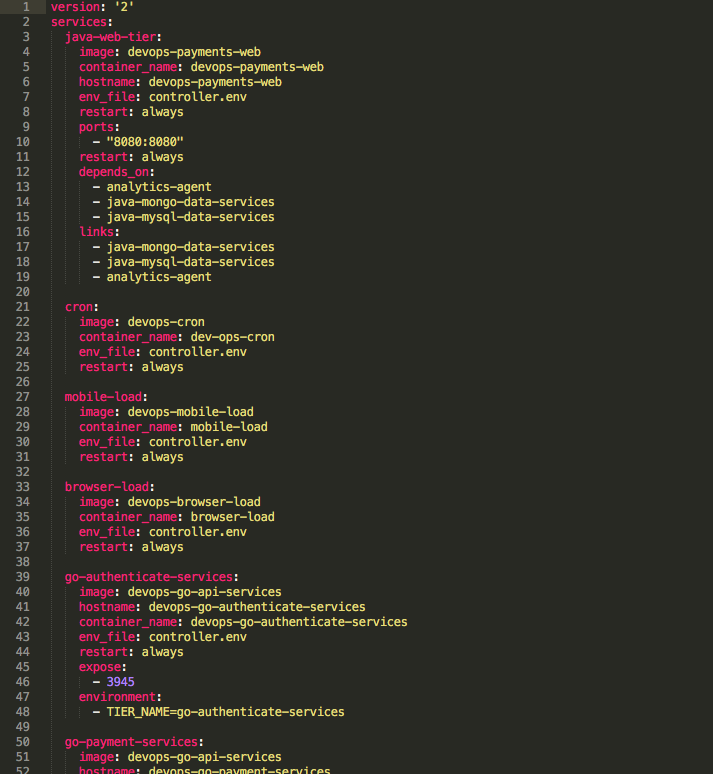
For those who have never used Docker Compose, it’s a framework that allows developers to define container-based applications in a single YAML file. This definition includes the Docker images used, exposed ports, dependencies, networking, etc. Looking at the snippet below, each block of 5 to 20 lines represents a separate service. Docker Compose is a very useful tool and makes application deployment fairly simple and easy.
Preparing for the Migration
The first hurdle to converting the project was learning how Kubernetes is different from Docker Compose. One of the most dramatic ways it differs is in container-to-container communication.
In a Docker Compose environment, the containers all run on a single host machine. Docker Compose creates a local network that the containers are all part of. Take this snippet, for example:
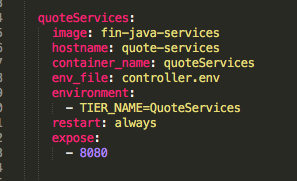
This block will create a container called quoteServices with a hostname of quote-services and port 8080. With this definition, any container within the local Docker Compose network can access it using http://quote-services:8080. Anything outside of the local network would have to know the IP address of the container.
By comparison, Kubernetes usually runs on multiple servers called nodes, so it can’t simply create a local network for all the containers. Before we started, I was very concerned that this might lead to many code changes, but those worries would prove to be unfounded.
Creating Kubernetes YAML Files
The best way to understand the conversion from Docker Compose to Kubernetes is to see a real example of what the conversion looks like. Let’s take the above snippet of quoteServices and convert it to a form that Kubernetes can understand.
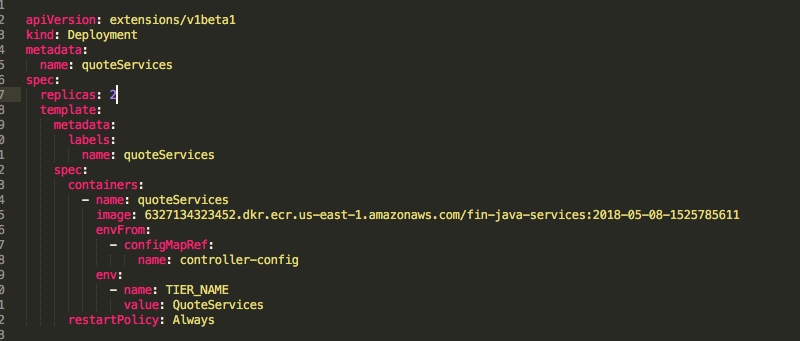
The first thing to understand is that the above Docker Compose block will get converted into two separate sections, a Deployment and a Service.
As its name implies, the deployment tells Kubernetes most of what it needs to know about how to deploy the containers. This information includes things like what to name the containers, where to pull the images from, how many containers to create, etc. The deployment for quoteServices is shown here:
As we mentioned earlier, networking is done differently in Kubernetes than in Docker Compose. The Service is what enables communication between containers. Here is the service definition for quoteServices:
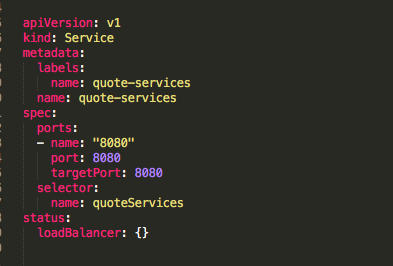
This service definition tells Kubernetes to take the containers that have a name = quoteServices, as defined under selector, and to make them reachable using quote-services as hostname and port 8080. So again, this service can be reached at http://quote-services:8080 from within the Kubernetes application. The flexibility to define services this way allows us to keep our URLs intact within our application, so no changes are needed due to networking concerns.
By the end, we had taken a single Docker Compose file with about 24 blocks and converted it into about 20 different files, most of which contained a deployment and a service. This conversion was a big part of the migration effort. Initially, to “save” time, we used a tool called Kompose to generate deployment and services files automatically. However, we ended up rewriting all of the files anyway once we knew what we were doing. Using Kompose is sort of like using Word to create webpages. Sure, it works, but you’re probably going to want to re-do most of it once you know what you’re doing because it adds a lot of extra tags that you don’t really want.
Instrumenting AppDynamics
This was the easy part. Most of our applications are dockerized, and we have always monitored these and our underlying Docker infrastructure with AppDynamics. Because our Docker images already had application agents baked in, there was nothing we had to change. If we had wanted, we could have left them the way they were, and they would have worked just fine. However, we decided to take advantage of something that is fairly common in the Kubernetes world: sidecar injection.
We used the sidecar model to “inject” the AppDynamics agents into the containers. The advantage of this is that we can now update our agents without having to rebuild our application images and redeploy them. It is also more fitting with best practices. To update the agent, all we have to do is update our sidecar image, then change the tag used by the application container. Just like that, our application is running with a new agent!
Server Visibility Agent
Incorporating the Server Visibility (SVM) agent was also fairly simple. One difference to note is that Docker Compose runs on a single host, whereas Kubernetes typically uses multiple nodes, which can be added or removed dynamically.
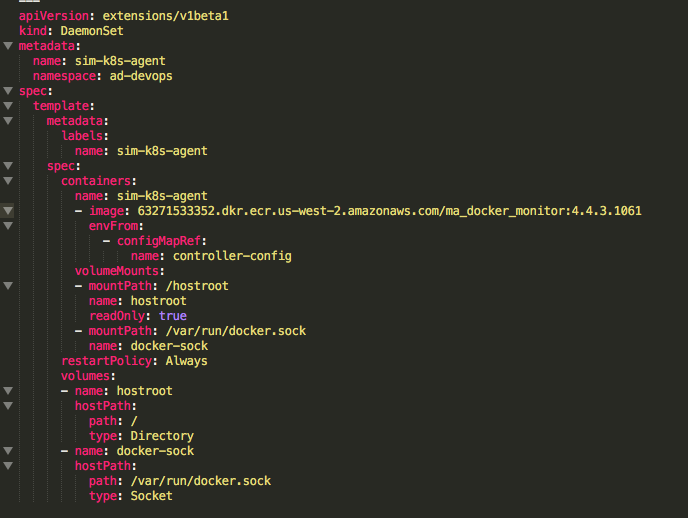
In our Docker Compose model, our SVM agent was deployed to a single container, which monitored both the host machine and the individual containers. With Kubernetes, we would have to run one such container on each node in the cluster. The best way to do this is with a structure called a DaemonSet.
You can see from the snippet below that a DaemonSet looks a lot like a Deployment. In fact, the two are virtually identical. The main difference is how they act. A Deployment typically doesn’t say anything about where in the cluster to run the containers defined within it, but it does state how many containers to create. A DaemonSet, on the other hand, will run a container on each node in the cluster. This is important, because the number of nodes in a cluster can increase or decrease at any time.
What Works Great
From development and operations perspectives, migrating to Kubernetes involves some extra overhead, but there are definite advantages. I’m not going to list all the advantages here, but I will tell you about my two favorites.
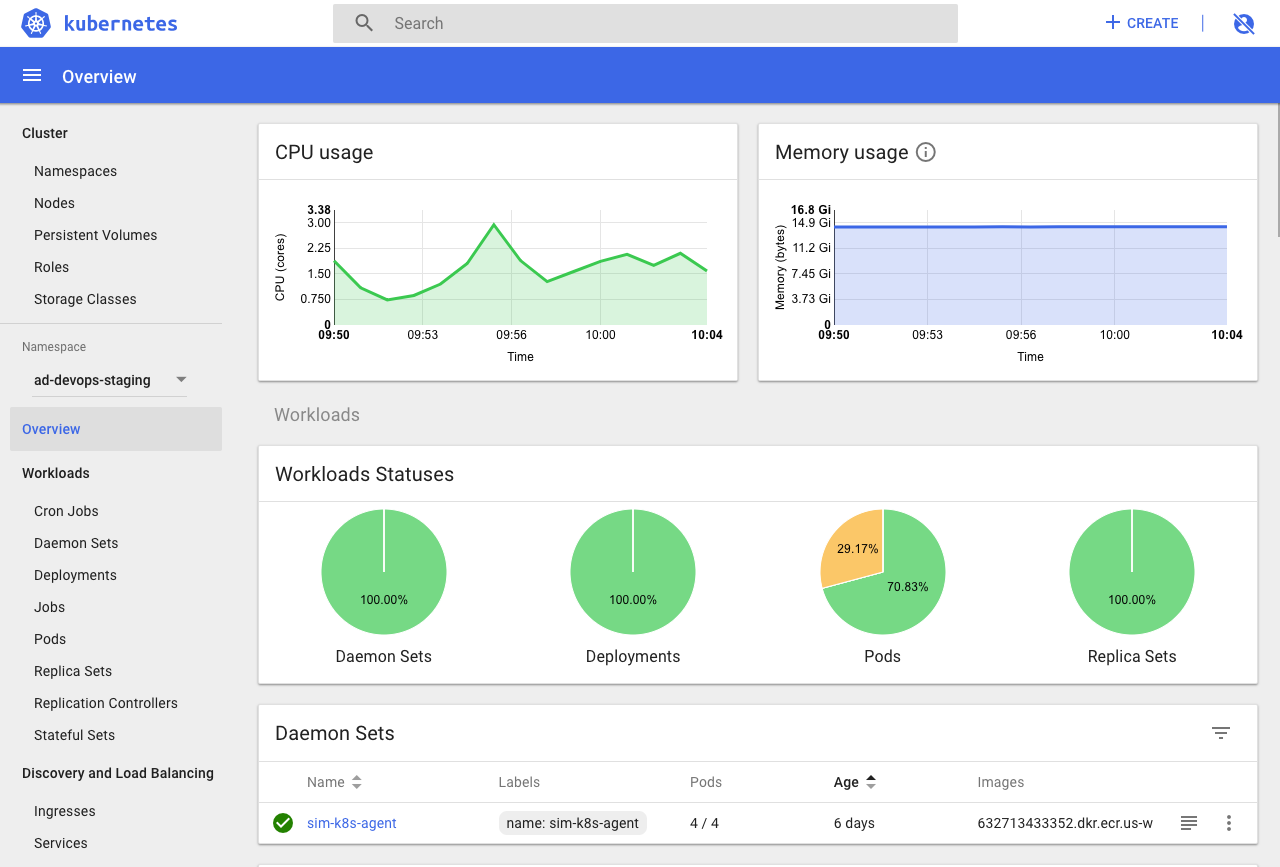
First of all, I love the Kubernetes Dashboard. It shows information on running containers, deployments, services, etc. It also allows you to update/add/delete any of your definitions from the UI. So when I make a change and build a new image, all I have to do is update the image tag in the deployment definition. Kubernetes will then delete the old containers and create new ones using the updated tag. It also gives easy access to log files or a shell to any of the containers.
Another thing that worked well for us is that we no longer need to keep and maintain the host machines that were running our Docker Compose applications. Part of the idea behind containerizing applications is to treat servers more like cattle than pets. While this is true to an extent, the Docker Compose host machines have become the new pets. We have seen issues with the host machines starting to have problems, needing maintenance, running out of disk space, etc. With Kubernetes, there are no more host machines, and the nodes in the cluster can be spun up and down anytime.
Conclusion
Before starting our Kubernetes journey, I was a little apprehensive about intra-application networking, deployment procedures, and adding extra layers to all of our processes. It is true that we have added a lot of extra configuration, going from a 300-line docker-compose.yaml file to about 1,000 lines spread over 20 files. This is mostly a one-time cost, though. We also had to rewrite some code, but that needed to be rewritten anyway.
In return, we gained all the advantages of a real orchestration tool: scalability, increased visibility of containers, easier server management, and many others. When it comes time to migrate our next application, which won’t be too far away, the process will be much easier and quicker.
Discover faster, more efficient performance monitoring with an enterprise APM product learning from your apps. Take the AppDynamics APM Guided Tour!
