1. Introduction
When you are a backend developer, you know the pain which is caused when you hear people saying you can’t create UI pages built-in HTML and can’t style them in CSS. It’s like being a backend developer has its known limitations that we can play and run big production backend applications but can’t make pretty pages which actually show the data managed by those backend applications. If the same idea has ever haunted you, don’t worry, Vaadin is here.
With Vaadin, it is possible to create frontend of your applications purely in Java. It provides a highly mature server-side UI-creation support which allows us to compose production-grade reusable components in Java language. It comes with a support from all popular Java development environments (Eclipse, IntelliJ, NetBeans, Maven, and so on; this tutorial’s examples use IntelliJ). We will start by understanding how Vaadin actually works and follow with various components and layouts which exists in Vaadin. We will finish the lesson with an excellent sample application which demonstrates event handling and multiple layouts in a single view. Let’s get started.
Table Of Contents
2. How Vaadin works?
Generally speaking, Vaadin is a lot like AWT, Spring and SWT. We have some layouts & components which we instantiate and provide our data to, finally bind them together in a parent layout to show the container. The difference arises on how these components & layouts are actually rendered. Instead of the traditional components being rendered using Java whose layout depends on the underlying Operating system, Vaadin components are the HTML5/CSS/JavaScript components talking via Ajax to the backend server and managed automatically by the framework. Let us visualise how Vaadin is arranged between frontend UI engines and its own components:
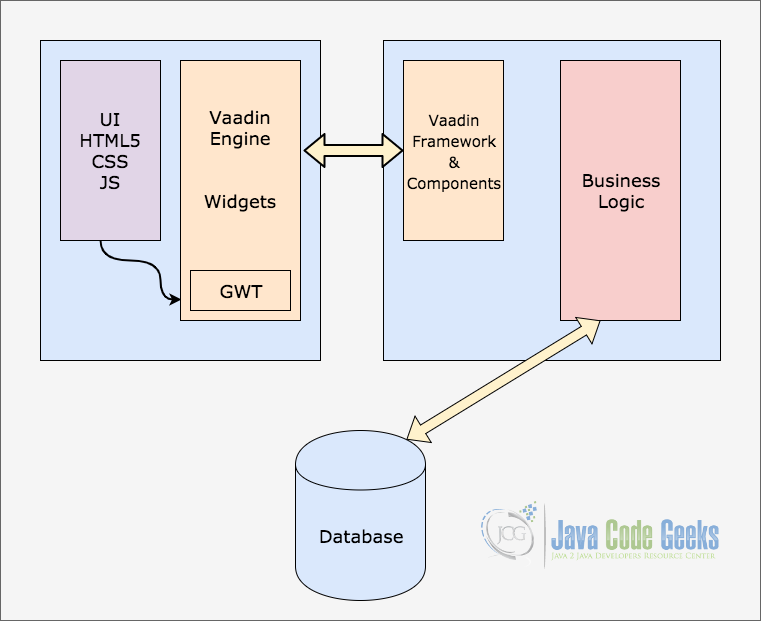
In above figure, it is very much clear how Vaadin guards backend developers against writing HTML, CSS and JS based components and provide a Vaadin engine where we can work on Java code itself for UI components which may be later translated to HTML Components by the framework itself.
It is the client-side Vaadin engine (written in HTML5/CSS/JavaScript, and based on the Google Web Toolkit) and the server-side framework which manage the UI for us. Server-side components also support data-binding in Vaadin which makes it very easy to integrate database in the components. Finally, do not think that Vaadin is only limited to Java. With newest versions of Vaadin, it is also possible to write HTML based Vaadin layout, style it with CSS and tune the behaviour with Javascript itself. In this lesson, we will limit ourselves to using the Java language only.
3. Vaadin Plugins
Now that we understand how Vaadin works, we are ready to setup our machine for its development. To move on with the lesson and an easy to use plugins available right inside your IDE, we can install Eclipse plugin as:

If you use IntelliJ (like me), we can get the plugin for the IDE as well:

The plugin is not absolutely needed but it opens an opportunity of working with 100% UI based system where you can work with WYSIWYG systems.
4. Creating a Project
Now that we are ready with everything, we can finally use Maven to create a project for us. We will be using a Vaadin archtype to create an application. Let’s look at the command in action here:
Creating a Project
mvn archetype:generate -DarchetypeGroupId=com.vaadin -DarchetypeArtifactId=vaadin-archetype-application -DarchetypeVersion=LATEST -DgroupId=com.javacodegeeks.example -DartifactId=JCG-Vaadin-Example -Dversion=1.0 -Dpackaging=jar
Here is what we get when we create the project (we only show the interesting parts):
Creating a project
[INFO] Scanning for projects...
[INFO]
[INFO] ------------------< org.apache.maven:standalone-pom >-------------------
[INFO] Building Maven Stub Project (No POM) 1
[INFO] --------------------------------[ pom ]---------------------------------
[INFO]
[INFO] >>> maven-archetype-plugin:3.0.1:generate (default-cli) > generate-sources @ standalone-pom >>>
[INFO]
[INFO] <<< maven-archetype-plugin:3.0.1:generate (default-cli) < generate-sources @ standalone-pom <<<
[INFO]
[INFO]
[INFO] --- maven-archetype-plugin:3.0.1:generate (default-cli) @ standalone-pom ---
[INFO] Generating project in Interactive mode
[INFO] Archetype repository not defined. Using the one from [com.vaadin:vaadin-archetype-application:8.4.1] found in catalog remote

....some non-interesting parts....

[INFO] Using property: groupId = com.javacodegeeks.example
[INFO] Using property: artifactId = JCG-Vaadin-Example
[INFO] Using property: version = 1.0
[INFO] Using property: package = com.javacodegeeks.example
[INFO] Using property: themeName = mytheme
[INFO] Using property: uiName = MyUI
Confirm properties configuration:
groupId: com.javacodegeeks.example
artifactId: JCG-Vaadin-Example
version: 1.0
package: com.javacodegeeks.example
themeName: mytheme
uiName: MyUI
 Y: :
[INFO] ----------------------------------------------------------------------------
[INFO] Using following parameters for creating project from Archetype: vaadin-archetype-application:LATEST
[INFO] ----------------------------------------------------------------------------
[INFO] Parameter: groupId, Value: com.javacodegeeks.example
[INFO] Parameter: artifactId, Value: JCG-Vaadin-Example
[INFO] Parameter: version, Value: 1.0
[INFO] Parameter: package, Value: com.javacodegeeks.example
[INFO] Parameter: packageInPathFormat, Value: com/javacodegeeks/example
[INFO] Parameter: package, Value: com.javacodegeeks.example
[INFO] Parameter: version, Value: 1.0
[INFO] Parameter: groupId, Value: com.javacodegeeks.example
[INFO] Parameter: themeName, Value: mytheme
[INFO] Parameter: uiName, Value: MyUI
[INFO] Parameter: artifactId, Value: JCG-Vaadin-Example
[INFO] Project created from Archetype in dir: /Users/shubham/JCG-Vaadin-Example
[INFO] ------------------------------------------------------------------------
[INFO] BUILD SUCCESS
[INFO] ------------------------------------------------------------------------
[INFO] Total time: 32.100 s
[INFO] Finished at: 2018-05-13T18:43:43+05:30
[INFO] ------------------------------------------------------------------------
Vaadin archtype takes care of adding appropriate dependencies in our project along with all other information needed to build the project. In the next section, we will understand all parts which were in the pom.xml file of the project.
5. Maven Dependencies
The project we built using the Vaadin archtype takes care of adding appropriate dependencies in our project. Let us take a peek at the pom.xml file of the project in parts. Let’s start by looking at the dependencies which were added to the file:
pom.xml
<dependencies>
    <dependency>
        <groupId>javax.servlet</groupId>
        <artifactId>javax.servlet-api</artifactId>
        <version>3.0.1</version>
        <scope>provided</scope>
    </dependency>
    <dependency>
        <groupId>com.vaadin</groupId>
        <artifactId>vaadin-server</artifactId>
    </dependency>
    <dependency>
        <groupId>com.vaadin</groupId>
        <artifactId>vaadin-push</artifactId>
    </dependency>
    <dependency>
        <groupId>com.vaadin</groupId>
        <artifactId>vaadin-client-compiled</artifactId>
    </dependency>
    <dependency>
        <groupId>com.vaadin</groupId>
        <artifactId>vaadin-themes</artifactId>
    </dependency>
</dependencies>
Following dependencies were added to the project:
javax.servlet-api: This dependency provides the ability to keep Servlets in our project to make network callsvaadin-server: This dependency includes packages for managing the server details like sessions, client communication etc.vaadin-push: This dependency is not necessary for this lesson but is still important to show. When we need to update the UI based on a thread executing on the server, we can send a request from the server to UI so that UI is immediately updated and UI doesn’t have to make a network request to get the data state on the server. For this, push packages are used.vaadin-client-compiled: This dependency is based on GWT and contains packages to compile the client components.vaadin-themes: This dependency includes some built-in themes and all utilities for making custom themes.
Next, we also need to add the Vaadin repository and the dependency management. The dependencyManagement tag helps to manage the version of all Vaadin dependencies:
pom.xml
<repositories>
    <repository>
        <id>vaadin-addons</id>
        <url>http://maven.vaadin.com/vaadin-addons</url>
    </repository>
</repositories>

<dependencyManagement>
    <dependencies>
        <dependency>
            <groupId>com.vaadin</groupId>
            <artifactId>vaadin-bom</artifactId>
            <version>${vaadin.version}</version>
            <type>pom</type>
            <scope>import</scope>
        </dependency>
    </dependencies>
</dependencyManagement>
Finally, we need to have the Jetty plugin which allows us to easily test the development build by running jetty:run on the command line.
pom.xml
<plugin>
    <groupId>org.eclipse.jetty</groupId>
    <artifactId>jetty-maven-plugin</artifactId>
    <version>${jetty.plugin.version}</version>
    <configuration>
        <scanIntervalSeconds>2</scanIntervalSeconds>
    </configuration>
</plugin>
This allows us to run the Vaadin app directly from the command-line and provides us with an embedded Jetty server.
6. Vaadin Servlet
In Vaadin, we don’t have a web.xml file to configure the dispatcher servlet for the application. Instead, we have the Vaadin Servlet, which with the help of some annotations defines the entry point of the application:
MyUI.java
@WebServlet(urlPatterns = "/*", name = "MyUIServlet", asyncSupported = true)
@VaadinServletConfiguration(ui = MyUI.class, productionMode = false)
public static class MyUIServlet extends VaadinServlet { }
In above servlet application, the ui field clearly mentions that MyUI.class is the main entry point for the specified application.
7. Vaadin Main Class
As we have defined our application using the Vaadin archtype, the app comes with a basic UI already set up in the main class of the application, which as shown in the previous section, also contains the definition for the Vaadin Servlet. Here is the main entry point UI class pre-defined in our application:
MyUI.java
package com.javacodegeeks.example;

import javax.servlet.annotation.WebServlet;

import com.vaadin.annotations.Theme;
import com.vaadin.annotations.VaadinServletConfiguration;
import com.vaadin.server.VaadinRequest;
import com.vaadin.server.VaadinServlet;
import com.vaadin.ui.Button;
import com.vaadin.ui.Label;
import com.vaadin.ui.TextField;
import com.vaadin.ui.UI;
import com.vaadin.ui.VerticalLayout;

@Theme("mytheme")
public class MyUI extends UI {

    private static final long serialVersionUID = 7132834690301152714L;

    @Override
    protected void init(VaadinRequest vaadinRequest) {
        final VerticalLayout layout = new VerticalLayout();

        final TextField name = new TextField();
        name.setCaption("Type your name here:");

        Button button = new Button("Click Me");
        button.addClickListener(e -> {
            layout.addComponent(new Label("Thanks " + name.getValue()
                    + ", it works!"));
        });

        layout.addComponents(name, button);

        setContent(layout);
    }

    @WebServlet(urlPatterns = "/*", name = "MyUIServlet", asyncSupported = true)
    @VaadinServletConfiguration(ui = MyUI.class, productionMode = false)
    public static class MyUIServlet extends VaadinServlet {
    }
}
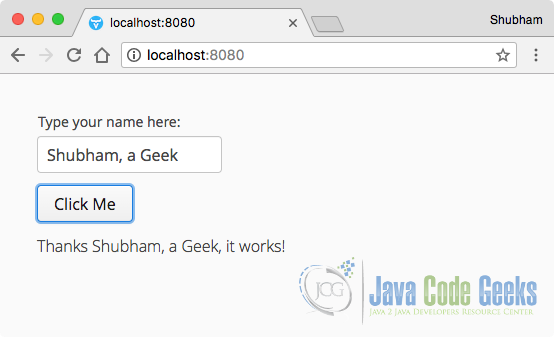
This UI is the application entry point. A UI may either represent a browser window (or tab) or some part of an HTML page where a Vaadin application is embedded. The UI is initialized using VaadinRequest. This method is intended to be overridden to add component to the user interface and initialize non-component functionality.
Actually, we’re ready to run the project as of now to show the default application layout made by the Vaadin archtype itself. Run the following command to run the project:
Running the project
mvn jetty:run
Visit the following URL to see the app running:
URL to open
http://localhost:8080/
We can try the app now:
8. Vaadin Layout Managers
The sample application we ran above made use of a VerticalLayout to arrange the UI elements in a vertical manner. Similar to the VerticalLayout, Vaadin provides us various Layout Managers to arrange the UI components in different directions. Let’s explore what the managers are
8.1 VerticalLayout
When we need to stack the components in a single column where first elements are kept on the bottom and the rest of the elements appear below the above component, we can use the VerticalLayout arrangement:
VerticalLayout
VerticalLayout vertical = new VerticalLayout();
vertical.setSpacing(true);
vertical.setMargin(true);
setContent(vertical);
All the components added to this layout will be stacked on top of each other. Note that the methods related to each component (a layout is a component as well) are well-styled with names based on the CSS property they set. This makes the method names easy to guess and much more readable.
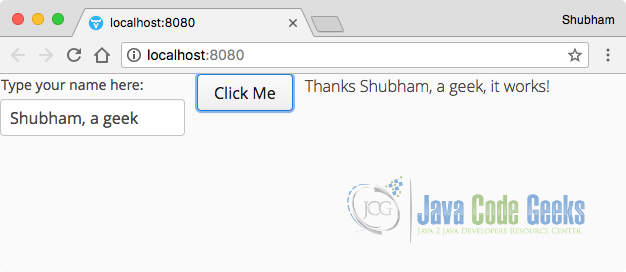
8.2 HorizontalLayout
As against the VerticalLayout where components are arranged in a vertical manner, HorizontalLayout arranges the components horizontally. Let’s look at an example of how this layout can be instantiated:
HorizontalLayout
final HorizontalLayout layout = new HorizontalLayout();
In the sample application, just replace the VerticalLayout with the VerticalLayout and see how the layout appears now:
8.3 GridLayout
Another layout, GridLayout allows us to make a Grid of components which provides a very sleek and consistent look to the page we render.
GridLayout
GridLayout gridLayout = new GridLayout(3, 2);
Go on and try the GridLayout in the existing layout to play with the arrangement of the UI components.
8.4 FormLayout
Finally, we can use the FormLayout which puts the label of a component and the component itself in two separate columns and can also have the optional indicator for required fields. It can be instantiated as:
FormLayout
FormLayout formLayout = new FormLayout();
9. Vaadin Components
In this section, we will look at some basic but most useful Vaadin UI elements which are used in almost all of the UIs made for Web.
9.1 Label
A Label is a component which is used to show a static text which doesn’t modify with application state. Let’s define a function which provides a Label instance and sets it in a VerticalLayout:
Label
private Layout showLabels() {
    final VerticalLayout layout = new VerticalLayout();

    Label label = new Label();
    label.setId("LabelID");
    label.setValue("JavaCodeGeeks");
    label.setCaption("Label");
    layout.addComponent(label);
    return layout;
}
Here is how this Label looks: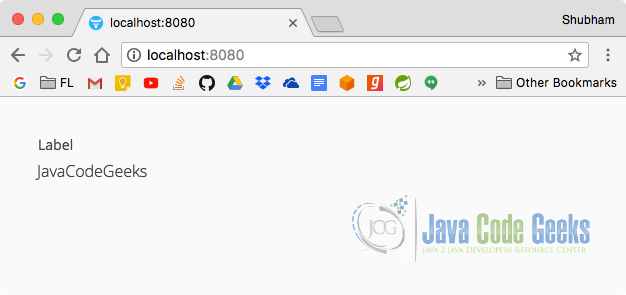
9.2 Link
When it comes to providing an address to external web pages, Vaadin provides the Link component which serves the same purpose:
Link
private Layout showLink() {
    final VerticalLayout layout = new VerticalLayout();

    Link jcgLink = new Link("JavaCodeGeeks",
            new ExternalResource("https://www.javacodegeeks.com/"));
    jcgLink.setTargetName("_blank");
    layout.addComponent(jcgLink);
    return layout;
}
Here is how a Link looks:

9.3 TextField
TextFields are the components which are a combination of a Label component and a single line TextArea which allows a user to provide an input. Here is a sample program to show a TextField with an icon as well which inbuilt into the Vaadin libraries:
TextField
private Layout showTextField() {
    final VerticalLayout layout = new VerticalLayout();

    TextField textField = new TextField();
    textField.setIcon(FontAwesome.USER);
    layout.addComponent(textField);
    return layout;
}
Here is how a TextField looks: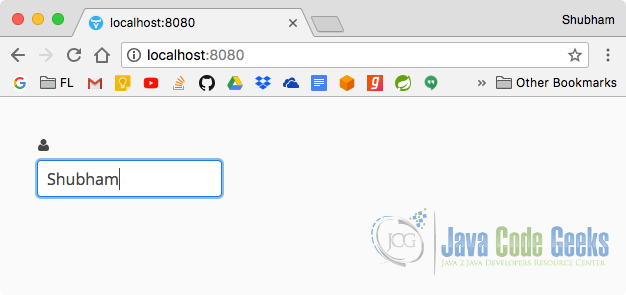
9.4 TextArea
A TextArea component is just like a TextField component with an only difference is that multiple lines of input are allowed in a TextArea component. Let us take a look at a demonstration:
TextArea
private Layout showTextArea() {
    final VerticalLayout layout = new VerticalLayout();

    TextArea textArea = new TextArea();
    layout.addComponent(textArea);
    return layout;
}
Here is how a TextArea looks:
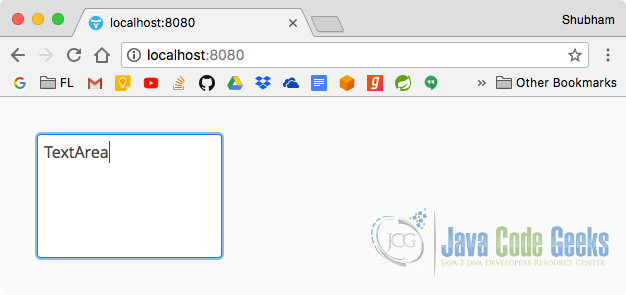
The TextArea component allows us to enter big text into the components and reflect limit of text that should be entered as well.
9.5 DateField and InlineDateField
Picking dates is a very common task in a Web UI. Vaadin provides us two elements to do the same, DateField and InlineDateField. A DateField component shows a dropdown calendar where we can pick a date. InLineDateField doesn’t disappear when we have selected a date in it. Let us take a look at a sample program:
DateField and InlineDateField
private Layout showDateField() {
    final VerticalLayout layout = new VerticalLayout();

    DateField dateField = new DateField("DateField", LocalDate.now());
    InlineDateField inlineDateField = new InlineDateField();
    layout.addComponent(dateField);
    layout.addComponent(inlineDateField);
    return layout;
}
Here is how a DateField looks: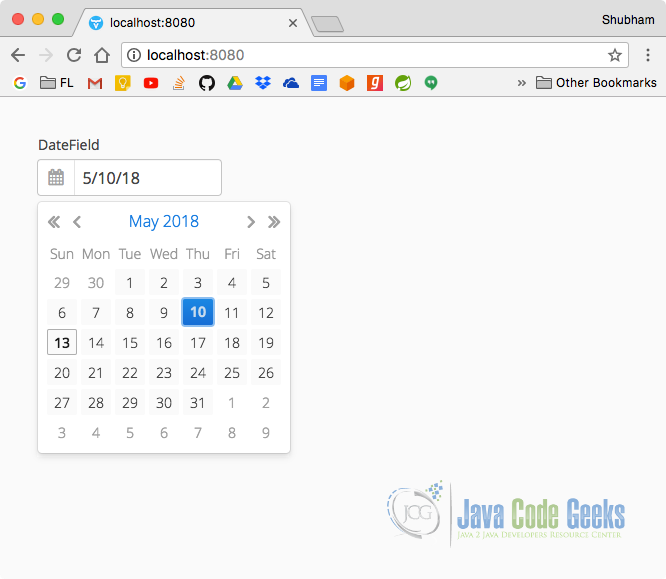
Here is how a InLineDateField looks: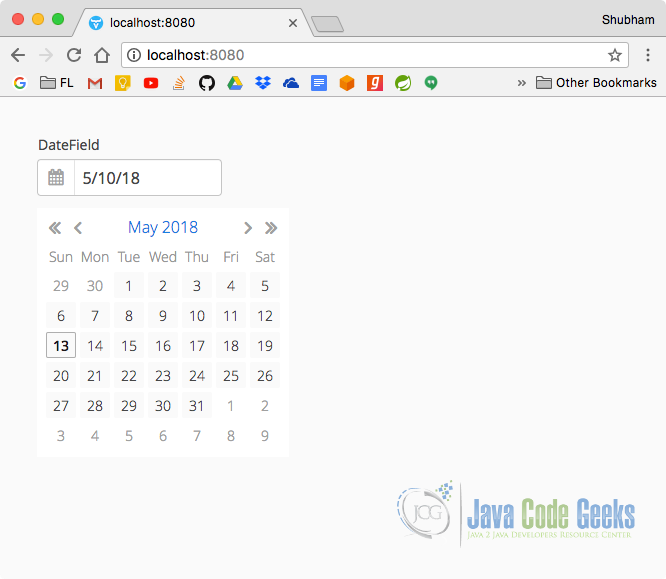
The InlineDateField doesn’t disappear when user has done selecting a date from it.
9.6 PasswordField
To accept secret keys and passwords in the UI, we can make use of the PasswordField. Let us take a look at a demonstration:
PasswordField
private Layout showPasswordField() {
    final VerticalLayout layout = new VerticalLayout();

    PasswordField passwordField = new PasswordField();
    layout.addComponent(passwordField);
    return layout;
}
Here is how a PasswordField looks:

A PasswordField is a TextField which just masks the text we enter into it.
9.7 Button
To provide a user with an ability to perform an action in certain cases like to submit a form or similar, Button is the best component to make use of. Let us take a look at a sample program:
Button
private Layout showButton() {
    final VerticalLayout layout = new VerticalLayout();

    Button normalButton = new Button("Normal Button");
    layout.addComponent(normalButton);
    return layout;
}
Here is how a Button component looks like:

Vaadin allows us to make many type of buttons like Danger buttons (red in colour by default), quite buttons and many more.
9.8 CheckBox
To accept multiple values to some value, we can make of CheckBoxes which allows a user to set or unset them without being dependent if other CheckBoxes in the UI are set or not. Let us take a look at a sample program:
CheckBox
private Layout showCheckBox() {
    final VerticalLayout layout = new VerticalLayout();

    CheckBox checkbox = new CheckBox("CheckBox");
    checkbox.setValue(true);
    layout.addComponent(checkbox);
    return layout;
}
Here is how a CheckBox component looks: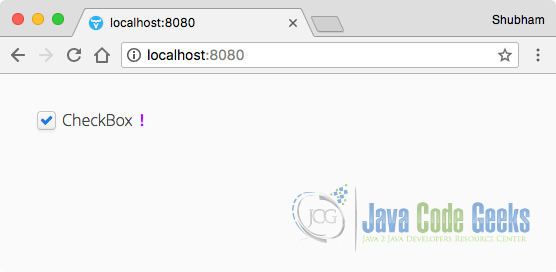
9.9 Lists
As a final component, showing a list of items which contains a fixed element is a very common task. Let us take a look at a demonstration on how we can do this:
Lists
private Layout showLists() {
    final VerticalLayout layout = new VerticalLayout();

    List<String> numbers = new ArrayList<>();
    numbers.add("One");
    numbers.add("Ten");
    numbers.add("Eleven");

    ComboBox comboBox = new ComboBox("ComboBox");
    comboBox.setItems(numbers);

    layout.addComponent(comboBox);
    return layout;
}
Here is how a Lists component looks:
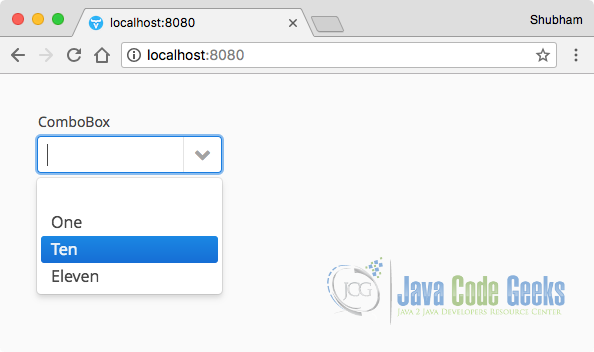
So, we just made a List to collect items into it and show those items into the ComboBox element which shows a drop-down menu containing the List items.
10. Working with Vaadin Themes
Vaadin themes are the best way to completely transform an application look by just pointing it towards a new theme altogether in the stylesheets Vaadin project uses. By default, Vaadin provides four built-in themes we can readily change among. The built-in themes are valo, reindeer, chameleon, and runo. To find the stylesheet, visit the WebContent/themes/declarativeui/declarativeui.scss. We can change the theme value specified toward the end of the specified file will change the theme the application picks.
Do take a look at the Vaadin directory to find almost unlimitd number of ready to use Vaadin themes which can be used in your projects.
11. Conclusion
In this lesson, we studied how we can make a very simple but effective Vaadin application with a single Maven command. We saw what Maven dependencies and plugins are needed for a production-grade Vaadin application. We looked at many Vaadin components which are commonly used in Vaadin UI applications. For a Java Backend engineer, Vaadin is an excellent Framework. It provides every advantage that a Java developer can think of, as it allows Maven-based build system for dependency management, a very easy way to directly use Spring services in the same project itself or just follow a Design Pattern to keep the UI and network layer completely separate in a project.
In one of the future Vaadin lessons, we will see how we can make a Vaadin application dynamic by adding a working backend to our application like using a Spring Boot application to provide dynamic content from the database to the application.
12. Download the Source Code
This was an example of Vaadin Framework.
You can download the full source code of this example here: Vaadin Example

What advantage does this bring over drag and drop UI tools such as WYSIWYGWEBBUILDER ? The same can be achieved without writing a single line of code.
I thing WYSIWYGWEBBUILDER helps building swing UI not a web UI.
hello, I am a fresh developper in java, I want to get a link to build small project in java to strong project, your vaadin tutorial is to advanced for me, thanks