1. About MySQL Workbench
MySQL Workbench, as the name indicates, is a desktop tool to manage MySQL database servers and the databases too. MySQL Workbench comes integrated with a whole bunch of tools to help make the task of working with the database easier. It is mainly a visual database design tool that integrates variety of facilities as listed below:
- Creation of database
- Management of database access and properties
- Development in the database
- Database structure design
- Database administration & maintenance
It is used by almost everyone in a software development project utilizing MySQL Database. Everyone including the developer, database administrator as well as software architect.
Table Of Contents
2. MySQL Workbench Installation
Before starting to understand the features of MySQL Workbench, let us begin with the installation of MySQL Workbench. There is just one pre-requisite for the installation. You need to have a compatible MySQL Server version installed on your system if you plan to use a local database. In case it is not installed, follow the process at this link to get it installed. In case of a remote MySQL server, MySQL Workbench can be installed right away.
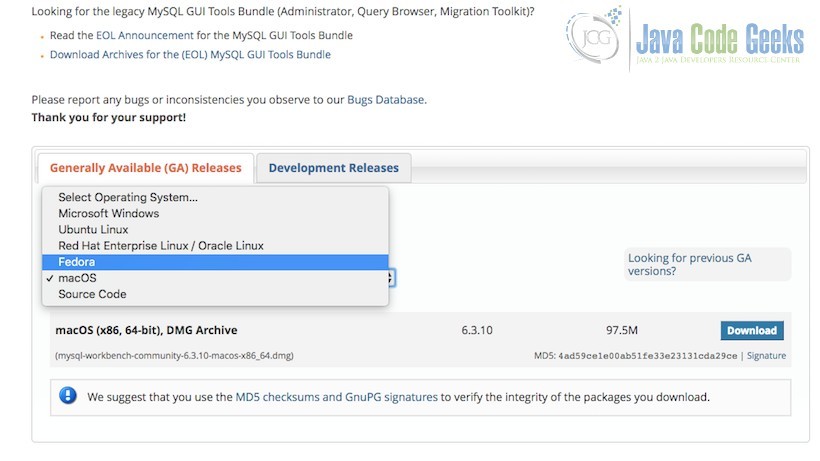
Once you have the MySQL server local or remote setup ready, ensure that the server is running by checking the processes/services for a running MySQL server process or connecting to the remote host using the relevant online plugin. To begin with MySQL Workbench installation, proceed with download of the relevant installation file from this link. As shown below, MySQL workbench is available for Windows, MacOSX & multiple variants of Linux systems.
The installation process is pretty straightforward. The below sub sections cover the installation process.
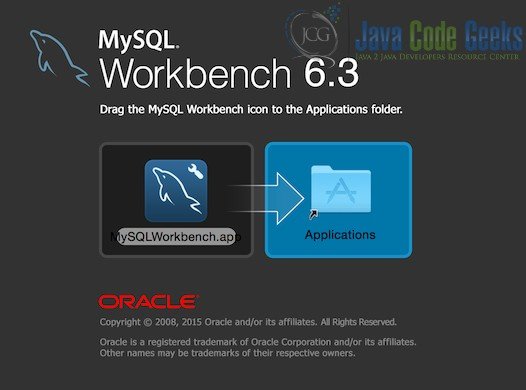
2.1 Installing in MacOSX
For installation in MacOSX, download the .dmg installer package. The installer package opens up an application window which allows you to copy the application into applications folder. The application window is shown below:
2.2 Installing in Windows OS
In order to install MySQL Workbench in Windows, download the .exe file for the setup. Execute the setup once downloaded. The setup checks for the installation of MySQL server before installing Workbench. Once the checks are passed, proceed with the installation of the same. More details about installing the Workbench in windows could be found here
2.3 Installing in Linux variants
For Linux variants, MySQL is available as a .deb file. A deb file is similar to an exe. It can be executed as a normal setup for installation. However, for Linux, developers usually prefer command line in order to install tools. To install MySQL Workbench using command line, first install the apt package manager for mysql by executing the following commands.
$ sudo dpkg -i mysql-apt-config_0.5.3-1_all.deb
$ sudo apt-get update
Once installed and updated, install the workbench using the below command.
$sudo apt-get install mysql-workbench-community
Thus, MySQL Workbench could be easily installed. Once installed, startup MySQL workbench. Workbench has a trend of frequently changing its welcome screen version to version.
3. Getting Started with MySQL Workbench
Once MySQL Server and MySQL Workbench are successfully installed, startup the Workbench application. Depending on the version you have installed, you would be greeted with a welcome screen similar to the one shown below.
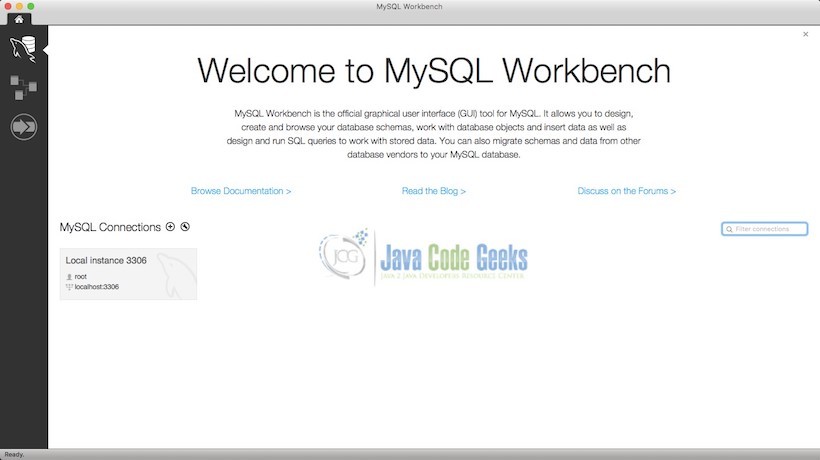
It displays a local connection by default. These connections can be edited at any point of time. It is also possible to add and manage multiple connections at the same time. The localhost server can be connected only if the local MySQL server has been installed. To connect to the running localhost server, simply click the instance label shown using the rectangular box.
3.1 Adding and Configuring connections
In order to add new connections, click the + symbol shown beside the MySQL Connections Label. A small window as shown below opens up.

In the window, there are certain mandatory values to be filled in. They are listed below:
- Connection Name
- Connection Method
- Hostname
- Port
- Username
- Password (You can choose to store it or enter each time)
The Connection Name parameter is usually for an alias that will be used to identify the connection. The Connection Method will remain Standard TCP/IP method generally. In the hostname, you need to provide the IP address of a remote MySQL server or localhost in case of a local server. The port is 3306 by default as it is configured by MySQL server as default port. Username and password are the credentials for the connection.
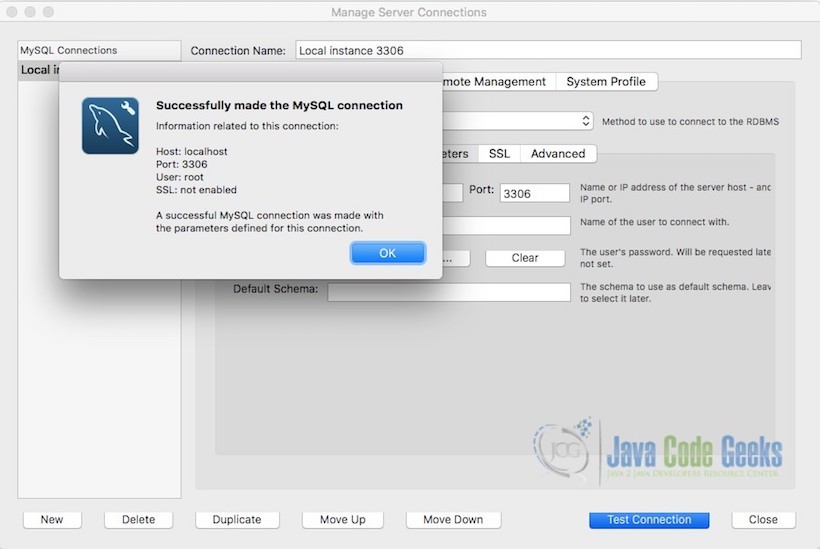
Once the credentials have been added, it is possible to test the connection before saving the details. In order to test the connection, click the Test Connection button in the above windows. If a warning related to incompatibility shows up, click Yes to continue. If the connection is successful, a response as shown below should be visible.
3.2 Connecting to the database for the first time
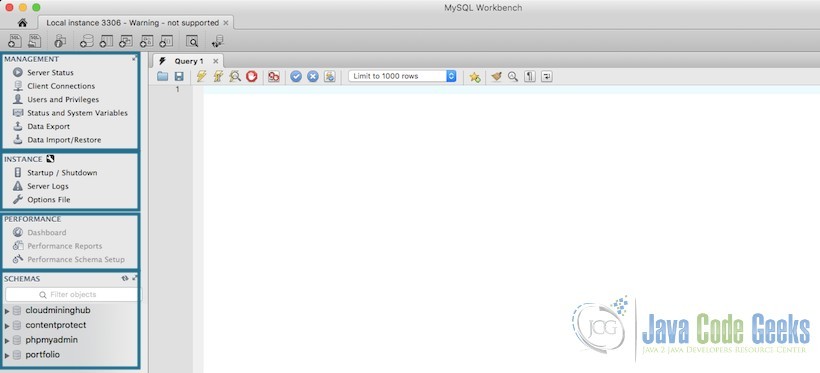
Once a connection is successful, you could open up the respective database. To save the configuration just click Close/Save and double click the connection to open the database. A screen as shown below will be displayed as long as the server is up and running. As it can be seen, there are various sections on the left side panel of the window namely:
- Management
- Instance
- Performance
- Schemas
Each section is detailed below.
The first section shown above is the Management section. The management section allows you to manage and monitor the server health. It allows to view the number of clients connected to the database, views the memory and space it uses, view the status of certain features being used and numerous other administration parameters. The management section also provides us with two important features for a database. The data import and export features. These features will be explored in detail further.
The second section is the Instance section. The instance section makes it possible to start or stop the server at any point of time. However, this requires the MySQL server to be installed at the default location as MySQL Workbench tries to locate the configuration file as well as server related scripts at the default location.
The next section is the Performance section which provides excellent performance analysis and reports. However, this feature is limited to MySQL Server version 5.6.6 or higher. Hence, to use this feature, ensure that the database server is of a higher release.
The final section visible in the image above is the main section for a normal developer. The Schemas section contains a list of schemas that have been created in the database. In MySQL database, a schema is a sort of directory created in the database to store various tables and records. The next section covers the process of creating and managing schemas and tables in the MySQL Workbench.
4. Create and managing database schema and tables
From the perspective of a developer, create and managing schema and tables is the most important thing to do in a database tool. Hence, we will cover this process in detail before proceeding to features that are specific to Database administrators or Database developers. Almost every database operation can be done in three ways using MySQL Workbench.
- Use the GUI to execute the command
- Write and execute an SQL query in the SQL window
- Open up the SQL command line and execute the queries using the SQL Console.
Herein, we will begin using the first two ways to create the schema.
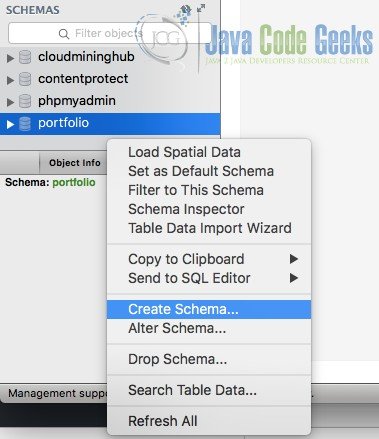
4.1 Creating a Schema
To create a schema using GUI, right click on any of the existing schemas or on the blank schema window. In the pop out menu that opens up, select Create Schema as shown below.
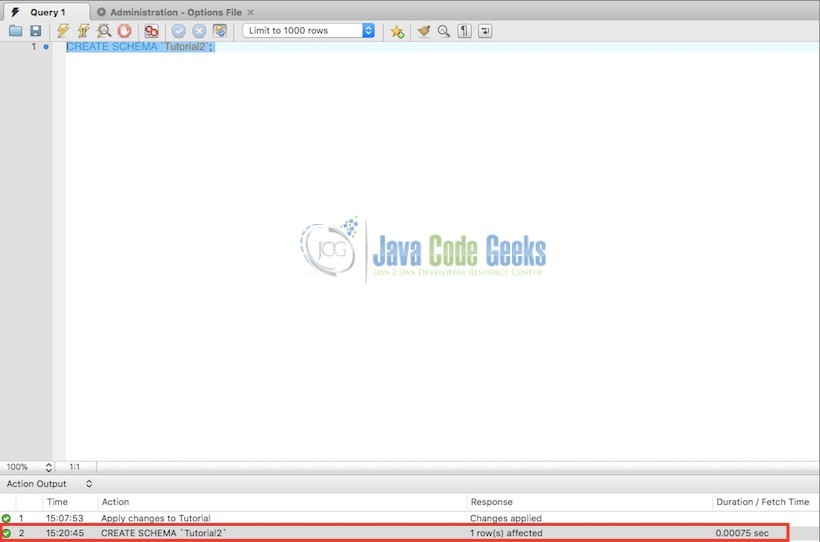
In the new schema tab that opens up, Enter the Schema name and Default collation. The collation attribute is a database specific term. In case you are not aware of it, you could leave it blank. Select Apply once you have entered the values. This will open up a review screen display the SQL as shown under. For every GUI based database operation, MySQL workbench provides the SQL query before applying the changes. This allows you to understand the syntax used for the action.
CREATE SCHEMA `Tutorial` ;
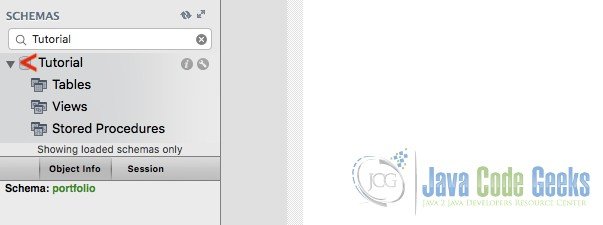
Now, on click of Apply, the schema is created and visible in the Schema Window. Close the New Schema tab now.
In order to do the same operation using MySQL query, go to the tab Query 1 that opened up by default and type the above query. The query window has numerous symbols in it which will be covered further in the article. For now, after typing the query, use Ctrl/Cmd+Enter to execute the query. The output of the query execution can be seen in the Action output window as shown below.
4.2 Dropping a Schema
Now that we created an extra schema which is of no use currently, we can choose to drop the schema in the same manner. Right click the schema from the Schemas section on the left side panel. Select Drop Schema. Just like Create Schema showed the corresponding SQL, Drop Schema also shows the corresponding SQL. You could apply it to drop the schema.
In the same way, the schema could also be dropped by mere execution of the corresponding SQL.
4.3 Creating a table using GUI
Once the schema is created, one can start creating the tables within the schema. In order to create a table in schema, right click on the small arrow beside the schema name to expand the node. It shows various groups like tables, views, stored procedures and functions. Right click on the tables group and select create table.
On selecting the option, a tab opens up to allow creation of table. Enter the table name as desired. In the tabular section below, you can enter the column names as desired. Sample data for a user details table is shown below.
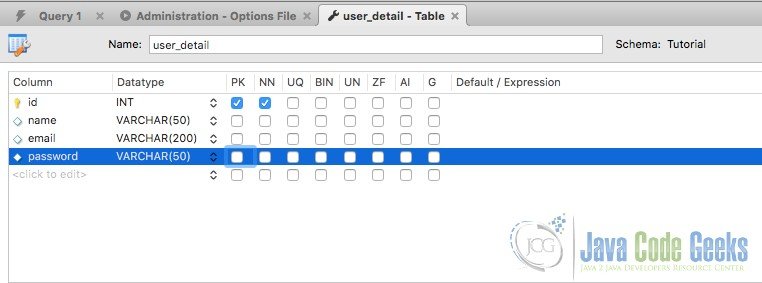
The first and second column above are self-explanatory. The rest of the columns are described below.
PK: Primary Key
NN: Not null
UQ: Unique data
BIN: Contains binary data
UN: Contains unsigned data
ZF: Stands for Zero-filled columns
AI: Auto Increment the field value
G: Generated column. The value is generated using a formula for the column
Select the relevant checkboxes to create the table. This is not the end of options. As it can be seen in the create table tab, there are numerous sub tabs available to configure various others parameters. They will be discussed further. Click apply to create the table. You will notice that just like Create Schema showed up the relevant SQL script, a create table DDL shows up in a pop out window. You could make any changes if required in the script and click Apply.
You might notice that the table group in the Schema tree displays a small arrow indicating that there are tables to be seen. You could find the table in the Tables group by expanding the node.
4.4 Configuring Foreign keys, Triggers and other parameters for the table
As discussed in the above section, create table GUI is not limited to column names, datatypes and column specific options. MySQL Workbench provides a detailed UI to configure every option related to the table.
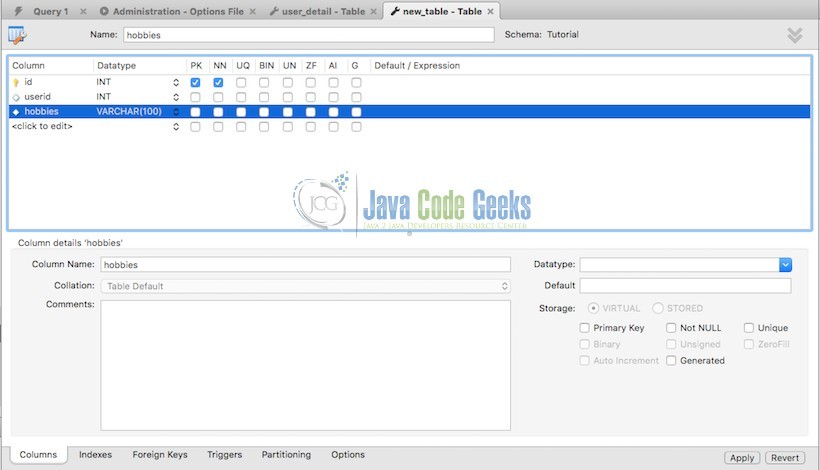
As it can be seen in the image above, there are 6 sub tabs in the create table window which allows to configure almost every possible option in the table creation process and generate a SQL script based on the options. In the above image, a table has been created with a user id column that is expected to reference the id column of the table previously created. In this section, we will go discuss each tab in brief.
Indexes tab is used to create index on specific columns in addition to the primary key. You can explore the options by clicking the Indexes tab. The available options are self-explanatory as long as the user has sufficient knowledge about MySQL Database. As of now, this table does not need any more indexes to be created. Hence, we would skip to the next tab.
The Foreign keys tab allows to assign foreign key constraints to the table columns. The tab shows the UI as shown below.
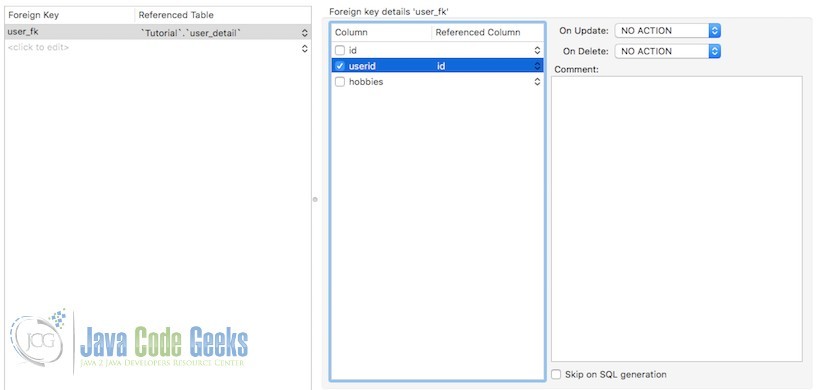
The left panel allows to give an alias to identify the foreign keys and allows to select the table to be referenced. The panel in between allows to decide the columns to be linked for the foreign key constraint. The right hand side panel allows you to configure the action to be taken on update and delete of a referenced row and provide some comment for the foreign key if necessary.
The next tab triggers is quite important when the developer is developing a large scale system. However, triggers are mostly created and developed by the Database administrators. In order to use this tab, one needs to create triggers using the Trigger GUI. Once created, they can be bound to a condition like Before Update, After update or others as needed.
The rest of the two tabs are for advanced users who need to manage the partitioning of the database and configure other encryption and protection options for the table.
4.5 Alter & Drop Table and Schema
Now that the tables are created, there might be a needed to change the columns or datatypes of the tables. Just like creation of table, this is also possible using the GUI. In order to alter the table, just hover over the table name in the schemas section. You would be able to see three icons –
Info – The first icon is to get the information about the tables.
Settings – Opens up the create table window to allow you to alter the table
Select Rows – The third icon executes a select query on the table to fetch all the rows of the table
To alter the schema, click the second icon and make the necessary changes in the window that opens up. Alter the parameters or table name as required and click apply. It will automatically generate the alter script as needed for the changes.
In order to drop the table or schema, all you need to do is right click on the respective objects and select drop table or drop schema respectively. It will display a drop table or drop schema SQL script and on click of apply, it does the operation.
5. Creating a model in MySQL Workbench
Now that we’ve had a gist of simple database creation in MySQL workbench, its time to use MySQL workbench for a greater purpose. The major reason for mySQL workbench being a popular tool among the database developers and administrators is that it provides immense power to make database creation easy with multiple tools like EER design tool, Model design tool, GUI for schema, table, trigger and procedures management, utilities for performance monitoring, utilities for server management and facilities for data export, import as well as migration. This section discusses one of these important features – Model creation.
Model creation is an alternate way to create schema and tables. Hence, we would shorten the process of table creation herein. However, we would cover the creation of EER diagram from the same.
5.1 Creating a Schema using Workbench model interface
A model is replica of a schema except for it being displayed visually as an EER diagram. In order to start with creation of a new model, navigate to File->New Model. It opens up a New model tab. In the tab, there are several icons on the top. The first three icons in the image shown below are related to File operations like create a new document, open an existing model and save a model. These icons are followed by undo and redo icons. The next group of icons are necessary here.
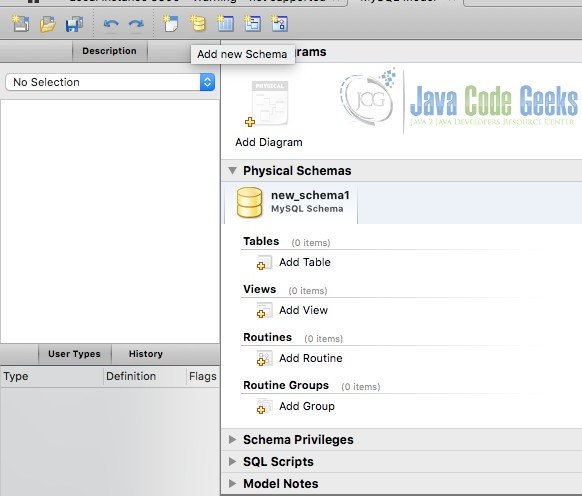
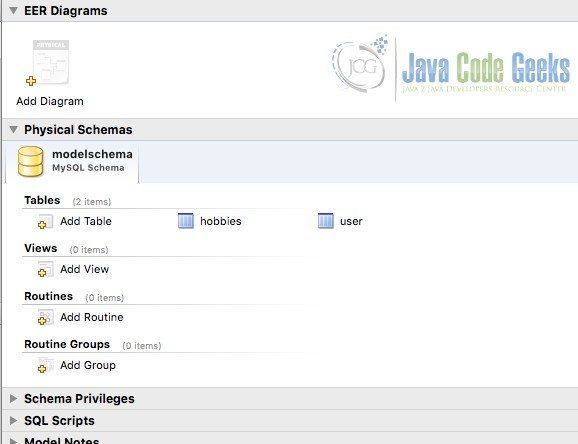
To start with, click the second icon in the group – Create a new schema. It should create a new schema as shown above. A tab opens up below it and allows to configure the schema name. Next, proceed with creation of tables by clicking Add Table in the image shown above. The table creation process is similar to the above section once the Add Table link is clicked.
Once there are two-three tables in the schema, one could proceed with the creation of EER diagram. In the below diagram, there are two tables created similar to the previous section. Click Add Diagram in the EER diagram section of the tab to create an EER diagram for the current schema.
A new tab opens up with a blank EER diagram sheet. On the left hand panel, there is a Catalog section marked with a red rectangle below.
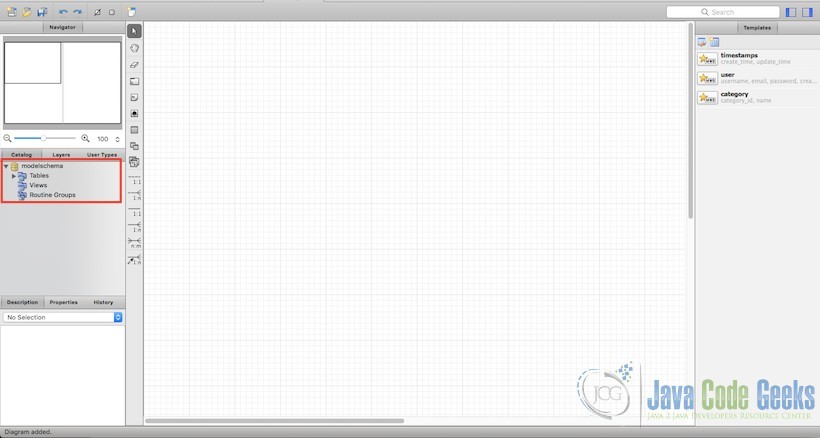
In order to create an EER diagram, simply expand the tables node and drag and drop the tables onto the sheet. On dragging the previously created tables onto the sheet, it automatically draws a line referencing the foreign link between the tables. It can be seen below.

It is also possible to create tables right away from the UI. The buttons marked with red rectangle allows you to easily add new tables in the sheet and opens up a create table UI in below the sheet. You could notice that as you add columns and foreign key constraints, they get added automatically in the EER diagram above. Thus, the EER diagram could be created using a drag and drop interface quite easily.
6. Data export & import
This is an important feature for every database. MySQL workbench makes it quite easy to export as well as import complete database using the GUI. MySQL Workbench provides a GUI that allows complete custom selection starting from the selection of schema to the selection of tables too.
6.1 Data Export
In order to export the data, navigate to Server -> Data export. It opens up a tab as shown under.
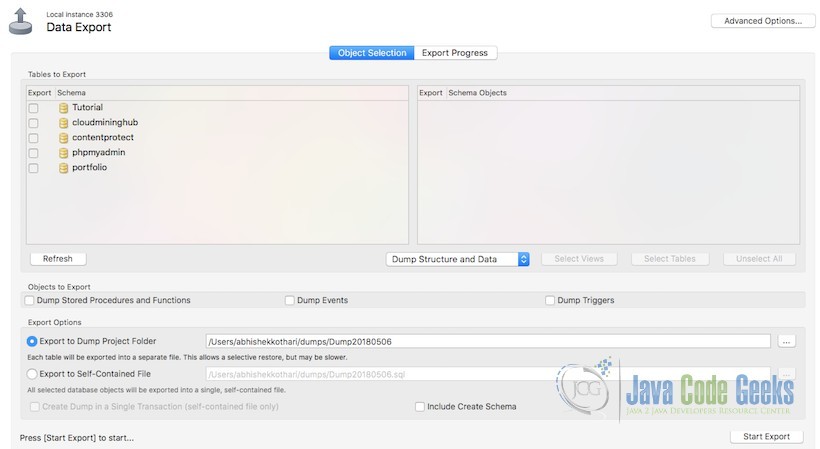
Whenever there are multiple schemas present, it allows selection of the schema. As you select the schema to be migrated, the right hand panel shows the corresponding tables. It also allows you to select the tables to be migrated. In the lower panel, you could find the options to migrate stored procedures, events as well as triggers. Additional export options allow you to select whether the objects should be exported as separate files or a single self-contained file. A dump to project folder generates separate file for every object selected to export.
For understanding the import process, just select Export to Self-Contained file for now after selecting the schema that you created in above steps. Now, drop the schema that was created previously. In case of object mismatch, it would display a warning. However, it is completely safe to process unless you have used something specific to the previous version. Enter the password when prompted. The file will be saved in the destination folder.
6.2 Data Import
In order to import the data into MySQL Database, open up the Data import UI by navigating to Server -> Data Import. In the UI that opens up, select the self-contained file option and browse for the stored dump file. In case you plan to import the tables to a different schema, select the schema and click import. It will import the complete table structure into the selected or new schema.
7. Reverse Engineering
It often happens that the code developer directly starts creation of tables instead of following the process of creating an EER first and then progressing with the tables. In such a case, when the count of tables increase, it is difficult to create an ER diagram from scratch. MySQL Workbench solves this trouble for you. With the Workbench Reverse Engineering feature, MySQL workbench allows you to create an EER diagram from any existing schema at any point of time. This is not the end of it. It also allows to create an EER of any other remote databases that one might have access to.

To create an EER diagram, simply navigate to Database-> Reverse engineer. It opens up a window asking for selecting the database connection to be used for reverse engineering. After selecting the connection, click continue. It connects to the database and validates the connection. Later, it fetches the available list of objects from the database. The next screen displays the success of these steps as shown under.

The next step allows you to select the schemas for which the EER needs to be generated. It is possible to generate combined EER diagram for multiple schemas too. Once the schemas are selected, Workbench retrieves the list of objects for the selected schemas and in the next step processes the EER diagram. One can also choose to select objects for the EER diagram to display.
The final output window displays the tables in the EER diagram format. One can drag and arrange the tables for a large database and cover them in a limited area of sheet too. The next is to save the diagram as an image to put it into a document. In order to save the diagram, navigate to File -> Export. Select the option as per your need and save the diagram.
8. Conclusion
The article elaborately captured all the important operations that could be done using MySQL workbench. The major operations like creation of schema, tables and EER diagram has been covered. In addition to that, we also covered the process of exporting and importing the data. However, this is not all that Workbench has. There is always more to explore. To learn more, you can explore the MySQL Workbench manual available on its site.
