1. Introduction
In this lesson, we will study about Gradle, which is a build tool and a dependency management system very similar to Maven and Ant and designed specifically for building Java-based projects.
Unlike Maven and Ant build systems, Gradle doesn’t use XML. It is actually built in DSL based on Groovy. The biggest advantage Groovy-based Gradle scripts provided was to make much smaller and concise build scripts as compared to other build systems which were based on XML. Just like a Maven build file is called pom.xml, Gradle’s configuration file is called build.gradle by convention. In this lesson, we will study about core Gradle concepts and also set up a simple project based on Spring Boot. Even if you’re not a Spring Developer, you can still follow along as the lesson is defined in such a way that a framework doesn’t introduce any hindrance in your learning the Gradle concepts. Let’s start the action!
Table Of Contents
2. Gradle Core Concepts
The core concepts behind Gradle build system can be listed down to three main features. They are:
- Projects: A software which you want to build
- Tasks: These are actions which actually build the project
- Build-scripts: This is the script which contains Tasks which build the project
To understand the relationship between each of them, let’s study them together. So, a project is something you want to build. The tasks are the actions which build the project. To be specific, there can be tasks to compile the source code, making an executable file like a WAR or a JAR file. A Gradle-based project can contain any number of tasks to execute in order to build the project.
The tasks are defined inside a build script file which can be executed by Gradle to run each task in a specified order. It is even possible to pick a particular task with the gradle command to run only the specified task. These tasks are defined in the build.script file which is present in the root directory of the project. Usually, we only have a single build file for a project.
3. Installing Gradle
Before we can start playing with Gradle commands and start defining Gradle tasks, we must install Gradle on our system. Please note that the Gradle needs JDK 6 or above to be run. Gradle will use the Java JDK which it finds on your system’s PATH environment as JAVA_HOME. If you want a Java version apart from what you actually use, just make the JAVA_HOME environment variable points to that version of Java and Gradle will start using it. You can make sure that Java is installed on your system with this simple command:
Check Java version
java -version
You should see something like this:

Once the Java version is confirmed, download the version of Gradle you want to install, and unzip it into the directory you want Gradle installed in. When Gradle is extracted into the install directory, add the DIRECTCRY_PATH/bin to the PATH environment variable. The DIRECTCRY_PATH part of the added path must be the full path to the Gradle install directory (and not “DIRECTCRY_PATH” as text). Once this is done, we can check the Gradle version the same way we did for Java, with the following command:
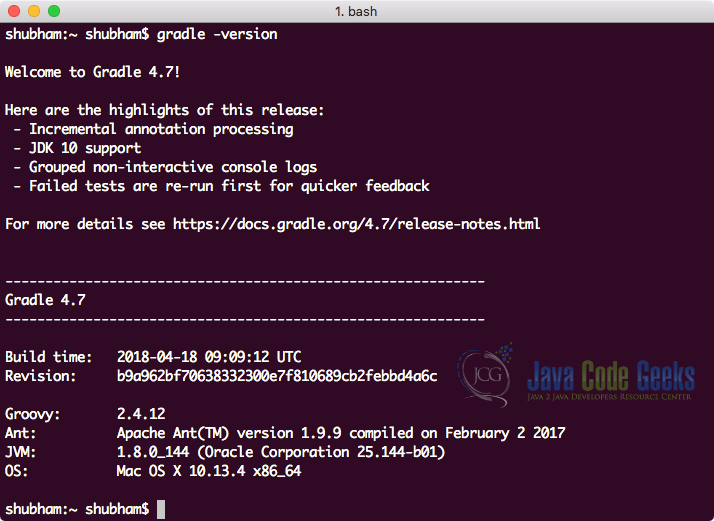
Check Gradle version
gradle -version
You should see something like this:
Even though we have already installed Gradle, you can follow along with the lesson even if you do not install Gradle and make a sample project as we describe in our next section. The gradle build script will be self-contained in that project and won’t need an explicit installation of Gradle on the system itself. Isn’t that excellent?!
4. Setting up a Sample Project
We will be using one of the most popular web tool to make a sample project in this lesson and won’t do it from the command line, we will make use of Spring Initializr. Just open the link in your browser and explore around. To setup our project, we used the following configuration:

We added a single dependency as shown and it doesn’t really matter. Unzip the project and open build.gradle file present in the root directory of the project in any text editor you like. For this project, the file will look like:
build.gradle
buildscript {
	ext {
		springBootVersion = '2.0.1.RELEASE'
	}
	repositories {
		mavenCentral()
	}
	dependencies {
		classpath("org.springframework.boot:spring-boot-gradle-plugin:${springBootVersion}")
	}
}

apply plugin: 'java'
apply plugin: 'eclipse'
apply plugin: 'org.springframework.boot'
apply plugin: 'io.spring.dependency-management'

group = 'com.javacodegeeks.example'
version = '0.0.1-SNAPSHOT'
sourceCompatibility = 1.8

repositories {
	mavenCentral()
}

dependencies {
	compile('org.springframework.boot:spring-boot-starter-web')
	testCompile('org.springframework.boot:spring-boot-starter-test')
}
In the script file above, we see that some plugins were specified in the file. The first plugin we made use of is the Java plugin. This plugin provides some predefined configurations and tasks that enable us to build a java project very easily. It makes use of Maven-like source sets to find the source code in the specified project.
A Source-Set is defined as a configuration that informs the plugin of where to look for the source code for compiling and testing tasks. By default, the Java source code is found under src/main/java and the test packages can be found under src/test/java. The same directories will be searched for the source code unless stated otherwise.
Apart from the plugin, we also added some dependencies to our project as well. Gradle knows where to look for these dependencies from the repositories section we defined. We specified that for any dependency resolution, Gradle should refer to the Maven central repository to download any needed JARs it needs to run the project.
5. Running Gradle
Open a command-line terminal and change to the root directory of the project. As this project is Gradle based and we have install Gradle on our system as well, we can run Gradle now. Let’s look at how this can be done:
Running Gradle
gradle
This will run Gradle on the build.gradle file present in the root directory of the project.
5.1 Running a Task
The Gradle build script contains one or more tasks which we can execute. We can execute a task on the project by simply putting the task name after the gradle command:
Running single tasks
gradle compileCode
The above command will trigger the mentioned task to compile the code for the project. As we mentioned earlier, Gradle will be able to find the source code of the project due to the presence of the apporpriate java plugin in the build file.
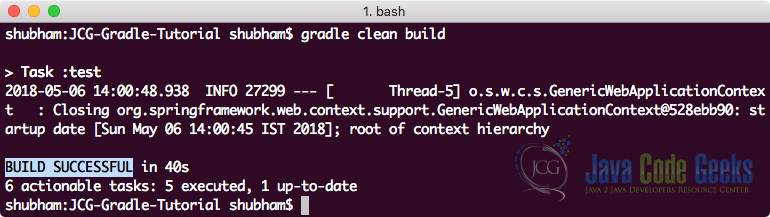
5.2 Running Multiple Tasks
Just like we executed a single task in the previous section by putting the task name after the gradle command, we can even execute multiple tasks at a single go to execute them in the specified order. Let’s look at how this can be done:
Running Multiple tasks
gradle clean build
This command will first execute the clean task. Once that task is completed, the install task will be automatically triggered. Once we run this command, we will see something like:
Just to make a point, even if you mention the same task multiple times, the task will be executed only one time. Like in following command:
Running Multiple tasks
gradle clean clean
Even if the clean task is mentioned more than once, it will only be executed once and not twice.
5.3 Task Name Abbreviation
It is not necessary that you type the complete task name to execute it. Like, for the clean task, we can write:
Task Abbreviation
gradle c
If there are no conflicts in name with other tasks, gradle will find the clean task and execute it. When we ran this, it failed as more than one tasks started with the character c:
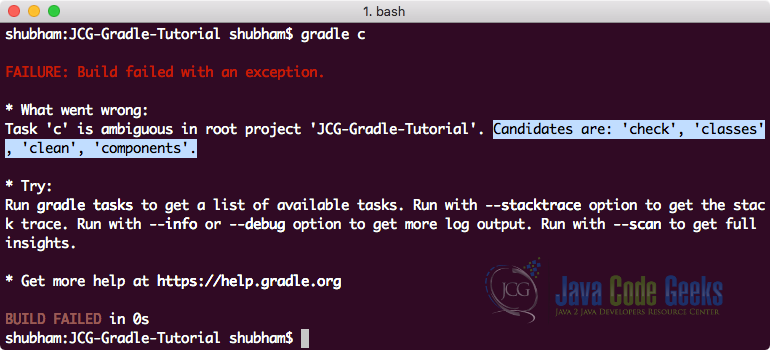
The error clearly states that the possible candidates are: ‘check’, ‘classes’, ‘clean’, ‘components’. So, we need to be more specific in this case. The following command will work fine though:
Task Abbreviation
gradle cle
This will execute the clean task. This way, Gradle provides a way to be friendly to developers even by providing esy conventions and command-line utilities and we don’t have to do anything manually shorten our commands.
5.4 Excluding Tasks
There are Gradle tasks which depend on other tasks as well. So, when you execute a primary task, it will trigger execution of all the tasks it depends on. Although this creates no issue but this slows down the build process. Consider a case when you want to execute the build task. It will trigger test and testClasses tasks as well but you know that test task will succeed as you just tested all the test cases, so you might want to ignore it to speed up the process. This can be done with the -x switch as shown:
Ignoring Tasks
gradle build -x test
5.5 Quiet Mode
Gradle, when executing a task, prints a lot of messages to the console. If you want a little and quiet task execution, we can use the -q switch as shown to quietly execute the task with no console messages:
Quiet Mode
gradle -q compileCode
Quiet mode is useful when you write scripts to deploy your project using automated build and deployment files or code pipelines. This way, the log files are not populated with unnecessary log messages produced during gradle task execution.
5.6 Listing Tasks in Build Script
When we want to list all tasks which are presented in a build script, we can simply run the following command:
List all tasks
gradle tasks
For our project, we will see that we have a lot of tasks defined already:

We see information related to each task. This provides a handy way where we get information to each task that was pre-defined into the plugins we defined in the script.
5.7 Explicitly Specifying Build Script
Even though Gradle automatically picks the default build.gradle file in the root directory of the project, if you want to name the file otherwise, it is possible to provide a name to the gradle name for the file you want it to pick as configuration file with the help of -b switch:
pom.xml
gradle -b build.gradle build
5.8 Specifying Project
If the project you’re building contains a subproject you want to build in a standalone mode, you can even specify the project to be executed with the -p option:
Execute Subprojects
gradle -p subproject-directory build
5.9 Listing Subprojects
We can list all subprojects contained in our main project (as specified inside the Gradle build script for the project) with a simple command:
Listing Subprojects
gradle projects
This command comes handy when you’re looking at public projects and want to identify what all subprojects are included in the project.
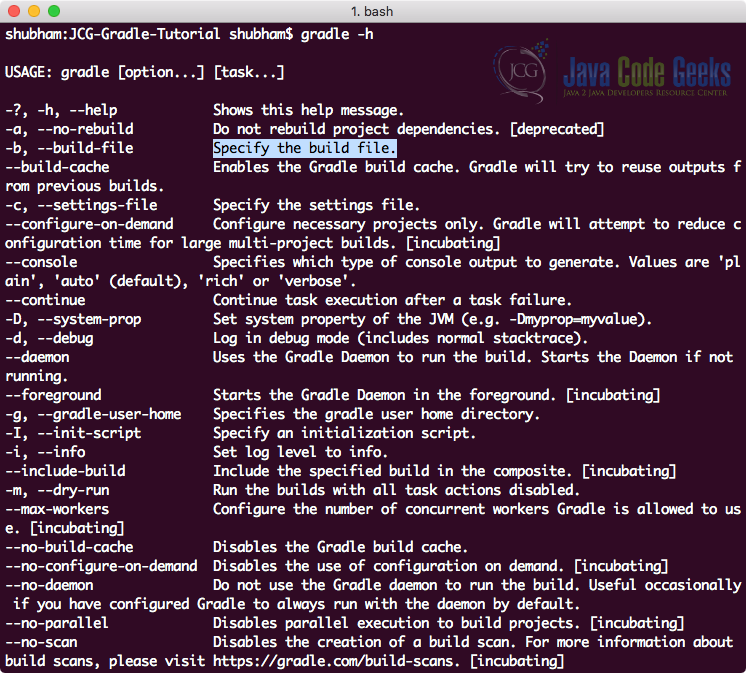
5.10 Gradle Help
If you need help related to any gradle command and tasks, we can run a simple command to obtain information about various tasks and commands we can execute:
pom.xml
gradle -h
We will present the detailed list of options we have for Gradle command:
6. Defining and Using Gradle Tasks
Gradle tasks define the actions needed to build a project. Without tasks, our build script will not build anything when Gradle executes it. Now, we will see how we can make our own tasks in the project we already defined above.
6.1 Defining Gradle Tasks
Let’s define a new Gradle Task in the build.gradle file as shown:
build.gradle
task hello {
    println "Hello, JavaCodeGeeks."
}
We can execute the task we defined as:
Running our task
gradle hello
We will see the output as:

6.2 Task Execution Phases
When a Gradle task is executed, it passes through two execution phases before the result is evaluated. These phases are:
- first
- last
Internally, a Gradle task is represented as an Object. To start the execution of the first phase, we must call one of the defined methods, passing a closure as a parameter (a closure is an anonymous function). The respective build phase methods are:
- doFirst()
- doLast()
Let’s look at an example on how to call these two methods in a task:
Call Phase methods
task hello

hello.doFirst({
	println "First method"
});

hello.doLast({
	println "Last method"
});
When we execute these methods using the command:
Running our task
gradle hello
We will see the output as:
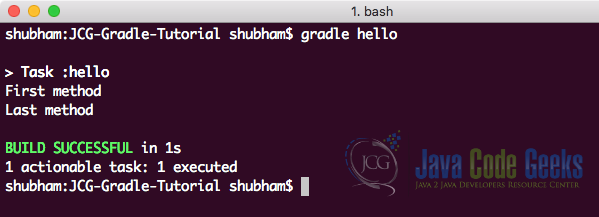
As we saw earlier, we first defined a task called hello. Next, we defined and called the doFirst() method and passed a closure as parameter which contains a print statement. Similarly defined the next method doLast() which essentially do the same thing. When we run the task, we can see these two methods being called in the same order.
6.3 Shorter Syntax for Task definition
With Groovy, possibilities of optimizing a code is much higher than other languages. Same is possible with the phased task definition we wrote in the previous section. Here are the improvements we can perform on the code we defined:
- No need of semi-colon at the end of each method definition, if the code line with the method calls ends with a new line.
- As the closure are anonymous functions, we do not need the parentheses around the statements which are present in a closure.
With these optimizations, our code will look like:
Call Phase methods
task hello

hello.doFirst{
	println "First method"
}

hello.doLast{
	println "Last method"
}
The output for this execution phase will, of course, remain the same as earlier. You will most often see the shorter syntax in the official Gradle documentation and in other Gradle tutorials as well because it is much more direct and concise.
7. Always running Gradle in Quiet Mode
Running Gradle in Quiet mode is not possible currently after the build has started. We can find the current value but it’s read-only by the time we can execute any code.
The LogLevel can be accessed via the gradle object in scripts by it’s startParamater:
Get Gradle Log level
LogLevel level = gradle.startParameter.logLevel
println "Current logging level: $level"
If we want to have logging that isn’t always sent to the console then we could use Gradle’s built-in logger:
Print on INFO only
project.logger.info("This gets printed only if caller uses --info flag on command line.")
Then for our events, we want the console logger to use the lifecycle level:
Message always printed
project.logger.lifecycle('my message that will always print')
8. Extending Java Spring Boot Project
In this section, we will add minor Java code in the project we set up and see how we can run it using the build script and the Gradle wrapper that came with the project itself. If you open the project in your favourite IDE, you will see that it only contains a single class with following code:
JcgGradleTutorialApplication.java
package com.javacodegeeks.example.JCGGradleTutorial;

import org.springframework.boot.SpringApplication;
import org.springframework.boot.autoconfigure.SpringBootApplication;

@SpringBootApplication
public class JcgGradleTutorialApplication {

	public static void main(String[] args) {
		SpringApplication.run(JcgGradleTutorialApplication.class, args);
	}
}
We will be modifying this class in the next section to make it a full-fledged Spring Boot project.
8.1 Defining a Controller
We will be making minor modifications in the class we defined above to turn it into a full-fledged Spring Boot controller class so that we define APIs into it as well. Here is the code we will use:
JcgGradleTutorialApplication.java
package com.javacodegeeks.example.JCGGradleTutorial;

import org.springframework.boot.SpringApplication;
import org.springframework.boot.autoconfigure.SpringBootApplication;
import org.springframework.web.bind.annotation.RequestMapping;
import org.springframework.web.bind.annotation.RestController;

@SpringBootApplication
@RestController
public class JcgGradleTutorialApplication {

  public static void main(String[] args) {
    SpringApplication.run(JcgGradleTutorialApplication.class, args);
  }

  @RequestMapping(value = "")
  public String helloWorld() {
    return "Hello Java Geek!";
  }
}
Now that the Controller is ready, we can move on to run the project. Also, for a deeper understanding of how Sprint Boot project and Controllers work, read the Spring Boot Tutorial.
8.2 Running the Project with Gradle
The project we downloaded comes with a Gradle wrapper. This wrapper contains Gradle scripts which can be used to run the project even if Gradle is not installed in the system we are running the project on. We can run the project using the following command:
Running the project
./gradlew spring-boot:run
Just note that before we run the project, remove the task we defined as it can alter other tasks and you might not be able to run the project. Once this is done, we can try the API we just made in the next section.
8.3 Trying the APIs
Once the project is up and running, visit the following URL:
Project URL
localhost:8080
We will see the message:

Excellent! With a single command, we were able to run the complete Spring boot project we defined with few lines of code.
9. Gradle Wrapper
For the easy execution of projects, Gradle also provides a wrapper so that we don’t have to install Gradle on every machine where we install and run projects which are built on top of Gradle build system. Just like the project we defined above, it contains some files which are Gradle wrappers for various Operating Systems like:
- gradlew is the shell script file that executes the Gradle tasks
- gradlew.bat file is the Windows batch script that executes the Gradle tasks
- ./gradle is a directory which contains a Gradle wrapper JAR and a properties file indicating the version we are using and other configurations. This explicit definition of version makes sure that any updates to Gradle don’t break this project
To run the project using the Gradle wrapper file, just run the gradlew file if you are using Linux/OSX or the gradlew.bat file if you are using windows OS. Another advantageGradle wrapper provides is that if we want to switch to a newer version of Gradle, we only need to change an entry in gradle-wrapper.properties.
10. Ant vs Maven vs Gradle
The three most popular build systems which are used across the industry are Ant, Maven and Gradle. When it comes to comparing these systems, each one stands with its own pros and cons. Let’s run a quick check with each of these systems to see where there power lies.
Ant was released in the year 2000 and was easy to learn and implement. It followed the XML script format and was having a clear drawback was that the XML is hierarchical in nature which was not considered a good fit for procedural programming approach. Also, an XML file with Ant tends to grow big even with a relatively smaller project.
Maven arrived in 2004 with huge improvements over ANT but it continued usng the XML format for its scripts. The biggest advantage added was a capability to download the required dependencies over a network. The community felt that customaization of goal targets was still difficult and dependency management doesn’t handle conflicts well when the same library was downloaded multiple times with different versions.
Gradle was released in 2012 and it gained a lot of traction when Google adopted it as the default build tool for the Android OS. Gradle does not use XML. Instead, it had its own DSL based on Groovy (one of JVM languages). As a result, Gradle build scripts tend to be much shorter and clearer than those written for Ant or Maven. Due to the presence of its own dependency resolution engine and huge improvements over the years, its builds are becoming comparitively faster than Maven and Ant.
11. Conclusion
In this lesson, we studied about how Gradle is one of the most popular and easy-to-use build system and dependency management system used for Java projects. The ease Gradle provides comes with the idea that it was defined specifically for domain related projects only and that is why it provides us with the power to define build scripts which are small in size and can perform so many operations with very few lines of Groovy code inside it.
We also compared Gradle with other build systems which Gradle challenges, which are Maven and Ant. Each of the mentioned build systems has their own pros and cons but the concise nature of Gradle scripts is what can take it a long way to production-grade systems.
12. Download the Source Code
This was an example of Gradle and Task definitions.
You can download the full source code of this example here: JCG-Gradle-Tutorial
