This project explores how to apply Machine Learning to IoT. In more details, as IoT platform, we will use Android Things and as Machine Learning engine we will use Google TensorFlow. Nowadays, Machine Learning is with Internet of Things one of the most interesting technological topics. To give a simple definition of the Machine Learning, it is possible to the Wikipedia definition:
Machine learning is a field of computer science that gives computer systems the ability to “learn” (i.e. progressively improve performance on a specific task) with data, without being explicitly programmed.
In other words, after a training step, a system can predict outcomes even if it is not specifically programmed for them. On the other hands, we all know IoT and the concept of connected devices. One of the most promising topics is how to apply Machine Learning to IoT, building expert systems so that it is possible to develop a system that is able to “learn”. Moreover, it uses this knowledge to control and manage physical objects.
There are several fields where applying Machine Learning and IoT produce an important value, just to mention a few interesting field, there are:
- Industrial IoT (IIoT) in the predictive maintenance
- Consumer IoT where the Machine earning can make the device intelligent so that it can adapt to our habits
In this tutorial, we want to explore how to apply Machine Learning to IoT using Android Things and TensorFlow. The basic idea that stands behind this Android Things IoT project is exploring how to build a robot car that is able to recognize some basic shapes (like arrows) and control in this way the robot car directions. We have already covered how to build robot car using Android Things, so I suggest you read the tutorial before starting this project.
This Machine Learning and IoT project covers these main topics:
- How to set up the TensorFlow environment using Docker
- How to train the TensorFlow system
- How to integrate TensorFlow with Android Things
- How to control the robot car using TensorFlow result
This project is derived from Android Things TensorFlow image classifier.
Let us start!
How to create an image classifier in Tensorflow
Before starting it is necessary to install and configure the TensorFlow environment. I’m not a Machine Learning expert, so I need to find something fast and ready to use so that we can build the TensorFlow image classifier. For this reason, we can use Docker to run an image of TensorFlow. Follow these steps:
- Clone the TensorFlow repository:
git clone https://github.com/tensorflow/tensorflow.git
cd /tensorflow
git checkout v1.5.0
- Create a directory (
/tf-data) that will hold all the files that we will use during the project. - Run Docker:
docker run -it \
--volume /tf-data:/tf-data \
--volume /tensorflow:/tensorflow \
--workdir /tensorflow tensorflow/tensorflow:1.5.0 bash
Using this command, we run an interactive TensorFlow environment and we mount some directories that we will use during the project
How to Train TensorFlow
Before the Android Things system is able to recognize images, it is necessary to train the TensorFlow engine so that it can build its model. For this purpose, it is necessary to gather several images. As said before, we want to use arrows to control the Android Things robot car so that we have to collect at least four arrow types:
- up arrow
- down arrow
- left arrow
- right arrow
To train the system is necessary to create a “knowledge base” with these four different image categories. Create in /tf-data a directory called images and under it four sub-directories named:
- up-arrow
- down-arrow
- left-arrow
- right-arrow
Now it is time to look for the images. I have used Google Image search but you can use other approaches too. To simplify the image download process, you should install a Chrome plugin that downloads all the images with only one click. Do not forget more images you download better is the training process, even if the time to create the model could increase.
Open your browser and start looking for the four image categories:
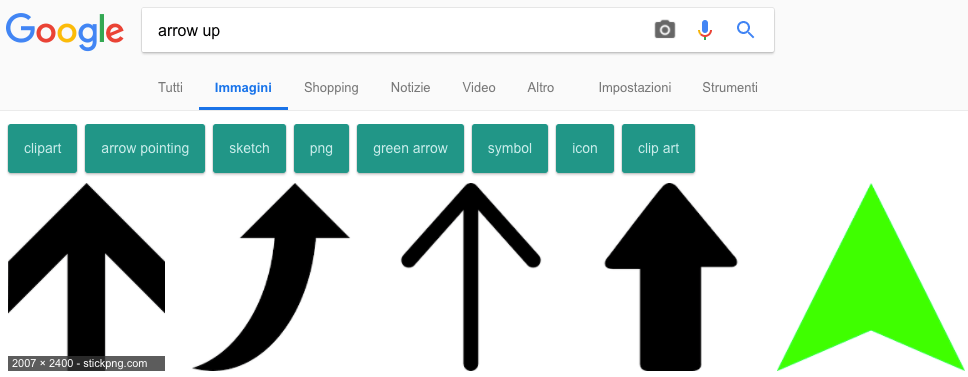
I have downloaded 80 images for each category. Do not care about image extension.
Once all the categories have their images follow these steps (in the Docker interface):
python /tensorflow/examples/image_retraining/retrain.py \
--bottleneck_dir=tf_files/bottlenecks \
--how_many_training_steps=4000 \
--output_graph=/tf-data/retrained_graph.pb \
--output_labels=/tf-data/retrained_labels.txt \
--image_dir=/tf-data/images
It could take some time so be patient. At the end, you should have two files in /tf-data folder:
- retrained_graph.pb
- retrained_labels.txt
The first file contains our model as the result of the TensorFlow training process while the second file contains the labels related to our four image categories.
How to test the Tensorflow model
If you want to test the model to check if everything is working you can use this command:
python scripts.label_image \
--graph=/tf-data/retrained-graph.pb \
--image=/tf-data/images/[category]/[image_name.jpg]
Optimizing the model
Before we can use this TensorFlow model in the Android Things project it is necessary to optimize it:
python /tensorflow/python/tools/optimize_for_inference.py \
--input=/tf-data/retrained_graph.pb \
--output=/tf-data/opt_graph.pb \
--input_names="Mul" \
--output_names="final_result"
That’s all we have our model. We will use this model to apply Machine Learning to IoT or in more details to integrate Android Things with TensorFlow. The goal is applying to the Android Things app the intelligence to recognize arrow images and react consequently controlling the robot car directions.
If you want to have more details about TensorFlow and how to generate the model look at the official documentation and to this tutorial.
How to apply Machine Learning to IoT using Android Things and TensorFlow
Once the TensorFlow data model is ready, we can move to the next step: how to integrate Android Things with TensorFlow. To this purpose, we can split this task into two steps:
- The hardware part, where we connect motors and other peripherals to the Android Things board
- Implementing the app
Android Things Schematics
Before digging into the details about how to connect peripherals, this is the list of components used in this Android Things project:
- Android Things board (Raspberry Pi 3)
- Raspberry Pi Camera
- One LED
- LN298N Dual H Bridge (to control the motors)
- A robot car chassis with two wheels
I do not cover again how to control motors using Android Things because we have already covered in the previous post.
Below the schematics:
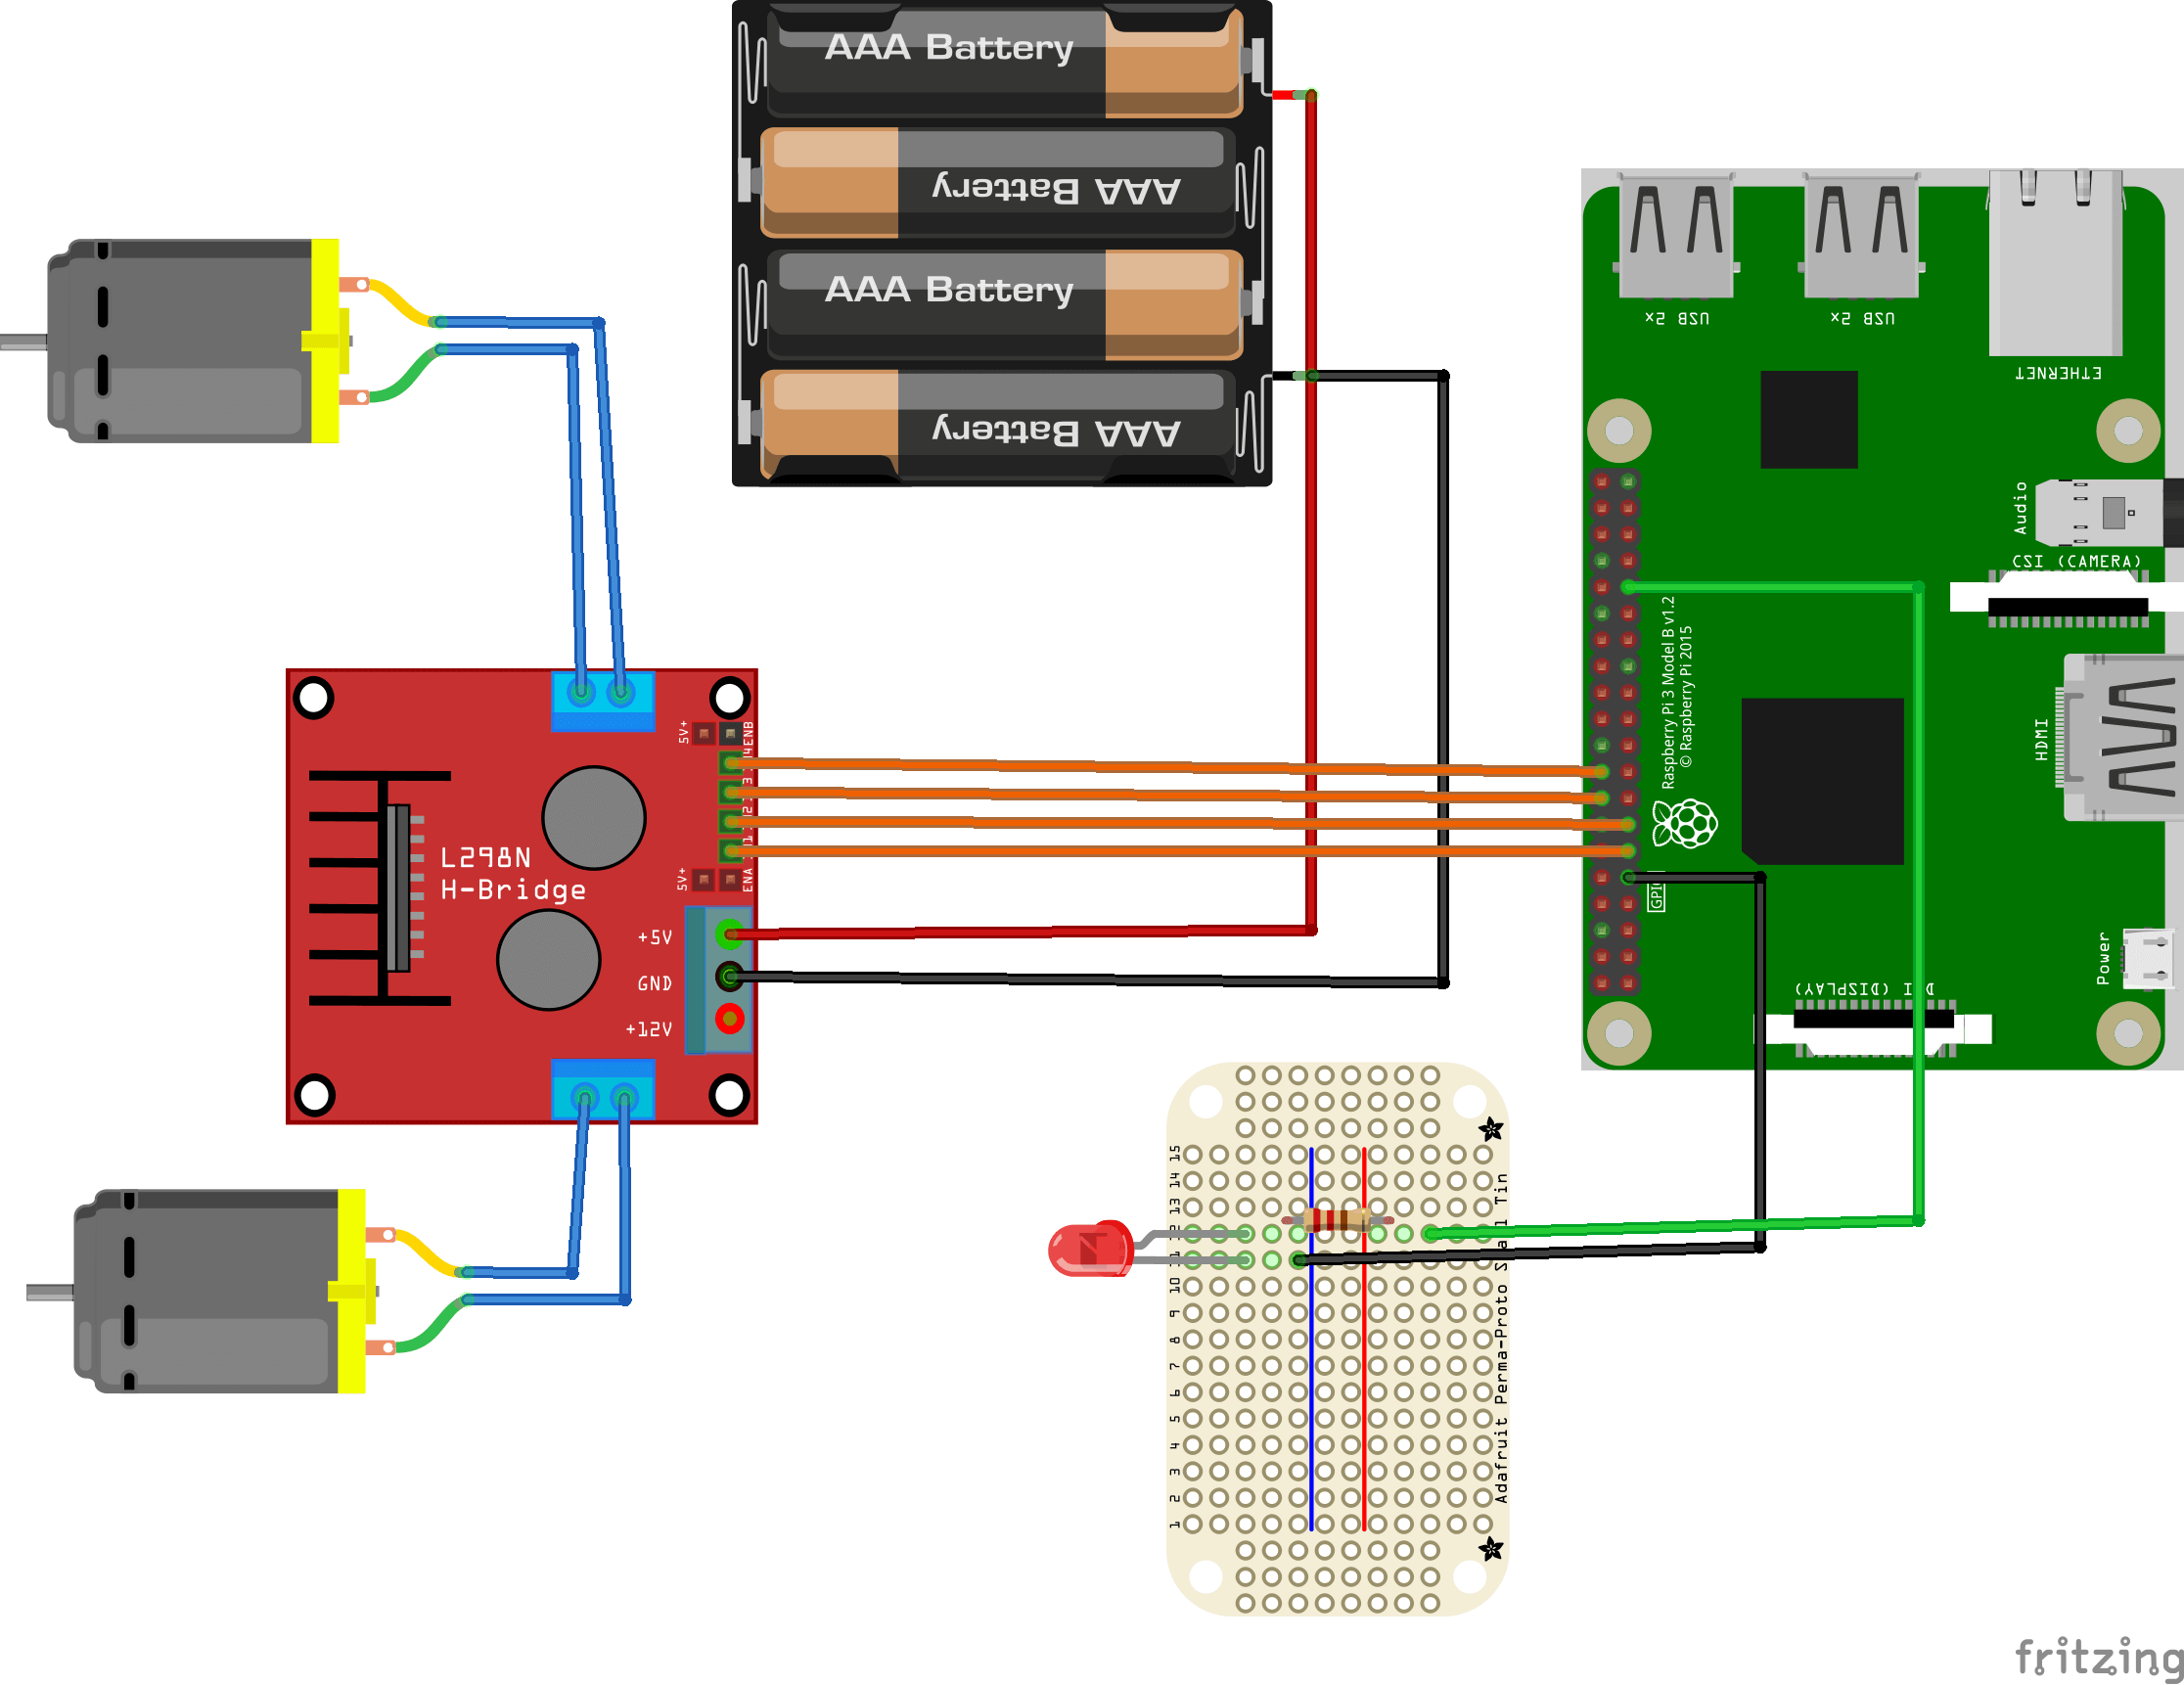
In the picture above, the camera is not shown. The final result is:

Implementing the Android Things app with TensorFlow
The last step is implementing the Android Things app. To this purpose, we can re-use the example available in Github named sample TensorFlow image classifier. Before starting, clone the Github repository so that you can modify the source code.
This Android Things app is different from the original app because:
- it does not use the button to start the camera to capture the image
- It uses a different model
- It uses a blinking led to notify that the camera will take the picture after the LED stops blinking
- It controls the motors when TensorFlow detects an image (arrows). Moreover, it turns on the motors for 5 seconds before starting the loop from step 3
To handle a blinking LED, use the following code:
private Handler blinkingHandler = new Handler();
private Runnable blinkingLED = new Runnable() {
  @Override
  public void run() {
    try {
     // If the motor is running the app does not start the cam
     if (mc.getStatus())
       return ;

     Log.d(TAG, "Blinking..");
     mReadyLED.setValue(!mReadyLED.getValue());
     if (currentValue <= NUM_OF_TIMES) {
       currentValue++;
       blinkingHandler.postDelayed(blinkingLED,
                       BLINKING_INTERVAL_MS);
     }
     else {
      mReadyLED.setValue(false);
      currentValue = 0;
      mBackgroundHandler.post(mBackgroundClickHandler);
     }
   } catch (IOException e) {
     e.printStackTrace();
   }
  }
};
When the LED stops blinking, the app captures the image.
Now it is necessary to focus on how to control the motors according to the image detected. Modify the method:
@Override
public void onImageAvailable(ImageReader reader) {
  final Bitmap bitmap;
   try (Image image = reader.acquireNextImage()) {
     bitmap = mImagePreprocessor.preprocessImage(image);
   }

   final List<Classifier.Recognition> results =
      mTensorFlowClassifier.doRecognize(bitmap);

   Log.d(TAG,
    "Got the following results from Tensorflow: " + results);

   // Check the result
   if (results == null || results.size() == 0) {
     Log.d(TAG, "No command..");
     blinkingHandler.post(blinkingLED);
     return ;
    }

    Classifier.Recognition rec = results.get(0);
    Float confidence = rec.getConfidence();
    Log.d(TAG, "Confidence " + confidence.floatValue());

    if (confidence.floatValue() < 0.55) {
     Log.d(TAG, "Confidence too low..");
     blinkingHandler.post(blinkingLED);
     return ;
    }

    String command = rec.getTitle();
    Log.d(TAG, "Command: " + rec.getTitle());

    if (command.indexOf("down") != -1)
       mc.backward();
    else if (command.indexOf("up") != -1)
       mc.forward();
    else if (command.indexOf("left") != -1)
       mc.turnLeft();
    else if (command.indexOf("right") != -1)
       mc.turnRight();
}
In this method, after the TensorFlow returns the possible labels matching the image captured, the app compares the result with the possible directions and controls the motors consequently.
Finally, it is time to use the model created at the beginning. Copy the opt_graph.pb and the reatrained_labels.txt under the assets folder replacing the existing files.
Open the Helper.java and modify the following lines:
public static final int IMAGE_SIZE = 299;
private static final int IMAGE_MEAN = 128;
private static final float IMAGE_STD = 128;
private static final String LABELS_FILE = "retrained_labels.txt";
public static final String MODEL_FILE = "file:///android_asset/opt_graph.pb";
public static final String INPUT_NAME = "Mul";
public static final String OUTPUT_OPERATION = "output";
public static final String OUTPUT_NAME = "final_result";
Run the app and have fun showing arrows to the camera and check the result. The robot car has to move according to the arrow shown.
Summary
At the end of this tutorial, we have discovered how to apply Machine Learning to IoT using Android Things and TensorFlow. We can control the robot car using images and make it moving according to the image shown.
| Published on Java Code Geeks with permission by Francesco Azzola, partner at our JCG program. See the original article here: How to apply Machine Learning to IoT using Android Things and TensorFlow Opinions expressed by Java Code Geeks contributors are their own. |
