This article describes how to implement an IoT notification system. A notification is a way we can use to send alarms or other kinds of information to users. This post details, step by step, how to build an IoT notification system using a few lines of code and integrating existing cloud platforms. The aim is to send a notification to several devices as Android, iOS or desktop PC. This IoT project uses ESP8266 but you can use other IoT development board to test it as Arduino UNO, MKR1000 other ESP and so on.
This is an interesting project because it is possible to further extend and we can use it in several scenarios where it is necessary to send a notification or an alert:
- Flood alert
- Temperature monitoring
- Air quality alert
- Alarm systems
and so on. They are just a few examples where it is possible to use this IoT notification project.
The idea, that stands at the base of this project, is building a general purpose IoT notification system that you can reuse in other scenarios, without writing too many code lines.
We have covered the notification topic in several other tutorials, for example, we have already described how to send notification using Google Firebase. Moreover, it is possible to use other IoT development boards to implement a notification system.
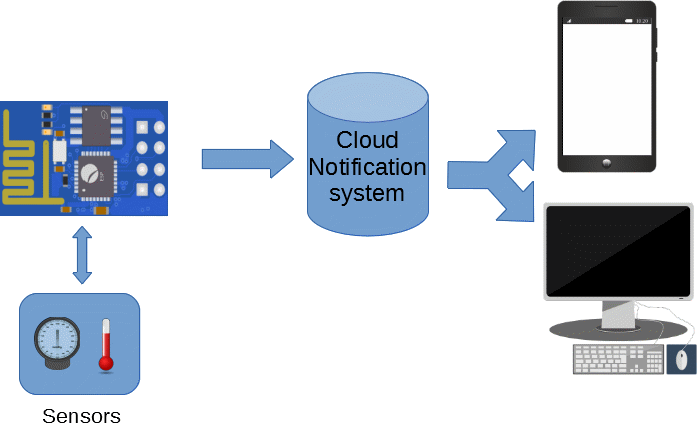
IoT notification project overview
Before diving into the project details, it is useful to have an overview of this project and the components that we will use in this project. To make things simple, the aim is to monitor the temperature and the air pressure and send it periodically using a notification message. The project overview is shown below:
As the sensor, the project uses BMP280 that is an I2C sensor. There is a library to use in order to exchange data with this sensor. You can download it from Github or import it into your IDE.
The cloud notification system has two components:
- One that is used by the ESP to trigger the notification (PushingBox)
- The second is the system that sends the notification to the connected devices (PushBullet)
The PushingBox is an interesting cloud platform that simplifies the process of sending data. It exposes a simple API that our IoT notification system uses to trigger the notification.
It is possible to divide this projects into three different steps:
- Configuring the notification system
- Developing a simple program to read data from the sensor and trigger the notification
Configuring the IoT notification system
The first step is configuring the notification system so that the ESP program can invoke an API exposed by PushingBox and trigger the process of sending the notification. I suppose you already know the PushBullet cloud platform and you have already an account. If not you can register for free and activate your account. In order to receive the notification, you have to install the PushBullet app on the device you want to use. You can receive the same notification on different devices at the same time. For example, if you want to receive the notification on your Android smartphone you have to install the Pushbullet app from the Google play store. Once your account is ready you can go to the dashboard and get your API key (Settings menu item):
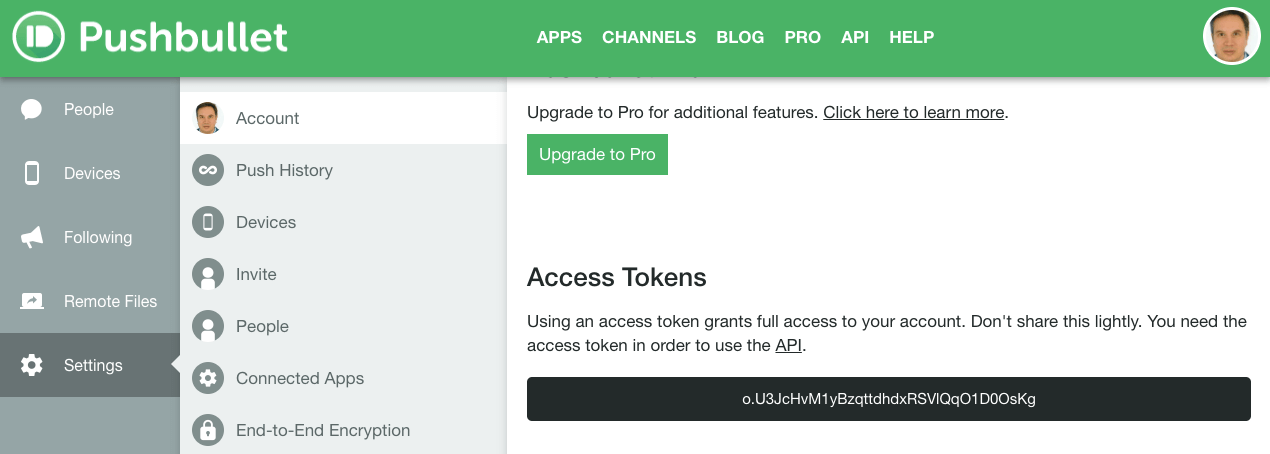
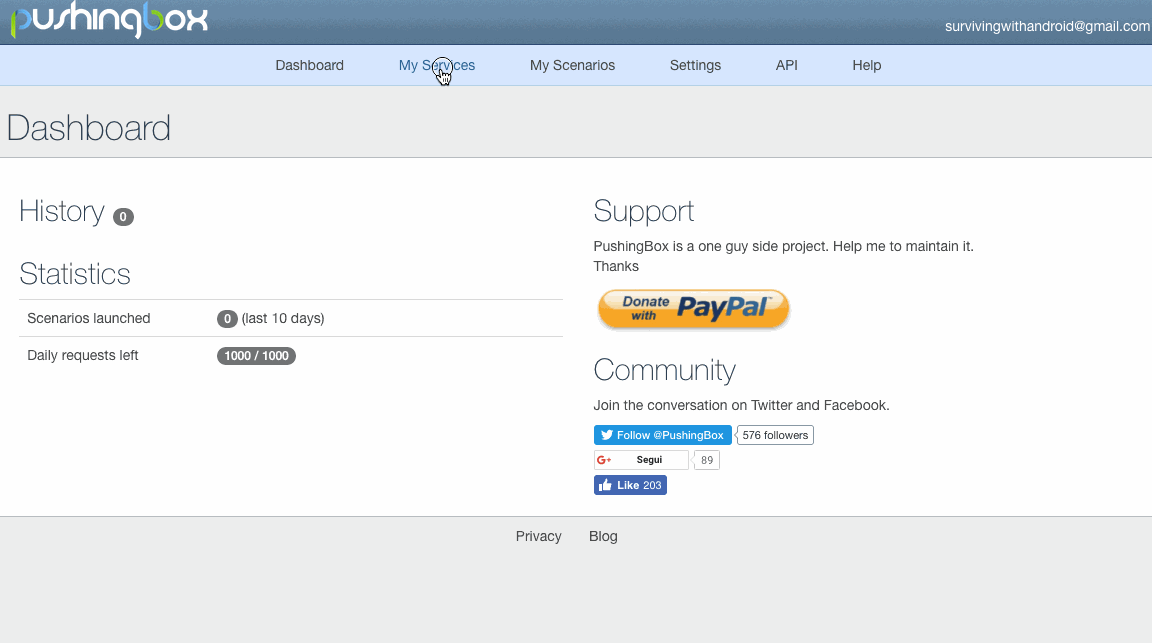
This is the API key we will later in the project. Now it is time to configure the PushingBox in order to receive the notification call from the ESP and trigger the notification. If you do not have, you have to create a free account. Once you are logged in, in the dashboard select My service to add PushBullet as service:
The next step is creating the scenario, or in other words, the content of the message we want to send:

That’s all. In a few steps, we have configured all the systems that this IoT notification project will use to send the notification. Save the deviceID because we will use it later.
Implementing the notification using ESP (or Arduino)
The last step is implementing the sketch that reads the temperature and the pressure from the sensor and triggers the notification. This is quite simple because we can use a library that simplifies our work.
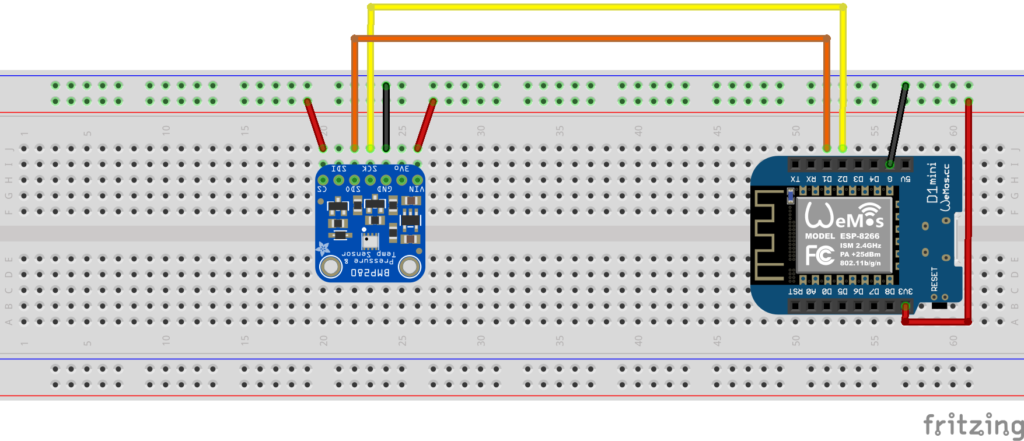
The connection schema is shown below:
In the first step, let us read the sensor data:
#include <ESP8266WiFi.h>
#include <Wire.h>
#include <Adafruit_Sensor.h>
#include <Adafruit_BMP280.h>

//BMP280
Adafruit_BMP280 bme;

void setup() {
  Serial.begin(115200);
  Serial.println("Setup...");

  if (!bme.begin()) {
    Serial.println("Could not find a valid BMP280 sensor, check wiring!");
    while (1);
  }
}
Now in the loop method, we can read the data:
float temp = bme.readTemperature();
float pressure = bme.readPressure();
Finally, we can focus on the last part of this project that is connecting to the pushingbox API. Add the following lines at the beginning:
// Pushingbox API
char *api_server = "api.pushingbox.com";
char *deviceId = "v10BAFBDA2376E5E";
and the following method that connects to the pushingbox api:
void sendNotification(float temp, float pressure) {
  Serial.println("Sending notification to " + String(api_server));
  if (client.connect(api_server, 80)) {
    Serial.println("Connected to the server");

  String message = "devid=" + String(deviceId) +
         "&temp=" + String(temp) +
         "⪯ss=" + String(pressure) +
         "\r\n\r\n";

  client.print("POST /pushingbox HTTP/1.1\n");
  client.print("Host: api.pushingbox.com\n");
  client.print("Connection: close\n");
  client.print("Content-Type: application/x-www-form-urlencoded\n");
  client.print("Content-Length: ");
  client.print(message.length());
  client.print("\n\n");
  client.print(message);
 }
 client.stop();
 Serial.println("Notification sent!");
}
Notice that, in the code above, the sketch sends three different parameters:
- deviceId (as specified in the configuration step)
- temperature(temp)
- pressure (press)
The last two parameters will be used by notification system in the message template to replace the $temp$ and $press$ with the current values measured by the sensor.
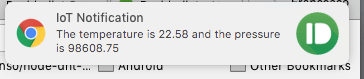
It is time to test this IoT notification project. Just upload the sketch into your ESP and wait for the notification that should arrive in a few seconds. The final result is shown below in case you use Pushbullet chrome extension:
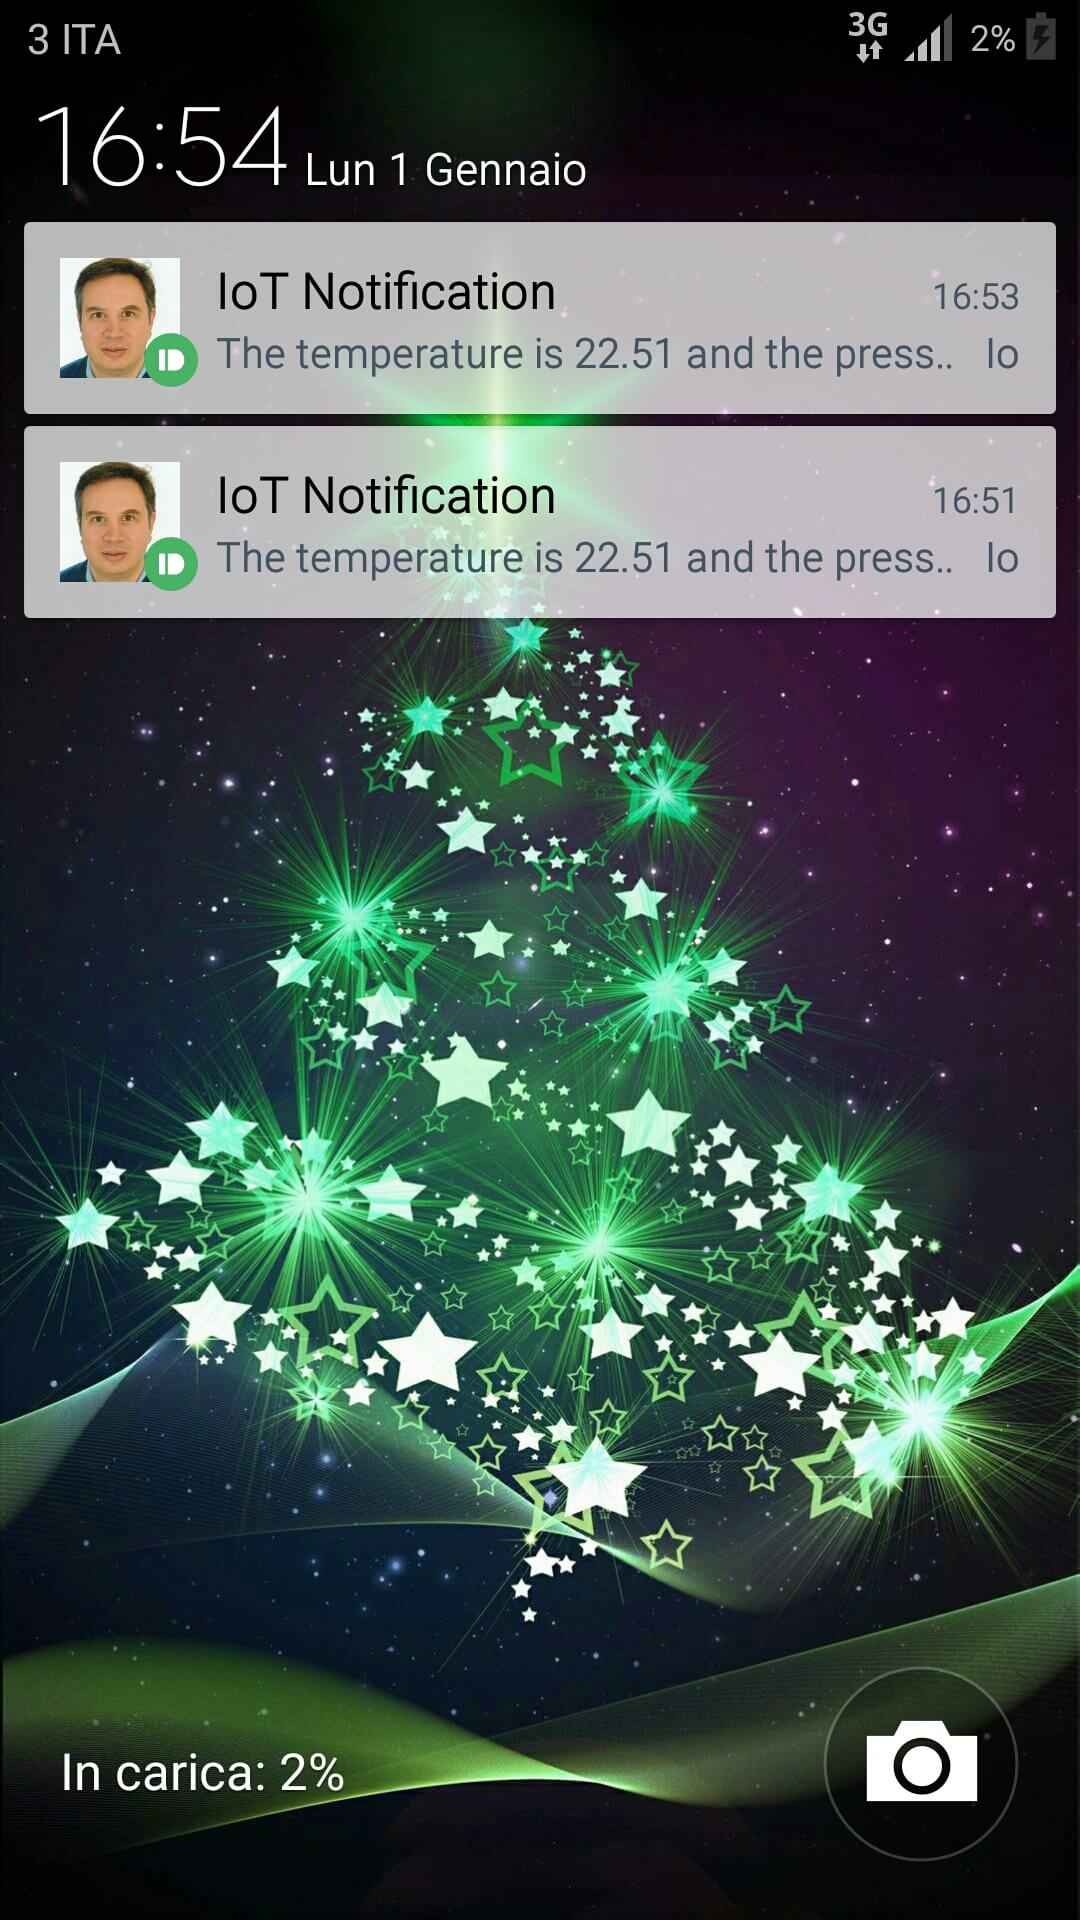
while if you enabled the smartphone notification you will get:
Summary
At the end of this tutorial, you, hopefully, gained the knowledge how to develop a IoT notification systems that sends messages to several devices using a few lines of code. As stated above, this IoT notification tutorial can be further extended and we can use it in several scenarios.
| Published on Java Code Geeks with permission by Francesco Azzola, partner at our JCG program. See the original article here: IoT Notification: How to implement a notification system Opinions expressed by Java Code Geeks contributors are their own. |
