In-memory approaches can achieve blazing speed by putting the working set of the data into the system memory. When all data is kept in memory, the need to deal with issues arising from the use of traditional spinning disks disappears. This means, for instance, there is no need to maintain additional cache copies of data and manage synchronization between them. But there is also a downside to this approach because the data is in memory only, it will not survive if the whole cluster gets terminated. Therefore, this types of data stores are not considered persistence at all.
In this blog post, I will do an effort to explore the Apache Ignite new native persistence feature and provide a clear, understandable picture how the Apache Ignite native persistence works.
In most cases, you can’t (should not) store the whole data set in memory for your application, most often you should store relatively small hot or active subset of data to increase the performance of the application. The rest of the data should be stored somewhere in low-cost disks or tape for archiving. There are two main in-memory database storage requirements available:
- Permanent media, to store committed transactions, thereby maintaining durability and for recovery purpose if the in-memory database needs to be reloaded into the memory.
- Permanent storage, to hold a backup copy of the entire in-memory database.
Permanent storage or media can be any distributed or local file system, SAN, NoSQL database or even RDBMS like Postgres or Oracle. Apache Ignite (since 1.5) provides an elegant way to connect persistence data stores such as RDBMS or NoSQL DB like Mongo DB or Cassandra. Most often persistence in an RDBMS will be bottlenecks and you never got a horizontal scaling in your system. For more information, I recommended you to have a look at the sample chapter of the book “High performance in-memory computing with Apache Ignite“.
So, from the version 2.1.0, Apache Ignite provides ACID and SQL-compliant disk store that transparently integrates with Ignite’s durable memory as an optional disk layer storing data and indexes on SSD, Flash, 3D XPoint, and other types of non-volatile storages.
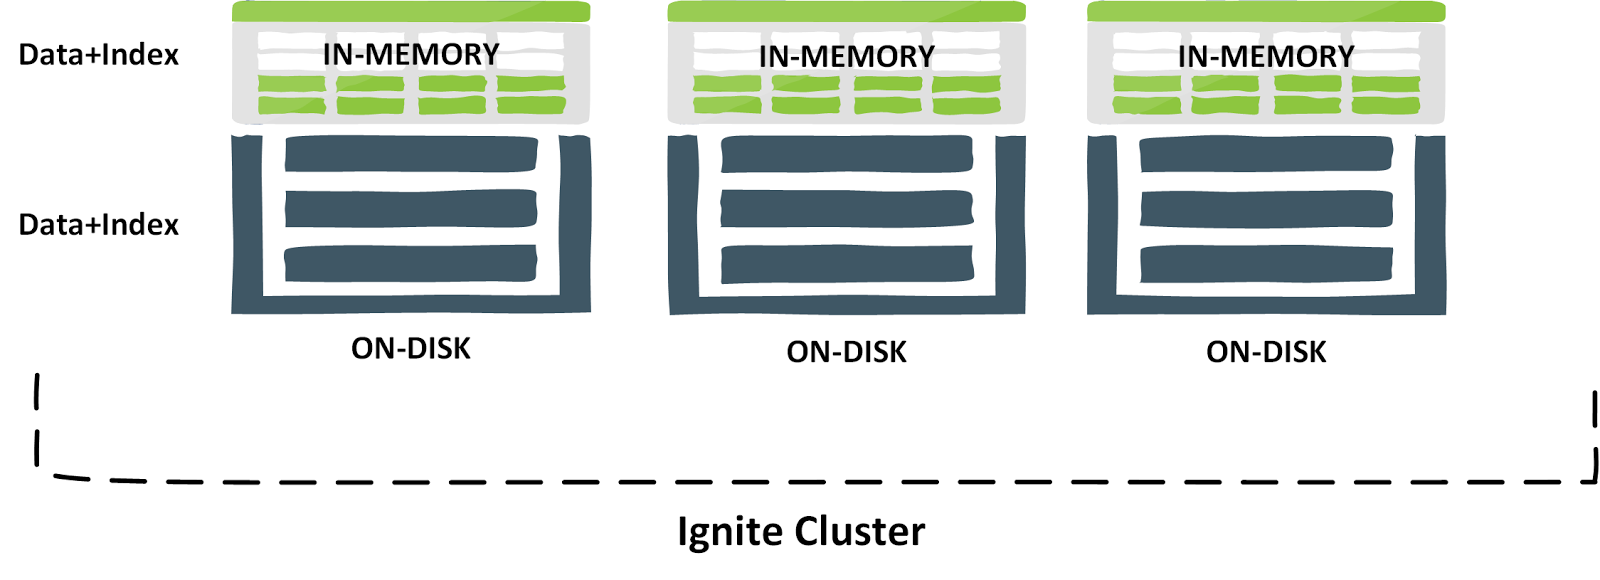
The Apache Ignite native persistence uses new durable memory architecture that allows storing and processing data and indexes both in-memory and on disk. Whenever the feature enables, Apache Ignite stores a superset of data on disk, and a subset of data in RAM based on its capacity. If a subset of data or an index is missing in RAM, the Durable Memory will take it from the disk as shown new pictures below.
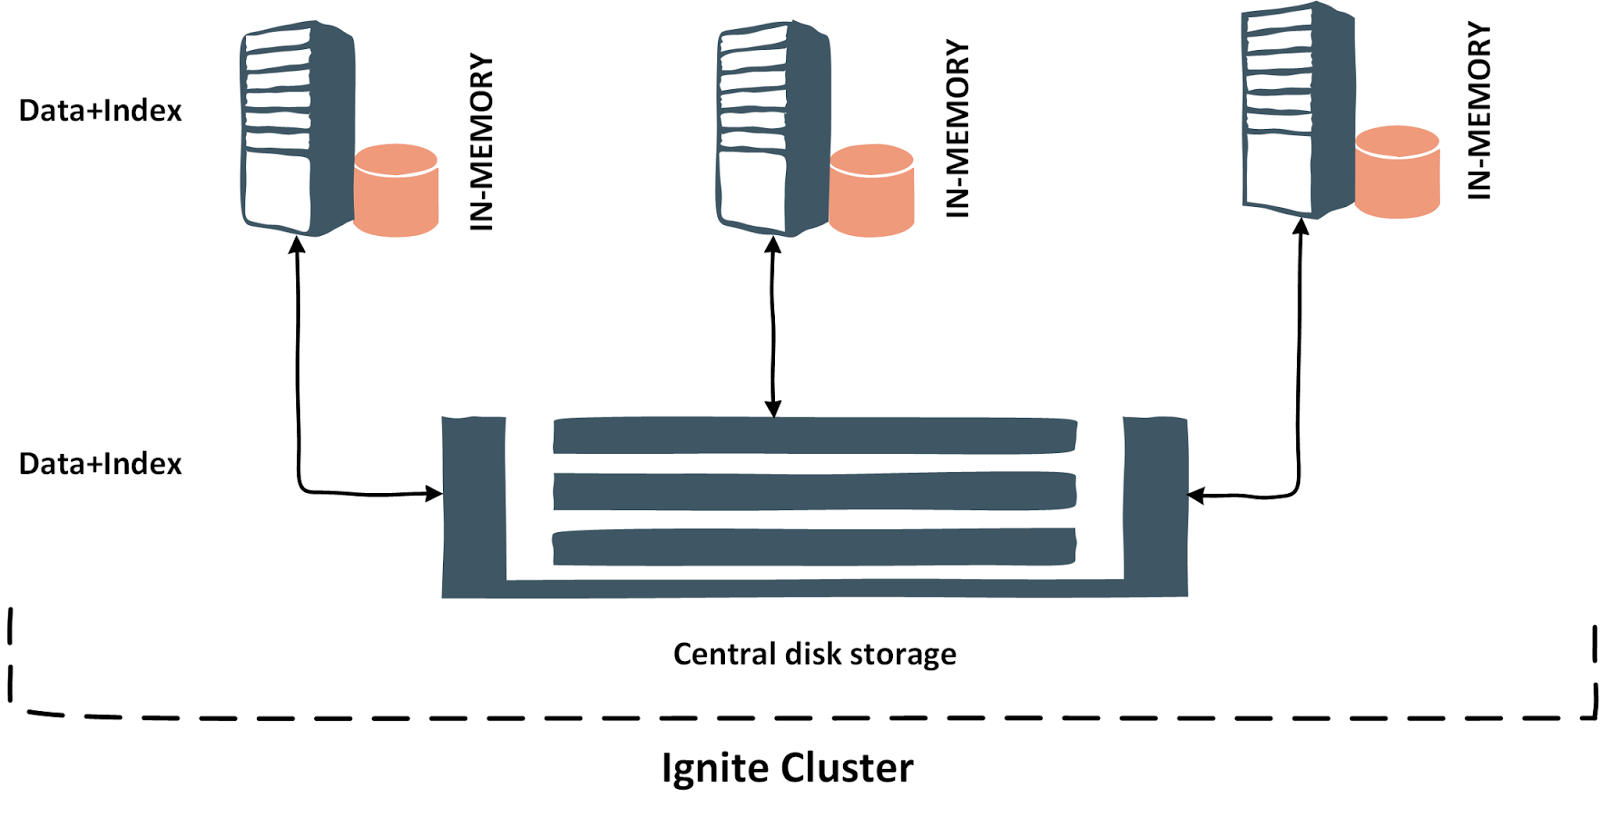
Data can be also stored in the central disk storage where all the Ignite nodes connected as shown below.
Before we start, let’s cover the prerequisites of the project in our sandbox:
- Apache Ignite version 2.1.0
- JVM 1.8
- Apache Maven version >3.0.3
- *nix based operating system
Installation.
There are basically two ways to use Apache Ignite:
- Download the binary distribution and unzip the archive somewhere in your os and run the ./ignite.sh bash script with the spring config files.
- Create a maven project with the required Apache Ignite dependencies, configure the node through the java code and run it.
Here, I am going to use the first option.
Step 1.
- Download the Apache Ignite binary distribution and unzip the distribution somewhere in your sandbox.
- Modify the IGNITE_HOME/examples/config/persistentstore/example-persistent-store.xml file and comment the following part of the cache configuration.
<property name="cacheConfiguration">
<list>
    <bean class="org.apache.ignite.configuration.CacheConfiguration">
        <property name="name" value="testCache"/>
            <property name="backups" value="1"/>
            <property name="atomicityMode" value="TRANSACTIONAL"/>
            <property name="writeSynchronizationMode" value="FULL_SYNC"/>
            <property name="indexedTypes">
            <list>
            <value>java.lang.Long</value>
                <value>org.apache.ignite.examples.model.Organization</value>
            </list>
            </property>
        </bean>
    </list>
</property>
Note that, to enable the Ignite native persistence, you only need to pass the following configuration (an instance of the PersistentStoreConfiguration), which already pre-configured in the example-persistent-store.XML file.
<property name="persistentStoreConfiguration">
<bean class="org.apache.ignite.configuration.PersistentStoreConfiguration"/>
</property>
- Run the following command from the IGNITE_HOME directory.
./ignite.sh $IGNITE_HOME/examples/config/persistentstore/example-persistent-store.xml
Step 2. create a Maven project with the following command.
mvn archetype:create -DgroupId=com.blu.imdg -DartifactId=ignite-persistence
- Add the following dependencies in the pom.xml
<dependency>
      <groupId>org.apache.ignite</groupId>
      <artifactId>ignite-core</artifactId>
      <version>2.1.0</version>
    </dependency>
    <dependency>
      <groupId>org.apache.ignite</groupId>
      <artifactId>ignite-spring</artifactId>
      <version>2.1.0</version>
    </dependency>
    <dependency>
      <groupId>org.apache.ignite</groupId>
      <artifactId>ignite-indexing</artifactId>
      <version>2.1.0</version>
    </dependency>
- Create a Java class with the following contents.
public class HelloWorld {
    public static void main(String[] args) {
        System.out.println("Hello Ignite");
        // create a new instance of TCP Discovery SPI
        TcpDiscoverySpi spi = new TcpDiscoverySpi();
        // create a new instance of tcp discovery multicast ip finder
        TcpDiscoveryMulticastIpFinder tcMp = new TcpDiscoveryMulticastIpFinder();
        tcMp.setAddresses(Arrays.asList("localhost")); // change your IP address here
        // set the multi cast ip finder for spi
        spi.setIpFinder(tcMp);
        // create new ignite configuration
        IgniteConfiguration cfg = new IgniteConfiguration();
        cfg.setClientMode(true);
        // set the discovery§ spi to ignite configuration
        cfg.setDiscoverySpi(spi);
        // Start ignite
        Ignite ignite = Ignition.start(cfg);
        ignite.active(true);
        // get or create cache
        IgniteCache cache = ignite.getOrCreateCache("testCache");
        // put some cache elements
        for (int i = 1; i <= 100; i++) {
            cache.put(i, Integer.toString(i));
        }
        // get them from the cache and write to the console
        for (int i = 1; i <= 100; i++) {
            System.out.println("Cache get:" + cache.get(i));
        }
        ignite.close();

    }
}
Note that, we are using Ignite client mode for manipulating data. After running the HelloWorld application 100 elements should be inserted in the cache (cache name
testCache).
Step 3.
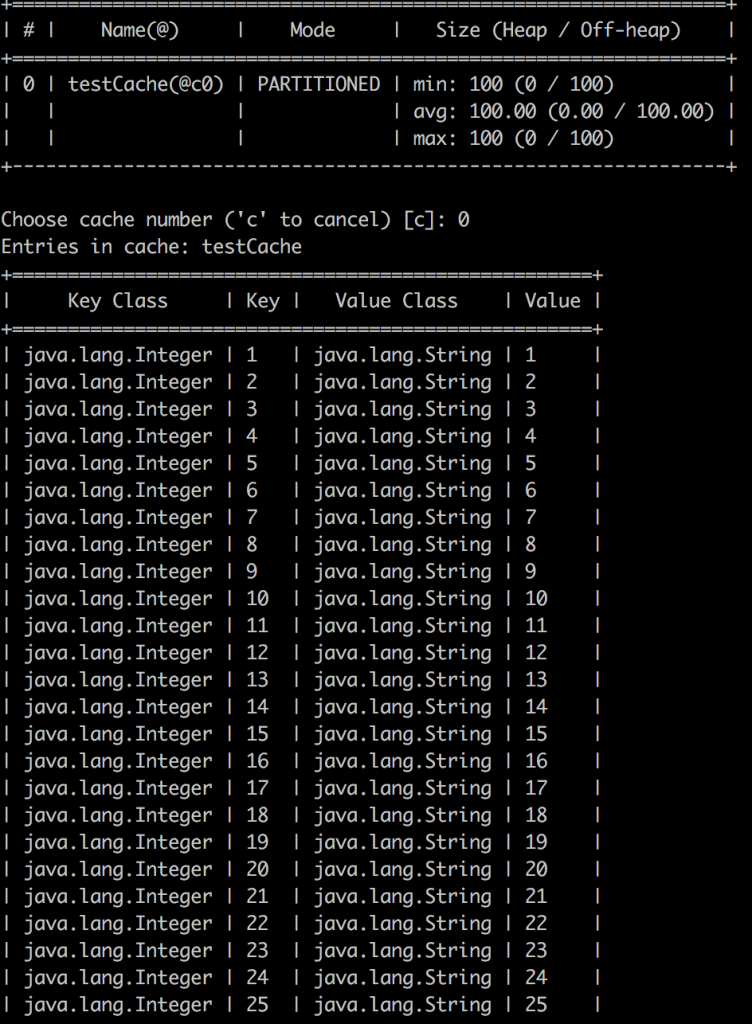
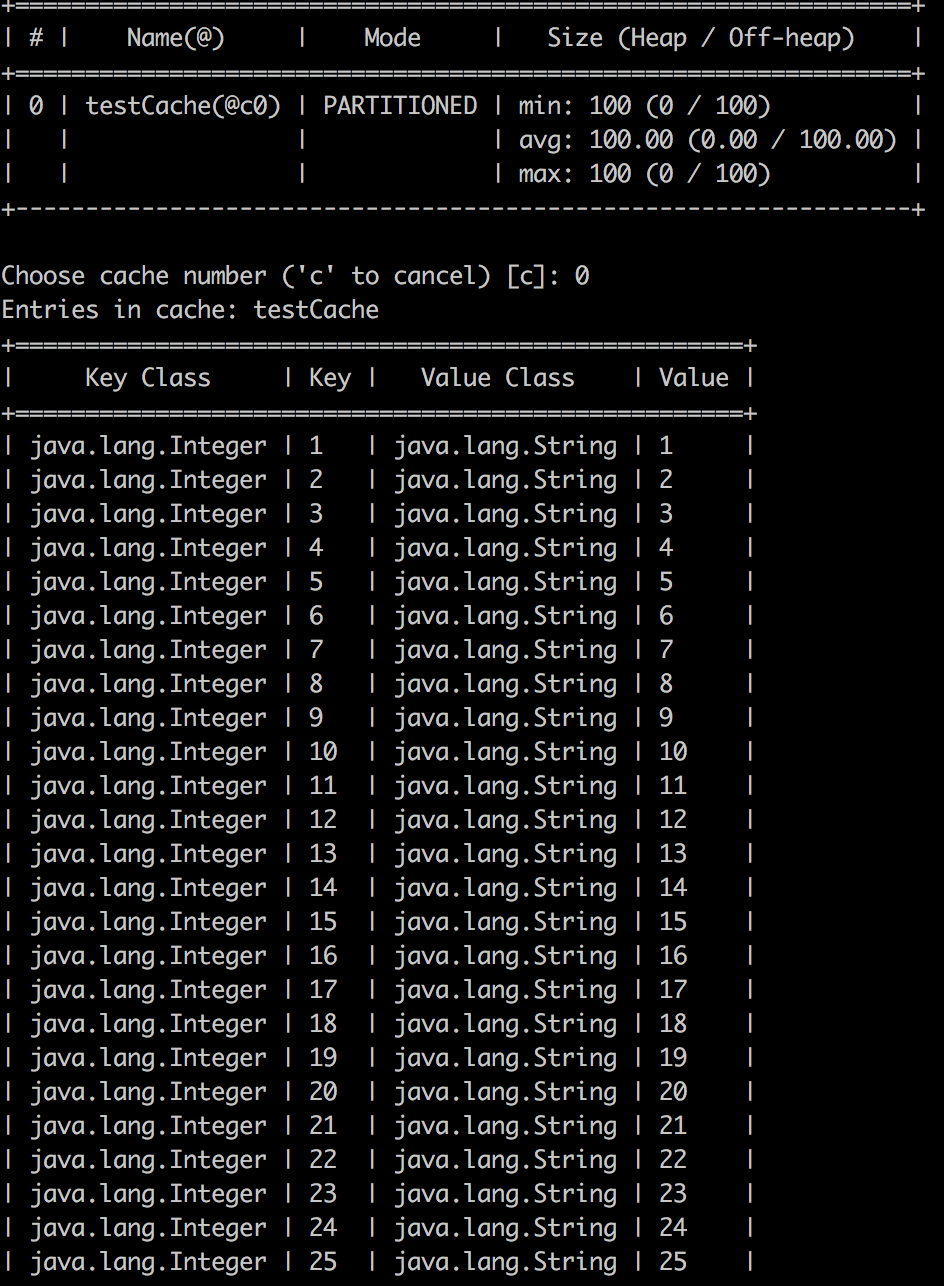
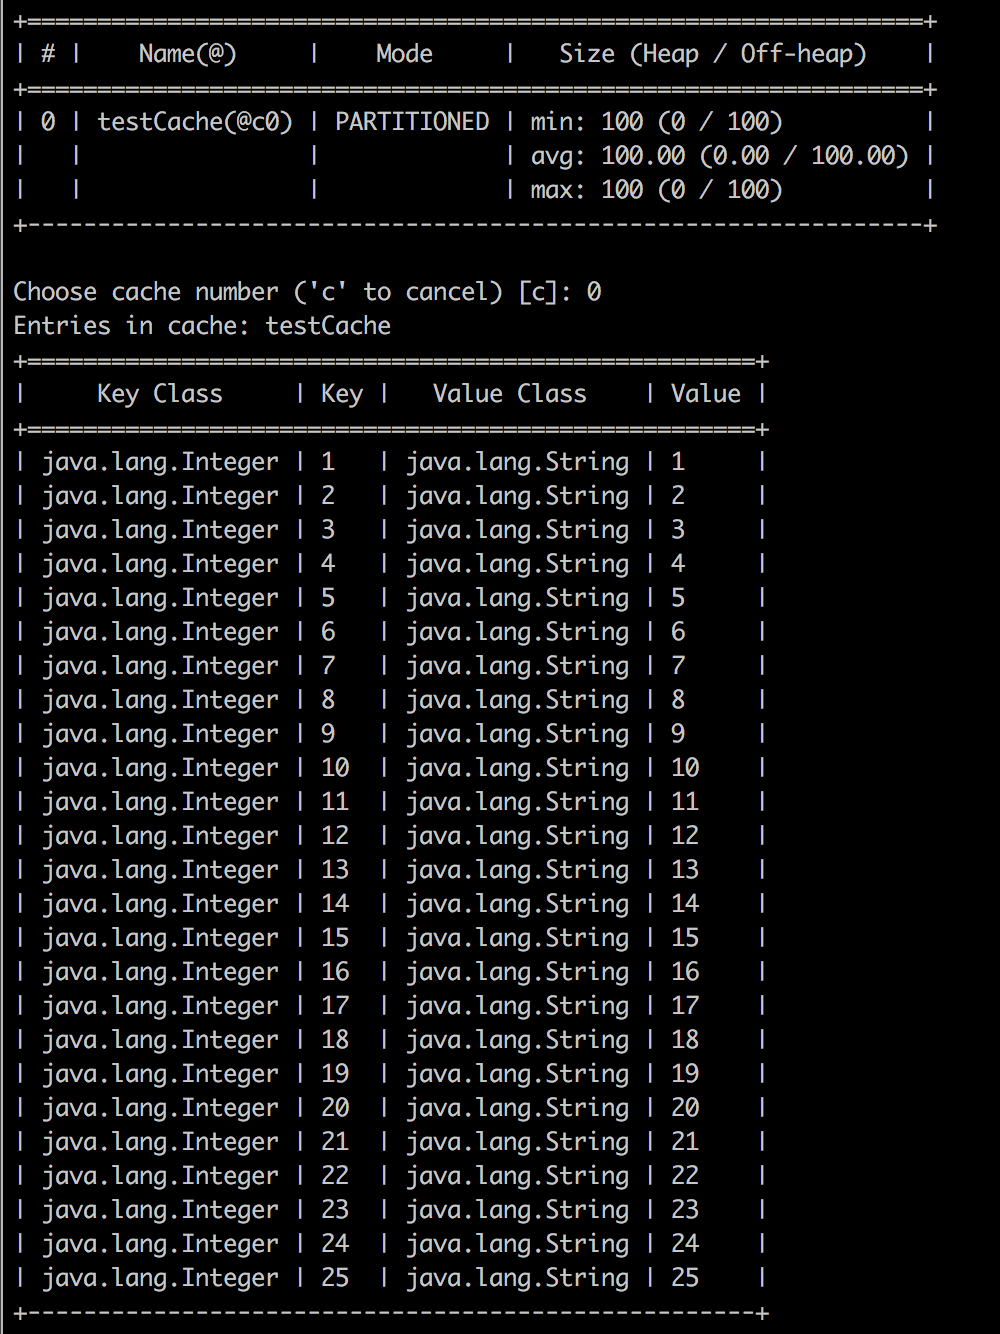
- let’s use the ignitevisor command tool to examine the data. use cache -scan command in ignitevisor command tool. You should get the similar illustration in your console. All 100 elements in the cache.
- Now, let’s see whats happened under the hood. Run the following command from the IGNITE_HOME/work directory
du -h .
You should get something like in your console as shown below.
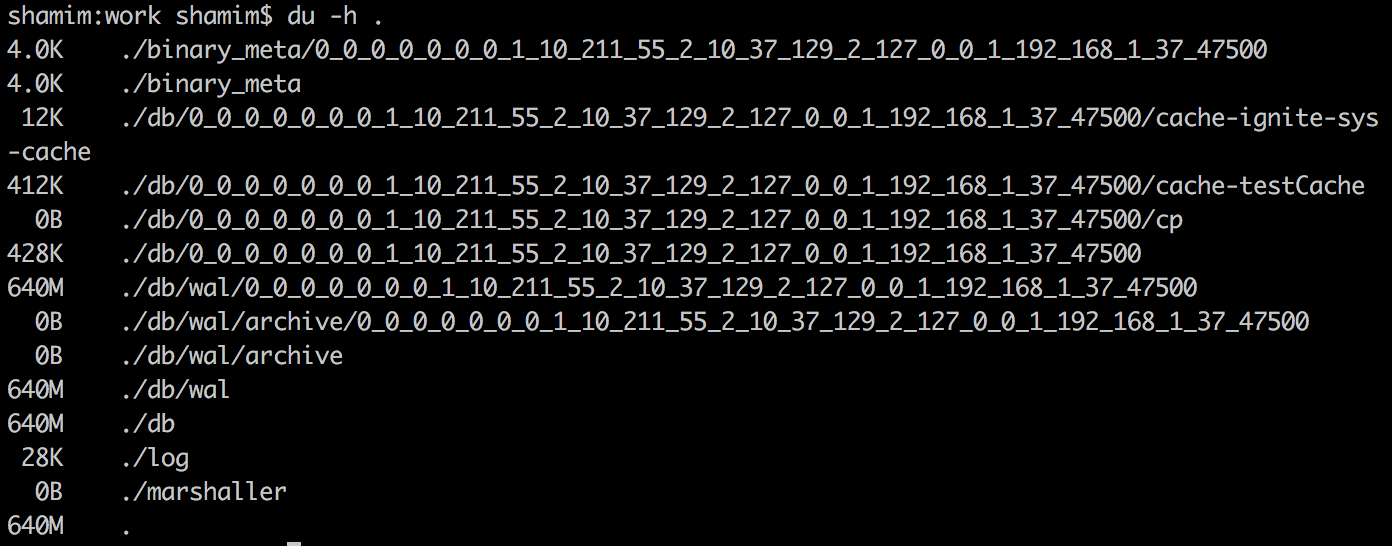
If Apache Ignite native persistence enables, Ignite will persist all the data and the index in memory and on disk across all the cluster nodes.
If you will go through the directory db/0_0_0_0_0_0_0_1_10_211_55_2_10_37_129_2_127_0_0_1_192_168_1_37_47500 (in my case), you will find individual folder for every cache. The folder with name cache-testCache will contain all the cache entries (100 elements) which we have just inserted.

The file index.bin is the index of the cache entries and every cache element gets their individual page file. Why did this happen? now Ignite architecture is page based architecture. Let’s take a closer look, memory now splits into regions -> regions split into segments -> segments split into pages. Pages can be swapped into the disk. Pages can store:
- data
- metadata
- index
Page are fixed-length block, it also supports automatic defragmentation. If you take a closer look at the pages size, all of them are 14 KB. Whenever Ignite needs to load data from the disk, it just loads the page file and so it’s very fast.
Also, there is another concept over write-ahead log (WAL). If you doing an update, first it will be updating the data in-memory and marks the page dirty, and then it will persist the data into the write-ahead log. Ignite just append the update into the WAL file. WAL file is very much similar to Cassandra commitlog file, with one difference. Cassandra writes parallel into in-memory and the commitlog file on disk, on the other hand, Ignite update the data into the memory first and then append the data into the WAL. For more information, I recommend you to have a look at the
documentation, which is quite exhaustive.
Step 4.
- Restart the Ignite node, and check the cache
testCache with
ignitevisor. You will end up with a surprise that no data into the cache.

- Let’s slightly modify our helloworld class and run the application again, comment or delete the following fragments of the code as shown below.
// put some cache elements
for (int i = 1; i <= 100; i++) {
  cache.put(i, Integer.toString(i));
}
Run the application and check the cache testCache through ignitevisor and you application console.
Whenever any read request occurs, Ignite first check the data into the memory. If the dataset doesn’t exist in memory, Ignite immediately load the cache entries from the disk and load into the memory. Also note that, all entries into the memory in offheap.
Benefits.
With Ignite native persistence, now you can easily do backup for the data recovery, Denis Magda writes a comprehensive article for data recovery by using Ignite native persistence. One thing I have to mention here is the data replication between clusters. By using Ignite native persistence, now you can replicate data from one cluster to another on line. You can use any standard disk based data replication tools to copy the changed data set from the primary data center to the stand-in data center or Ignite cluster.
| Reference: | The Apache Ignite Native persistence, a brief overview from our JCG partner Shamim Bhuiyan at the My workspace blog. |

hello sir,thank you for explaining this new Native Persistence Feature of Apache Ignite.It helps us to understand the overall working of Apache ignite native persistence.
any clue how to improve persistence storage ?
for example if I have CSV file with 1G and if I transfer it to Ignite Cache in persistence store its consuming near by 3G (including indexes without backup).. how can we optimize? as I googled it seems like that we have many double column( taking 8 bytes) to store we may need to convert it to String (3 byte) but lot of manual handling.