Welcome back to this JHipster tutorial series! In part one we covered creating a monolithic application. In part two, we walked through creating a microservice application (which was a bit more complicated).
For those of you out there working to get things going with JHipster, there are some setup things and “gotchas” that I’d like to highlight. So this little blog is more of a helper for those of you who have decided to try JHipster out and play around with it. That’s what we’ll be discussing in this blog post with the hope that I can help you minimize the getting-up-to-speed curve.
MySQL as a database.
But I don’t wanna use an in-memory database…
So the in-memory database is great for testing things out and getting a start. But let’s face it, in-memory isn’t likely the production scenario that will be used. At times, I think it should be dropped altogether.
Anyway, using a mySQL database is fairly simple and you just have to configure it. Not too much of a pain really.
If you chose MySQL from the selections during build, then most of the work is done for you. You just have to plug in your info.
datasource:
        url: jdbc:mysql://localhost:3306/your_db?useUnicode=true&characterEncoding=utf8&useSSL=false
        name:
        username: username
        password: pass
        hikari:
            data-source-properties:
                cachePrepStmts: true
                prepStmtCacheSize: 250
                prepStmtCacheSqlLimit: 2048
                useServerPrepStmts: true
    jpa:
        database-platform: org.hibernate.dialect.MySQL5InnoDBDialect
        database: MYSQL
        show-sql: true
        properties:
            hibernate.cache.use_second_level_cache: true
            hibernate.cache.use_query_cache: false
            hibernate.generate_statistics: true
            hibernate.cache.region.factory_class: com.wwc.extendedday.config.hazelcast.HazelcastCacheRegionFactory
            hibernate.cache.use_minimal_puts: true
            hibernate.cache.hazelcast.use_lite_member: true
Greenfield schmeenfield…
Of course, since we all have a green field database, the naming convention for columns is set up up nice and neat for you. It will be a breeze to get your tables up and going.
OK, OK, I know, the chances of being a green field app in the real world are pretty slim. Usually there is a database already somewhere with nicely named columns. Possibly you already have a data accessing layer you want to reuse because we all hate to do it “again”.
So the only problem is, you keep getting errors that the column doesn’t exist when launching and/or trying to get the data. What the heck is causing this nightmare?
Well after hours of searching (believe me it did), it dawned on me that I had dealt with this silliness before. The default naming strategy has to be changed! The default is SpringNamingStrategy and must be changed to EJB3NamingStrategy which will respect any annotations with the column names given (or not explicit). If your original code you are reusing was generated with SpringNamingStrategy, then just ignore this and go on your merry way. Otherwise find it in the appropriate application.yml file and change it.
jpa:
        open-in-view: false
        hibernate:
            ddl-auto: none
            #naming-strategy: org.springframework.boot.orm.jpa.hibernate.SpringNamingStrategy
            naming-strategy: org.hibernate.cfg.EJB3NamingStrategy
Tie a ribbon around the old oak…
Ribbon timeouts
So you’re up and running and you want to output your data to a page, but it keeps timing out! Aaarrgggghhhh!!! You have too much data!
So, by default, the timeout is pretty quick. Let’s face it though, most customers want all the data to come through in one call. So again, I am here for you!
I searched for quite a while on how to make the timeout longer. I found the right configuration for this. There are a lot of way that you can do it, but this “fix” gives more time to all calls. Check it out!
eureka:
    instance:
        appname: ExtendedDayGateway
        instanceId: ExtendedDayGateway:${spring.application.instance_id:${random.value}}

ribbon:
    eureka:
        enabled: true

zuul:
    host:
        connect-timeout-millis: 10000
        socket-timeout-millis: 60000

hystrix:
    command:
        default:
            execution:
                isolation:
                    thread:
                        timeoutInMilliseconds: 60000
You can’t see that, sorry…
Give it some direction.
If you have your project up and running as a microservice, but can’t get the data endpoint to give you data because of unauthorized calls, be sure that you have the service set up correctly.
By default, the service that is generated assumes the endpoint is in the same project. You have to take the time and give it proper direction. So in the service file, you have to prepend the call with your endpoint API name. In this example, the extendeddayapi is the name of the endpoint.
(function() {
    'use strict';
    angular
        .module('extendedDayGatewayApp')
        .factory('Students', Students);

    Students.$inject = ['$resource'];

    function Students ($resource) {
        var resourceUrl =  'extendeddayapi/api/students';

        return $resource(resourceUrl, {}, {
            'query': { method: 'GET', isArray: true},
            'get': {
                method: 'GET',
                transformResponse: function (data) {
                    if (data) {
                        data = angular.fromJson(data);
                    }
                    return data;
                }
            },
            'update': { method:'PUT' }
        });
    }
})();
Sharing is caring. No deposit, no return.
Some of you may not want to use the Angular front end via JHipster apps, etc. If you go this route, be sure to include passing the token to all the calls that you are making to the backend. The JWT token can be retrieved after login and passed around to all subsequent calls.
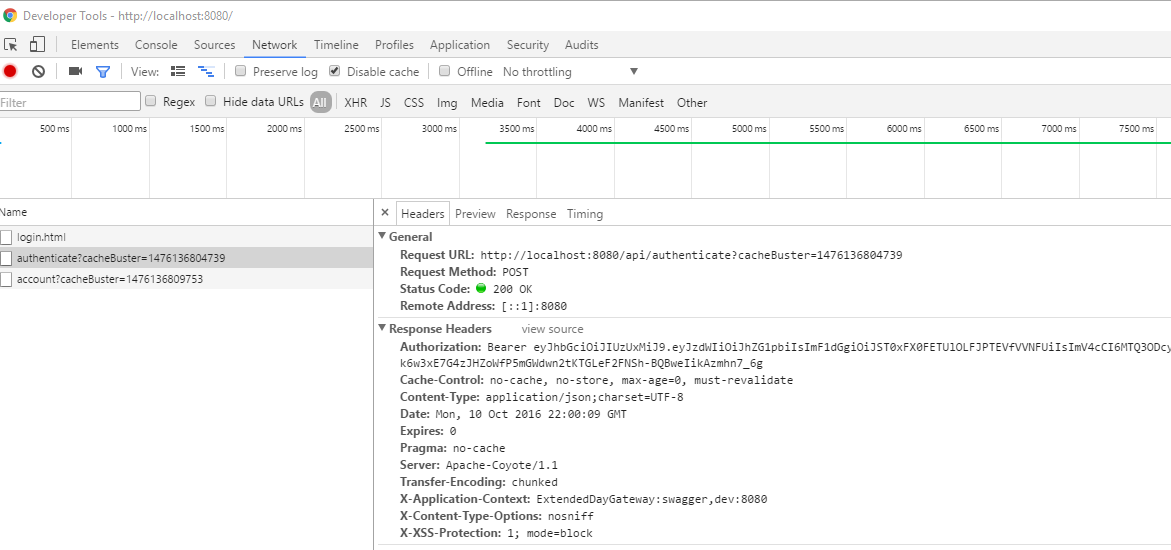
There are a whole host of different ways to do this. I’ll leave you to your devices here. After you login through the JHipster login a JWT token will be generated. You should be able to retrieve by looking at the authenticate call’s response. You will notice an “Authorization” field and the value following it. It will begine with “Bearer “ and then a long token.
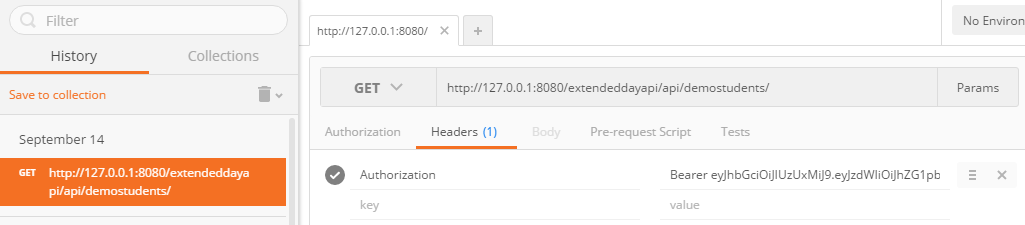
Here is a postman blurb to show you what it would kind of look like. Pass it the Authorization value and test out your calls. This can be duplicated in some way in your code so that you have access to the JWT token within your application. It is all up to how you want to go about it.
FYI: postman is a tool that allows you to test GET, POST, etc without having to create any code.
It’s a screwdriver, not a hammer
The tools are there to help you.
The toolbox that comes with JHipster allow you to generate new entities. You can generate the whole kit and kaboodle, front and back, or choose just front or back. Given that I had a back end already poised to use for a new front end, I tried the front end generator and it helped. The example excludes the backend code.
yo jhipster:entity student --skip-server
The code that is generated looks like this.
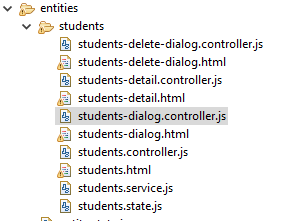
This is a great tool for getting the basics out of the way. It really only helps though if you are using the JHipster Angular app as the front end.
It’s not goodbye, I’ll see you later
So this ends the JHipster saga. I know this list of helpers is short, but they were very time consuming for me.
Go ahead, share with everyone
Not sure where to start with an overview of my thoughts on JHipster. Given a limited window to really get into it, I will only give my “first impressions.”
It’s huge…
The amount of stuff out of the box is great, yet not so great. It is daunting to see all this stuff come out of the box and not know what any of it is doing other than that it is there. While I love having all these features, I feel like I have no time to learn how it all works or at least be comfortable enough to explain them to someone who asks about them.
Can we go with another angle…
I am not a big fan of Angular. To be fair, I haven’t delved into it too much. It’s a little frustrating that JHipster uses Angular 1, but Angular 2 is available. As a newbie, I would much rather learn the “future” than dwelling upon the past. I know there is a flavor that you can use React JS with, but again, some folks may be averse to this. Why do I need JHipster to assume the front end stack for me?
Startup is slow…
I haven’t looked up if there is other options here, but the npm install and bower install when building a monolithic or gateway application is terribly slow. It’s a little bit of a turn off. I want to fire up the application in a hurry. In contrast, though, you are really only doing this once per application. So it is a little bit of a toss up.
Give it the boot…
This is a GOOD boot. I, so far, love to work with Spring Boot. It makes working with a web application so much easier. No messing around with installing the tools into your IDE so that you can use whatever server you choose. Just fire it up and it works fairly simply. Maybe the biggest drawback to Spring Boot is the amount of memory it begins to eat up with multiple threads running.
Honest feedback…
After playing with it for a while, I do like the microservice aspect of it. Creating all of these service oriented applications seems like a great idea to me. I am not a 100% sold on the need of JHipster, but I am willing to give it a try. I would probably like to just make a simple SPA with it providing the backend and something very simple for the front end like BackboneJS. I am not by any means ruling out Angular or React, but it’s all an aspect of how much time to I have to learn something new.
I will be doing my best to transition an existing monolithic application (JSF) over to JHipster and the microservice architecture. Maybe it will afford another opportunity to blog for everyone what my experience is.
Thanks for taking the time to read! Good luck being hip!
| Reference: | Getting Started With JHipster, Part 3 from our JCG partner Matt McCandless at the Keyhole Software blog. |
