![]() As showed in my previous post I have set up a GitLab account so I can host my Git repositories there. In this post I will show how you can combine XCode (v7.1) with GitFlow and GitLab. In fact I will end up to use both XCode (for programming) and the Terminal (for my GitFlow) but that is the same when I am developing Java. In that case I also prefer the prompt most of the time for my (basic) Git stuff.
As showed in my previous post I have set up a GitLab account so I can host my Git repositories there. In this post I will show how you can combine XCode (v7.1) with GitFlow and GitLab. In fact I will end up to use both XCode (for programming) and the Terminal (for my GitFlow) but that is the same when I am developing Java. In that case I also prefer the prompt most of the time for my (basic) Git stuff.
It takes the following steps to setup your project:
- Create the project in XCode
- Create the project in GitLab
- Link XCode project to GitLab project
- Init Git Flow
Each step will be showed in more details next.
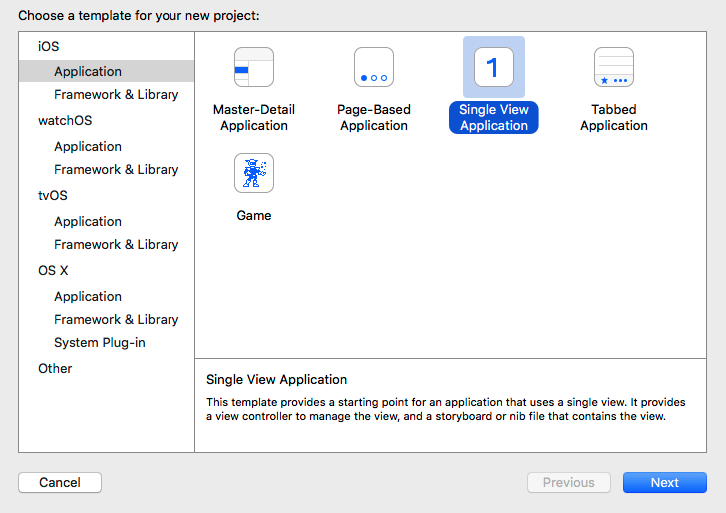
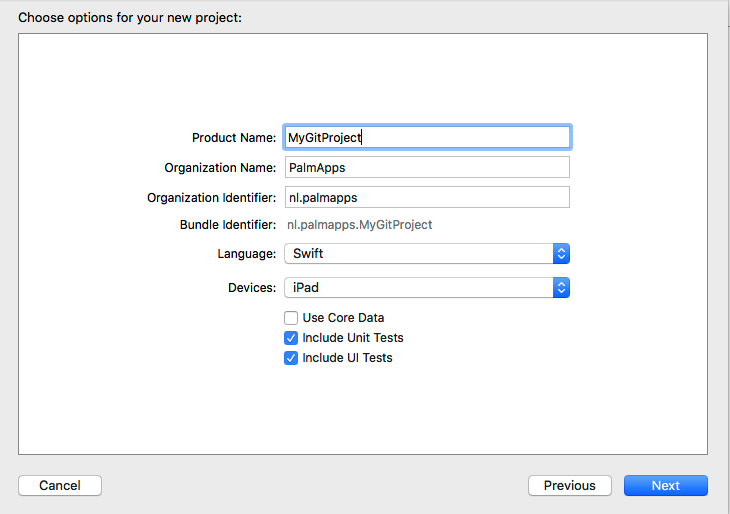
Create the project in XCode
This is the most easy part. Just create a new project in XCode and make sure that Git is enabled in the project:

Create the project in GitLab
Next step is to create a corresponding project in GitLab. This is also quite straightforward:

When the project is created copy the url to the repository:
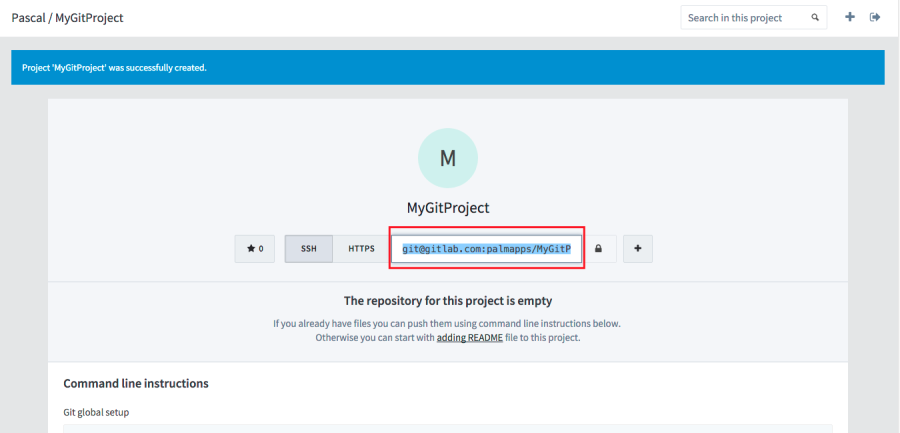
Now we have two separated project so lets connect them in the next step.
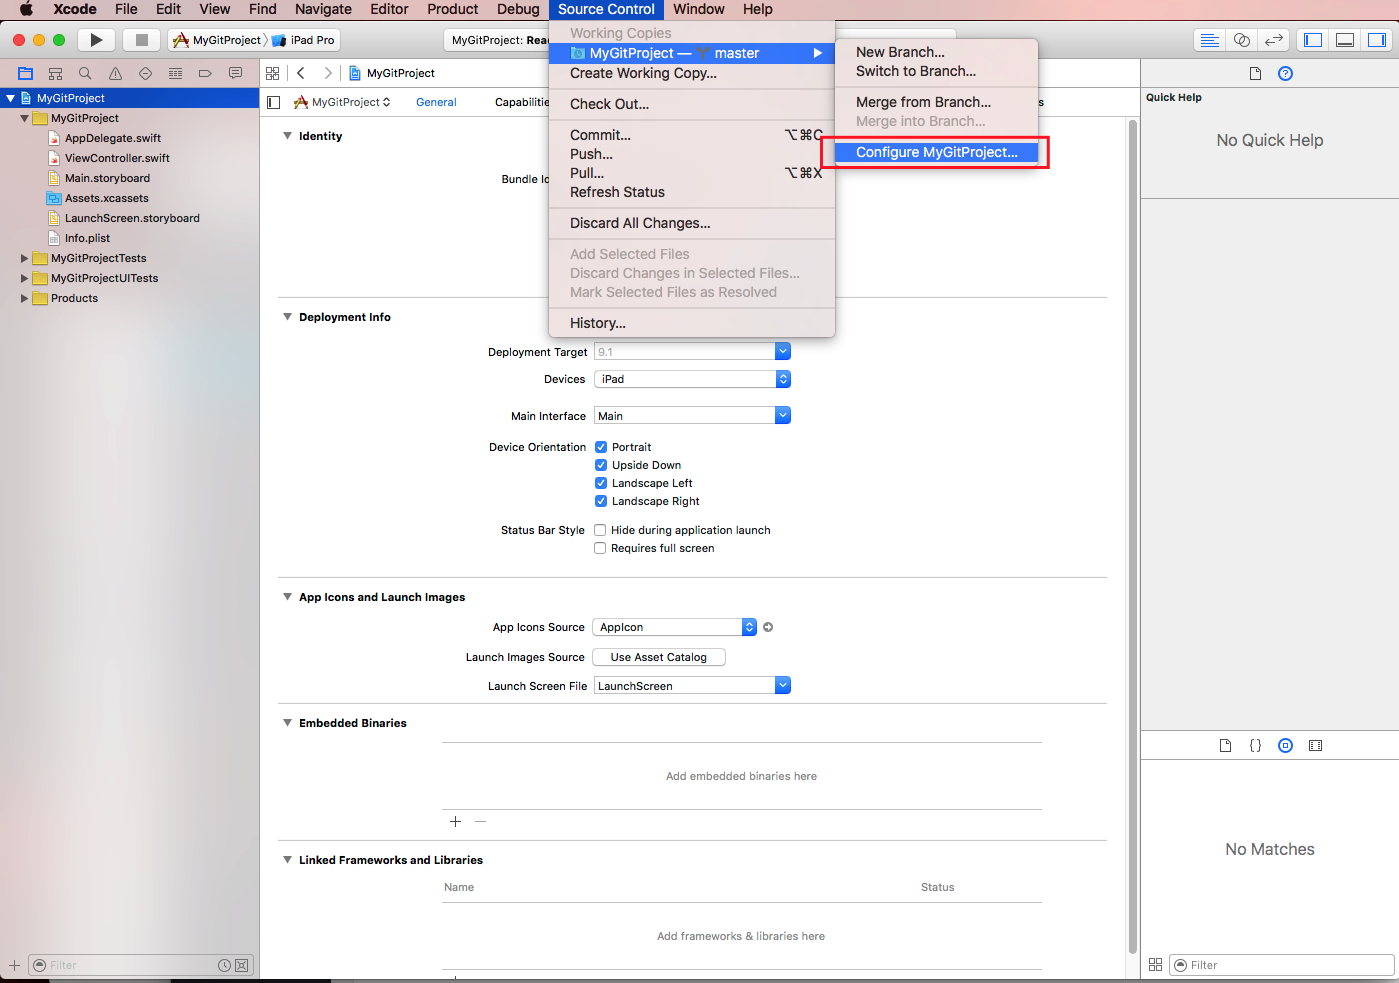
Link XCode project to GitLab project
In this step we connect the two projects together by setting the remote URL for the local Git project. This means that by pushing the local repo to the remote one it ends up in our GitLab repository we just created. To ‘connect’ these two repositories open the ‘Source Control’ menu item in XCode for our new project and navigate to the settings:
Then select ‘Remotes’ and choose the option to add one:
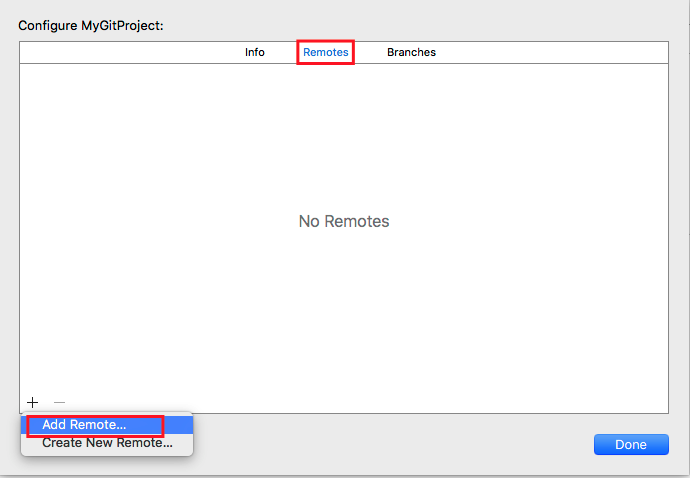
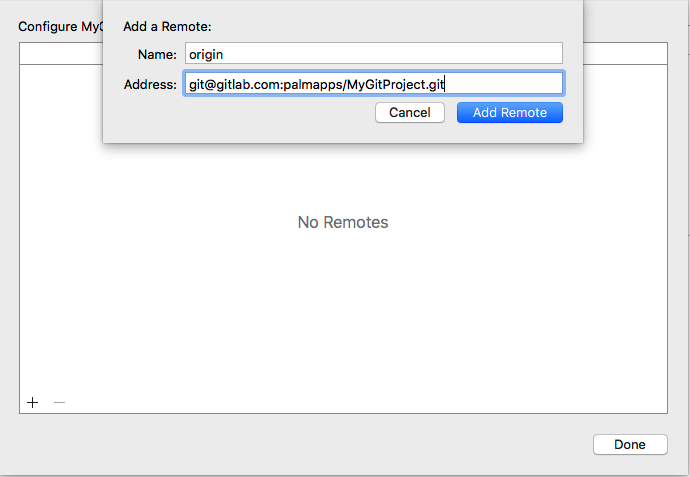
In the popup fill in the name of the remote repo (default called ‘origin’) and the url you copied in GitLab for the new project:
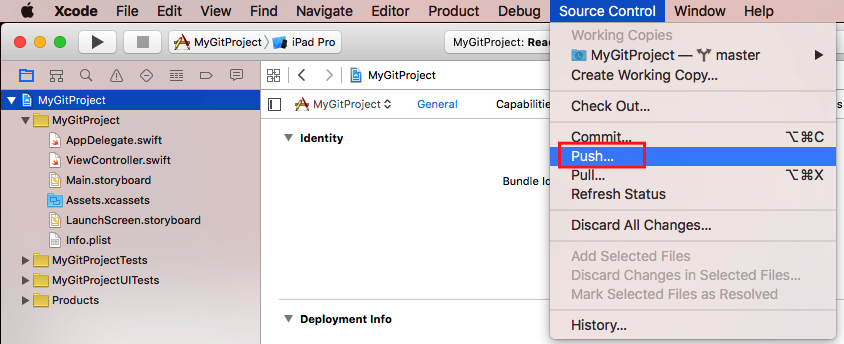
Now you can commit and push your changes to the remote repository from XCode by selecting first ‘Commit’ and then ‘Push’ in the ‘Source Control’ menu:
So now we have XCode and GitLab connected. It’s time to put some Flow into it.
Init Git Flow
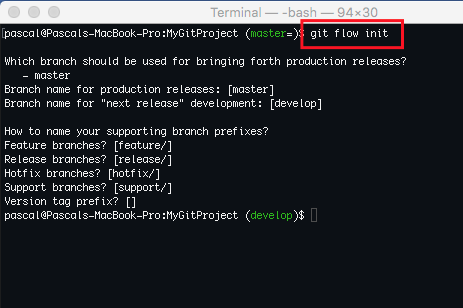
Open the Terminal in Mac and browse to the ‘MyGitProject’ directory. Execute the command:
git flow init
to initiate gitFlow for this project:
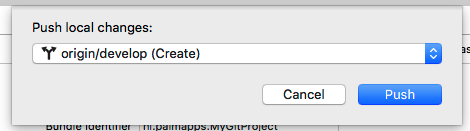
Now push the changes either in Terminal or XCode to the remote server. As you can see we are now working on our ‘Develop’ branch:

and
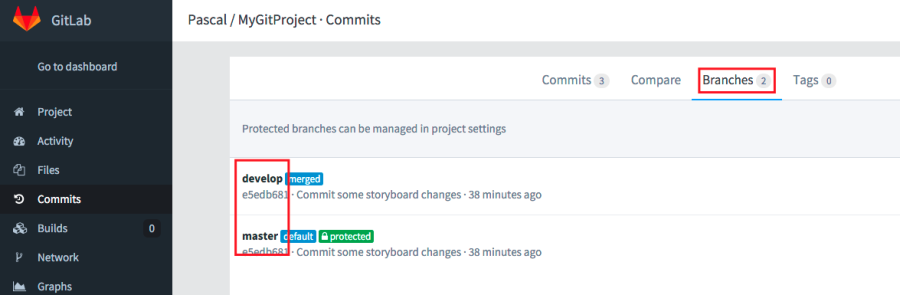
That’s it. If you look into GitLab again you will see our project has now two branches:
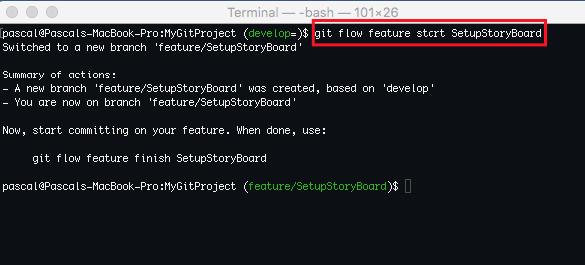
The way to go now is to create a feature branche in the Terminal with
git flow feature start SetupStoryBoard
like this
Now make your changes in XCode, commit them and when you are done finish the feature with
git flow feature finish SetupStoryBoard
and push the changes in the develop branch to the remote server.
- Lots more of Git fun with XCode can be found here, here and here. More info why GitFlow with iOS here.
| Reference: | Starting developing in Swift: Using GitLab with XCode from our JCG partner Pascal Alma at the The Pragmatic Integrator blog. |
