Getting started with Docker from a developer point of view: how to build an environment you can trust
Lately I have spent a lot of thoughts on building repeatable processes that can be trusted. I think that there lies the difference between being an happy hacker cracking out code for the fun of it and an happy hacker delivering something you can count on. What makes you a professional it is a process that is stable, is safe and permit you to evolve without regressions.
As part of this process I focused more on Continuous Integration and on techniques for testing. I think a big part of having a good process is to have an environment you can control, easily configure and replicate as you want. Have you ever updated something on your development machine and all the hell breaks loose? Well, I do not like that. Sure, there are a few tools we can use:
- Virtualenv when working on python, to isolate the libraries you want to access
- RVM and Gemfiles to play with different versions of Ruby/JRuby + libraries for different projects
- Cabal, which permits to specify project specific sets of libraries for Haskell projects (and BTW good luck with that…)
- Maven to specify which version of the java compiler you want to use and which dependencies
These tools help a lot, but they are not nearly enough. Sometimes you have to access shared libraries, sometimes you need a certain tool (apache httpd? MySQL? Postgresql?) installed and configured in a certain way, for example:
- you could need to have an apache httpd configured on a certain port, for a certain domain name
- you could need a certain set of users for your DB, with specific permissions set
- you could need to use a specific compiler, maybe even a specific version (C++’11, anyone?)
There are many things that you could need to control to have a fully replicable environment. Sometimes you can just use some scripts to create that environment and distribute those scripts. Sometimes you can give instructions, listing all the steps to replicate that environment. The problem is that other contributors could fail to execute those steps and your whole environment could be messed up when you update something in your system. When that happen you want a button to click to return to a known working state.
You can easily start having slightly different environments w.r.t. your other team members or the production environment and inconsistencies start to creep in. Moreover if you have a long setup process, it could be take a long time to you to recreate the environment on a new machine. When you need to start working on another laptop for whatever reason you want to be able to do that easily, when you want someone to start contributing to your open-source projects you want to lower the barriers.
It is for all these reasons that recently I started playing with Docker.
What is Docker and how to install it
Basically you can imagine Docker as a sort of lightweight alternative to VirtualBox or other similar hypervisors. Running on a linux box, you can create different sort-of virtual-machines all using the kernel of the “real” machine. However you can fully isolate those virtual machines, installing specific versions of the tools you need, specific libraries, etc.
Docker runs natively only on Linux. To use it under Mac OS-X or Windows you need to create a lightweight virtual machine running Linux and Docker will run on that virtual machine. However the whole mess can be partially hidden using boot2docker. It means some additional headaches but you can survive that, if you have to. If I can I prefer to ssh on a Linux box and run Docker there, but sometimes it is not the best solution.
To install docker on a Debian derivative just run:
# if your system is not recent you could have to use apt-get instead of apt
sudo apt install docker
Our example: creating two interacting docker containers
Let’s start with a simple example: let’s suppose you want to develop a PHP application (I am sorry…) and you want to use MySQL as your database (sorry again…).
We will create two docker containers: on the first one we will install PHP, on the second one MySQL. We will make the two containers communicate and access the application from the browser on our guest machine. For simplicity we will run PhpMyAdmin instead of developing any sample application in PHP.
The first Docker container: PHP
Let’s start with something very simple: let’s configure a Docker image to run httpd under centos6. Let’s create a directory named phpmachine and create a file named Dockerfile.
# Based on an example found at https://github.com/CentOS/CentOS-Dockerfiles
FROM centos:centos6
MAINTAINER Federico Tomassetti
RUN yum -y update; yum clean all
RUN yum -y install httpd; yum clean all
RUN yum -y install php; yum clean all
RUN yum -y install php-mbstring; yum clean all
RUN yum -y install php-mysql; yum clean all
RUN echo "Apache HTTPD" >> /var/www/html/index.html
EXPOSE 80
Note that this is a very simple example: we are not specifying a certain version of httpd to be installed. When installing some other software we could want to do that.
From the directory containing the Dockerfile run:
docker build -t phpmachine .
This command will create a container as described by he instructions. As first thing it will download a Centos 6 image to be used as base of this machine.
Now running docker images you should find a line similar to this one:
~/d/phpmachine ❯❯❯ docker images
REPOSITORY                  TAG                 IMAGE ID            CREATED              VIRTUAL SIZE
phpmachine                  latest              a6f6e10d6834        About a minute ago   236.6 MB
You can now start this container and login into it with this command:
docker run -t -i -P phpmachine /bin/bash
Once you are logged into the container you can start Apache and find out the IP of the docker machine running it:
~/d/phpmachine ❯❯❯ docker run -t -i -P phpmachine /bin/bash
[root@f9226ce4ca3b /]# /usr/sbin/apachectl start
httpd: Could not reliably determine the server's fully qualified domain name, using 172.17.0.5 for ServerName
[root@f9226ce4ca3b /]# ifconfig
eth0      Link encap:Ethernet  HWaddr 5A:71:53:91:7C:D2
          inet addr:172.17.0.5  Bcast:0.0.0.0  Mask:255.255.0.0
          inet6 addr: fe80::5871:53ff:fe91:7cd2/64 Scope:Link
          UP BROADCAST RUNNING  MTU:1500  Metric:1
          RX packets:7 errors:0 dropped:2 overruns:0 frame:0
          TX packets:8 errors:0 dropped:0 overruns:0 carrier:0
          collisions:0 txqueuelen:1000
          RX bytes:558 (558.0 b)  TX bytes:648 (648.0 b)

lo        Link encap:Local Loopback
          inet addr:127.0.0.1  Mask:255.0.0.0
          inet6 addr: ::1/128 Scope:Host
          UP LOOPBACK RUNNING  MTU:65536  Metric:1
          RX packets:0 errors:0 dropped:0 overruns:0 frame:0
          TX packets:0 errors:0 dropped:0 overruns:0 carrier:0
          collisions:0 txqueuelen:0
          RX bytes:0 (0.0 b)  TX bytes:0 (0.0 b)

[root@f9226ce4ca3b /]#
Now, if you type that IP in a browser you should see something like this:
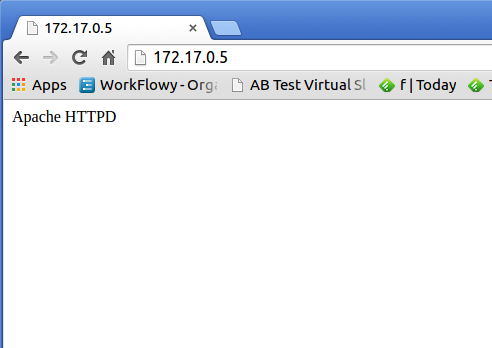
Cool, it is up and running!
Let’s improve the process so that 1) we can start the httpd server without having to use the console of the docker container 2) we do not have to figure out the IP of the container.
To solve the first issue just add this line to the Dockerfile:
CMD exec /usr/sbin/apachectl -D FOREGROUND
Now rebuild the container and start it like this:
docker build -t phpmachine .
docker run -t -p 80:80 -P phpmachine
In this way the port 80 of the docker container is re-mapped into the port 80 of the host machine. You can now open a browser and use the localhost or 127.0.0.1 address.
Wonderful, now let’s get started with the MySQL server.
The second Docker container: MySQL server
We want to create a Dockerfile in another directory and add in the same directory a script named config_db.sh.
# Dockerfile
FROM centos:centos6
MAINTAINER Federico Tomassetti
RUN yum -y update; yum clean all
RUN yum -y install mysql-server; yum clean all
EXPOSE 3306

# Run a script to create a DB
ADD ./config_db.sh /config_db.sh
RUN chmod +x /config_db.sh
RUN /etc/init.d/mysqld start && /config_db.sh && /etc/init.d/mysqld stop

# Start Mysql and open a mysql shell just to keep the process alive:
# this is a poor-man trick and you probably want to do something smarter
CMD /etc/init.d/mysqld start && mysql
# config_db.sh
# note that by default we do not need a password to connect to
# mysql as root
mysql -e "CREATE DATABASE mydb"
mysql -e "GRANT ALL PRIVILEGES ON mydb.* TO 'myuser'@'localhost' IDENTIFIED BY 'myuserpwd'; FLUSH PRIVILEGES;"
mysql -e "GRANT ALL PRIVILEGES ON mydb.* TO 'myuser'@'%' IDENTIFIED BY 'myuserpwd'; FLUSH PRIVILEGES;"
mysql -e "select user, host FROM mysql.user;"
Note: we are not saving in any way the data of our MySQL DB, so every time we restart the container we lose everything.
Now we can build the machine:
docker build -t mysqlmachine .
Then we can run it:
docker run -p 3306:3306 -P -i -t mysqlmachine
And we can connect from our “real box” to the mysql server running in the docker container:
mysql --host=127.0.0.1 --protocol=TCP -u myuser -pmyuserpwd mydb
Does everything works as expected so far? Cool, let’s move on.
Make the two docker containers communicate
Let’s assign a name to the mysql container:
docker run -p 3306:3306 -P --name mysqlcontainer -i -t mysqlmachine
Now let’s start the PHP container telling it about the mysqlcontainer:
docker run -i -t -p 80:80 -P --link mysqlcontainer:dbhost phpmachine /bin/bash
From the console of the phpmachine you should be able to ping dbhost (the name under which the phpmachine can reach the mysql container). Good!
In practice a line is added to the /etc/hosts file of the phpmachine, associating dbhost with the IP of our mysqlmachine.
Installing PHPMyAdmin
We are using PHPMyAdmin as the placeholder for some application that you could want to develop. When you develop an application you want to edit it on your development machine and making it available to the docker container. So, download PhpMyAdmin version 4.0.x (later versions require mysql 5.5, while centos 6 uses mysql 5.1) and unpack it in some directory, suppose it is in ~/Downloads/phpMyAdmin-4.0.10-all-languages. Now you can run the docker container with php like this:
docker run -v ~/Downloads/phpMyAdmin-4.0.10-all-languages:/var/www/html -i -t -p 80:80 -P --link mysqlcontainer:dbhost phpmachine
This will mount the directory with the source code of PhpMyAdmin on /var/www/html in the* phpmachine*, which is the directory which Apache httpd is configured to serve.
At this point you need to rename config.sample.inc.php in config.inc.php and change this line:
# From

$cfg['Servers'][$i]['host'] = 'localhost';

# To

$cfg['Servers'][$i]['host'] = 'dbhost';
In this way the phpmachine should use the db on the mysqlmachine.
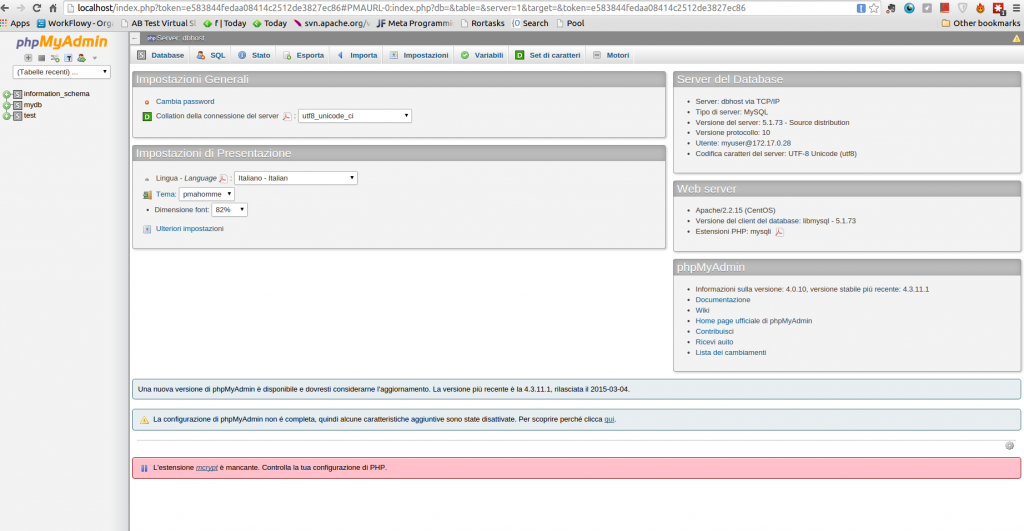
Now you should be able to visit localhost and see a form.There insert the credentials for the db: myuser, myuserpwd and you should be all set!
How does Docker relate with Vagrant and Ansible, Chef, Puppet?
There are a few other tools that could help with managing virtual machines and sort-of-virtual machines. If you are a bit confused about the relations between different tools this is an over-simplistic summary:
- Vagrant is a command line utility to manage virtual machines, but we are talking about complete simulations of a machine, while Docker uses the kernel from the Docker host, resulting in much lighter “virtual machines” (our Docker containers)
- Ansible, Chef and Puppet are ways to manage the configuration of these machines (operationalising processes) they could be used in conjunction with Docker. Ansible seems much lighter compared to Chef and Puppet (but slightly less powerful). It is gaining momentum among Docker users and I plan to learn more about it.
This post gives some more details about the relations between these tools.
Conclusions
In our small example we could play with a realistic simulation of the final production setup, which we suppose composed by two machines running CentOS 6. By doing so we have figured out a few things (e.g., we have packages for MySQL 5.1 and it forces us to not use the last version of PhpMyAdmin, we know the complete list of packages we need to install, etc.). In this way we can reasonably expects very few surprised when deploying to the production environment. I strongly believe that having less surprises is extremely good.
We could also just deploy the docker containers itself if we want so (I have never tried that yet).
Update: I am happy the guys at Docker cited this article in their weekly newsletter, thanks!
| Reference: | Getting started with Docker from a developer point of view: how to build an environment you can trust from our JCG partner Federico Tomassetti at the Federico Tomassetti blog. |
