This is a final, third part of Spring MVC REST tutorial with CNVR. Here I will demonstrate how all that stuff works, which I have developed within first two parts. Here will be four sections for each type of CRUD operations: CREATE, READ, UPDATE, DELETE. As a pre-requirement you need to install any REST client for a working with a REST requests.
Spring REST: CREATE
The first operation will be creation of a smartphone. I’m going to use POSTMAN REST client. It’s a Google Chrome extension and you can download it absolutely free. When I perform CREATE or UPDATE operation I have to pass some data in a body of the request which will be used for creation or update of entity. So let’s see how it works:
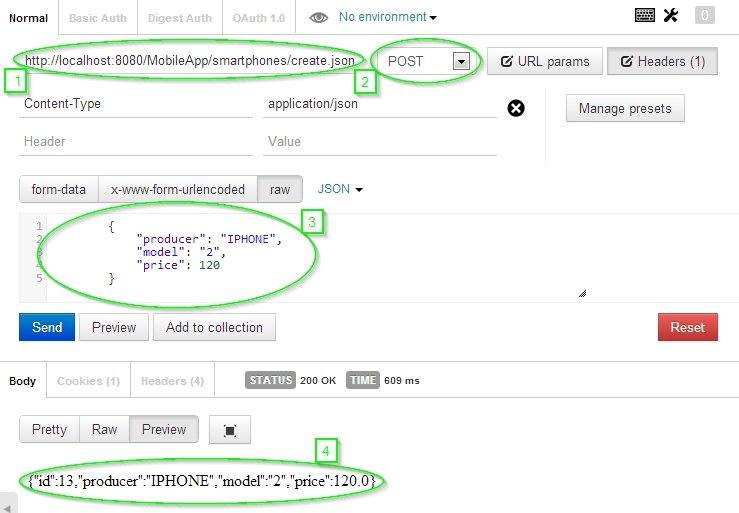
On the image above you can see completed CREATE operation. Let’s consider the most essential parts of it.
- The URL contains .json sufix
- POST selected as a HTTP method
- Request body it is the JSON document which contain required fields for a smartphone creation
- Response body it is the JSON document which in our case equals to Request body
I hope you noticed one more important detail. I talk about the Content-type = application/json. As you remember in the methods of controoler I specified such parameters as “consumes“:
...
	@RequestMapping(value="/create", method=RequestMethod.POST,
			produces = "application/json", consumes = "application/json")
	@ResponseBody
	public Smartphone createSmartphone(@RequestBody Smartphone smartphone) {
		return smartphoneService.create(smartphone);
	}
...
That’s mean that the method will work just with JSON. Spring permits to set multiple types for “produces” and “consumes” attributes.
Spring REST: READ
The second operation will show how to select some records.
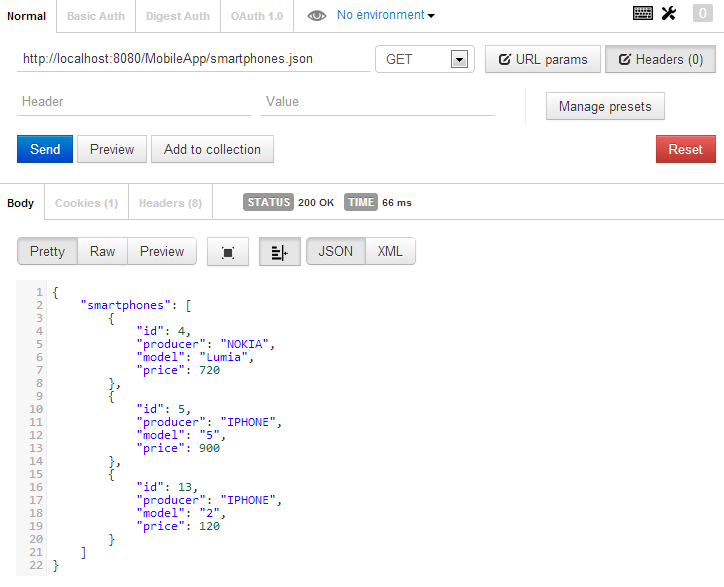
In this case I just used the HTTP GET request and it returned to me a list of existing smartphones in JSON format.
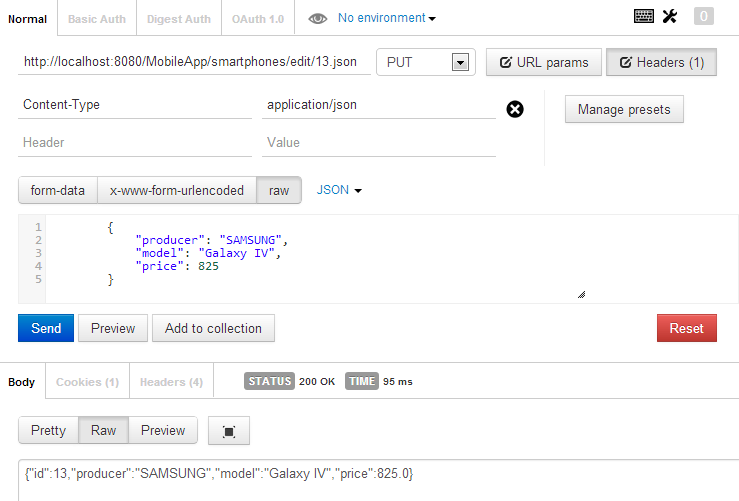
Spring REST: UPDATE
A HTTP PUT request as a HTTP POST request should have body content to be have information about updating data.
Spring REST: DELETE
In the most straightforward case HTTP DELETE request just need to know ID of entity which will be removed.
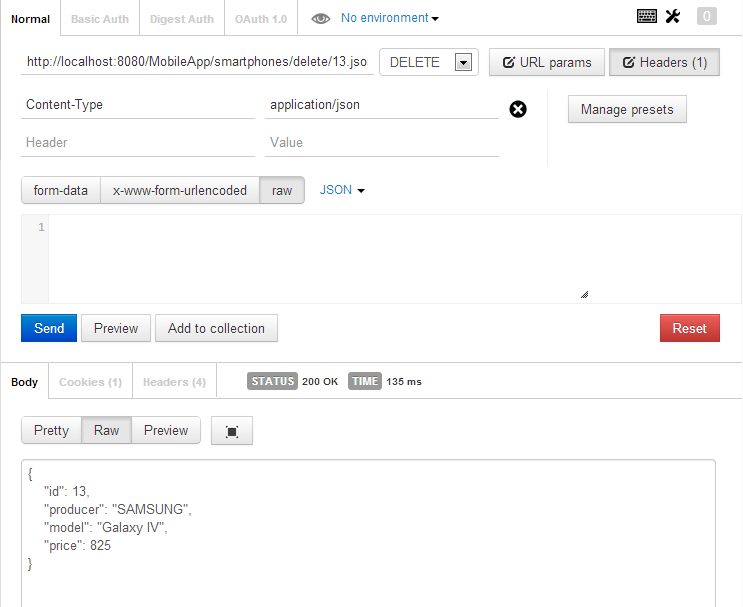
As you see everything goes as in previous examples except HTTP request type, which was changed to DELETE.
It’s not all
But as you remember I have developed some methods in the controller which return ModelAndView object. Hence you can do the same operations through a web interface. It was very challenging for me to write these tutorials. I covered here just a top of the “REST” iceberg. In the future I will write some articles about AJAX, exception handling and other cool stuff related to the REST.

Hi,
I am a new comer to java config for spring mvc.
I have used your example from GIT, the application is deployed fine on JBoss.
21:03:12,711 INFO [org.jboss.as.server] (DeploymentScanner-threads – 1) JBAS018559: Deployed “MobileApp.war”
But unable to access the links shared, http://localhost:8080/MobileApp/smartphones/create.json
I recieve a 404 error. Resource not found. How should I trace it.