This excerpt has been taken from the “From Tomcat to WildFly” book in which you’ll learn how to port your existing Tomcat architectures to WildFly, including both the server configuration and the applications running on the top of it.
WildFly is a fully compliant Java Enterprise Edition 7 container with a much wider set of available services and options compared to Tomcat.
The book will also give you exposure to the most common pitfalls and drawbacks, which might happen during the migration.
Table Of Contents
1. Introduction
| Problem: I have a Datasource configuration on Tomcat, which is used to collect database connections from a pool. I need to port my configuration on WildFly. |
On Apache Tomcat, the datasource configuration can be included in the global section of your server.xml file. Here is for example a configuration for the popular MySQL database:
<Resource name="jdbc/mysqlds" auth="Container" type="javax.sql.DataSource"
          maxActive="100" maxIdle="30" maxWait="10000"
          username="tomcat" password="tomcat"
          driverClassName="com.mysql.jdbc.Driver"
          url="jdbc:mysql://localhost:3306/mydatabase"/>
In addition, the following lines should be placed on the WEB-INF/web.xml for the application-specific content.
<web-app xmlns="http://java.sun.com/xml/ns/j2ee" xmlns:xsi="http://www.w3.org/2001/XMLSchema-instance" xsi:schemaLocation="http://java.sun.com/xml/ns/j2ee http://java.sun.com/xml/ns/j2ee/web-app_2_4.xsd" version="2.4">
<description>Tomcat DB</description>
<resource-ref>
<description>Database Connection</description>
<res-ref-name>jdbc/mysqlds</res-ref-name>
<res-type>javax.sql.DataSource</res-type>
<res-auth>Container</res-auth>
</resource-ref>
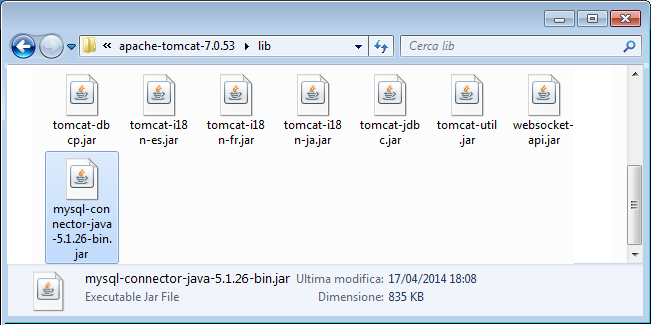
</web-app> In order to be able to load the MySQL JDBC driver, you need to include the JAR library in the CATALINA_HOME/lib folder:
Let’s see how to configure a Datasource configuration in WildFly. This can be accomplished in several ways, yet all possible solutions involve the following steps:
- Installing the JDBC driver as module
- Registering the JDBC driver on the application server
- Configuring a datasource which uses the JDBC driver
We will see the recommended approach, which requires using the Command Line Interface, although we will mention some alternatives available.
2. Installing the JDBC Driver as module
WildFly is based on the assumption that every library is itself a module. So, we will turn at first the JDBC driver into a module. This can be done by creating a file path structure under the JBOSS_HOME/modules directory. For example, in order to install a MySQL JDBC driver, create a directory structure as follows: JBOSS_HOME/modules/com/mysql/main.
- Copy the JDBC driver JAR into the main subdirectory.
- In the main subdirectory, create a module.xml file containing the following definitions (just adapt the JDBC driver name to your case):
<?xml version="1.0" encoding="UTF-8"?>
<module xmlns="urn:jboss:module:1.0" name="com.mysql">

  <resources>
    <resource-root path="mysql-connector-java-5.1.24-bin.jar"/>
  </resources>

  <dependencies>
    <module name="javax.api"/>
    <module name="javax.transaction.api"/>
  </dependencies>

</module>
The above procedure can be completed as well using the Command Line Interface, with a single command, which will create the file system structure, copy the JDBC driver into the main folder and configure a module.xml based on the options provided to the CLI.
Here is how to do it, supposing that MySQL JDBC driver is available in the /home/wildfly folder:
module add --name=com.mysql --resources=/home/wildfly/mysql-connector-java-5.1.24-bin.jar --dependencies=javax.api,javax.transaction.api
3. Registering the JDBC driver on the application server
Now that your MySQL is available as module on the application server, we will register it as JDBC driver. When using the CLI, this is a one-step operation:
/subsystem=datasources/jdbc-driver=mysql:add(driver-name=mysql,driver-module-name=com.mysql)
Now, you can check that your MySQL driver is enlisted through the available JDBC Drivers. Here is how you can achieve it:
[standalone@localhost:9990 /] /subsystem=datasources:installed-drivers-list
{
         . . . . . . . . . . .
         "driver-name" => "mysql",
         "deployment-name" => undefined,
         "driver-module-name" => "com.mysql",
         "module-slot" => "main",
         "driver-datasource-class-name" => "",
         "driver-xa-datasource-class-name" => "",
         "driver-class-name" => "com.mysql.jdbc.Driver",
         "driver-major-version" => 5,
         "driver-minor-version" => 1,
         "jdbc-compliant" => false        }
    ]
}
4. Configuring a datasource which uses the JDBC driver
The last step will actually create a datasource to be used by your applications. For this purpose, we will use the CLI data-source shortcut command, which requires as input the Pool name, the JNDI bindings, the JDBC Connection parameters and finally the security settings (username and password):
data-source add --jndi-name=java:/jdbc/mysqlds --name=MySQLPool --connection-url=jdbc:mysql://localhost:3306/mydatabase --driver-name=mysql --user-name=jboss --password=jboss
| Please note that the JNDI name for the Datasource must use the prefix java:/ to be accepted as valid. Therefore the binding used in tomcat (“jdbc/mysqlds”) has been changed to “java:/ jdbc/mysqlds”. |
5. Configuration output
If you have followed the above steps, you should have the following datasource configuration available in your datasource section:
<datasources>
	<datasource jndi-name="java:/jdbc/mysqlds"
                   pool-name="MySQLPool" enabled="true">
		<connection-url>jdbc:mysql://localhost:3306/mydatabase</connection-url>
		<driver>mysql</driver>
		<security>
			<user-name>jboss</user-name>
			<password>jboss</password>
		</security>
	</datasource>
	<drivers>
		<driver name="mysql" module="com.mysql"/>
	</drivers>
 </datasources>
6. Porting Datasource parameters to WildFly
Configuring the datasource on the application server is the first milestone for porting your applications on WildFly. Odds are however that you are using some specific connection pool settings that need to be ported on the application server. Some of these parameters have an identical match on WildFly, some others are based on different pooling strategies; therefore you need to adapt the configuration when porting them to the application server. Let’s see how to port the most common pool options to WildFly:
6.1. Minimum and Maximum pool size
Choosing the right pool size is a must for the performance of your applications. Tomcat minimum pool size is determined by the minIdle parameter and the max pool size is configured through maxActive. The initial size of the pool, on the other hand, is configured with the initialSize parameter. Here is a sample configuration:
<Resource name="jdbc/mysqlds" auth="Container" type="javax.sql.DataSource"
          maxActive="100" minIdle="30" initialSize=”15”
          username="tomcat" password="tomcat"
          driverClassName="com.mysql.jdbc.Driver"
          url="jdbc:mysql://localhost:3306/mydatabase"/>
When porting to WildFly, the parameters are named respectively min-pool-size and max-pool-size and can be set with any management instrument. Here’s how to change them for the default datasource:
/subsystem=datasources/data-source=ExampleDS/:write-attribute(name=min-pool-size,value=30)
/subsystem=datasources/data-source=ExampleDS/:write-attribute(name=max-pool-size,value=100)
The initial pool size, on the other hand, can be set using:
/subsystem=datasources/data-source=ExampleDS/:write-attribute(name=initial-pool-size,value=5)
Additionally note that WildFly has also an attribute named pool-prefill, which determines whether to attempt to prefill the connection pool to the minimum number of connections:
/subsystem=datasources/data-source=ExampleDS/:write-attribute(name=pool-prefill,value=true)
6.2. Dealing with Idle connections
Connections that have been created but haven’t been used by your applications are classified as idle connections. WildFly and Tomcat have a different way to deal with idle connections. More in detail, Tomcat uses both a minIdle and maxIdle parameter to determine respectively the minimum and maximum of idle connections that should be kept in the pool. We have already discussed about the minIdle parameter, which can be turned to be WildFly min-pool-size. On the other hand, the maxIdle parameter has not corresponding match on WildFly. The closest match is the idle-timeout-minutes, which is the number of minutes after which unused connections are closed (default 15 minutes). You can actually vary this parameter let’s say to 10 minutes as follows:
/subsystem=datasources/data-source=ExampleDS/:write-attribute(name=idle-timeout-minutes,value=10)
6.3. Setting a timeout when acquiring connections
If all your connections in a pool are busy, your applications will obviously have to wait for a connection to be released. As you can imagine, there is a timeout for this scenario, which is handled by the maxWait parameter in Tomcat. In the following example the timeout is set to 30 seconds:
<Resource name="jdbc/mysqlds" auth="Container" type="javax.sql.DataSource"
          maxWait="30000"
 . . . . />
WildFly has a corresponding parameter named blocking-timeout-wait-millis ; in the following CLI command we are setting it to 1 second (1000 ms):
/subsystem=datasources/data-source=ExampleDS/:write-attribute(name=blocking-timeout-wait-millis,value=1000)
6.4. Handling Connection leaks
A connection leak is called in Tomcat terms an “Abandoned connection”, which happens when you are creating a Statement, or a PreparedStatement or CallableStatement and you miss to close the connection or the statement (or more often, you don’t include the Connection close in a finally block).
You can handle abandoned connections in Tomcat by enabling the removeAbandoned parameter. If set to true a connection is considered abandoned and eligible for removal if it has not been used for longer than the removeAbandonedTimeout (default 300 seconds).
<Resource name="jdbc/mysqlds" auth="Container" type="javax.sql.DataSource"
          removeAbandoned ="true"  removeAbandonedTimeout=”300”
          . . . . />
On the WildFly side, there is no corresponding tweak for abruptly closing connections that are qualified as abandoned. On the other hand, there are some useful parameters, which can be used to detect or trace the issue.
If you are concerned about Statements (and PreparedStatements), you can use the track-statements parameter that checks for unclosed statements when a connection is returned to the pool and result sets are closed when a statement is closed/return to the prepared statement cache. Valid values are:
- false: do not track statements and results
- true: track statements and result sets and warn when they are not closed
- nowarn: track statements but do no warn about them being unclosed
Here is how to set this parameter to use NOWARN:
/subsystem=datasources/data-source=ExampleDS/:write-attribute(name=track-statements,value=NOWARN)
In addition, you can enable debugging of the caching layer, which is handled in WildFly by the Cached Connection Managed, part of the Connector subsystem (JCA).
/subsystem=jca/cached-connection-manager=cached-connection-manager/:write-attribute(name=debug,value=true)
You should enable also the error parameter, which will let you detect any error connected with the cached connection manager:
/subsystem=jca/cached-connection-manager=cached-connection-manager/:write-attribute(name=error,value=true)
Once that you have enabled logging, you will see for each connection acquired from the pool the following information:
DEBUG [org.jboss.jca.core.connectionmanager.pool.strategy.OnePool] (MSC service thread 1-4) {JNDI_NAME}: getConnection(null, null) [1/100] On the other hand, you will read the following message when connections are returning to the pool:
DEBUG [org.jboss.jca.core.connectionmanager.pool.strategy.OnePool] (MSC service thread 1-4) {JNDI_NAME}: returnConnection(607e334, false) [1/99] If you are debugging the statements emitted by your applications, you can easily find out where the connection leakage is.
Finally, if you want some details about what is going on at JDBC level, you can log the JDBC statements by setting to true the property named spy:
/subsystem=datasources/data-source=MySQLPool/:write-attribute(name=spy,value=true)
In order to debug the JDBC statements in your server logs, you need to create a logger element, which traces the jboss.jdbc.spy package. You can do it as follows:
/subsystem=logging/logger=jboss.jdbc.spy/:add(level=TRACE)
Reload your server configuration and check the server logs, which are by default contained into JBOSS_HOME/standalone/log/server.log (standalone mode) or JBOSS_HOME/domain/[server-name]/log/server.log (domain mode).
6.5. Configuring Statement Cache
A Prepared Statement is a pre-compiled object on the database whose access plan will be reused to execute further queries much quicker than normal queries. Prepared statements can be also cached by the application server itself when it’s necessary to issue the same statements across different requests. Tomcat’s jdbc-pool capabilities can manage the Prepared Statement cache using a JDBC interceptor, which is set as a JDBC property during pool creation. For example:
<Resource name="jdbc/mysqlds" auth="Container" type="javax.sql.DataSource"
   jdbcInterceptors="StatementCache(prepared=true,callable=false,max=50)"
</Resource>
When running on WildFly, you can set the PreparedStatement cache size by writing the prepared-statements-cache-size attribute as in the following example, which sets its size to 25 statements:
/subsystem=datasources/data-source=ExampleDS/:write-attribute(name=prepared-statements-cache-size,value=25)
 This excerpt has been taken from the “From Tomcat to WildFly” book in which you’ll learn how to port your existing Tomcat architectures to WildFly, including both the server configuration and the applications running on the top of it. You will also get exposure to the most common pitfalls and drawbacks, which might happen during the migration.
Apache Tomcat is a popular Web server and Servlet Container developed as an open-source project by the Apache Software Foundation since 1999. Today it is one of the most widely used platform for running Web applications both in simple sites and in large networks.
Nevertheless, the amount of libraries available on Apache Tomcat are usually just enough for very simple architectures which require just the HTTP protocol and a limited number of services; this caused the natural tendency to increase its capabilities with new extensions or modules such as Spring, Hibernate, JDO or Struts. Although the purpose of this book is not to cast in a bad light on these architectures, we do believe that a comparative knowledge of other solutions can help you to choose the best for your projects.

hi,
How to add wildfly modules to our application in wildfly migration?
Can i get someone to help me with learning java please i am a begginer studying java