Introduction
Clever Cloud is the first PaaS to provide Couchbase as a service allowing developers to run applications in a fully managed environment. This article shows how to deploy an existing application to Clever Cloud.
I am using a very simple Node application that I have documented in a previous article: “Easy application development with Couchbase, Angular and Node”.

Clever Cloud provides support for various databases MySQL, PostgreSQL, but also and this is most important for me Couchbase. No only Clever Cloud allows you to use database services but also you can deploy and host your application that could be developed in the language/technology of your choice : Java, Node, Scala, Python, PHP, … and all this in a secure, scalable and managed environment.
Setting up your Clever Cloud environment
Create your account
- Go to the Clever Cloud site : http://www.clever-cloud.com/
- Click on “Login” link and follow the steps to create your account.
- After few seconds you will received an email and be redirected to the Clever Cloud Console.
Create a Couchbase instance
The Clever Cloud Console allows you to create your Couchbase Bucket in few clicks:
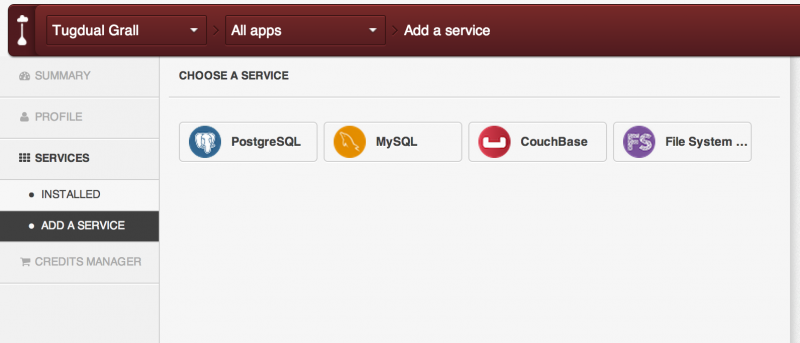
- Cick on “Services” in the left menu
- Click on “Add a Service” in the left menu
- Click on “Couchbase” button.
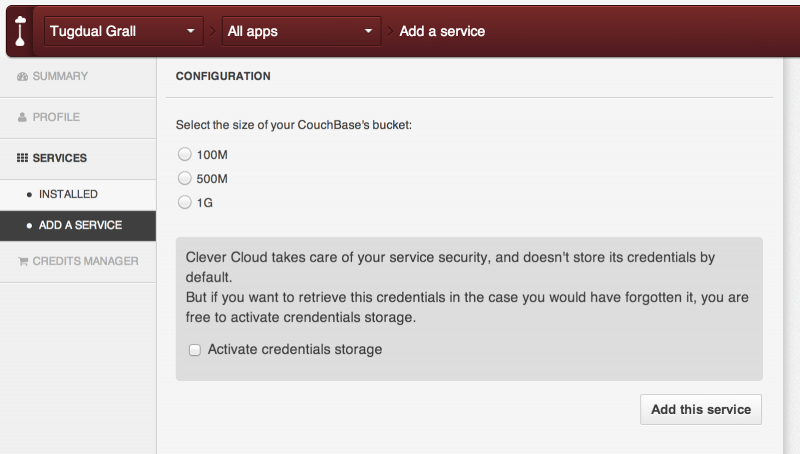
- Select the size of the RAM quota for your bucket

The size of the RAM Quota for your bucket will have an impact on performance but also on the pricing.
- Click “Add this Service”
You are done, you should receive an email with all the information to access your newly created bucket.
The mail from Clever Cloud contains the following information:
| db_host = xxxxxxxx.couchbase.clvrcld.net | Location of the database, this is where the endpoint is located. |
| db_name = yyyyyyyy | Name of the Couchbase bucket |
| db_username = xxxxxxxx | Not used in Couchbase context |
| db_password = zzzzzzzz | Password to connect to the Couchbase Bucket |
So you are now ready to use your bucket.
Note: In the current version of the Clever Cloud Couchbase Service you do not have access to a management console. If you want to get some information about the database or create views you need to do it from you application code.
Connect your Application to Couchbase@Clever-Cloud
The first step is to get some code, so let’s clone the “Couchbase Ideas Sample Application”, and install the dependencies, using the following commands:
git clone -b 03-vote-with-value https://github.com/tgrall/couchbase-node-ideas.git

cd couchbase-node-ideas

git branch mybranch

git checkout mybranch

npm install
Open the app.js and edit the connection info to point your application to the Couchbase instance and modify the HTTP port of your application to 8080 – this is a mandatory step documented here :
dbConfiguration = {
 "hosts": ["xxxxxxxxxxx.couchbase.clvrcld.net:8091"],
 "bucket": "xxxxxxxxxxx",
 "user": "xxxxxxxxxx",
 "password": "yyyyyyyyyyyyyyyyyyyyyyyyy"

};
...
...

  appServer = app.listen(8080, function() {
 console.log("Express server listening on port %d in %s mode", appServer.address().port, app.settings.env);
  });
Launch your application using
node app.js
Go to http://localhost:8080. Your application is now using Couchbase on the cloud powered by Clever Cloud. Let’s now deploy the application itself on Clever Cloud
Deploy your application on Clever Cloud
The easiest way to deploy an application to Clever Cloud is using git. The first thing to do is to add your SSH public key into Clever Cloud Console. If you do not have any SSH yet, follow the steps described on Github : “Generating SSH Keys”.
Add your SSH key
Note: As you can guess this should be done only once
Open the id_rsa.pub file with a text editor. This is your SSH key. Select all and copy to your clipboard.
- Go to the Clever Cloud Console
- Click on “Profile” entry in the left menu
- Click on “SSH Keys”
- Click on “Add a SSH Key”
- Enter a name (anything you want) and paste your key
- Click “Add” button
You are now ready to deploy applications to Clever Cloud. The next thing to do, is to create a new node application in Clever Cloud.
Create your Application
- Click “Add an app” in the Application menu in the top menu.
- Give a name and description to this application
- Select the Instance type, in this case “Node.js”
- Configure your instances, you can keep the default values for now, click “Next”
- Check the configuration, and click “Create”
Your application is created, you are redirected to the generic information page, where you can find a Git URL that we will use to deploy the application.
You can navigate into the entries in the left menu to see more information about your application. In addition to the Information page, you can look at the following entries:
- “Domain Names” to configure the URL to access your application
- “Logs” to view the application logs
Deploy the Application
So we are almost there!
The deployment to Clever Cloud is done using a Git push command, so you need to add the deployment URL as a remote repository to your application, using the following command:
git remote add clever git+ssh://git@push.clever-cloud.com/app_[your_app_id].git

git commit -a -m “Couchbase on Clever Cloud connection”

git push clever mybranch:master
Once you have added the application as remote repository you can commit and push your application.
The last command pushes the application to Clever Cloud. It is important to note that Clever Cloud will always deploy the application on the “master” branch on the remote repository. The notation mybranch:master is used to mention it. If you work locally on your master branch just use “master”.
You can now go to the Clever Cloud console and look in the log and click on the URL in the “Domain Names” section to test your application. You should be able to see your application, that is running on the Clever Cloud PaaS. When you update your application, you just need to do a git push and git commit.
Conclusion
In this tutorial you have learned how to:
- Create your Clever Cloud account
- Create a Couchbase instance
- Create and deploye a Node.js application
Feel free to test this yourself, with Node or other technology, as you can see it is quite easy to setup.

