Being a hardcore back-end developer, whenever I am thinking about building web application with some UI on JVM platform, I feel scared. And there are reasons for that: having experience with JSF, Liferay, Grails, … I don’t want to go this road anymore. But if a need comes, is there a choice, really? I found one which I think is awesome: Play Framework.
Built on top of JVM, Play Framework allows to create web applications using Java or Scala with literally no efforts. The valuable and distinguishing differences it provides: static compilation (even for page templates), easy to start with, and concise (more about it here).
To demonstrate how amazing Play Framework is, I would like to share my experience with developing simple web application. Let’s assume we have couple of hosts and we would like to watch CPU usage on each one in real-time (on a chart). When one hears “real-time”, it may mean different things but in context of our application it means: using WebSockets to push data from server to client. Though Play Framework supports pure Java API, I will use some Scala instead as it makes code very compact and clear.
Let’s get started! After downloading Play Framework (the latest version on the moment of writing was 2.1.1), let’s create our app by typing
play new play-websockets-example
and selecting Scala as a primary language. No wonders here: it’s a pretty standard way nowadays, right?
Having our application ready, next step would be to create some starting web page. Play Framework uses own type safe template engine based on Scala, it has a couple of extremely simple rules and is very easy to get started with. Here is an example of views/dashboard.scala.html:
@(title: String, hosts: List[Host])

<!DOCTYPE html>
<html>
  <head>
    <title>@title</title>
    <link rel="stylesheet" media="screen" href="@routes.Assets.at("stylesheets/main.css")">
    <link rel="shortcut icon" type="image/png" href="@routes.Assets.at("images/favicon.png")">
    <script src="@routes.Assets.at("javascripts/jquery-1.9.0.min.js")" type="text/javascript">
    <script src="@routes.Assets.at("javascripts/highcharts.js")" type="text/javascript">
  </head>

  <body>
    <div id="hosts">
      <ul class="hosts">
        @hosts.map { host =>
        <li>
          <a href="#" onclick="javascript:show( '@host.id' )"><b>@host.name</b></a>
        </li>
        }
      </ul>
    </div>

    <div id="content">
    </div>
  </body>
</html>

<script type="text/javascript">
function show( hostid ) {
  $("#content").load( "/host/" + hostid,
    function( response, status, xhr ) {
      if (status == "error") {
        $("#content").html( "Sorry but there was an error:" + xhr.status + " " + xhr.statusText);
      }
    }
  )
}
</script>
Aside from coupe of interesting constructs (which are very well described here), it looks pretty like regular HTML with a bit of JavaScript. The result of this web page is a simple list of hosts in the browser. Whenever user clicks on a particular host, another view will be fetched from the server (using old buddy AJAX) and displayed on right side from the host. Here is the second (and the last) template, views/host.scala.html:
@(host: Host)( implicit request: RequestHeader )

<div id="content">
  <div id="chart">
  <script type="text/javascript">
    var charts = []
    charts[ '@host.id' ] = new Highcharts.Chart({
      chart: {
        renderTo: 'chart',
        defaultSeriesType: 'spline'
      },
      xAxis: {
        type: 'datetime'
      },
      series: [{
        name: "CPU",
        data: []
      }]
    });
  </script>
</div>

<script type="text/javascript">
var socket = new WebSocket("@routes.Application.stats( host.id ).webSocketURL()")
socket.onmessage = function( event ) {
  var datapoint = jQuery.parseJSON( event.data );
  var chart = charts[ '@host.id' ]

  chart.series[ 0 ].addPoint({
    x: datapoint.cpu.timestamp,
    y: datapoint.cpu.load
  }, true, chart.series[ 0 ].data.length >= 50 );
}
</script>
It’s looks rather as a fragment, not a complete HTML page, which has only a chart and opens the WebSockets connection with a listener. With an enormous help of Highcharts and jQuery, JavaScript programming hasn’t ever been so easy for back-end developers as it’s now. At this moment, the UI part is completely done. Let’s move on to back-end side.
Firstly, let’s define the routing table which includes only three URLs and by default is located at conf/routes:
GET     /                           controllers.Application.index
GET     /host/:id                   controllers.Application.host( id: String )
GET     /stats/:id                  controllers.Application.stats( id: String )
Having views and routes defined, it’s time to fill up the last and most interesting part, the controllers which glue all parts together (actually, only one controller, controllers/Application.scala). Here is a snippet which maps index action to the view templated by views/dashboard.scala.html, it’s as easy as that:
def index = Action {
  Ok( views.html.dashboard( "Dashboard", Hosts.hosts() ) )
}
The interpretation of this action may sound like that: return successful response code and render template views/dashboard.scala.html with two parameters, title and hosts, as response body. The action to handle /host/:id looks much the same:
def host( id: String ) = Action { implicit request =>
  Hosts.hosts.find( _.id == id ) match {
    case Some( host ) => Ok( views.html.host( host ) )
    case None => NoContent
  }
}
And here is a Hosts object defined in models/Hosts.scala. For simplicity, the list of hosts is hard-coded:
package models

case class Host( id: String, name: String )

object Hosts {
  def hosts(): List[ Host ] = {
    return List( new Host( "h1", "Host 1" ), new Host( "h2", "Host 2" ) )
  }
}
The boring part is over, let’s move on to the last but not least implementation: server push of host’s CPU statistics using WebSockets. As you can see, the /stats/:id URL is already mapped to controller action so let’s take a look on its implementation:
def stats( id: String ) = WebSocket.async[JsValue] { request =>
  Hosts.hosts.find( _.id == id ) match {
    case Some( host ) => Statistics.attach( host )
    case None => {
      val enumerator = Enumerator
        .generateM[JsValue]( Promise.timeout( None, 1.second ) )
        .andThen( Enumerator.eof )
      Promise.pure( ( Iteratee.ignore[JsValue], enumerator ) )
    }
  }
}
Not too much code here but in case you are curious about WebSockets in Play Framework please follow this link. This couple of lines may look a bit weird at first but once you read the documentation and understand basic design principles behind Play Framework, it will look much more familiar and friendly. The Statistics object is the one who does the real job, let’s take a look on the code:
package models

import scala.concurrent.Future
import scala.concurrent.duration.DurationInt

import akka.actor.ActorRef
import akka.actor.Props
import akka.pattern.ask
import akka.util.Timeout
import play.api.Play.current
import play.api.libs.concurrent.Akka
import play.api.libs.concurrent.Execution.Implicits.defaultContext
import play.api.libs.iteratee.Enumerator
import play.api.libs.iteratee.Iteratee
import play.api.libs.json.JsValue

case class Refresh()
case class Connect( host: Host )
case class Connected( enumerator: Enumerator[ JsValue ] )

object Statistics {
  implicit val timeout = Timeout( 5 second )
  var actors: Map[ String, ActorRef ] = Map()

  def actor( id: String ) = actors.synchronized {
    actors.find( _._1 == id ).map( _._2 ) match {
      case Some( actor ) => actor
      case None => {
        val actor = Akka.system.actorOf( Props( new StatisticsActor(id) ), name = s"host-$id" )
        Akka.system.scheduler.schedule( 0.seconds, 3.second, actor, Refresh )
        actors += ( id -> actor )
        actor
      }
    }
  }

  def attach( host: Host ): Future[ ( Iteratee[ JsValue, _ ], Enumerator[ JsValue ] ) ] = {
    ( actor( host.id ) ? Connect( host ) ).map {
      case Connected( enumerator ) => ( Iteratee.ignore[JsValue], enumerator )
    }
  }
}
As always, thanks to Scala conciseness, not too much code but a lot of things are going on. As we may have hundreds of hosts, it would be reasonable to dedicate to each host own worker (not a thread) or, more precisely, own actor. For that, we will use another amazing library called Akka. The code snippet above just creates an actor for the host or uses existing one from the registry of the already created actors. Please note that the implementation is quite simplified and leaves off important details. The thoughts in right direction would be using supervisors and other advanced concepts instead of synchronized block. Also worth mentioning that we would like to make our actor a scheduled task: we ask actor system to send the actor a message Refresh every 3 seconds. That means that the charts will be updated with new values every three seconds as well.
So, when actor for a host is created, we send him a message Connect notifying that a new connection is being established. When response message Connected is received, we return from the method and at this point connection over WebSockets is about to be established. Please note that we intentionally ignore any input from the client by using Iteratee.ignore[JsValue].
And here is the StatisticsActor implementation:
package models
import java.util.Date
import scala.util.Random
import akka.actor.Actor
import play.api.libs.iteratee.Concurrent
import play.api.libs.json.JsNumber
import play.api.libs.json.JsObject
import play.api.libs.json.JsString
import play.api.libs.json.JsValue
class StatisticsActor( hostid: String ) extends Actor {
val ( enumerator, channel ) = Concurrent.broadcast[JsValue]
def receive = {
case Connect( host ) => sender ! Connected( enumerator )
case Refresh => broadcast( new Date().getTime(), hostid )
}
def broadcast( timestamp: Long, id: String ) {
val msg = JsObject(
Seq(
"id" -> JsString( id ),
"cpu" -> JsObject(
Seq(
( "timestamp" -> JsNumber( timestamp ) ),
( "load" -> JsNumber( Random.nextInt( 100 ) ) )
)
)
)
)
channel.push( msg )
}
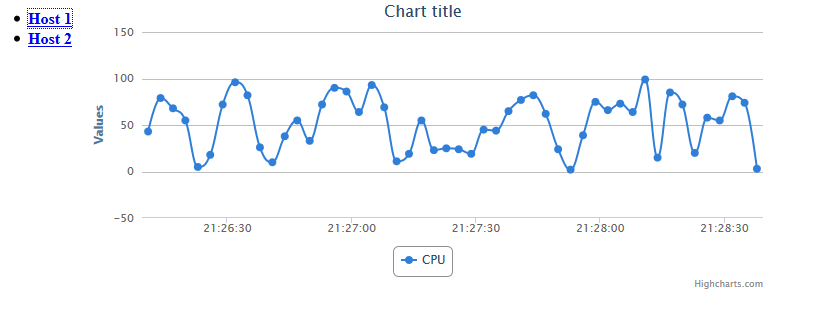
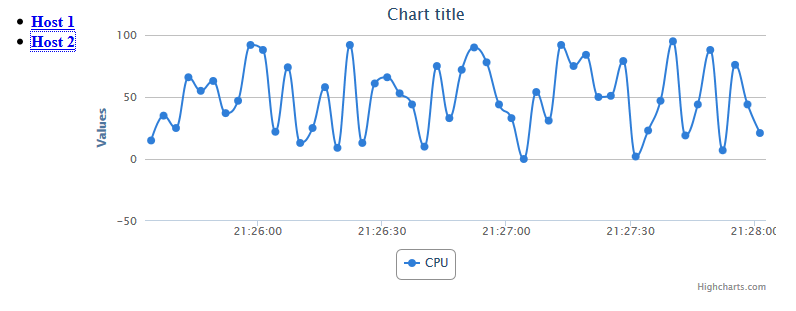
}The CPU statistics is randomly generated and the actor just broadcasts it every 3 seconds as simple JSON object. On the client side, the JavaScript code parses this JSON and updates the chart. Here is how it looks like for two hosts, Host 1 and Host 2 in Mozilla Firefox:
To finish up, I am personally very excited with what I’ve done so far with Play Framework. It took just couple of hours to get started and another couple of hours to make things work as expected. The errors reporting and feedback cycle from running application are absolutely terrific, thanks a lot to Play Framework guys and the community around it. There are still a lot of things to learn for me but it worth doing it. Please find the complete source code on GitHub.
