As posted before I attended to a technical handson AWS training last week. The subjects during these days were of course the standard EC2 and S3 services which I have used before. Added to that we worked with RDS, Elastic Load Balancing, SNS and VPC, Elastic Beanstalk and discussed a lot of terminology and business cases. In this post I setup a new EC2 server and connect to it with your MacOs although it will work similar in case of Linux. I have an account at AWS in place. Before you start make sure you have selected the correct region (for a simple demo it isn’t very big thing but when you are going to setup a real server it can make a big difference in the costs (network traffic) and latency although there are solutions for that). By the way, there are two approaches to setup your EC2 server, you can choose a “S3 backed” AMI (Amazon Machine Image) or a “EBS-bakced” AMI. There are a lot of good articles
available about the differences and when to use which one. In this demo I will install a “pre-baked” AMI with a complete WordPress setup installed. There are thousands of these AMI’s available in the AWS community. For this one launch the AWS Management Console at http://aws.amazon.com and choose the EC2 tab. In the AWS console make certain you selected the correct region and select ‘Images-AMIs’ in the left menu and search for “bitnami-wordpress”:
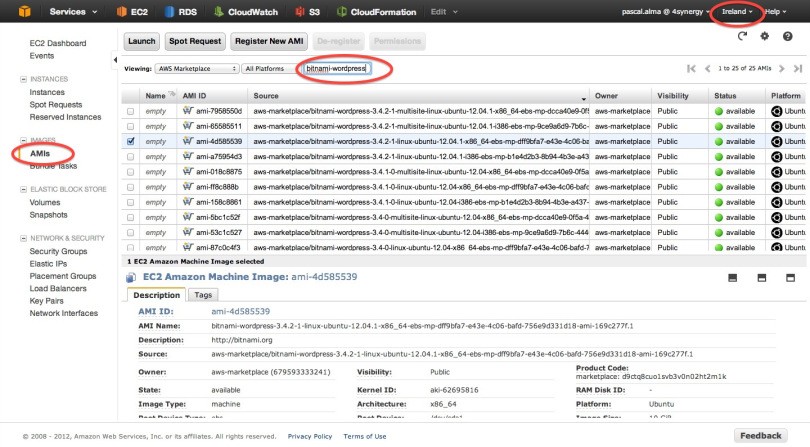
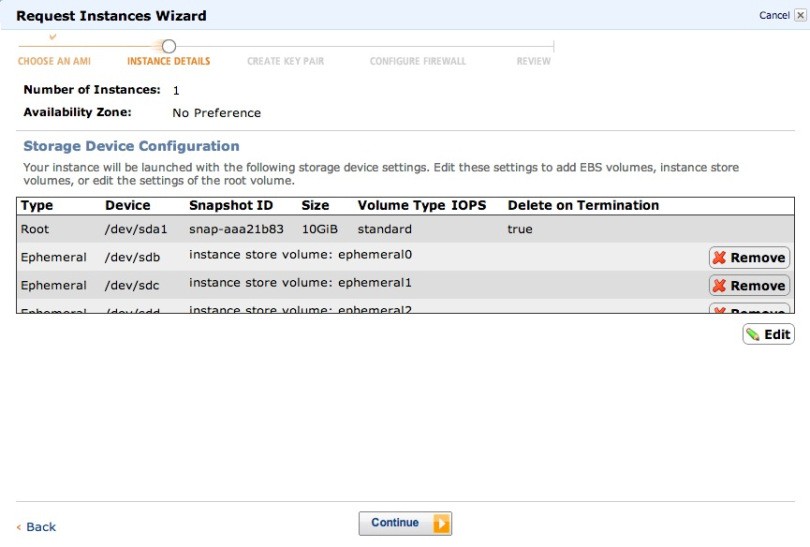
Select the AMI of your choice (I have 64-bit Ubuntu running WordPress 3.4.2.1) and click ‘Launch’. Now simply follow the steps of the wizard (although there is a lot to tell about almost every option in the wizard I simply go for the most default installation). At the Instance Details step make sure you select a Micro instance (to cut down the cost of having this demo running):

In the next two steps simply accept all defaults:

At the Create Key Pair step create a key pair if you haven’t already done so:

The next step Configure Firewall create a Security Group so we are able to access our Linux instance from the outside world by HTTP and SSH:

Finally review all your settings and if it is okay then launch the instance:

After a few seconds you should be able to see your new instance in the Instances overview in the AWS Management Console:
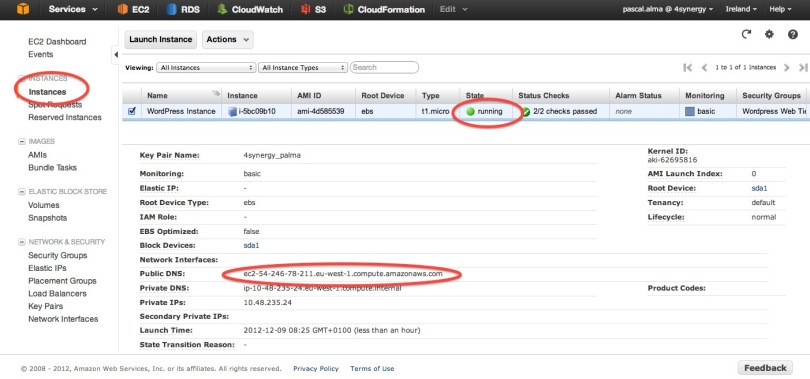
Please pay specific attention to the public DNS that is assigned to the instance. As you might be aware this DNS will change after you stopped and started this instance. So I use it now to show how to connect to the instance via SSH but you should not use this DNS as if it was a fixed IP/DNS. To work around this issue Amazon supplies Elastic IP which I show in another post.
To connect with SSH to this instance open up a Terminal on your Mac and type the following commands. First I had to narrow the permissions on the downloaded pem file for which I used: chmod u=r,go= 4synergy_palma.pem Then I was able to connect to the Bitnami instance via SSH with: ssh -i 4synergy_palma.pem bitnami@ec2-54-246-78-211.eu-west-1.compute.amazonaws.com as you can see here:

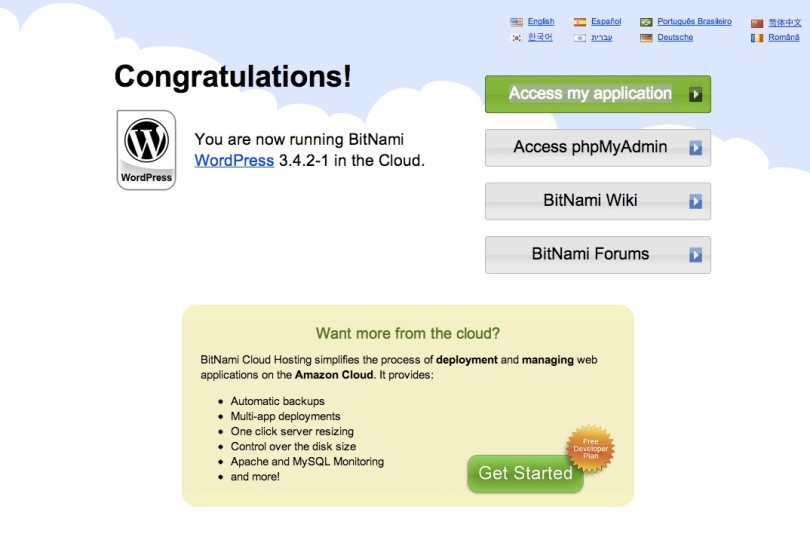
And of course we can enter our WordPress by opening the home URL in a web browser:
Reference: Working with Amazon Web Services (EC2) from our JCG partner Pascal Alma at the The Pragmatic Integrator blog.
