The user interface component can be arranged/attached with the activity in two different ways.
- Declaring UI element in layoutfile
Basically, Layout file is xml formatted file present in res/layout. In this file, tags are used to define any UI component and properties are used to configure the components. It is similar to HTML tags. This style is preferred because UI related codes and business logic codes are separated. It is comparatively easier to manage. - Creating view element at runtime
UI Companent can be created programmatically. UI component class setter methods help to configure the component. This style is not recommended unless it’s really required. In this style, business logic gets mixed with the component UI code. It doesn’t look neat and sometimes it’s hard to manage.
In this tutorial, we will create two different Activity classes with the same UI components but with different techniques.
Create an Android project(as shown in this tutorial) and name the Activity as XMLLayoutActivity and layout file as activity_xmllayout.xml. We will define some string constants to be used in layout file and Activity. Open the file string.xml present in res/values and put the following contents:
<resources>
    <string name='app_name'>AndroidLayout</string>
    <string name='menu_settings'>Settings</string>
    <string name='title_activity_xmllayout'>XMLLayoutActivity</string>
    <string name='c4r'>Code4Reference.com</string>
    <string name='OtherActivity'>Other Activity</string>
    <string name='dynamic_layout_activity'>Dynamic Layout Activity</string>
</resources>
Now, we will write very simple layout file which contains Textview, EditText and Button UI components as shown below.
<LinearLayout xmlns:android='http://schemas.android.com/apk/res/android'
    xmlns:tools='http://schemas.android.com/tools'
    android:layout_width='match_parent'
    android:layout_height='match_parent'
    android:orientation='vertical'>

    <TextView
        android:layout_width='match_parent'
        android:layout_height='wrap_content'
        android:padding='@dimen/padding_medium'
        android:text='@string/c4r'
        tools:context='.XMLLayoutActivity' />
    <EditText
        android:layout_width='match_parent'
        android:layout_height='wrap_content'
        android:padding='@dimen/padding_medium'
        android:hint='@string/c4r'
        tools:context='.XMLLayoutActivity'/>

    <Button
        android:id='@+id/btOtherActivity'
        android:layout_width='match_parent'
        android:layout_height='wrap_content'
        android:padding='@dimen/padding_medium'
        android:text='@string/OtherActivity'
        />
</LinearLayout>
Let’s define the first activity class called XMLLayoutActivity. This Activity uses the layout file defined above.
package com.code4reference.androidlayout;

import android.app.Activity;
import android.content.Intent;
import android.os.Bundle;
import android.view.View;
import android.view.View.OnClickListener;
import android.widget.Button;

public class XMLLayoutActivity extends Activity {

 Button btOtherActivity;

 @Override
 public void onCreate(Bundle savedInstanceState) {
  super.onCreate(savedInstanceState);
  // Attaching the layout file with the current Activity.
  setContentView(R.layout.activity_xmllayout);
  // Associate the Button object with the Button defined in the layout
  // file. Notice that R.id.btOtherActivity is associated with the
  //button in activity_xmllayout.xml layoutfile.
  btOtherActivity = (Button) findViewById(R.id.btOtherActivity);
  //Attaching the OnclickListener with the button.
  btOtherActivity.setOnClickListener(new OnClickListener() {
   @Override
   public void onClick(View view) {
    //Creating an Intent which will invoke
    //the other Activity (DynamicLayoutActivity).
    Intent intent = new Intent(getApplicationContext(),
      DynamicLayoutActivity.class);
    //This method will start the other activity.
    startActivity(intent);
   }
  });
 }
}
Now, add another DynamicLayoutActivity class to the same package which extends Activity class.This activity class will dynamically add the UI component to Activity. Put the following content in the class definition. The embedded comments will help to understand the code.
package com.code4reference.androidlayout;

import android.app.Activity;
import android.os.Bundle;
import android.view.View;
import android.view.View.OnClickListener;
import android.widget.Button;
import android.widget.EditText;
import android.widget.LinearLayout;
import android.widget.LinearLayout.LayoutParams;
import android.widget.TextView;
import android.widget.Toast;

public class DynamicLayoutActivity extends Activity {

 @Override
 protected void onCreate(Bundle savedInstanceState) {
  super.onCreate(savedInstanceState);
  // This will create the LinearLayout
  LinearLayout ll = new LinearLayout(this);
  ll.setOrientation(LinearLayout.VERTICAL);

  // Configuring the width and height of the linear layout.
  LayoutParams llLP = new LayoutParams(
    //android:layout_width='match_parent' an in xml
    LinearLayout.LayoutParams.MATCH_PARENT,
    //android:layout_height='wrap_content'
    LinearLayout.LayoutParams.MATCH_PARENT);
  ll.setLayoutParams(llLP);

  TextView tv = new TextView(this);
  LayoutParams lp = new LayoutParams(
    LinearLayout.LayoutParams.MATCH_PARENT,
    LinearLayout.LayoutParams.WRAP_CONTENT);

  tv.setLayoutParams(lp);
  //android:text='@string/c4r'
  tv.setText(R.string.c4r);
  //android:padding='@dimen/padding_medium'
  tv.setPadding(8, 8, 8, 8);
  ll.addView(tv);
  EditText et = new EditText(this);
  et.setLayoutParams(lp);
  et.setHint(R.string.c4r);
  et.setPadding(8, 8, 8, 8);

  ll.addView(et);
  Button bt = new Button(this);
  bt.setText(R.string.OtherActivity);
  bt.setPadding(8, 8, 8, 8);
  ll.addView(bt);
  //Now finally attach the Linear layout to the current Activity.
  setContentView(ll);

  //Attach OnClickListener to the button.
  bt.setOnClickListener(new OnClickListener() {
   @Override
   public void onClick(View view) {
    Toast.makeText(getApplicationContext(),
      'This is dynamic activity', Toast.LENGTH_LONG).show();
   }
  });
 }
}
As you can see, the code doesn’t look that neat compared to the former one. In OnClickListener, Toast class has been used to prompt the message. Now, we need to modify the AndroidManifest file because another activity class has been added.
<manifest xmlns:android='http://schemas.android.com/apk/res/android'
    package='com.code4reference.androidlayout'
    android:versionCode='1'
    android:versionName='1.0' >
    <uses-sdk
        android:minSdkVersion='8'
        android:targetSdkVersion='15' />
    <application
        android:icon='@drawable/ic_launcher'
        android:label='@string/app_name'
        android:theme='@style/AppTheme' >
        <activity
            android:name='.XMLLayoutActivity'
            android:label='@string/title_activity_xmllayout' >
            <intent-filter>
                <action android:name='android.intent.action.MAIN' />
                <category android:name='android.intent.category.LAUNCHER' />
            </intent-filter>
        </activity>
        <activity android:name='.DynamicLayoutActivity'
            android:label='@string/dynamic_layout_activity'>
            <intent-filter >
                <category android:name='android.intent.category.LAUNCHER'/>
            </intent-filter>
        </activity>
    </application>
</manifest>
Once the coding is done, execute the application and you will notice the following Activity on screen.
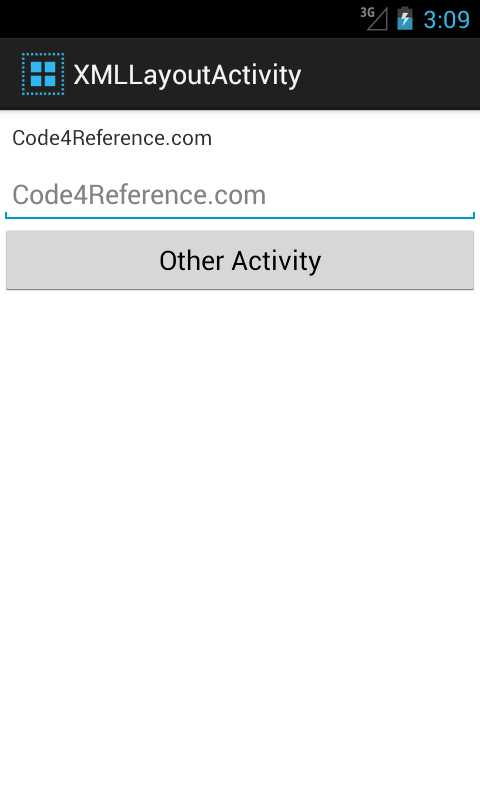
If you click the button, the next activity will appear having almost similar layout but with different title. If you click the button on the another activity, it will show you a toast message. You can get the source code from github/Code4Reference. You can read more about the android layout here.
Reference: Android dynamic and xml layout from our JCG partner Rakesh Cusat at the Code4Reference blog.

Do i need to create activity with title DynamicLayoutActivity or only class with title DynamicLayoutActivity ?