In this tutorial we will see how to integrate GWT with Spring’s security module, i.e. Spring Security. We will see how to protect the GWT entrypoint, how to retrieve the user’s credentials and how to log the various authentication events. Moreover, we are going to implement a custom authentication provider so that existing authentication schemes can be reused.
If you are a regular JavaCodeGeeks reader, you should probably know by now that we are really fond of GWT. In the past, Justin has written some killer articles on GWT: how to integrate GWT with Spring and Hibernate (JPA) and how to add Eclipse and Maven in the mix. Moreover, I have written about how to add JSON capabilities into your GWT application, how to add CAPTCHA for GWT and how to get started with SmartGWT. Finally, Pat has written about building your own GWT Spring Maven Archetype and integrating GWT, EJB3, Maven and JBoss.
Thus, it should be of no surprise that we are now bringing Spring’s Security module into play. As the official site states, Spring Security is a powerful and highly customizable authentication and access-control framework. It is the de-facto standard for securing Spring-based applications. Spring Security is the evolution of the Acegi framework which used Spring under the hood in order to provide security mainly to web applications. However, Spring Security is now a full-blown security framework, incorporating functionality not only for the web, but also for LDAP integration and ACLs creation. Before getting started with this tutorial, it would be nice to take a look at the Spring Security Reference Documentation and having at hand the Spring Security API Javadocs.
For this tutorial I will be using GWT 2.1.0 and Spring Security 3.0.5. You can download the latest production release here. As you might have guessed, some libraries from the core Spring framework will also be needed. You can download the framework here.
Let’s get started by creating a new Web Application project in Eclipse (I suppose you have already installed the Google plugin for Eclipse and that you also have GWT deployed). I chose the profound name “GwtSpringSecurityProject” for the project’s name. Here what the Eclipse screen will look like:

The first step for adding Spring security to our project is declaring a filter in our “web.xml” file. This filter, which is an instance of the FilterChainProxy class, will intercept all incoming requests and delegate the request’s control to the appropriate Spring handler. The relevant web declaration file snippet is the following:
…
<filter>
        <filter-name>springSecurityFilterChain</filter-name>
        <filter-class>org.springframework.web.filter.DelegatingFilterProxy</filter-class>
</filter>

<filter-mapping>
      <filter-name>springSecurityFilterChain</filter-name>
      <url-pattern>/*</url-pattern>
</filter-mapping>
...
We also have to define a ContextLoaderListener in our “web.xml” in order to bootstrap the Spring context. This is done via the following snippet:
…
    <listener>
        <listener-class>org.springframework.web.context.ContextLoaderListener</listener-class>
    </listener>
...
Next we create a file named “applicationContext.xml” inside the “war/WEB-INF” folder. There we declare the spring security related information. The most important element is the “http”, which can be used to define on which URLs should security be applied, as well as what roles should the users have in order to access particular resources. In our case, the snippet is the following:
…
<http auto-config="true">
        <intercept-url pattern="/gwtspringsecurityproject/**" access="ROLE_USER"/>
        <intercept-url pattern="/gwt/**" access="ROLE_USER"/>
        <intercept-url pattern="/**/*.html" access="ROLE_USER"/>
        <intercept-url pattern="/**" access="IS_AUTHENTICATED_ANONYMOUSLY" />
</http>
...
In short, the above states that role “ROLE_USER” is required in order to gain access to the files under the “gwt” and the “gwtspringsecurityproject” folders (where the GWT related resources reside). Similarly, all HTML files (like GWT’s entrypoint) require the same role. The “IS_AUTHENTICATED_ANONYMOUSLY” means that all users can access the particular resource, without having to be part of a specific role. With this simple usage of the “http” element, the default login page and logout URL will be used by Spring.
All the authentication requests are handled by an AuthenticationManager, so an instance of that has to be declare in our file. More specifically, the requests are usually delegated to an AuthenticationProvider. Some already created implementations can be used, such as the DaoAuthenticationProvider (when working with roles and users defined in a DB) or the LdapAuthenticationProvider (which authenticates users against an LDAP server). For the purposes of this tutorial however, we are going to create a custom authentication provider and integrate it with spring’s security infrastructure.
Before we delve into the application’s code, we have to take care of dependencies first. Here are the JARs that have to be added to the project’s classpath:
- org.springframework.context-3.0.5.RELEASE.jar
- spring-security-core-3.0.5.RELEASE.jar
- spring-security-web-3.0.5.RELEASE.jar
Ok, now we are ready. Our provider is quite plain and just uses a static Map in order to store users and their corresponding password. Here is the code:
package com.javacodegeeks.gwt.security.server.auth;

import java.util.HashMap;
import java.util.Map;

import org.springframework.security.authentication.AuthenticationProvider;
import org.springframework.security.authentication.BadCredentialsException;
import org.springframework.security.authentication.UsernamePasswordAuthenticationToken;
import org.springframework.security.core.Authentication;
import org.springframework.security.core.AuthenticationException;
import org.springframework.security.core.userdetails.UsernameNotFoundException;

public class CustomAuthenticationProvider implements AuthenticationProvider {

    private static Map<String, String> users = new HashMap<String, String>();

    static {
        users.put("fabrizio", "javacodegeeks");
        users.put("justin", "javacodegeeks");
    }

    @Override
    public Authentication authenticate(Authentication authentication)
            throws AuthenticationException {

        String username = (String) authentication.getPrincipal();
        String password = (String)authentication.getCredentials();

        if (users.get(username)==null)
            throw new UsernameNotFoundException("User not found");

        String storedPass = users.get(username);

        if (!storedPass.equals(password))
            throw new BadCredentialsException("Invalid password");

        Authentication customAuthentication =
            new CustomUserAuthentication("ROLE_USER", authentication);
        customAuthentication.setAuthenticated(true);

        return customAuthentication;

    }

    @Override
    public boolean supports(Class<? extends Object> authentication) {
        return UsernamePasswordAuthenticationToken.class.isAssignableFrom(authentication);
    }

}
Let’s begin the elaboration on that code from the end. The supports method defines the kind of authentication that this provider provides. In our case, the UsernamePasswordAuthenticationToken is the one we wish to handle. That implementation is designed for simple presentation of a username and password.
The authenticate method is implemented and inside that we retrieve the username provided in the login form (via the getPrincipal method) as well as the accompanying password (via the getCredentials method). First, we check if the specific username exists and if not, a UsernameNotFoundException is thrown. Similarly, if the username exists but the password is incorrect, a BadCredentialsException is thrown. Note that both theses exceptions extend the parent AuthenticationException class.
If both the username and the password are correct, we are in place to authenticate the user. In order to do so, we have to return a concrete instance of the Authentication interface. In that, we have to encapsulate the already known user information (credentials etc.) as well as the roles (authorities) that the user has. Note that the assigned role (ROLE_USER) matches the one declared in the “applicationContext.xml” file. In addition, the setAuthenticated method has to be invoked (with true as argument) in order to indicate to the rest of the authentication chain that the specific user was successfully authenticated by our module. Let’s see how the custom authentication object is defined in our case:
package com.javacodegeeks.gwt.security.server.auth;

import java.util.ArrayList;
import java.util.Collection;

import org.springframework.security.core.Authentication;
import org.springframework.security.core.GrantedAuthority;
import org.springframework.security.core.authority.GrantedAuthorityImpl;

public class CustomUserAuthentication implements Authentication {

    private static final long serialVersionUID = -3091441742758356129L;

    private boolean authenticated;

    private GrantedAuthority grantedAuthority;
    private Authentication authentication;

    public CustomUserAuthentication(String role, Authentication authentication) {
        this.grantedAuthority = new GrantedAuthorityImpl(role);
        this.authentication = authentication;
    }

    @Override
    public Collection<GrantedAuthority> getAuthorities() {
        Collection<GrantedAuthority> authorities = new ArrayList<GrantedAuthority>();
        authorities.add(grantedAuthority);
        return authorities;
    }

    @Override
    public Object getCredentials() {
        return authentication.getCredentials();
    }

    @Override
    public Object getDetails() {
        return authentication.getDetails();
    }

    @Override
    public Object getPrincipal() {
        return authentication.getPrincipal();
    }

    @Override
    public boolean isAuthenticated() {
        return authenticated;
    }

    @Override
    public void setAuthenticated(boolean authenticated) throws IllegalArgumentException {
        this.authenticated = authenticated;
    }

    @Override
    public String getName() {
        return this.getClass().getSimpleName();
    }

}
In the constructor, we pass the user’s role and the original Authentication object. In the implemented methods, the most important one is the getAuthorities, which returns the authorities that the principal has been granted. That information is provided inside a collection of GrantedAuthority objects.
Let’s see now how the “applicationContext.xml” looks like:
<?xml version="1.0" encoding="UTF-8"?>

<beans:beans xmlns="http://www.springframework.org/schema/security"
    xmlns:beans="http://www.springframework.org/schema/beans"
    xmlns:xsi="http://www.w3.org/2001/XMLSchema-instance"
    xsi:schemaLocation="http://www.springframework.org/schema/beans http://www.springframework.org/schema/beans/spring-beans-3.0.xsd
                        http://www.springframework.org/schema/security http://www.springframework.org/schema/security/spring-security-3.0.xsd">

    <beans:bean id="customAuthListener" class="com.javacodegeeks.gwt.security.server.auth.CustomAuthListener"/>

    <http auto-config="true">
        <intercept-url pattern="/gwtspringsecurityproject/**" access="ROLE_USER"/>
        <intercept-url pattern="/gwt/**" access="ROLE_USER"/>
        <intercept-url pattern="/**/*.html" access="ROLE_USER"/>
        <intercept-url pattern="/**" access="IS_AUTHENTICATED_ANONYMOUSLY" />
    </http>

    <beans:bean id="customAuthenticationProvider" class="com.javacodegeeks.gwt.security.server.auth.CustomAuthenticationProvider" />

    <authentication-manager alias="authenticationManager">
     <authentication-provider ref="customAuthenticationProvider"/>
 </authentication-manager>

</beans:beans>
Every element of the declaration file has been defined except for the “CustomAuthListener”. Being part of the Spring framework, Spring Security allows the application developer to provide callbacks which will be invoked on specific parts of the application’s lifecycle. Thus, we can register our methods to be called when specific authentication events occur. In our case, we will create a listener that receives AbstractAuthorizationEvents, i.e. all security interception related events. Let’s see how this is accomplished:
package com.javacodegeeks.gwt.security.server.auth;

import org.apache.commons.logging.Log;
import org.apache.commons.logging.LogFactory;
import org.springframework.context.ApplicationListener;
import org.springframework.security.authentication.event.AbstractAuthenticationEvent;
import org.springframework.security.authentication.event.AbstractAuthenticationFailureEvent;

public class CustomAuthListener implements ApplicationListener<AbstractAuthenticationEvent> {

 private static final Log logger = LogFactory.getLog(CustomAuthListener.class);

 @Override
 public void onApplicationEvent(AbstractAuthenticationEvent event) {

 final StringBuilder builder = new StringBuilder();
        builder.append("Authentication event ");
        builder.append(event.getClass().getSimpleName());
        builder.append(": ");
        builder.append(event.getAuthentication().getName());
        builder.append("; details: ");
        builder.append(event.getAuthentication().getDetails());

        if (event instanceof AbstractAuthenticationFailureEvent) {
            builder.append("; exception: ");
            builder.append(((AbstractAuthenticationFailureEvent) event).getException().getMessage());
        }

        logger.warn(builder.toString());

 }

}
In our implementation, we just log all successful and unsuccessful authentication events (based on the LoggerListener class) but it is obviously quite straightforward to provide your own business logic here.
Finally, we will create a GWT asynchronous server side service that will provide the client with information regarding the user and the username that he has logged in with. If you have the tiniest experience with GWT, you will not have any problems understanding the code. Here are the two interfaces and the concrete implementation of the service:
AuthService
package com.javacodegeeks.gwt.security.client;

import com.google.gwt.user.client.rpc.RemoteService;
import com.google.gwt.user.client.rpc.RemoteServiceRelativePath;

/**
 * The client side stub for the RPC service.
 */
@RemoteServiceRelativePath("auth")
public interface AuthService extends RemoteService {
 String retrieveUsername();
}
AuthServiceAsync
package com.javacodegeeks.gwt.security.client;

import com.google.gwt.user.client.rpc.AsyncCallback;

/**
 * The async counterpart of <code>AuthService</code>.
 */
public interface AuthServiceAsync {
 void retrieveUsername(AsyncCallback<String> callback);
}
AuthServiceImpl
package com.javacodegeeks.gwt.security.server;

import org.springframework.security.core.Authentication;
import org.springframework.security.core.context.SecurityContextHolder;

import com.google.gwt.user.server.rpc.RemoteServiceServlet;
import com.javacodegeeks.gwt.security.client.AuthService;

@SuppressWarnings("serial")
public class AuthServiceImpl extends RemoteServiceServlet implements AuthService {

    @Override
    public String retrieveUsername() {

        Authentication authentication =
            SecurityContextHolder.getContext().getAuthentication();

        if (authentication==null){
            System.out.println("Not logged in");
            return null;
        }
        else {
            return (String) authentication.getPrincipal();
        }

    }

}
The code is very simple. We use the SecurityContextHolder class to retrieve the current SecurityContext and then the getAuthentication method in order to take reference of the underlying Authentication object. From that, we retrieve the username, if any, via the getPrincipal method.
Of course, we have to declare the specific servlet in our application “web.xml” file. Here it is:
...
<servlet>
 <servlet-name>authServlet</servlet-name>
 <servlet-class>com.javacodegeeks.gwt.security.server.AuthServiceImpl</servlet-class>
</servlet>

<servlet-mapping>
 <servlet-name>authServlet</servlet-name>
 <url-pattern>/gwtspringsecurityproject/auth</url-pattern>
</servlet-mapping>
...
And here is the whole web declaration file:
<?xml version="1.0" encoding="UTF-8"?>
<!DOCTYPE web-app
    PUBLIC "-//Sun Microsystems, Inc.//DTD Web Application 2.3//EN"
    "http://java.sun.com/dtd/web-app_2_3.dtd">

<web-app>

    <filter>
        <filter-name>springSecurityFilterChain</filter-name>
        <filter-class>org.springframework.web.filter.DelegatingFilterProxy</filter-class>
    </filter>

    <filter-mapping>
      <filter-name>springSecurityFilterChain</filter-name>
      <url-pattern>/*</url-pattern>
    </filter-mapping>

    <listener>
        <listener-class>org.springframework.web.context.ContextLoaderListener</listener-class>
    </listener>

    <!-- Servlets -->
    <servlet>
        <servlet-name>greetServlet</servlet-name>
        <servlet-class>
            com.javacodegeeks.gwt.security.server.GreetingServiceImpl
        </servlet-class>
    </servlet>

    <servlet-mapping>
        <servlet-name>greetServlet</servlet-name>
        <url-pattern>/gwtspringsecurityproject/greet</url-pattern>
    </servlet-mapping>

    <servlet>
        <servlet-name>authServlet</servlet-name>
        <servlet-class>com.javacodegeeks.gwt.security.server.AuthServiceImpl</servlet-class>
    </servlet>

    <servlet-mapping>
        <servlet-name>authServlet</servlet-name>
        <url-pattern>/gwtspringsecurityproject/auth</url-pattern>
    </servlet-mapping>

    <!-- Default page to serve -->
    <welcome-file-list>
        <welcome-file>GwtSpringSecurityProject.html</welcome-file>
    </welcome-file-list>

</web-app>
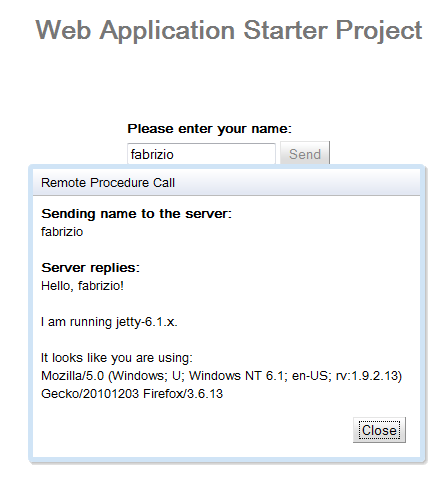
Let’s see how this service is used inside the application’s entry point. We add the following code snippet just before the end of the onModuleLoad method:
authService.retrieveUsername(
 new AsyncCallback<String>() {
  public void onFailure(Throwable caught) {
   dialogBox.setText("Remote Procedure Call - Failure");
  }
  public void onSuccess(String result) {
   nameField.setText(result);
  }
 }
);
A last step before launching our application is to take care of the runtime dependencies. Spring requires a bunch of libraries in order to do its DI magic, so here is the list of the JARs that have to be present inside your “war/WEB-INF/lib” folder:
- org.springframework.aop-3.0.5.RELEASE.jar
- org.springframework.asm-3.0.5.RELEASE.jar
- org.springframework.beans-3.0.5.RELEASE.jar
- org.springframework.context-3.0.5.RELEASE.jar
- org.springframework.core-3.0.5.RELEASE.jar
- org.springframework.expression-3.0.5.RELEASE.jar
- org.springframework.web-3.0.5.RELEASE.jar
- spring-security-config-3.0.5.RELEASE.jar
- spring-security-core-3.0.5.RELEASE.jar
- spring-security-web-3.0.5.RELEASE.jar
After copying all of the above, launch the Eclipse project configuration and try to access the default URL:
http://127.0.0.1:8888/GwtSpringSecurityProject.html?gwt.codesvr=127.0.0.1:9997
The request will be intercepted by Spring Security and you will be presented with a default login page. Provide the valid credentials as below:

Submit the form data and you will be redirected to the original URL. Notice that the text field will be populated with the username used to log in.
Return to your Eclipse Console view and check out the various logs printed there. You should see something like the following:
12 Dec 2010 8:45:49 PM com.javacodegeeks.gwt.security.server.auth.CustomAuthListener onApplicationEvent
WARNING: Authentication event AuthenticationSuccessEvent: CustomUserAuthentication; details: org.springframework.security.web.authentication.WebAuthenticationDetails@fffdaa08: RemoteIpAddress: 127.0.0.1; SessionId: im1fdjvdu7yw
12 Dec 2010 8:45:49 PM com.javacodegeeks.gwt.security.server.auth.CustomAuthListener onApplicationEvent
WARNING: Authentication event InteractiveAuthenticationSuccessEvent: CustomUserAuthentication; details: org.springframework.security.web.authentication.WebAuthenticationDetails@fffdaa08: RemoteIpAddress: 127.0.0.1; SessionId: im1fdjvdu7yw
That’s all folks. You can find here the Eclipse project created. Have fun!
- GWT 2 Spring 3 JPA 2 Hibernate 3.5 Tutorial
- Getting Started with SmartGWT for awesome GWT interfaces
- Building your own GWT Spring Maven Archetype
- GWT 2 Spring 3 JPA 2 Hibernate 3.5 Tutorial – Eclipse and Maven 2 showcase
- Sending e-mails in Java with Spring – GMail SMTP server example

Hi,
am using this tutorial and it works fine in dev. mode (from eclipse) but when I compile and deploy the project I get a blanck screen instead of the login form! can u please help me?
— Edit —
I fixed it by adding
I’m using Spring Security + GWT and it works fine, but there is an annoying issue – browser cache. After logout user can press back button in browser and browser loads gwt host page from cache and don’t redirect to login page. I’ve tried to add meta to html page (like
) but it doesn’t work well.
Can someone help me with this problem? Thanks!
Hi Sergey,
I have the exact same problem with logout & browser cache, have you managed to resolve it?
Thanks,
Werner
>user can press back button in browser and browser loads gwt host page from cache and
>don’t redirect to login page.
It shouldn’t matter that the Back button of the browser will get the page from local browser cache.
When the user will press Save or some other functionality that touches the web server, you will get redirected to the login page.
2 things:
1. You need to include spring-security-config in your project.
2. you need to manually put this jar in war/WEB-INF/lib in your project.
thx for this tutorial !
giving me the following execption. anyone have any idea why this may be? Grave: Context initialization failedorg.springframework.beans.factory.BeanCreationException: Error creating bean with name ‘customAuthListener’ defined in ServletContext resource [/WEB-INF/applicationContext.xml]: Instantiation of bean failed; nested exception is java.lang.VerifyError: Expecting a stackmap frame at branch target 158 in method com.infomedical.presmedwebaplication.security.server.auth.CustomAuthListener.onApplicationEvent(Lorg/springframework/security/authentication/event/AbstractAuthenticationEvent;)V at offset 113 at org.springframework.beans.factory.support.AbstractAutowireCapableBeanFactory.instantiateBean(AbstractAutowireCapableBeanFactory.java:965) at org.springframework.beans.factory.support.AbstractAutowireCapableBeanFactory.createBeanInstance(AbstractAutowireCapableBeanFactory.java:911) at org.springframework.beans.factory.support.AbstractAutowireCapableBeanFactory.doCreateBean(AbstractAutowireCapableBeanFactory.java:485) at org.springframework.beans.factory.support.AbstractAutowireCapableBeanFactory.createBean(AbstractAutowireCapableBeanFactory.java:456) at org.springframework.beans.factory.support.AbstractBeanFactory$1.getObject(AbstractBeanFactory.java:291) at org.springframework.beans.factory.support.DefaultSingletonBeanRegistry.getSingleton(DefaultSingletonBeanRegistry.java:222) at org.springframework.beans.factory.support.AbstractBeanFactory.doGetBean(AbstractBeanFactory.java:288) at org.springframework.beans.factory.support.AbstractBeanFactory.getBean(AbstractBeanFactory.java:190) at org.springframework.beans.factory.support.DefaultListableBeanFactory.preInstantiateSingletons(DefaultListableBeanFactory.java:580) at org.springframework.context.support.AbstractApplicationContext.finishBeanFactoryInitialization(AbstractApplicationContext.java:895) at org.springframework.context.support.AbstractApplicationContext.refresh(AbstractApplicationContext.java:425) at org.springframework.web.context.ContextLoader.createWebApplicationContext(ContextLoader.java:276) at org.springframework.web.context.ContextLoader.initWebApplicationContext(ContextLoader.java:197) at org.springframework.web.context.ContextLoaderListener.contextInitialized(ContextLoaderListener.java:47) at org.mortbay.jetty.handler.ContextHandler.startContext(ContextHandler.java:548) at org.mortbay.jetty.servlet.Context.startContext(Context.java:136) at org.mortbay.jetty.webapp.WebAppContext.startContext(WebAppContext.java:1250) at org.mortbay.jetty.handler.ContextHandler.doStart(ContextHandler.java:517) at org.mortbay.jetty.webapp.WebAppContext.doStart(WebAppContext.java:467) at org.mortbay.component.AbstractLifeCycle.start(AbstractLifeCycle.java:50) at org.mortbay.jetty.handler.HandlerWrapper.doStart(HandlerWrapper.java:130) at org.mortbay.component.AbstractLifeCycle.start(AbstractLifeCycle.java:50) at org.mortbay.jetty.handler.HandlerWrapper.doStart(HandlerWrapper.java:130) at org.mortbay.jetty.Server.doStart(Server.java:224) at org.mortbay.component.AbstractLifeCycle.start(AbstractLifeCycle.java:50)… Read more »
Hi, thanks for your tutorial. but i have some problem with redirecting to Spring Security Login page.. it still in my default html page althouh in log i see this line :
07:38:31.713 [41995883@qtp-356612778-0] DEBUG o.s.s.w.a.ExceptionTranslationFilter – Access is denied (user is anonymous); redirecting to authentication entry point
org.springframework.security.access.AccessDeniedException: Access is denied
what am i doing wrong??
I think you don’t need your CustomUserAuthentication class and could instead just instantiate UsernamePasswordAuthenticationToken in your authentication provider.
Yes, following code excerpt uses UsernamePasswordAuthenticationToken:
ArrayList authorities = new ArrayList();
authorities.add(new SimpleGrantedAuthority(“ROLE_USER”));
Authentication customAuthentication =
new UsernamePasswordAuthenticationToken(“ROLE_USER”, authentication, authorities);
//customAuthentication.setAuthenticated(true);
Hi,
This is a nice starting point for securing your application. But I have 2 tips for the future. The first is to supply a full (all sources relevant) sample in your blog and second, attach your sample project so other people can download it and use it.
As it stands now, it is not possible to reproduce your wonderful tutorial of security. It would be much appreciated if you could mail me the full source for this tutorial.
Hi Ilias
How can I use a custom login page in gwt with spring security?
Good question! I’m intrested about this too!
Hi,
Is it possible to have the source of this article.
It will be a great help for everyone.
can you support me with maven configure ? I got below error and I can’t fix it.
org.springframework.beans.factory.parsing.BeanDefinitionParsingException: Configuration problem: Unable to locate Spring NamespaceHandler for XML schema namespace [http://www.springframework.org/schema/security]
I tested and run from your project download link. I added required jars as you described but still get error. How should I fix ? Does your sample project run properly at this time . Please give me some suggestions and I would really appreciated . Thanks for your great sample project. But I didn’t taste yet.
About source is located here :
http://dl.dropbox.com/u/7215751/JavaCodeGeeks/GWTSpringSecurityTutorial/GwtSpringSecurityProject.zip
I’m getting the exception:
org.springframework.beans.factory.NoSuchBeanDefinitionException: No bean named ‘springSecurityFilterChain’ is defined
at org.springframework.beans.factory.support.DefaultListableBeanFactory.getBeanDefinition(DefaultListableBeanFactory.java:687)
at org.springframework.beans.factory.support.AbstractBeanFactory.getMergedLocalBeanDefinition(AbstractBeanFactory.java:1168)
at org.springframework.beans.factory.support.AbstractBeanFactory.doGetBean(AbstractBeanFactory.java:281)
at org.springframework.beans.factory.support.AbstractBeanFactory.getBean(AbstractBeanFactory.java:199)
Does somebody know what’s the problem there?
For those still trying to do this with newer Spring versions, replace GrantedAuthorityImpl with org.springframework.security.core.authority.SimpleGrantedAuthority. :-)
do you still have the code available