Modern software systems rely on multiple applications, services, and data sources working together. Managing these integrations manually can be inefficient, error-prone, and difficult to scale. Automation helps standardize processes, reduce manual intervention, and ensure consistent execution of recurring tasks. By connecting systems through automated workflows, teams can improve productivity and focus on higher-value work.
In this article, we will examine how n8n simplifies automation, discuss its components, and demonstrate how to create a beginner workflow.
1. What is n8n?
n8n is an open-source workflow automation platform. Compared to many traditional automation platforms, n8n is highly customizable and self-hostable, giving users complete control over their workflows. It supports over 200 integrations, ranging from popular services like Slack, Google Sheets, and GitHub to databases and APIs.
Key benefits of n8n include:
- Flexibility: Connect multiple apps and services in a single workflow.
- Open-source: Self-host your automation, ensuring privacy and control.
- No-code / low-code: Build complex workflows with a visual editor.
- Extensibility: Add custom logic or code when needed.
2. Setting Up n8n
Getting started with n8n is straightforward. Here are some common methods to set it up:
- Cloud Option: n8n.cloud offers a managed version with no setup required.
- Self-hosting: Use Docker or a Node.js environment to host n8n on your server.
Once installed, we can access the n8n editor, a visual canvas where we create and manage workflows.
Running n8n with npx (Node.js Installed) – Quick Start
If Node.js is already installed on your machine, the quickest way to start n8n is by using npx. Before proceeding, ensure that you have Node.js version 18 or later installed. Once confirmed, you can immediately launch n8n using the appropriate npx command:
npx n8n
Once the server starts, open your browser and navigate to:
http://localhost:5678
You should now see the n8n editor interface, where you can begin creating workflows.
Running n8n with Docker Compose (Recommended)
For a more stable setup, Docker Compose is recommended. This approach ensures consistent deployment and easier configuration management.
Create a file named docker-compose.yml:
services:
  n8n:
    image: n8nio/n8n
    container_name: n8n
    restart: always
    ports:
      - "5678:5678"
    environment:
      - N8N_BASIC_AUTH_ACTIVE=true
      - N8N_BASIC_AUTH_USER=admin
      - N8N_BASIC_AUTH_PASSWORD=password
    volumes:
      - n8n_data:/home/node/.n8n
    healthcheck:
      test: ["CMD", "wget", "--quiet", "--tries=1", "--spider",
"http://localhost:5678/healthz"]
      interval: 30s
      timeout: 10s
      retries: 3
      start_period: 40s

volumes:
  n8n_data:
Start n8n with:
docker compose up -d
This setup runs n8n in detached mode, enables basic authentication for secure access, ensures workflow data is persisted through volumes, and provides a more stable and reliable environment suitable for long-term use.
3. Understanding n8n Workflows
A workflow in n8n consists of nodes connected by connections.
- Nodes: Represent actions or triggers, such as sending an email, fetching data, or performing a function.
- Triggers: Nodes that start a workflow, like a webhook, scheduler, or event from an app.
- Actions: Nodes that perform tasks in response to triggers.
For example, a simple workflow could fetch new emails from Gmail and post a summary to Slack. The Gmail node acts as a trigger, and the Slack node performs the action.
4. Building Your First Automation
Now that n8n is running, let’s create a simple workflow that runs on a schedule, fetches data from an external API, and stores the results in Google Sheets. This example demonstrates how nodes connect and how data flows through a workflow.
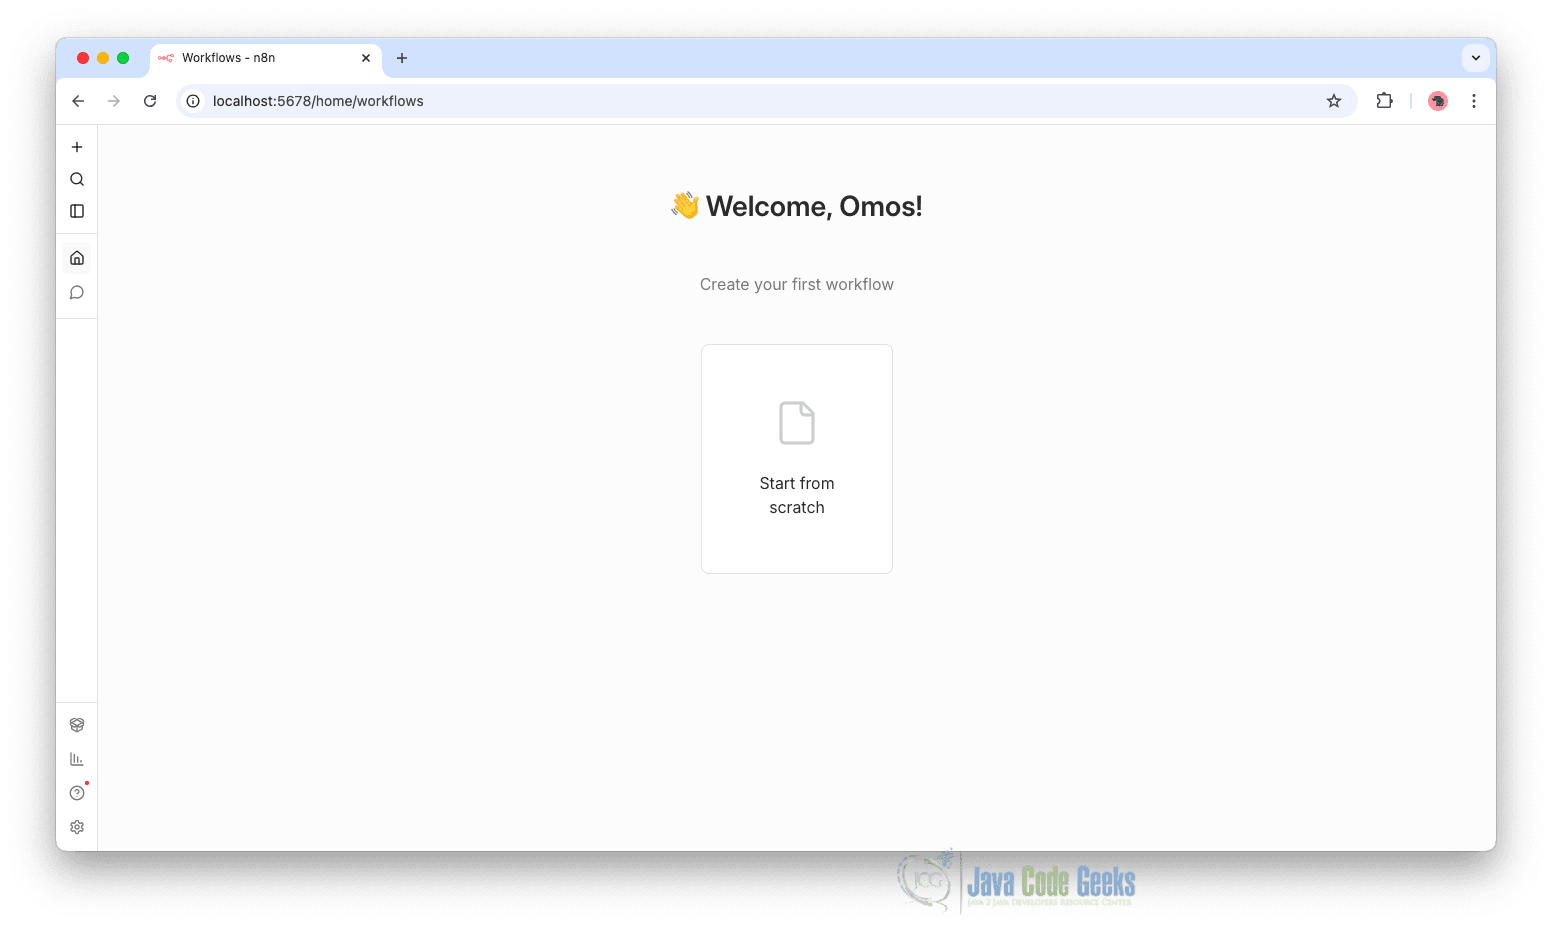
Step 1: Create a New Workflow
- Open the n8n editor in your browser and, after logging in, click “Create Workflow.”
- Give your workflow a name, for example:
Scheduled API to Google Sheets. - You will see an empty canvas where you can begin adding nodes.

This canvas is where you visually design your automation by connecting nodes.
Step 2: Add a Schedule Trigger
- Click the “+” button to add a node.
- Search for Schedule Trigger.
- Select it and configure the interval (for example, every day or every 5 minutes for testing).
- Execute step.
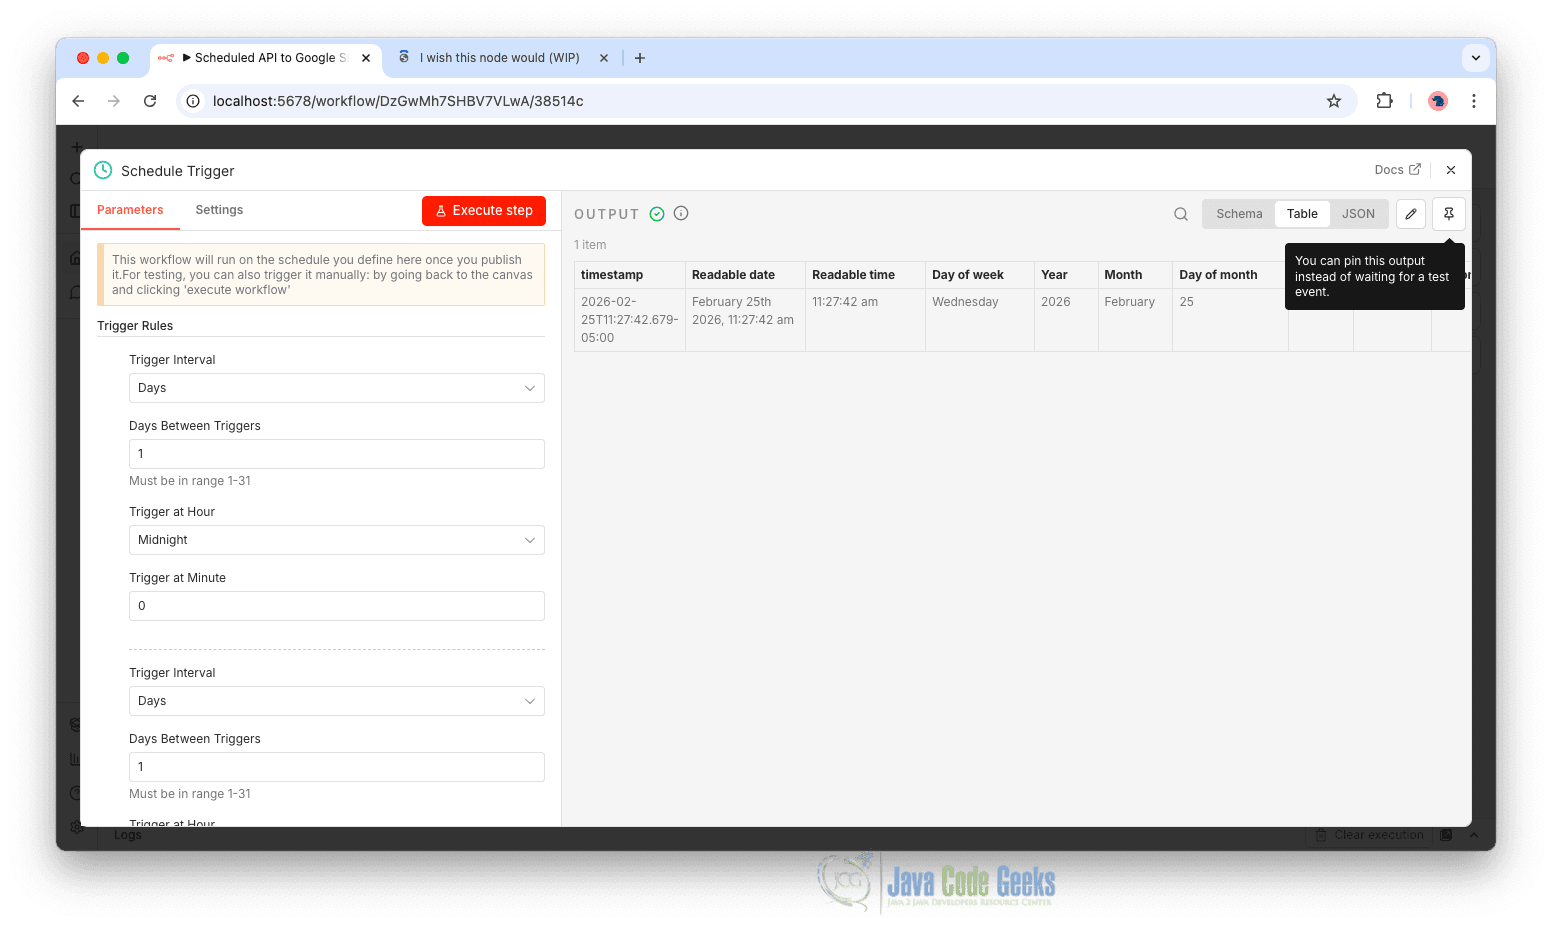
This trigger will automatically start the workflow at the defined interval without manual intervention.
Step 3: Add an HTTP Request Node
Next, we will fetch data from a public API.
- Click the “+” icon connected to the Schedule node.
- Search for HTTP Request and select it.
- Configure the node:
- Method: GET
- URL:
https://jsonplaceholder.typicode.com/posts
- Execute step.
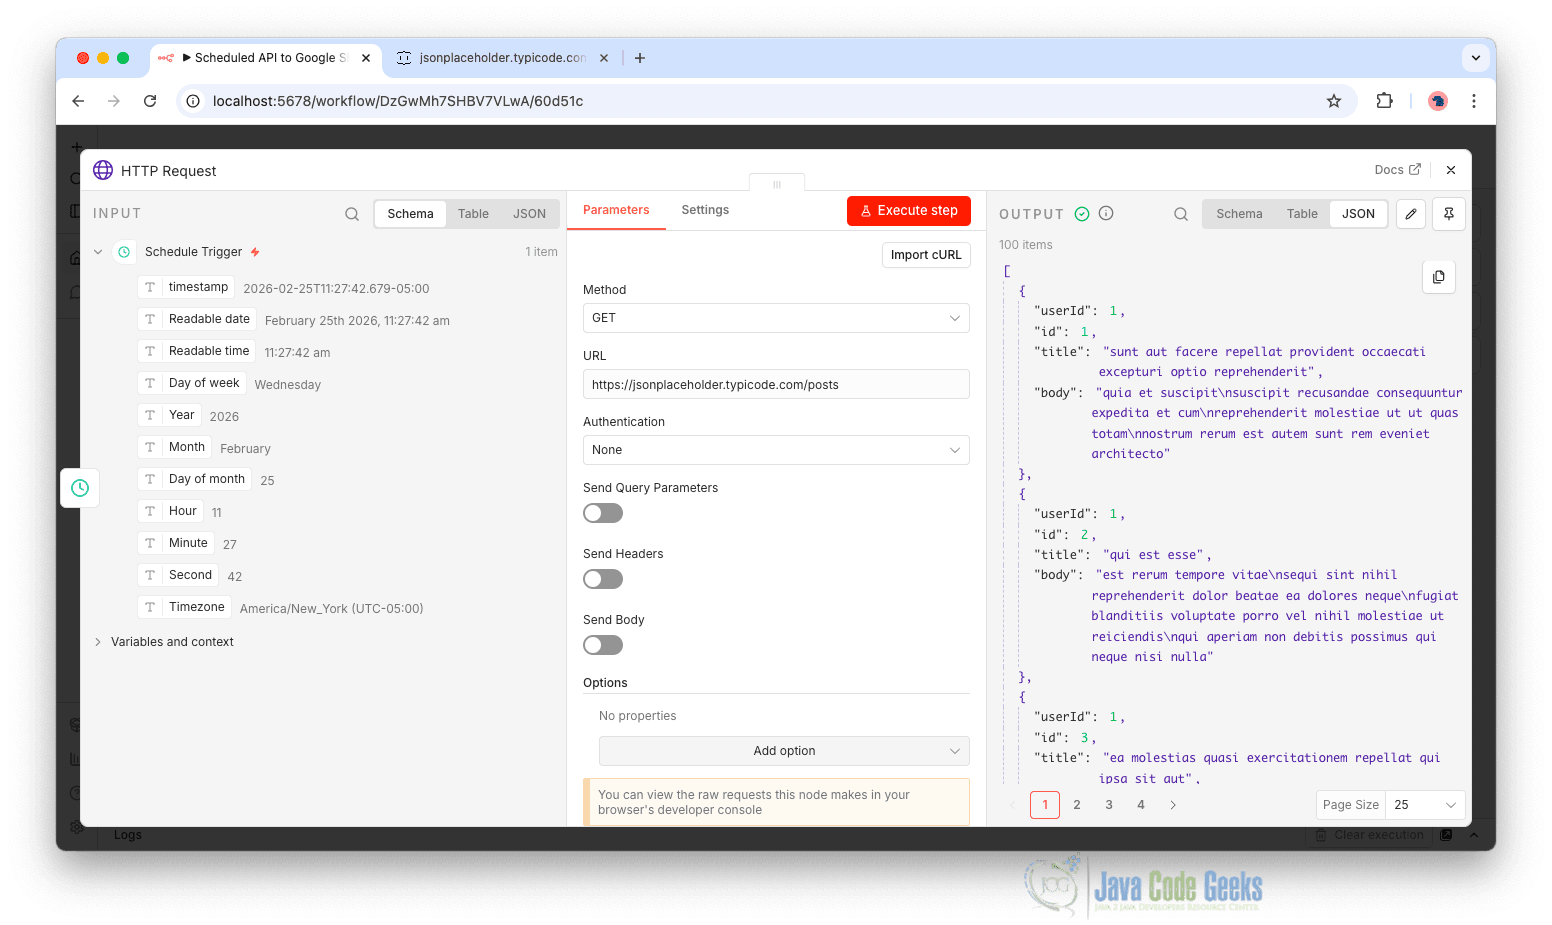
This API returns sample JSON data, which makes it ideal for testing automation workflows.
Step 4: Add a Google Sheets Node
Now, we will send the retrieved data to Google Sheets.
- Click the “+” icon after the HTTP Request node.
- Search for Google Sheets.
- Authenticate with your Google account (if prompted).
- Choose the appropriate operation, such as:
- Append Row
- Select your spreadsheet and sheet name.
- Map the fields from the HTTP response (e.g., title, body, userId) to columns in your Google Sheet.
- Execute step.
At this point, your workflow should look like this:
Schedule Trigger → HTTP Request → Google Sheets
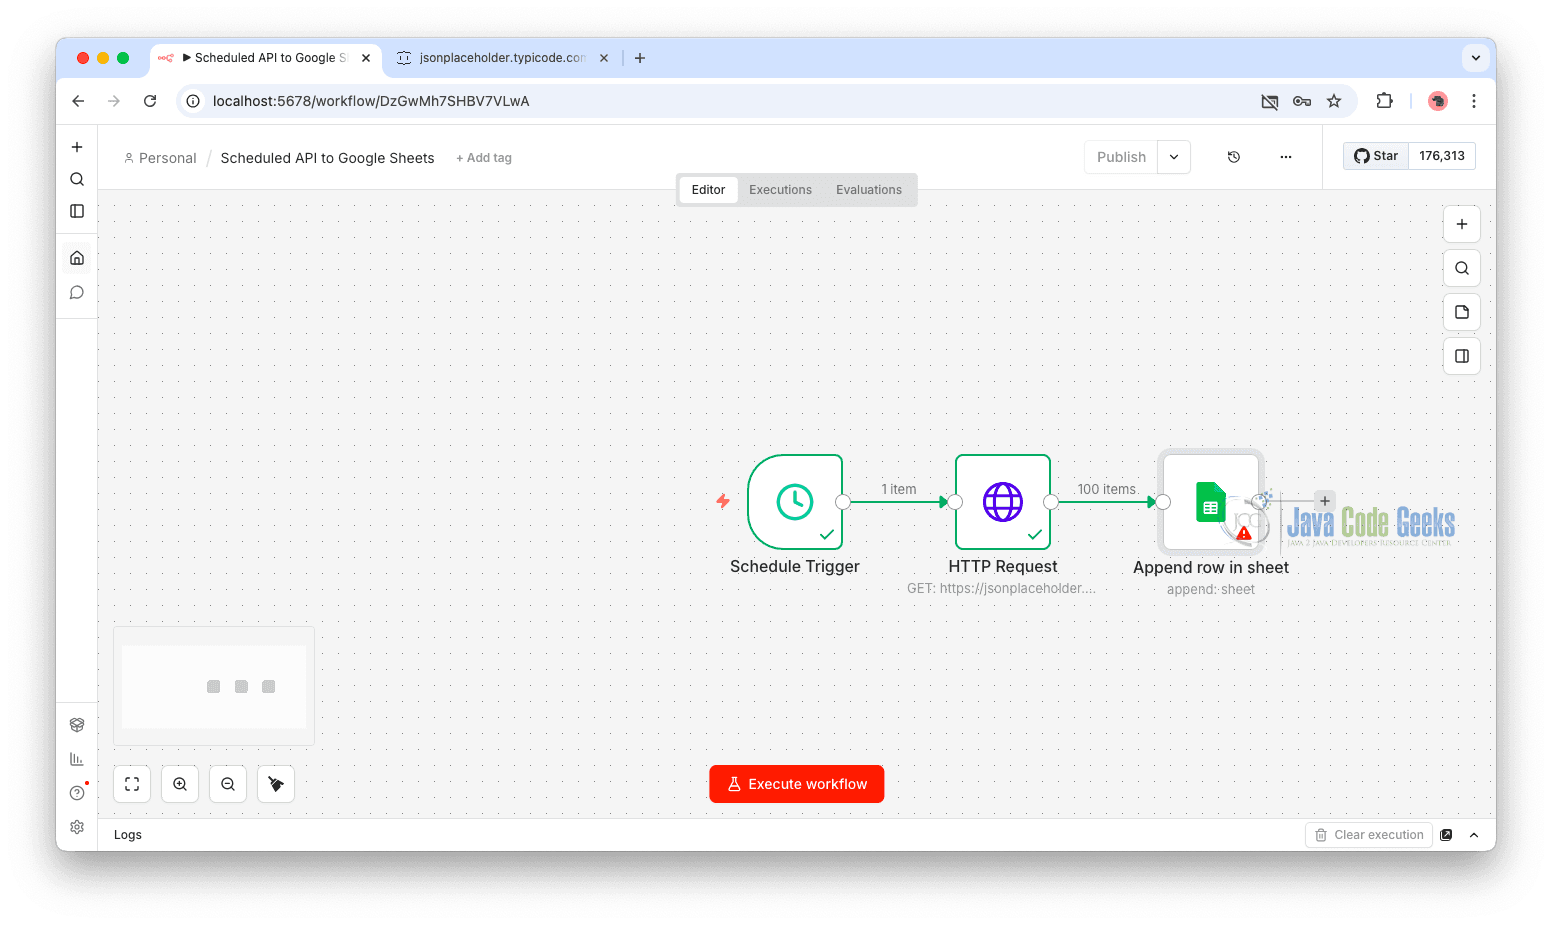
Step 5: Execute and Test the Workflow
- Click “Execute Workflow.”
- Observe the execution panel on the right.
- Verify that:
- The HTTP request returns data successfully.
- Rows are inserted into your Google Sheet.
- Check your Google Sheet to confirm the data has been appended correctly.
5. Extending a Workflow with a Local LLM
Workflows can incorporate AI-powered capabilities such as summarization, classification, content generation, and sentiment analysis. In this section, we will enhance our previous workflow by integrating a local Large Language Model (LLM) using Ollama.
Using a local LLM ensures:
- Data privacy (no external API calls)
- No per-request API costs
- Full control over model selection
- Offline capability
How n8n and Ollama Work Together
- n8n manages triggers, data flow, integrations, and workflow logic.
- Ollama runs large language models locally and exposes them via an API endpoint.
- The Basic LLM Chain node acts as the bridge between workflow data and the local model.
When connected:
- n8n retrieves structured data (for example, blog posts from an API).
- The Basic LLM Chain sends selected fields to Ollama.
- Ollama processes the prompt using a local model (e.g.,
mistral). - The AI-generated response is returned to n8n.
- n8n routes or stores the result automatically.
This enables intelligent automation without relying on external AI services.
Install and Run Ollama
On Linux:
curl -fsSL https://ollama.ai/install.sh | sh
sudo systemctl start ollama
sudo systemctl enable ollama
On macOS:
brew install ollama
(Ollama starts automatically after installation.)
On Windows (WSL2)
curl -fsSL https://ollama.ai/install.sh | sh
sudo systemctl start ollama
Verify Installation:
curl http://localhost:11434/
If you receive a response, Ollama is running correctly.
Download a Model
ollama run mistral
Build the AI Workflow in n8n
Click “+ ” to create a new workflow, or extend the earlier automation that uses a Schedule trigger to fetch posts from the JSONPlaceholder API. Schedule → Fetch Posts (JSONPlaceholder)
Node 1: Schedule Trigger
- Select Schedule Trigger
- Set schedule to: Every 5 minutes
This automatically triggers the workflow.
Node 2: Fetch External Data (HTTP Request)
Add an HTTP Request node to retrieve posts:
- Method: GET
- URL:
https://jsonplaceholder.typicode.com/posts
You may limit processing to the first item using a Function node.
Node 3: Add the Basic LLM Chain Node
- Inside your workflow, click the “+” button to add a new node.
- Search for Basic LLM Chain, select it, and add it to your workflow canvas.
This node will serve as the AI processing layer for our API data.
Node 4: Add the Ollama Model Subnode
The Basic LLM Chain requires a model connection.
- Click outside the node briefly to expose the subnode option.
- Click “+” to add a subnode.
- Search for Ollama and select the Ollama Model option.
This connects the LLM Chain to a local Ollama instance instead of a cloud provider.
Create Ollama Credentials
When selecting the Ollama model, you will be prompted to create credentials.
- Click Create New Credential.
- Fill in the connection details:
- Base URL:
http://localhost:11434 - If running in Docker, use the appropriate service hostname:
http://host.docker.internal:11434
- Base URL:
- Click Save.
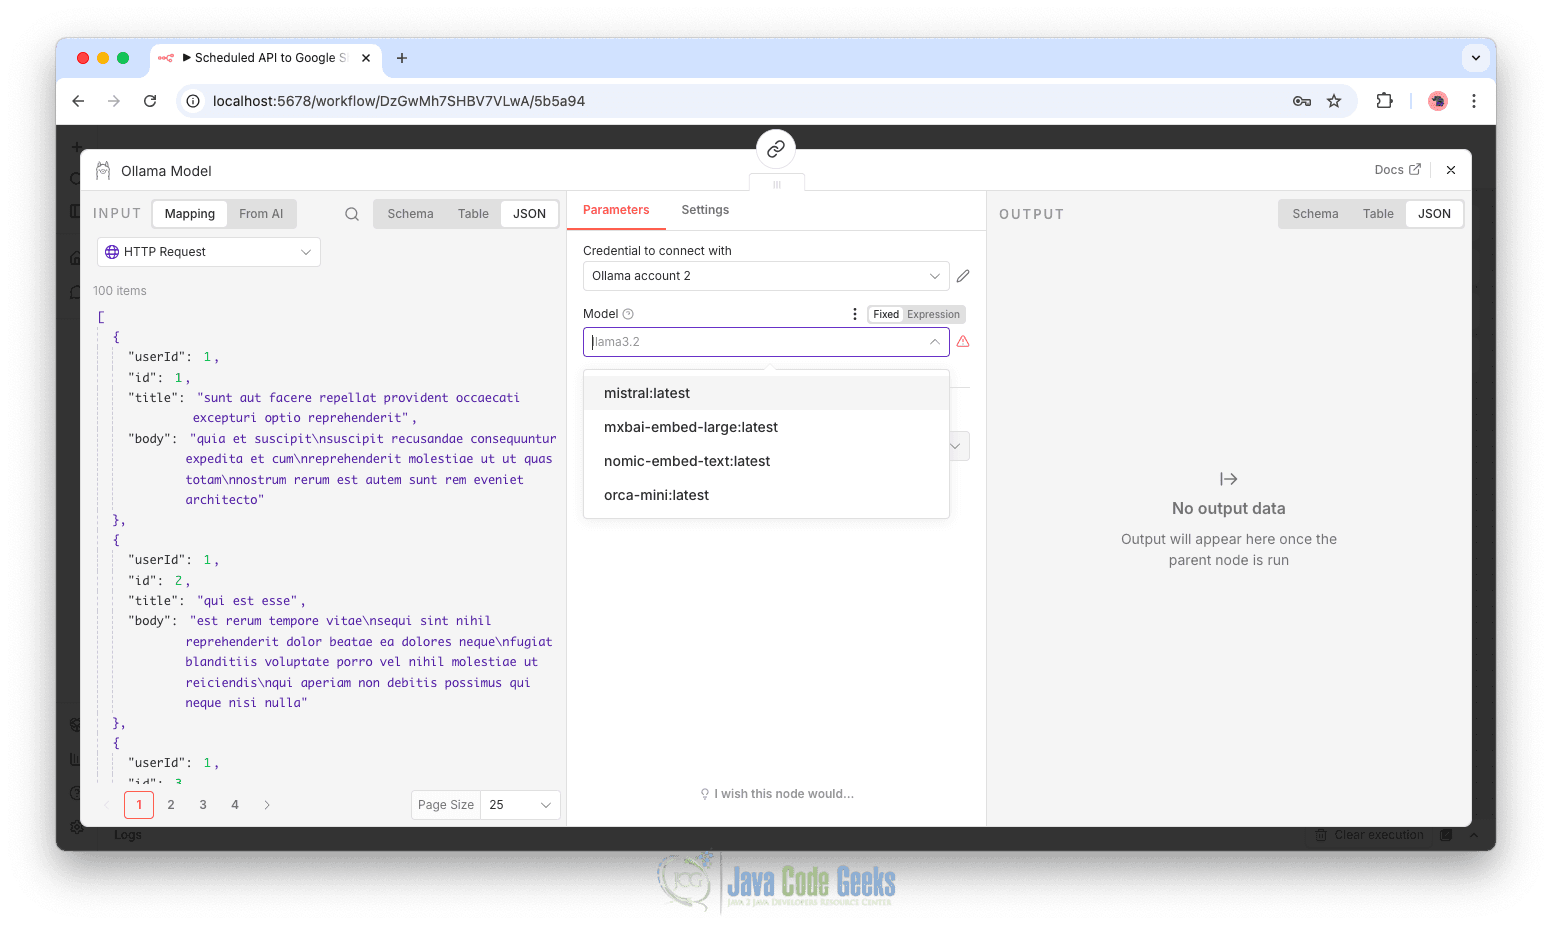
If configured correctly, you should see a success confirmation message.
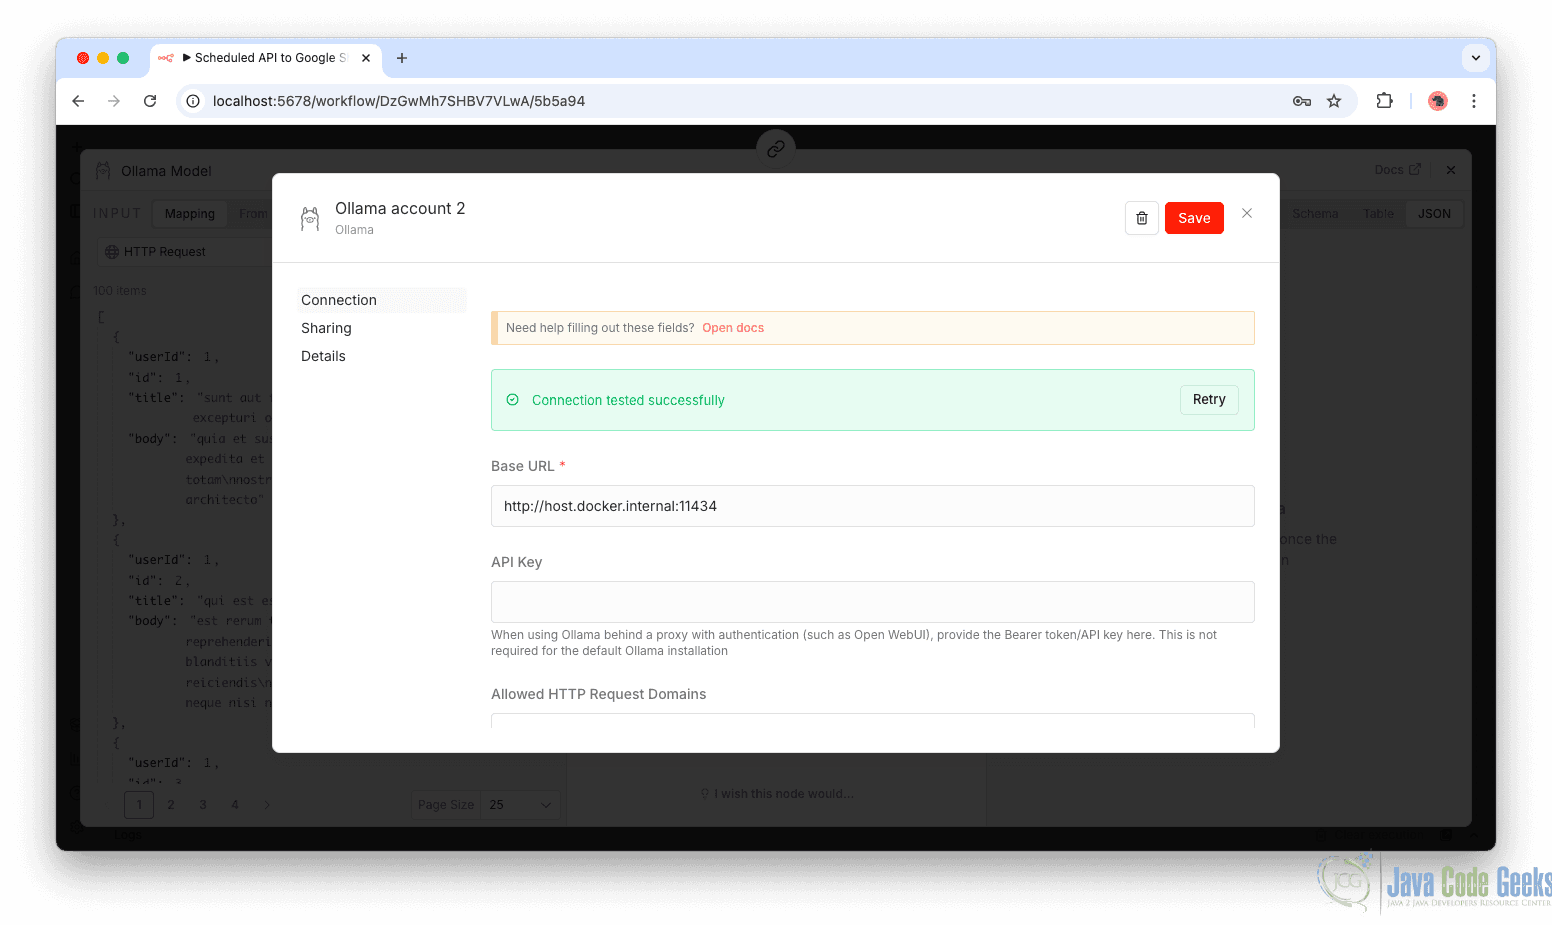
This means n8n can communicate with your local Ollama server. You can now select your downloaded model, for example: mistral:latest
Configure the Prompt Template
Within the Basic LLM Chain node, you can define a custom prompt to control exactly what is sent to the model. To configure this, change the Source for Prompt setting to Define below, click Expression to enable dynamic input, and then select the expand icon to open a larger editor for easier prompt editing.
Once the editor is open, write your prompt directly in the Expression field and insert the dynamic variable (for example, json.body or data from the previous node) where needed. You can drag the variable into the editor to ensure correct syntax.
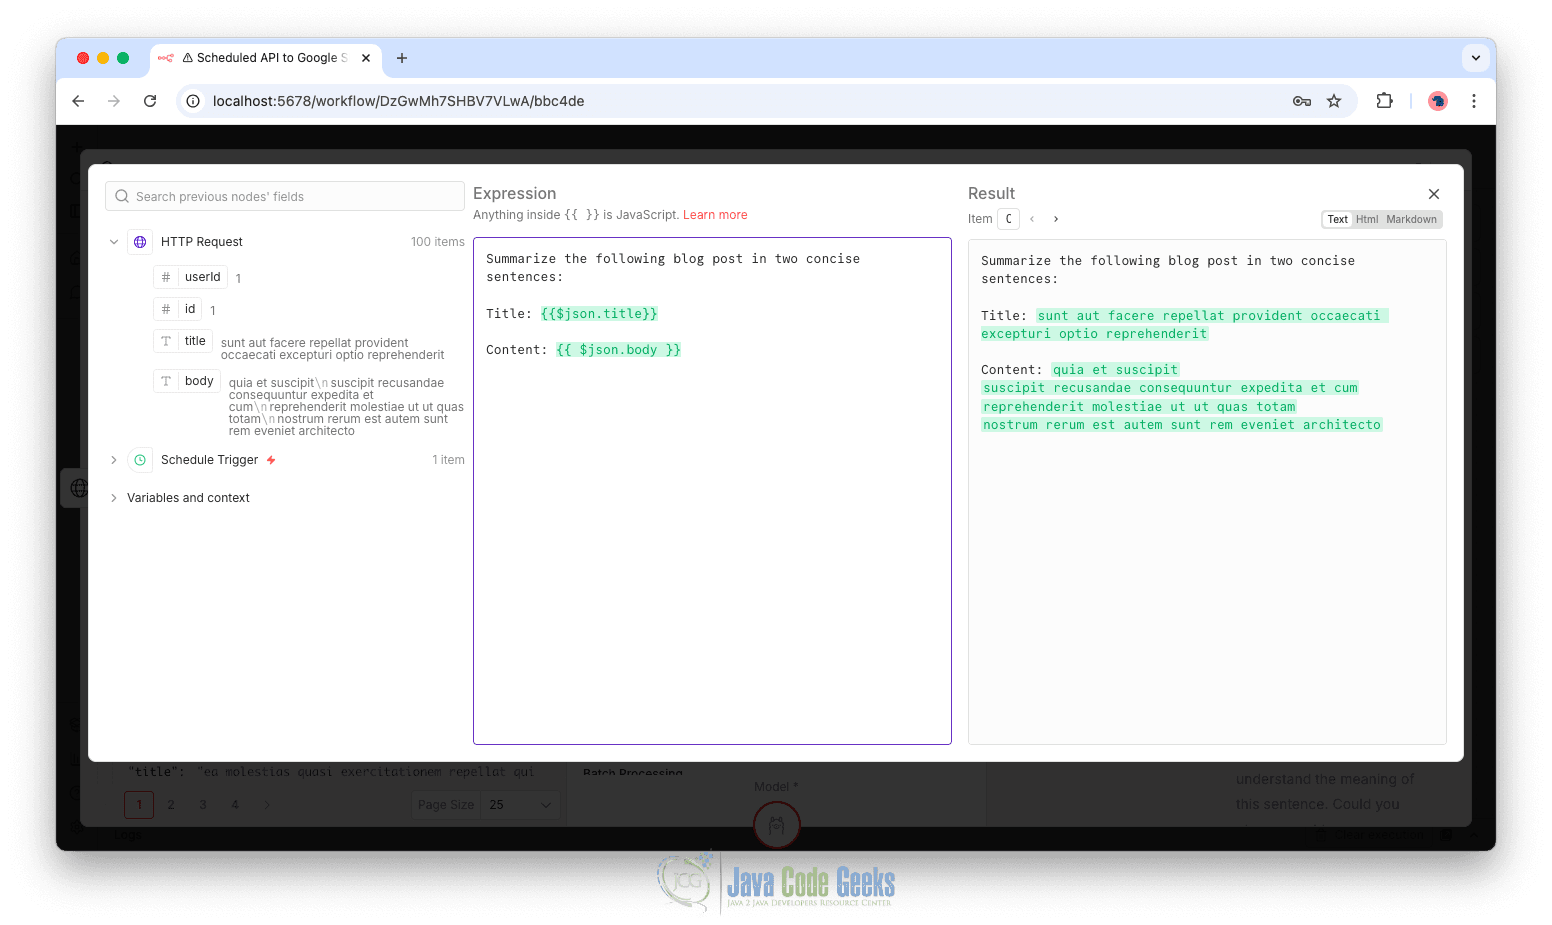
The Result preview panel will display a sample of the final prompt as it will be sent to the LLM.
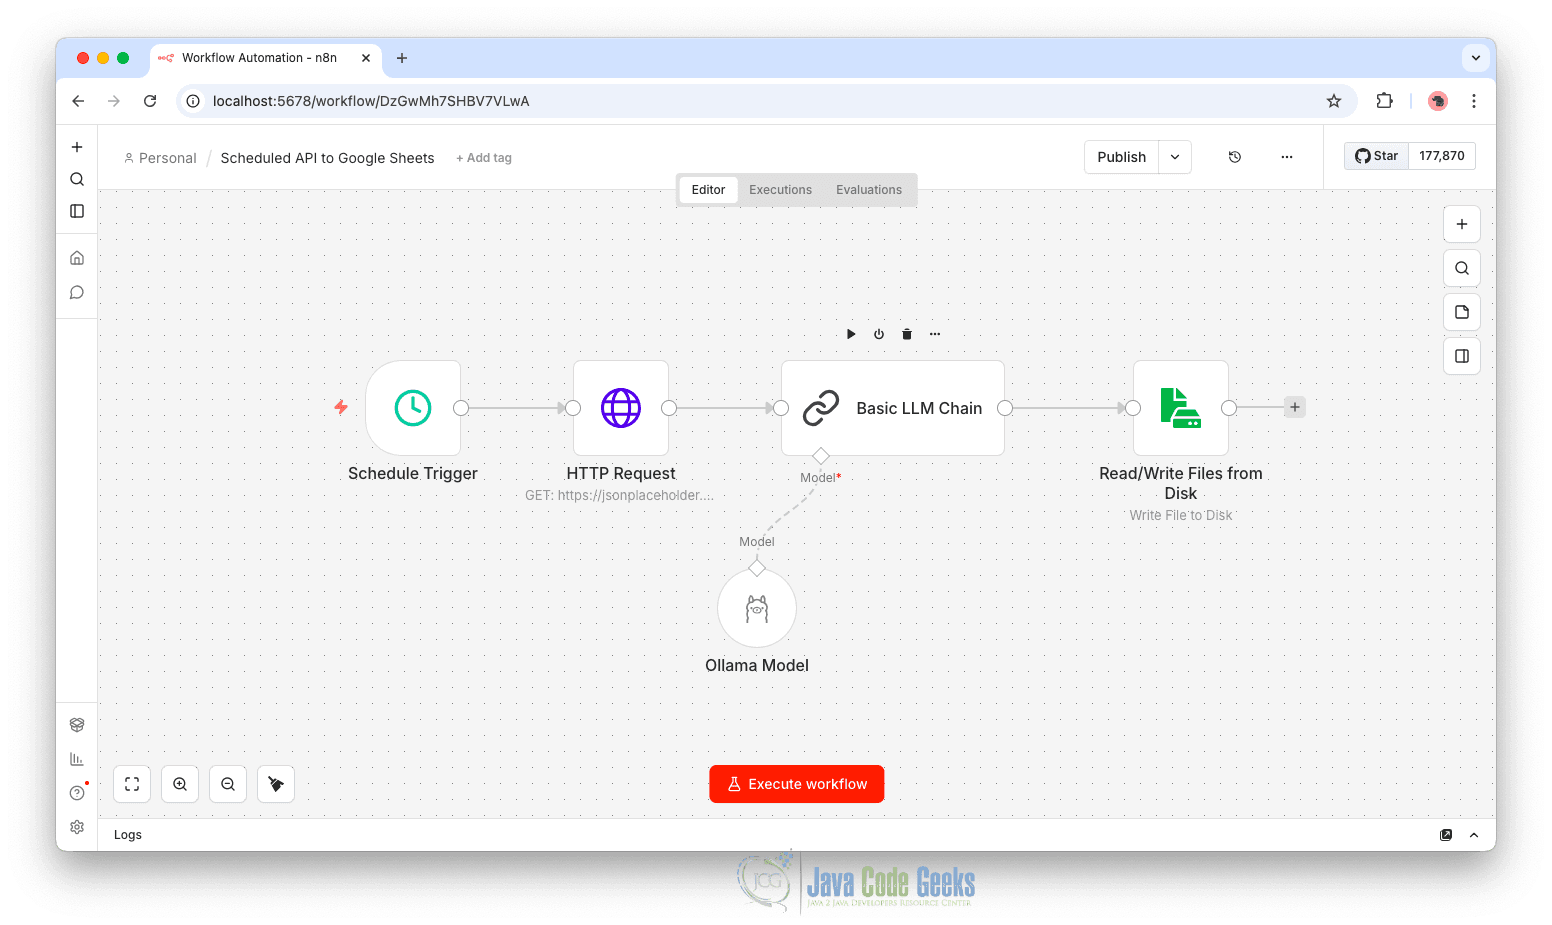
Connect It to the Existing Workflow
After the LLM generates the output, the next step is to store the result locally. To do this, add a Read/Write Files from Disk > Write File to Disk node after the Basic LLM Chain node. This node allows n8n to write data directly to a file on the system where n8n is running.
Inside the Write File to Disk node, configure the filename so that each execution generates a uniquely timestamped file. For example:
/tmp/output_{{ $now.toFormat('yyyy-MM-dd HH:mm:ss') }}.txt
Next, configure the data field so that the generated content is written to the file:
{{ $json.title }}

{{ $json.body }}
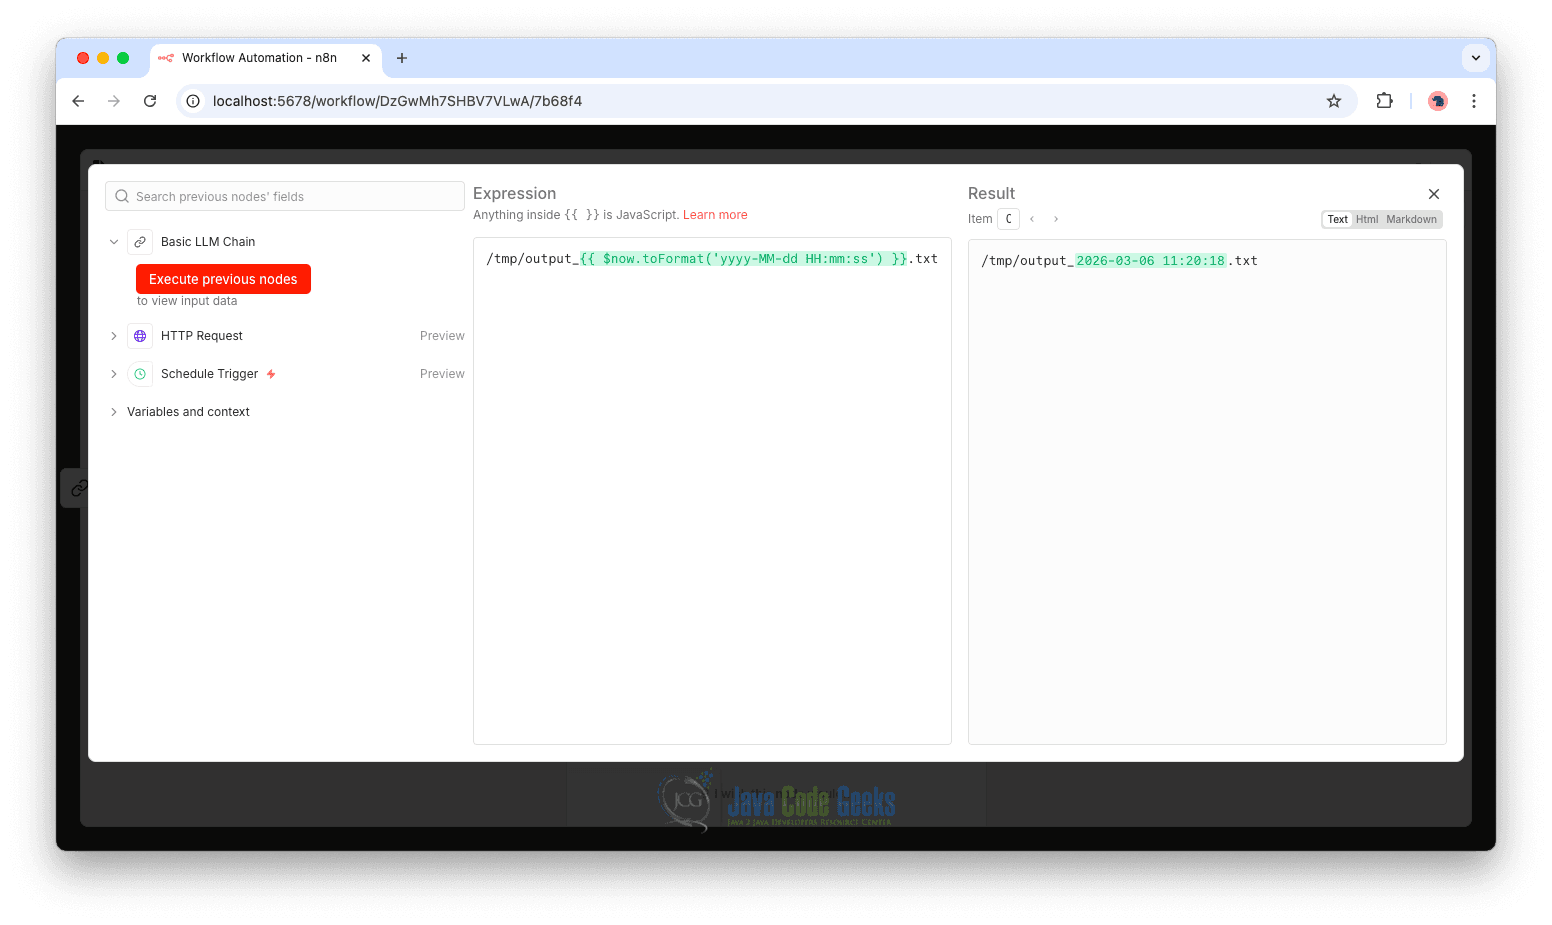
This expression references the output produced by the Basic LLM Chain node and writes the generated text into the file.
Once the workflow runs, n8n will automatically create a new file in the /tmp directory containing the AI-generated result for each execution. This allows you to inspect outputs easily, maintain a history of processed results, and verify that the AI workflow is functioning as expected.
6. Conclusion
In this article, we explored how to get started with workflow automation using n8n, from setting up a self-hosted environment to building workflows. We created automated processes that run on a schedule, fetch external data, and store structured results. We then extended this foundation by integrating a local Large Language Model using Ollama, demonstrating how traditional automation can evolve into intelligent automation.
By combining n8n’s orchestration capabilities with local AI processing, you can build flexible and scalable workflows without relying on external services. Whether you are a beginner learning the fundamentals or a developer designing advanced pipelines, this approach provides a strong foundation for creating efficient, AI-powered automation systems.
This article provided a guide for beginners exploring automation with n8n.
