Hello! In this tutorial, we will learn about Express.js File Upload. More specifically, we will handle the file upload in the node.js application. To perform the file upload we will use a simple express middleware (named express-fileupload) as an npm package.
1. Introduction
1.1 Setting up Node.js
To set up Node.js on windows you will need to download the installer from this link. Click on the installer (also include the NPM package manager) for your platform and run the installer to start with the Node.js setup wizard. Follow the wizard steps and click on Finish when it is done. If everything goes well you can navigate to the command prompt to verify if the installation was successful as shown in Fig. 1.

2. Express.js File Upload
To set up the application, we will need to navigate to a path where our project will reside. For programming stuff, I am using Visual Studio Code as my preferred IDE. You’re free to choose the IDE of your choice.
2.1 Setting up dependencies
Navigate to the project directory and run npm init -y to create a package.json file. This file holds the metadata relevant to the project and is used for managing the project dependencies, script, version, etc. Add the following code to the file wherein we will specify the required dependencies.
package.json
01 02 03 04 05 06 07 08 09 10 11 12 13 14 15 16 17 18 19 | { "name": "fileupload", "version": "1.0.0", "description": "", "main": "index.js", "scripts": { "test": "echo \"Error: no test specified\" && exit 1" }, "keywords": [], "author": "daniel atlas", "license": "MIT", "dependencies": { "express": "^4.17.1", "express-fileupload": "^1.2.1" }, "devDependencies": { "nodemon": "^2.0.7" }} |
To download the dependencies navigate to the directory path containing the file and use the npm install command. If everything goes well the dependencies will be loaded inside the node_modules folder and you are good to go with the further steps.
2.2 Creating the index controller
Create a controller file that will expose the endpoints responsible for showing the file upload index page to the user and perform the upload operation. The pre-requisite for the controller is that you will need a uploads folder in the project directory to store the uploaded files.
index.js
01 02 03 04 05 06 07 08 09 10 11 12 13 14 15 16 17 18 19 20 21 22 23 24 25 26 27 28 29 30 31 32 33 34 35 36 37 38 39 40 41 42 43 44 45 46 47 48 49 50 51 | const express = require('express');const fileUpload = require('express-fileupload');const app = express();app.use(fileUpload());app.get('/', (req, res) => { res.sendFile(__dirname + '/index.html')});app.post('/', (req, res) => { if (req.files) { // console.log(req.files); let file = req.files.file; let filename = file.name; // checking file size. // max size - 1 mb if (file.size > 1048576) { res.status(413).send('Payload too large'); } //Todo - Other validations like file type etc are skipped for brevity. // using the mv() method to save the uploaded file in the // 'uploads' folder. file.mv('./uploads/' + filename, function (error) { if (error) { // console.log(error); res.status(500).json({ message: 'Error while uploading file' }); } else { res.json({ message: 'File uploaded successfully', data: { name: filename, mimetype: file.mimetype, size: file.size } }); } }); } else { return res.status(400).send({ message: 'No file uploaded' }); }});// start appconst PORT = process.env.port || 5001;app.listen(PORT, () => { console.log(`Server started on port ${PORT}`);}); |
2.3 Creating an index page
Create the index HTML page that will be shown to the user to perform the file upload functionality.
index.html
01 02 03 04 05 06 07 08 09 10 11 12 13 14 15 16 17 | <!DOCTYPE html><html><head> <title>Index</title></head><body> <h1>File upload example in node.js</h1> <form id="upload-form" method="POST" enctype="multipart/form-data"> <input type="file" name="file" /> <input type="submit" value="Upload" /> </form></body></html> |
3. Run the Application
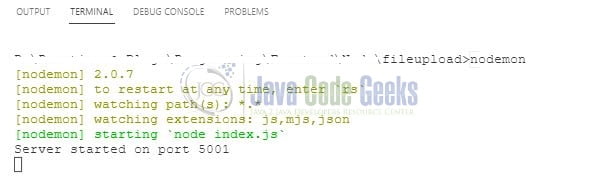
To run the application navigate to the project directory and enter the following command as shown in Fig. 4. If everything goes well the application will be started successfully on port number 5001.
4. Project Demo
When the application is started, open the browser of your choice and hit the following url – http://localhost:5001. The file upload index HTML page will be shown to the user as in Fig. 3.

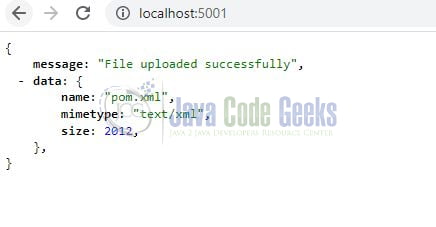
Select the file of your choice and on successful upload, the message will be sent to the user as shown in Fig. 4.
That is all for this tutorial and I hope the article served you with whatever you were looking for. Happy Learning and do not forget to share!
5. Summary
In this tutorial, we learned:
- Introduction to
express-fileupload - Steps to setup Node.js
- Sample programming stuff
You can download the source code of this tutorial from the Downloads section.
6. Download the Project
This was a programming tutorial to handle file upload in a node.js application.
You can download the full source code of this example here: Express.js File Upload
