GitHub is far more than just a platform for hosting code. It is a vast and constantly evolving collection of real-world software projects, design patterns, and practical solutions. Every day, developers from around the world contribute code, resolve issues, and share ideas. Within all of this activity lies a powerful opportunity: the ability to search, explore, and learn directly from real production code.
Many developers use GitHub search in a very basic way by typing a keyword and browsing through the results. However, experienced developers take a more strategic approach. They rely on filters, search operators, and structured queries to quickly find exactly what they are looking for.
In this guide, you will learn how to move beyond simple searches and develop a more advanced, efficient way of using GitHub search to find high-quality results.
1. Understanding GitHub Search
At its core, GitHub search functions as a multi-layered search engine that indexes various types of content across the platform. When you perform a search, GitHub does more than return repositories. It also explores code files, issues, pull requests, and even user profiles to provide more comprehensive results.
This means a single search query can help you discover complete projects, locate specific function implementations, debug issues by reviewing how others have solved similar problems, and explore community discussions related to the same challenge.
Understanding this structure is important because becoming skilled at GitHub search is really about knowing how to narrow down to the most relevant layer quickly.
2. Basic Search Functionality
Before you can start searching on GitHub, you need to know how to access the search bar. On any GitHub page, whether you are on the homepage, inside a repository, or viewing an issue thread, the search bar is always located at the top navigation area of the screen.
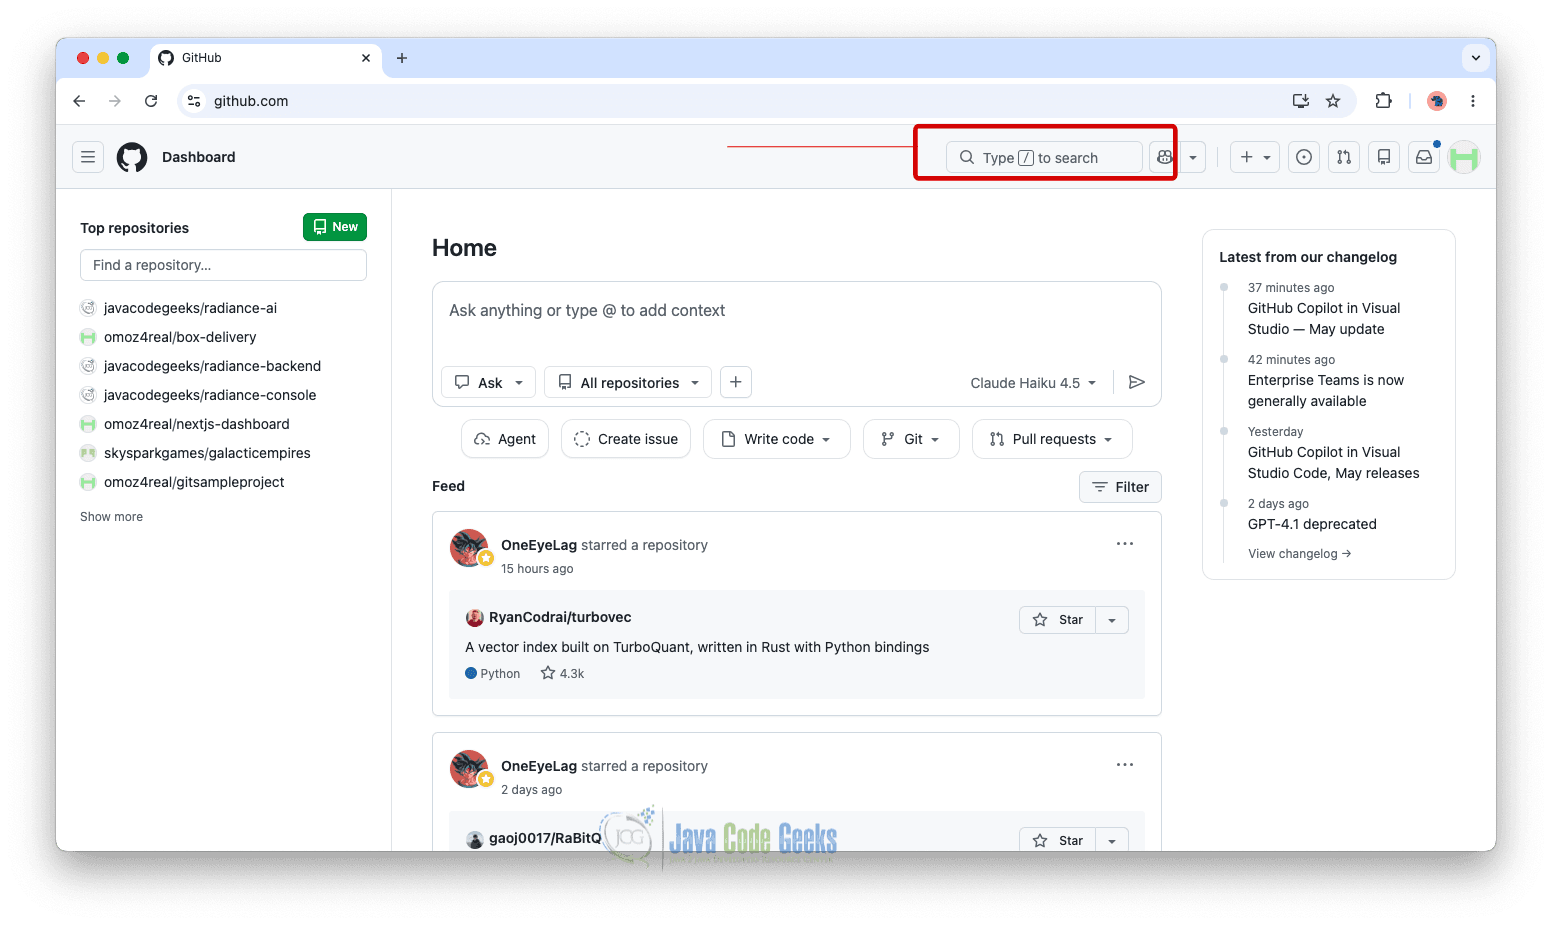
It is usually labeled “Type / to Search…” and you can activate it by clicking on it or by using the keyboard shortcut “/” on most pages.
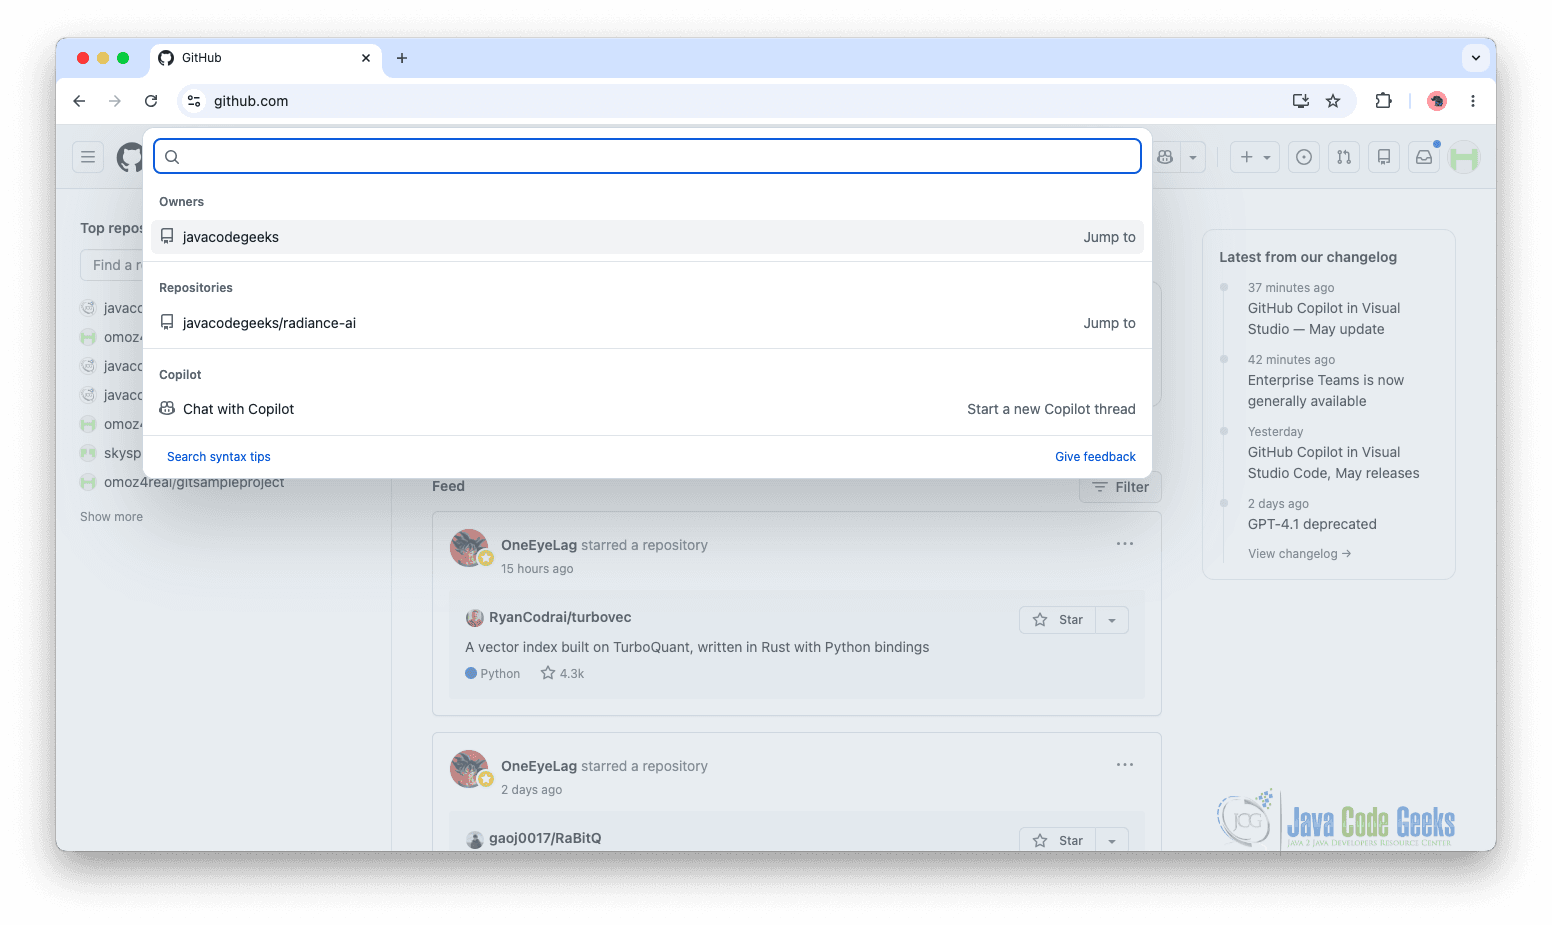
After opening the search bar, you can start entering your query, and selecting the “Search all of GitHub” option will take you to a page that shows all results related to what you searched for.
2.1 Targeted Search Within a Repository or Organization
As you get more comfortable with GitHub search, you may want to narrow results instead of searching the entire platform. This is where scoped search becomes useful. It lets you limit your query to a specific repository or organization, reducing irrelevant results and helping you focus on a single codebase or related projects.
Searching Within a Specific Repository
To search inside a particular repository, you can use the repo: qualifier. This tells GitHub to only return results from that repository. Example:

This query will only show results related to authentication within the Node.js repository. This is helpful when working with large projects where manually browsing files would take too much time.
Searching Within an Organization
If you want to explore multiple repositories under the same organization, you can use the org: qualifier. Example:
org:spring-projects security
This will return results related to security across all repositories owned by the Spring Projects organization.
3. Advanced Search Functionality
GitHub’s advanced search gives you much more control over how you find information across the platform. Instead of relying only on keywords, you can refine your results using structured filters and dedicated search tools. This makes it easier to locate specific code, repositories, issues, or discussions without wasting time scrolling through irrelevant results.
Accessing the Advanced Search Page
To use GitHub’s advanced search, you can go directly to: https://github.com/search/advanced
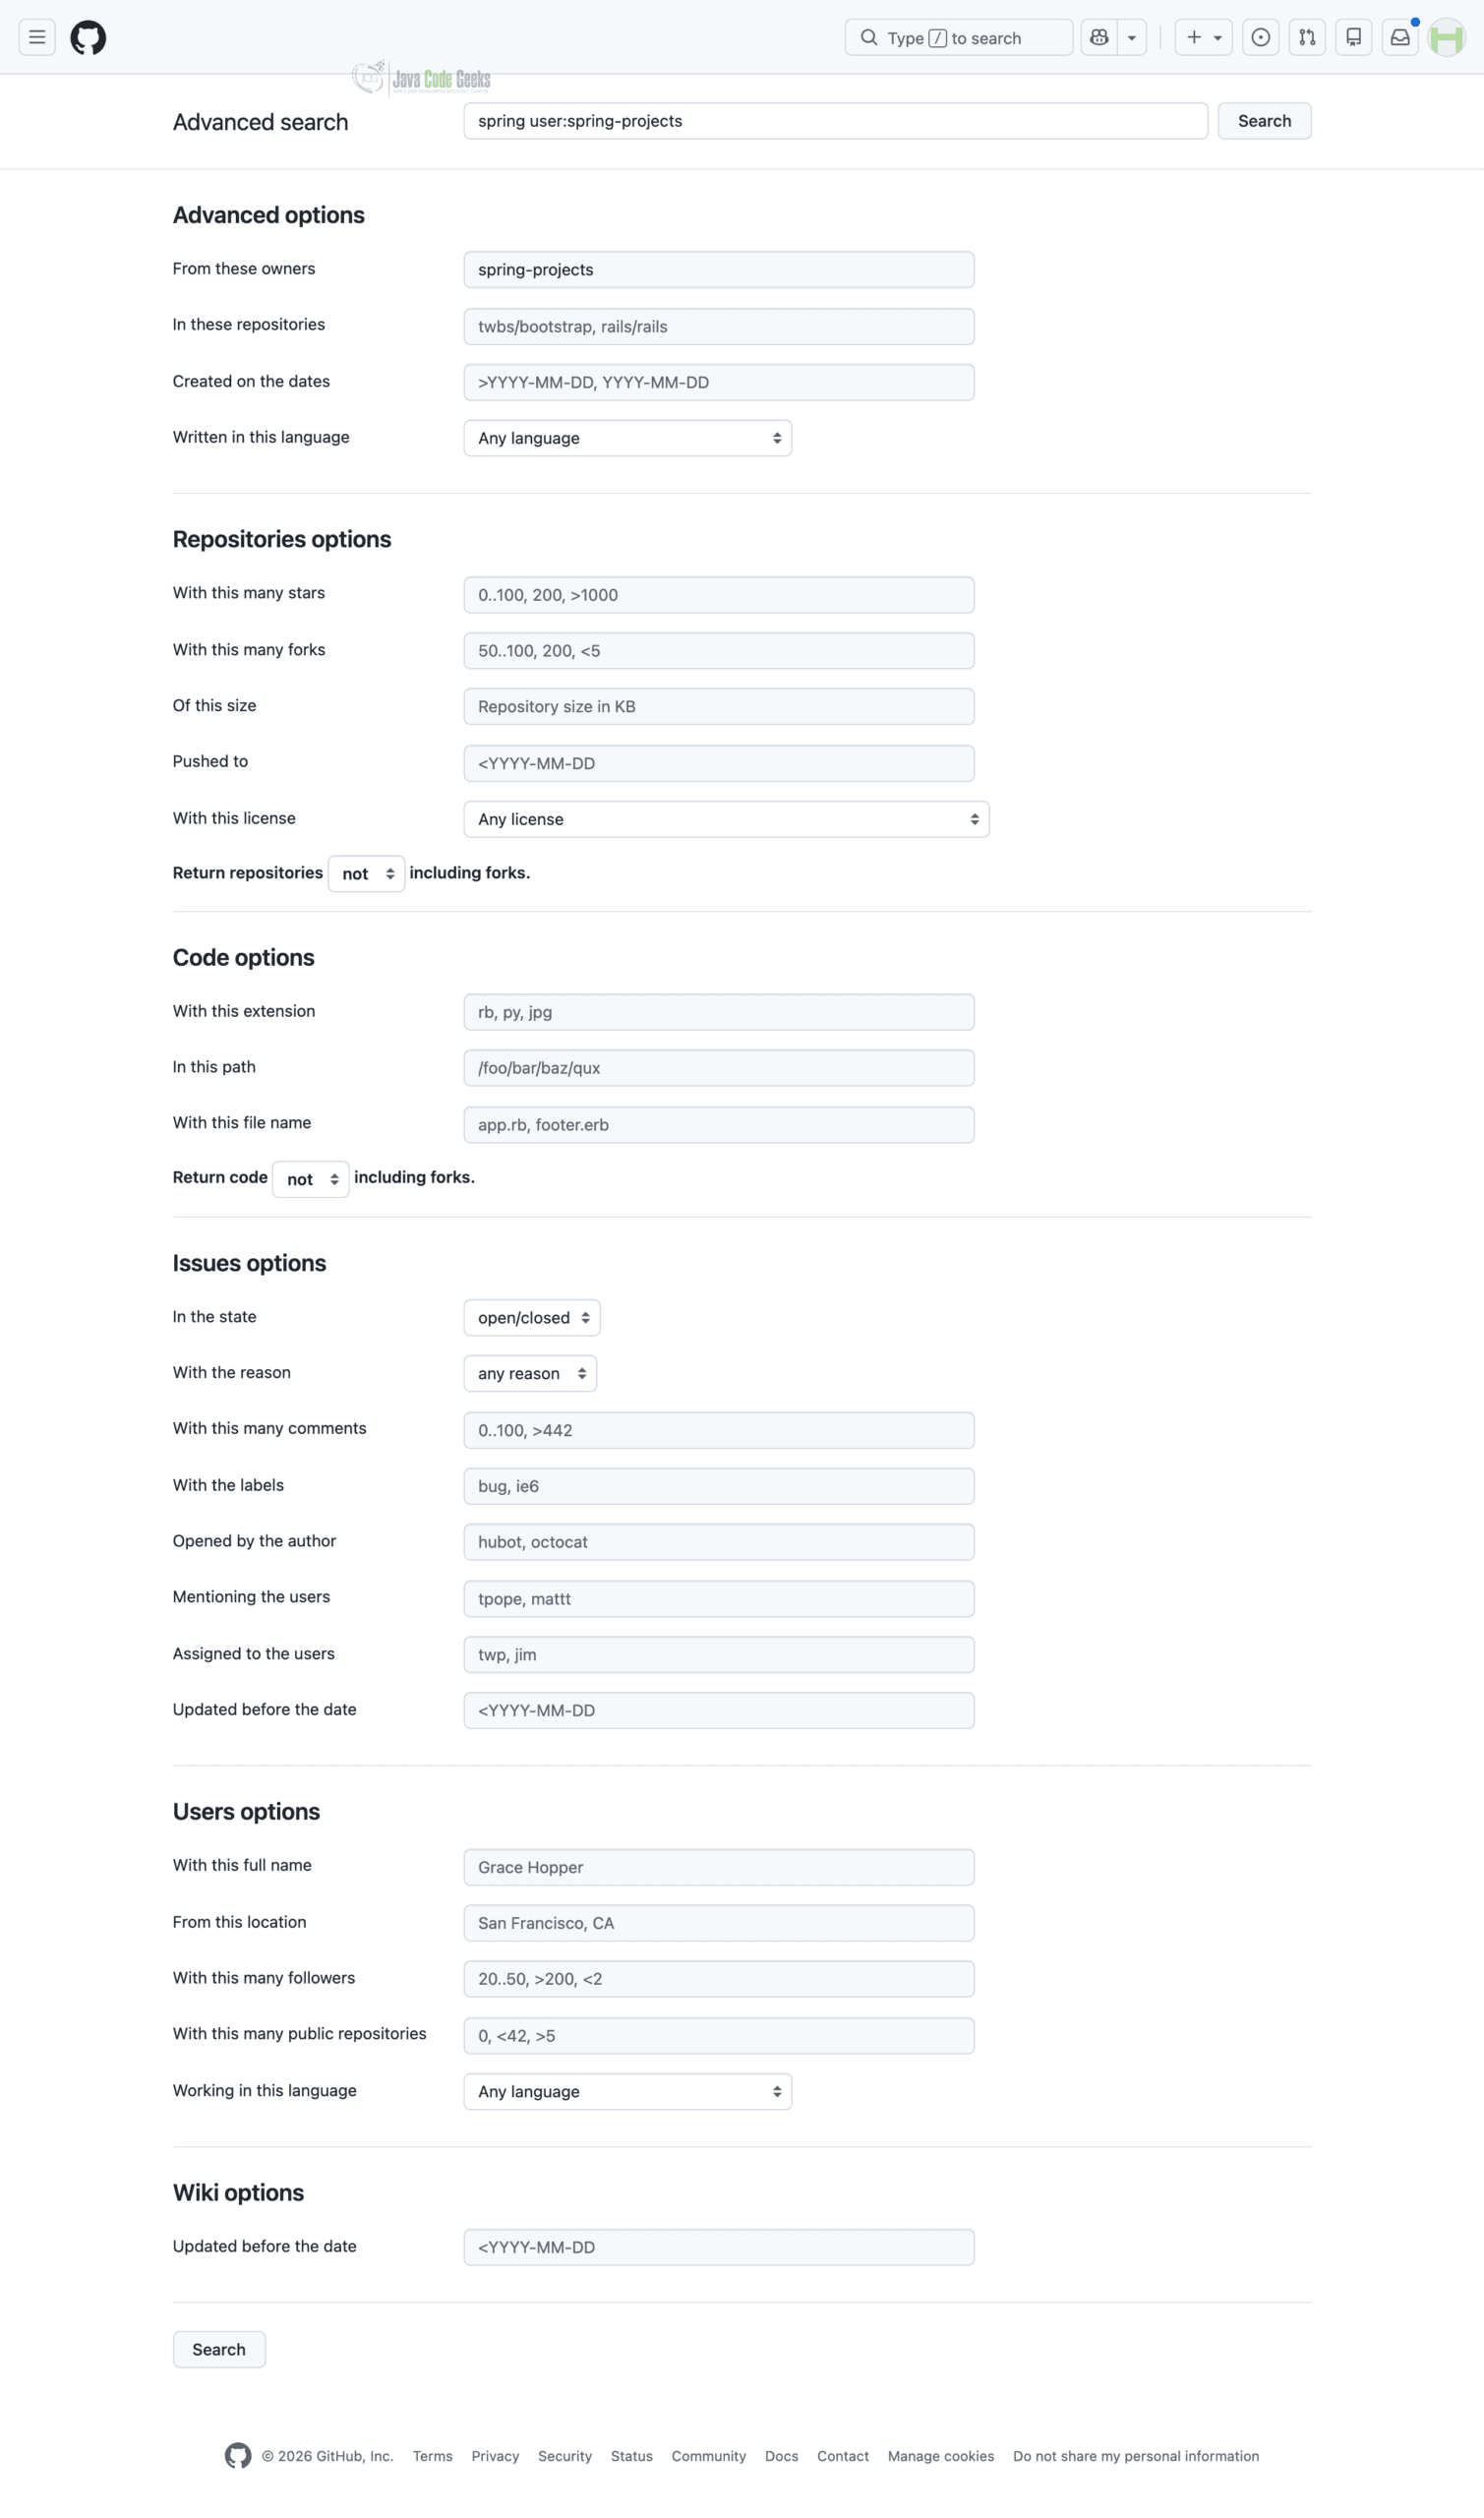
On this page, GitHub provides a structured interface where you can build your search step by step instead of typing everything manually. You can specify:
- The keywords you want to search for
- The programming language
- The repository or organization
- File type or path
- Stars, forks, and more
This is helpful if you prefer to create precise queries using a visual interface.
Example of Using Advanced Search
For example, let’s search for Spring on GitHub and explore related content connected to these projects. Using GitHub’s advanced search page, you can refine your results more precisely instead of relying on a single keyword search.
In the first input field, enter “Spring” as your main search term. Then, in the From this owner field, specify an organization such as spring-projects to narrow the results to that ecosystem.
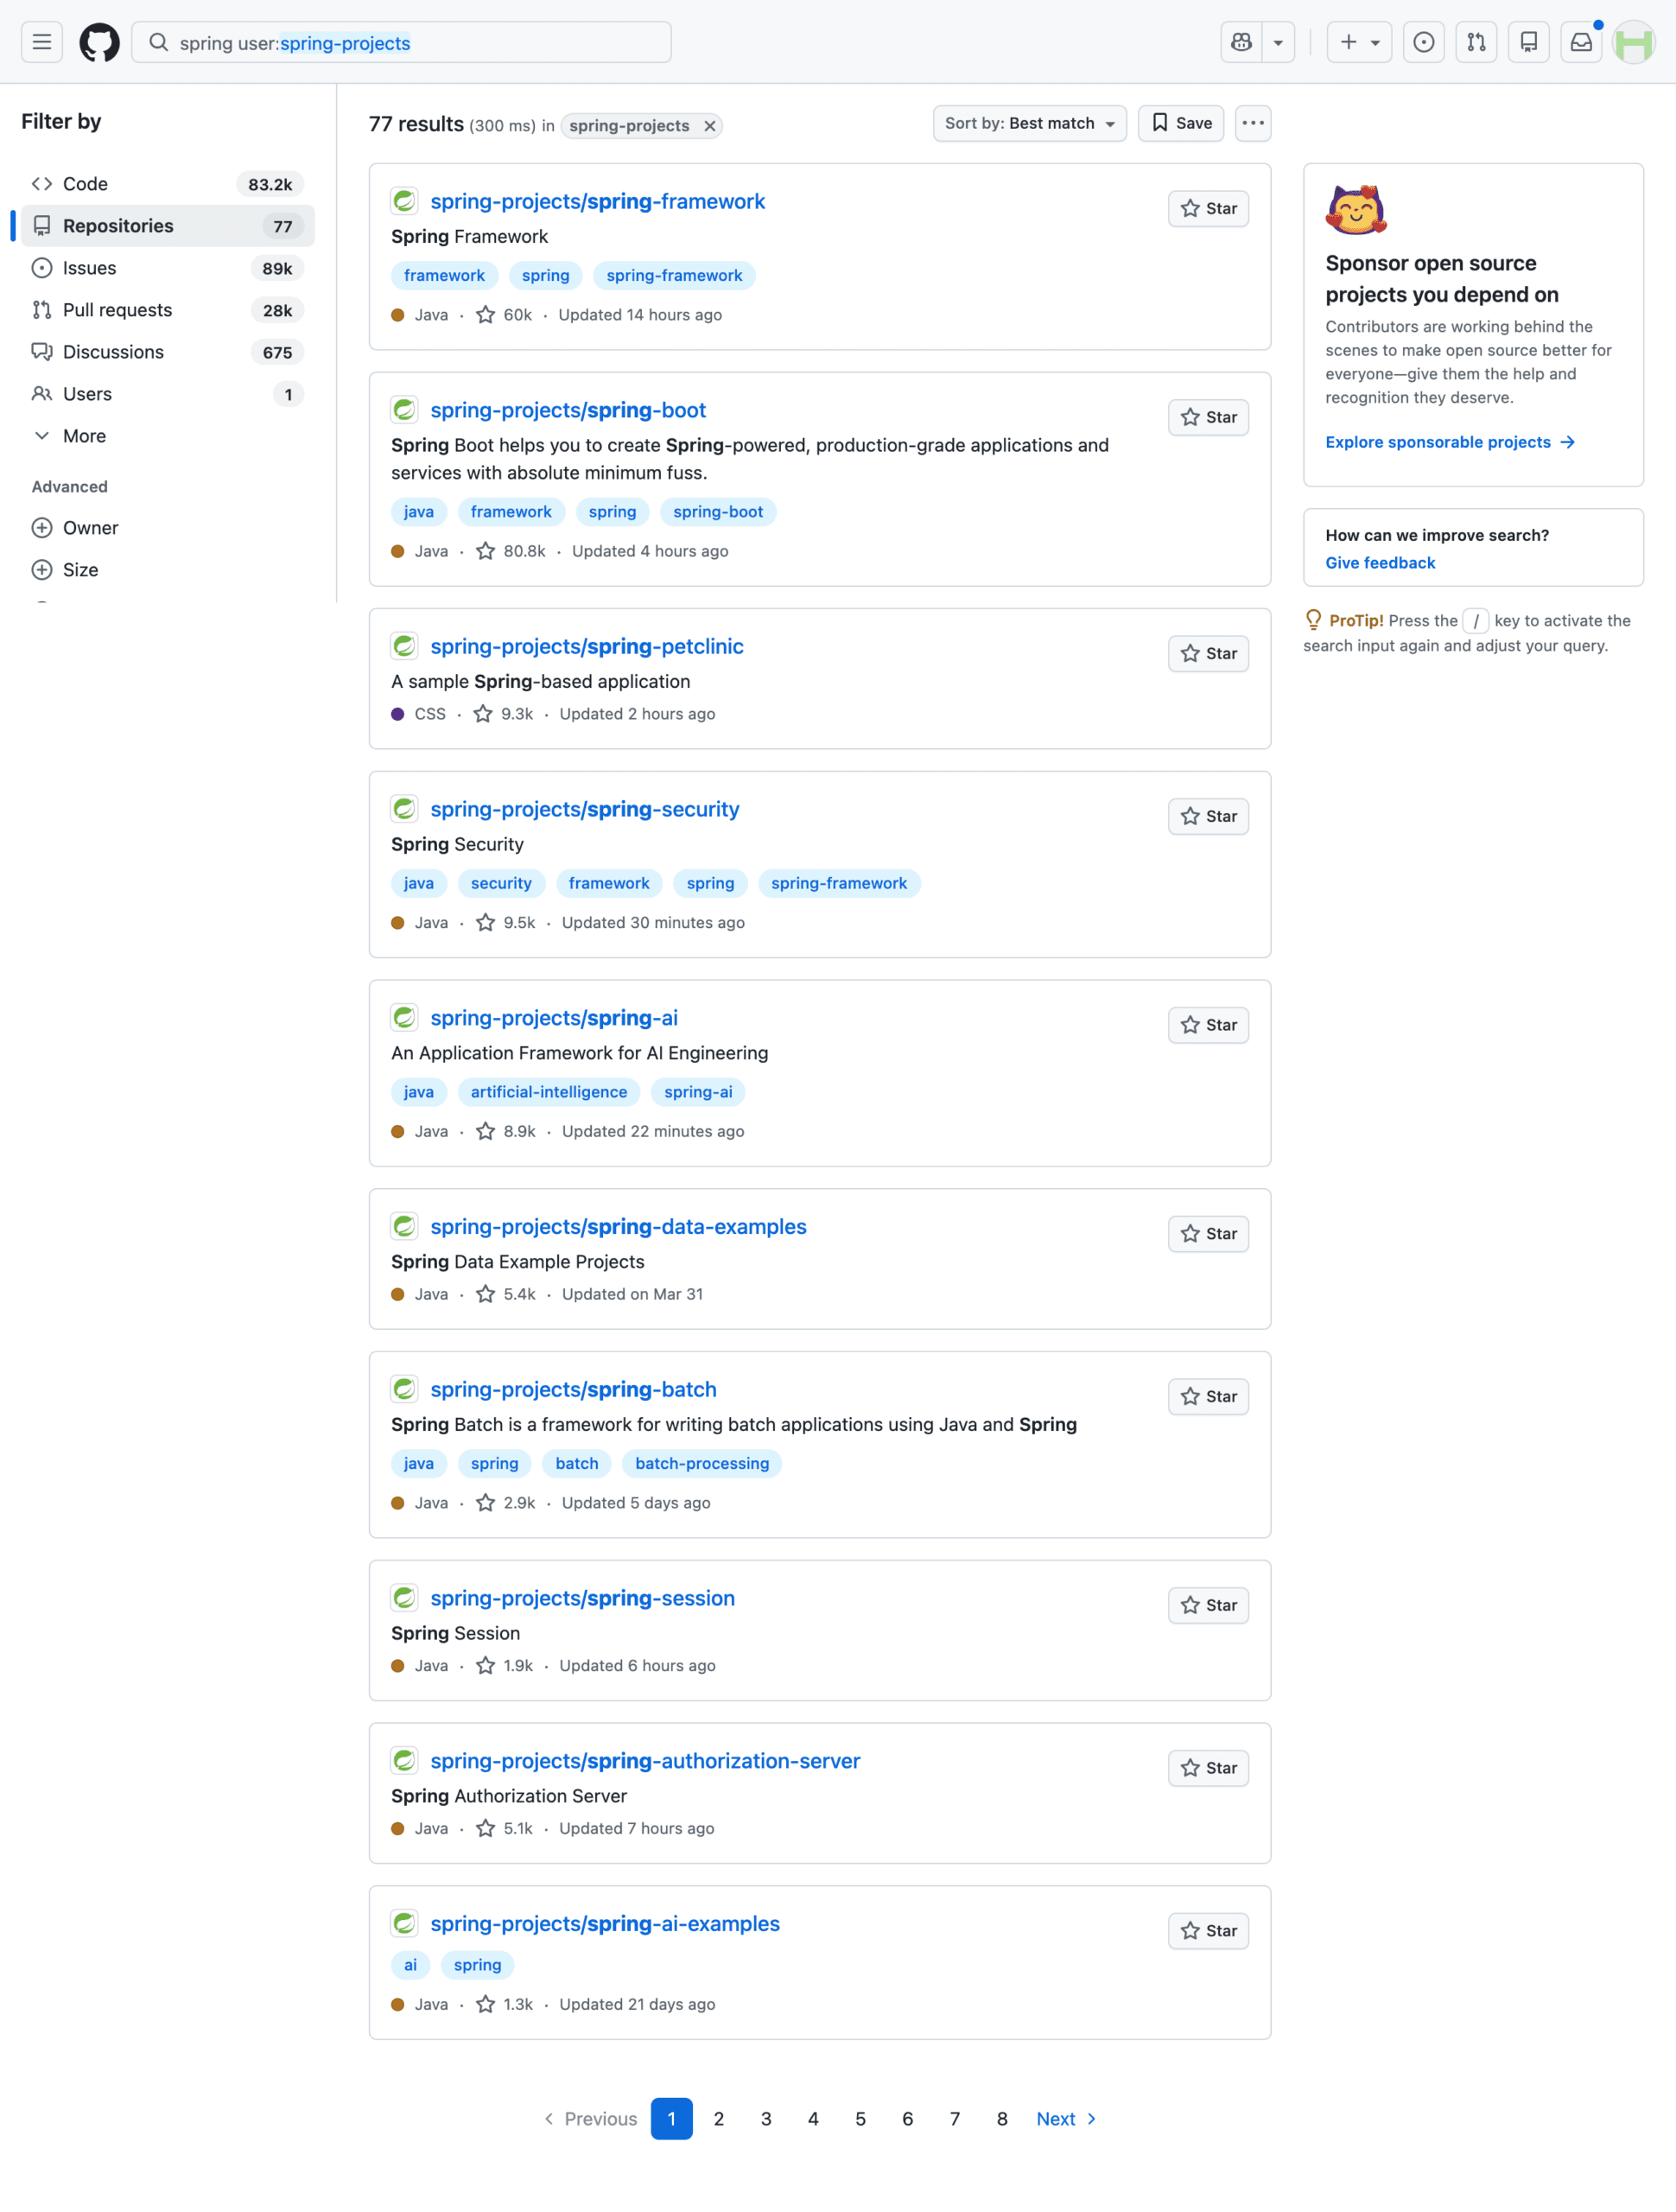
As you complete the advanced search fields, your query is automatically generated in the search bar at the top. This lets you see exactly how GitHub is interpreting your filters in real time.
Once you finish filling out the form and click the Search button, GitHub processes your request and redirects you to a results page. This page shows all matching content that fits your criteria, including repositories, code, issues, pull requests, and discussions related to your selected framework and organization.
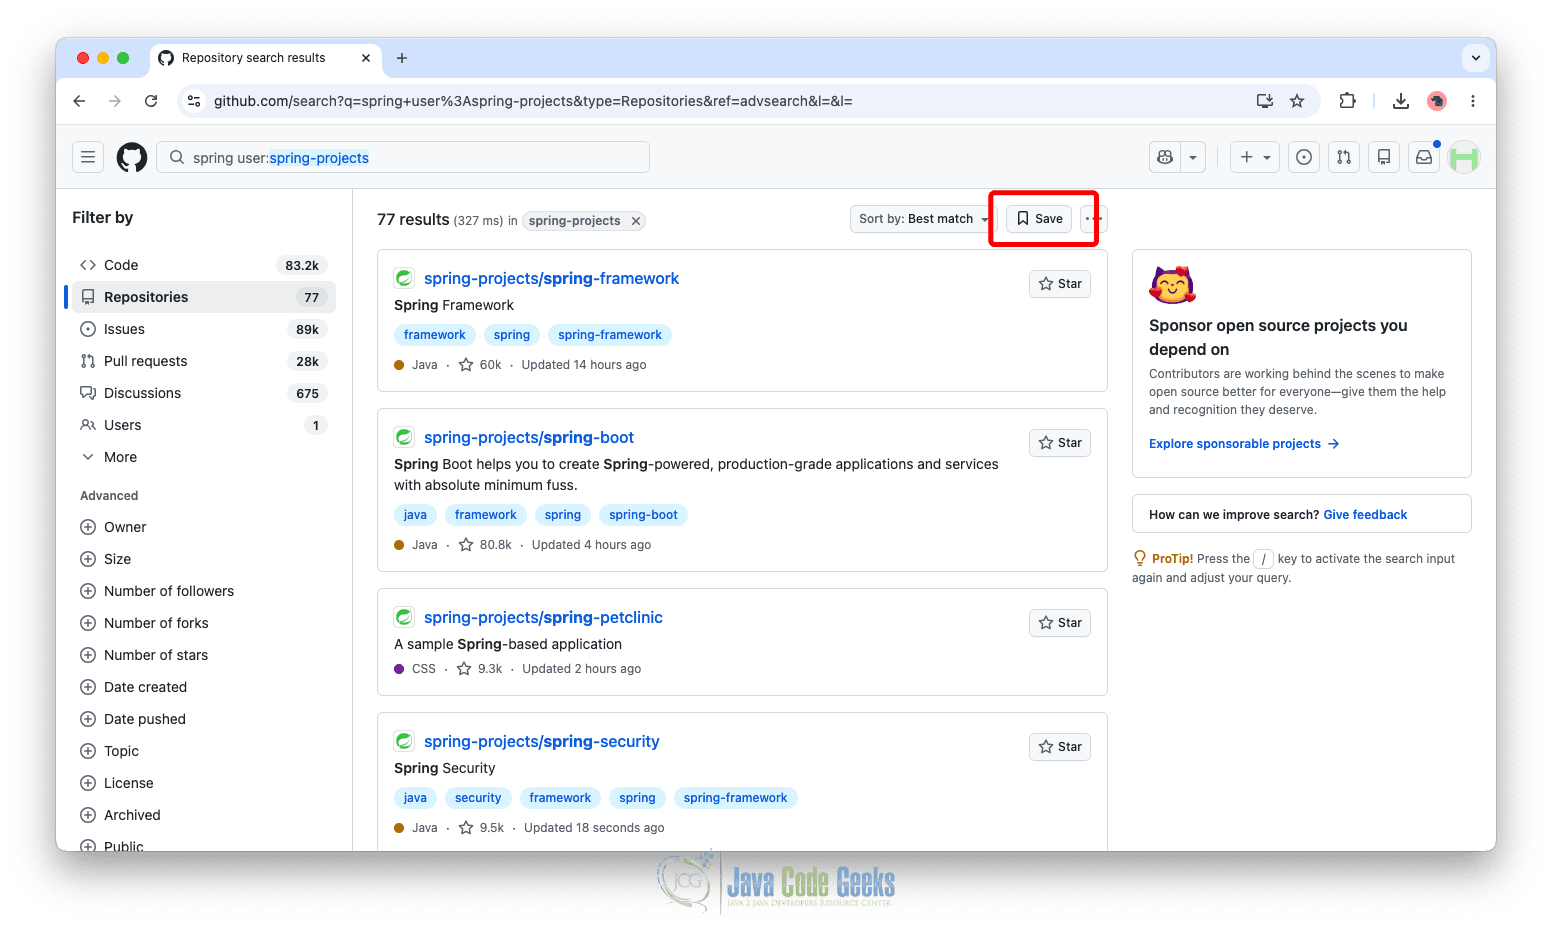
4. Saving Your Searches
After running a search, GitHub allows you to store it so you can quickly reuse it later without having to rebuild the same filters again. After performing a search, you can click the “Save” option to store the query.
To save a search, enter a clear and descriptive name such as “Spring Security Issues Tracker”, then click the “Create saved search” button.
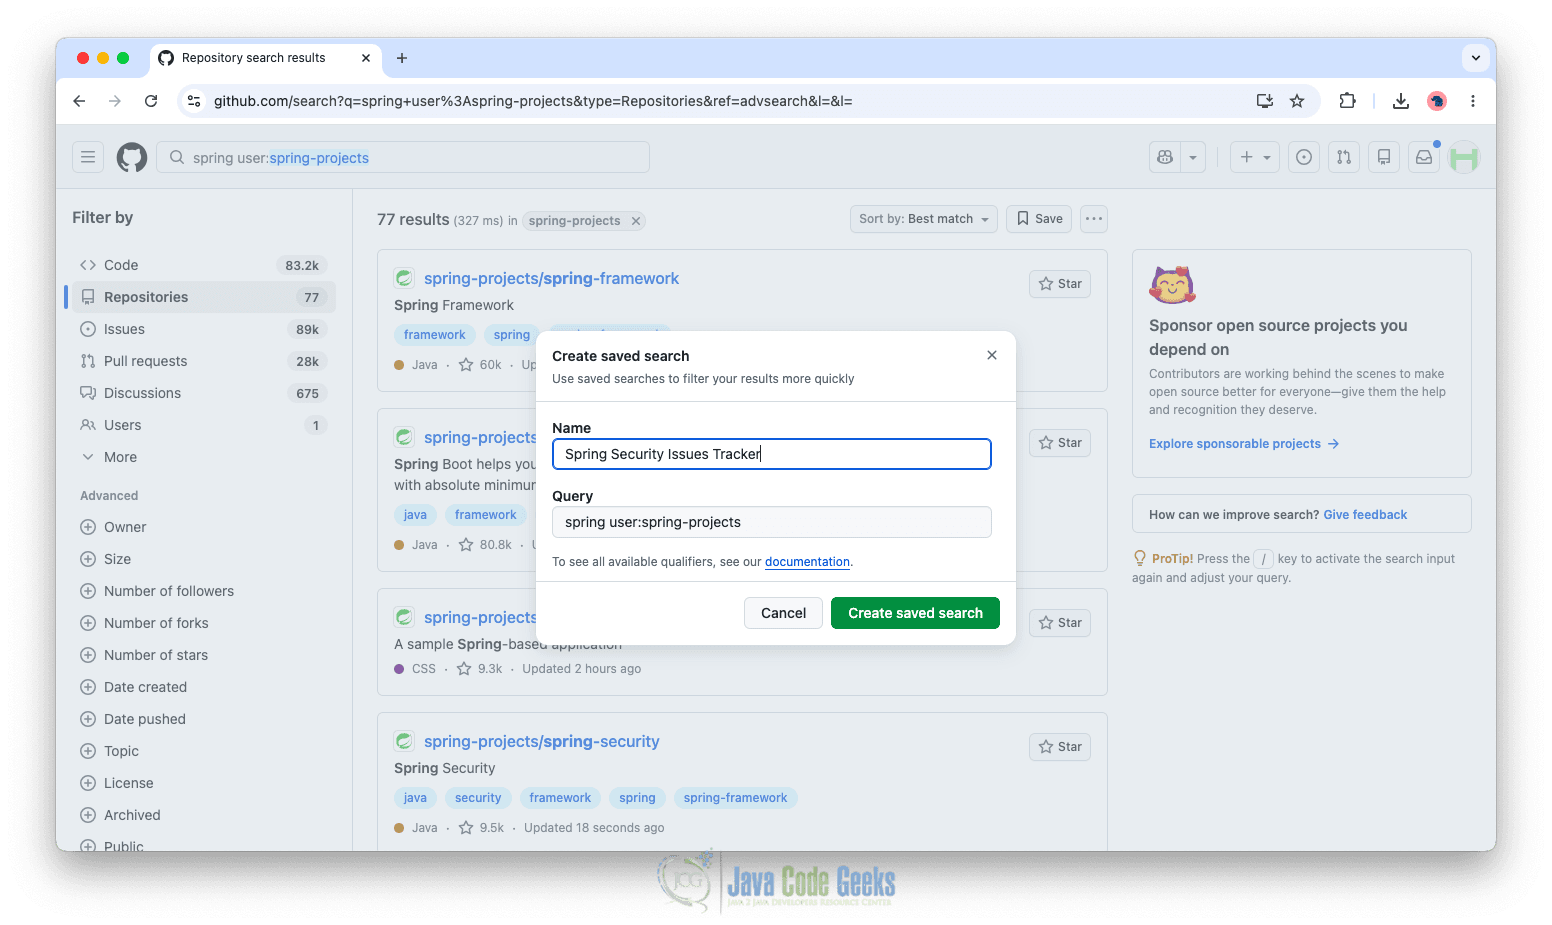
Once you do this, GitHub stores the query under your account so you can access it anytime from your saved searches list.
Saved searches are useful when:
- You frequently look for the same type of issues or code
- You are tracking bugs or updates in a project
- You want to monitor new repositories matching specific criteria
After saving, you will be able to view a list of all your saved searches in one place. This makes it easy to manage and switch between different search queries depending on what you are working on.
To manage your saved searches, open the search bar and type saved:, then select the “Manage saved searches” option. This will take you to a page where all your saved searches are displayed.

From this page:
- Click the pencil icon to edit an existing saved search and update its query or name
- Click the trash icon to delete a saved search you no longer need
Using saved searches helps you stay organized and improves your workflow, especially when you are tracking ongoing issues, monitoring projects, or researching specific technologies over time.
5. Conclusion
In this article, we explored how GitHub search works and how you can use it more effectively to find exactly what you need across repositories, code, issues, pull requests, and discussions. We started with the basics of accessing and using the search bar, then moved into more advanced techniques such as scoped searches and the advanced search interface. Finally, we covered how to save searches, manage them, and reuse them to improve your workflow over time.
With these techniques, GitHub becomes more than just a code hosting platform. It becomes a powerful search and discovery tool that helps you learn faster and navigate large codebases.
This article explored how to use GitHub search effectively.
