Whether it is an application or web app, every software requires testing after development to ensure it does what we expect it to do. Software testing involves using manual or automated tools. Test automation tools are the best to use over manual tools because they increase software testing effectiveness, efficiency, and coverage.
End-to-End testing (or E2E testing) is used to test whether the flow of an application right from start to finish is behaving as expected. End-to-End tests simulate real user scenarios where the automation tool tests how a real user would use the application.
This blog on modern web testing with TestCafe will help you learn how to perform End-to-End automated web tests with JavaScript using TestCafe and cloud Selenium Grid.
Let’s get started!
What is TestCafe?
As per the StackOverflow 2021 Developer Survey, JavaScript completed its ninth year as the most commonly used programming language.

TestCafe is a Node.js End-to-End free and open-source automation framework used to test web applications. TestCafe supports both JavaScript and TypeScript. Hence you can write TestCafe tests in either one of the two. With TestCafe, you needn’t depend upon WebDriver or worry about manual timeouts. Get the most out of cross browser testing with this TestCafe tutorial on performing modern web testing with TestCafe.
What is Selenium?
Selenium is an open-source automation framework extensively used in automated tests for web applications. A new version of Selenium has been launched in the market. The latest version is Selenium 4, an upgrade from Selenium 3. You can learn about the features and improvements in Selenium 4 by going through this Selenium 4 tutorial.
The most notable improvement in Selenium 4 is the World Wide Web Consortium(W3C) compliance with WebDriver APIs. This means that Selenium 4 offers more stable cross-browser tests, as no additional encoding-decoding of the API requests is necessary.
TestCafe Trends on GitHub
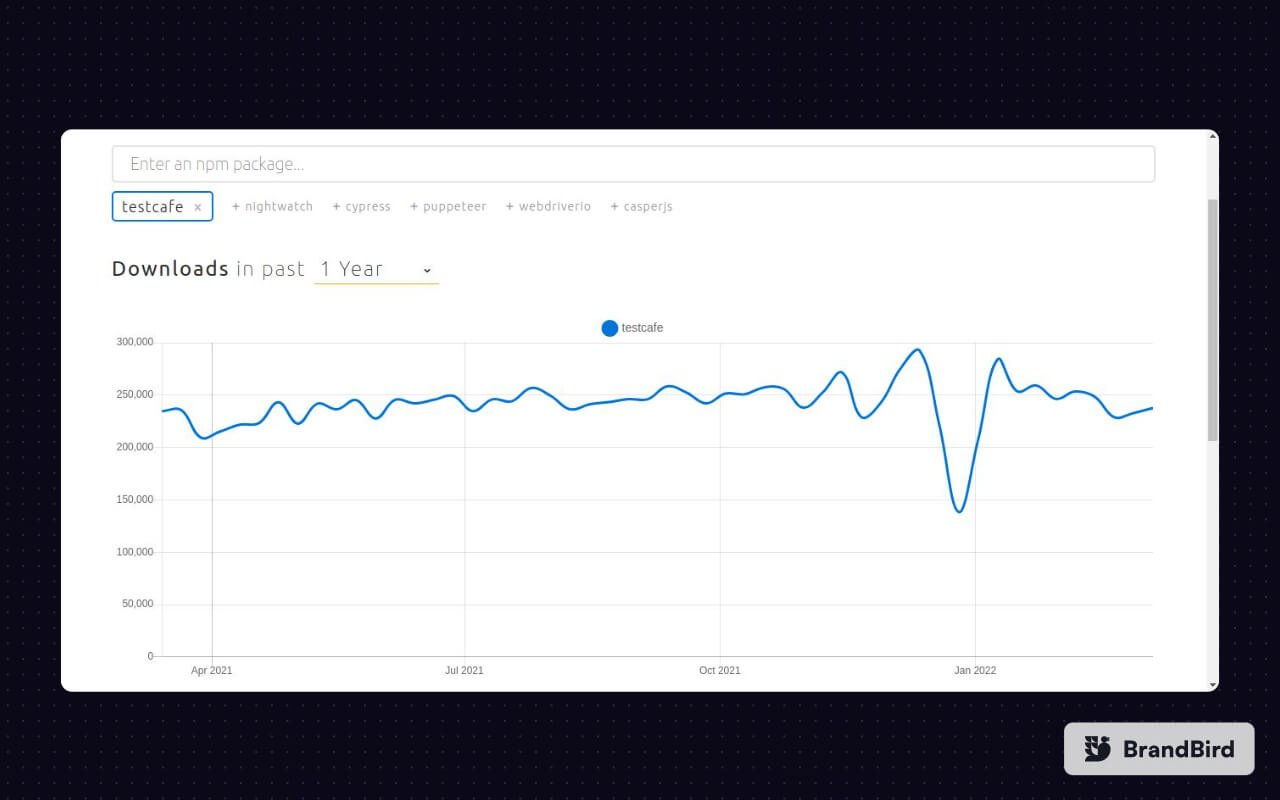
TestCafe is a prevalent test automation framework; the data obtained from the official TestCafe GitHub repository says it all:
- Stars: 93K
- Contributors: 107
- Forks: 650
- Releases: 338
- Used by 10K users
At the time of writing this blog, TestCafe had 254,003 weekly downloads on NPM.
Advantages of TestCafe Automation
Now that I have covered the fundamentals of TestCafe, let’s look at some of the significant advantages of TestCafe. JavaScript supports several other web automation frameworks like WebDriverIO, Mocha, Jasmine, Protractor, etc. The critical question is, what is the core speciality of TestCafe?
Here are some of the major benefits of the TestCafe automation framework:
- TestCafe is easy to set up because it does not require the installation of third-party plugins, web drivers, or additional libraries to run tests.
- TestCafe supports all major browsers, such as
- Google Chrome
- IE 11
- Microsoft Edge
- Mozilla
- Safari
- Chrome mobile
- Safari mobile
- TestCafe is open source and free to use because it is licensed by MIT.
Liked this video? Follow the LambdaTest YouTube Channel for more such videos around Selenium testing, CI/CD, Cypress UI testing, and more,
Getting Started With TestCafe Automation
In this section of this article on modern web testing with TestCafe, you will learn how to install TestCafe and run your first test in TestCafe. To install and use TestCafe in your system, you need a Text Editor, NodeJS, and Node Package Manager (NPM) installed.
For demonstration, I will be using Visual Studio Code as the Text Editor. However, you can use the IDE of your choice.
Here is the list of VS Code extensions necessary for performing modern web testing with TestCafe.
- TestCafe Snippets: Provides code snippets for TestCafe
- TestCafe Test Runner: Allows you to run tests directly from VS Code
- TestLatte: Lets you debug or run your TestCafe tests on VS Code
How to install TestCafe Extensions
To install TestCafe Extensions, please follow the below mentioned steps:
- On your computer, create a folder called “TestCafeDemo”.
- Right-click on the folder and open it using VS Code.
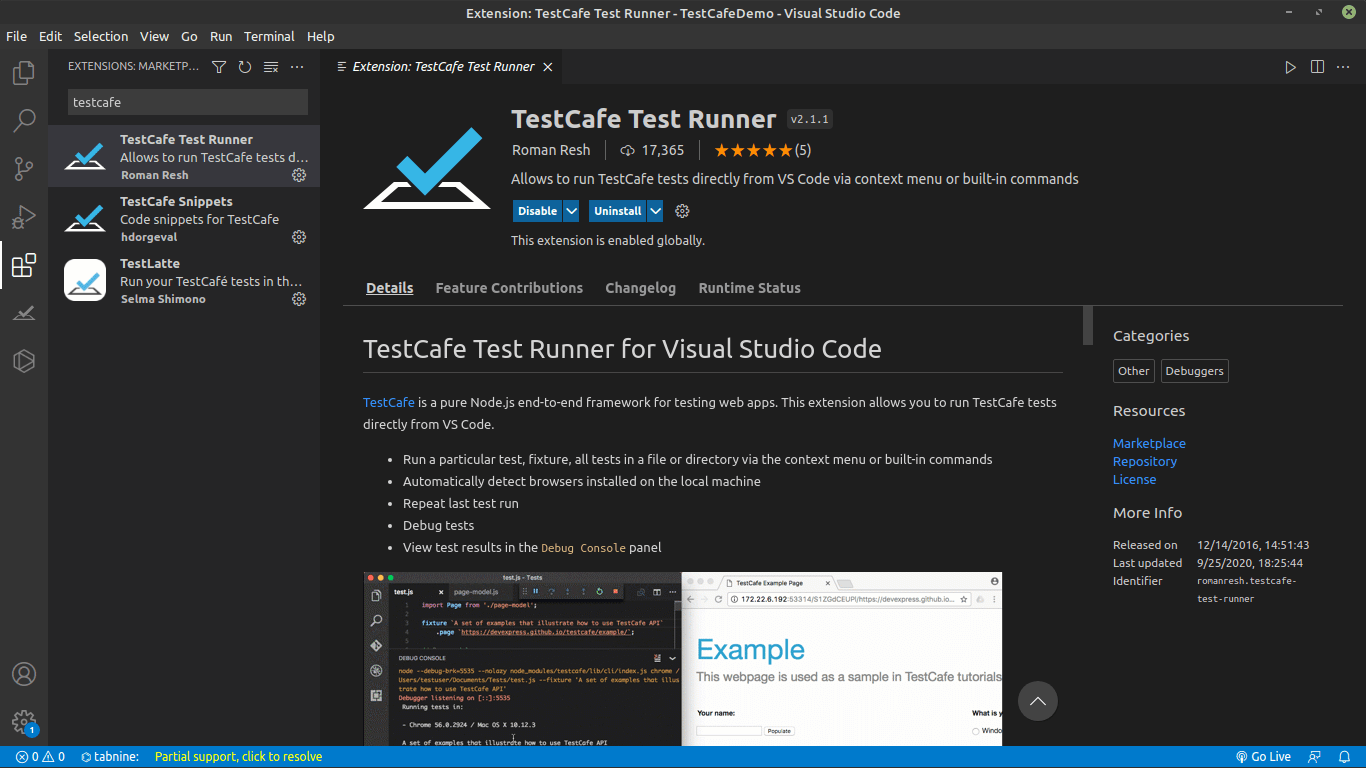
- Once VS Code has launched, navigate to extensions by clicking the extensions button on the left side of your screen.

On the extension’s search bar, type “testcafe” and all three extensions will appear. Click on each extension and install it.
Installing TestCafe in VS Code
To install TestCafe in VS Code, please follow the below mentioned steps:
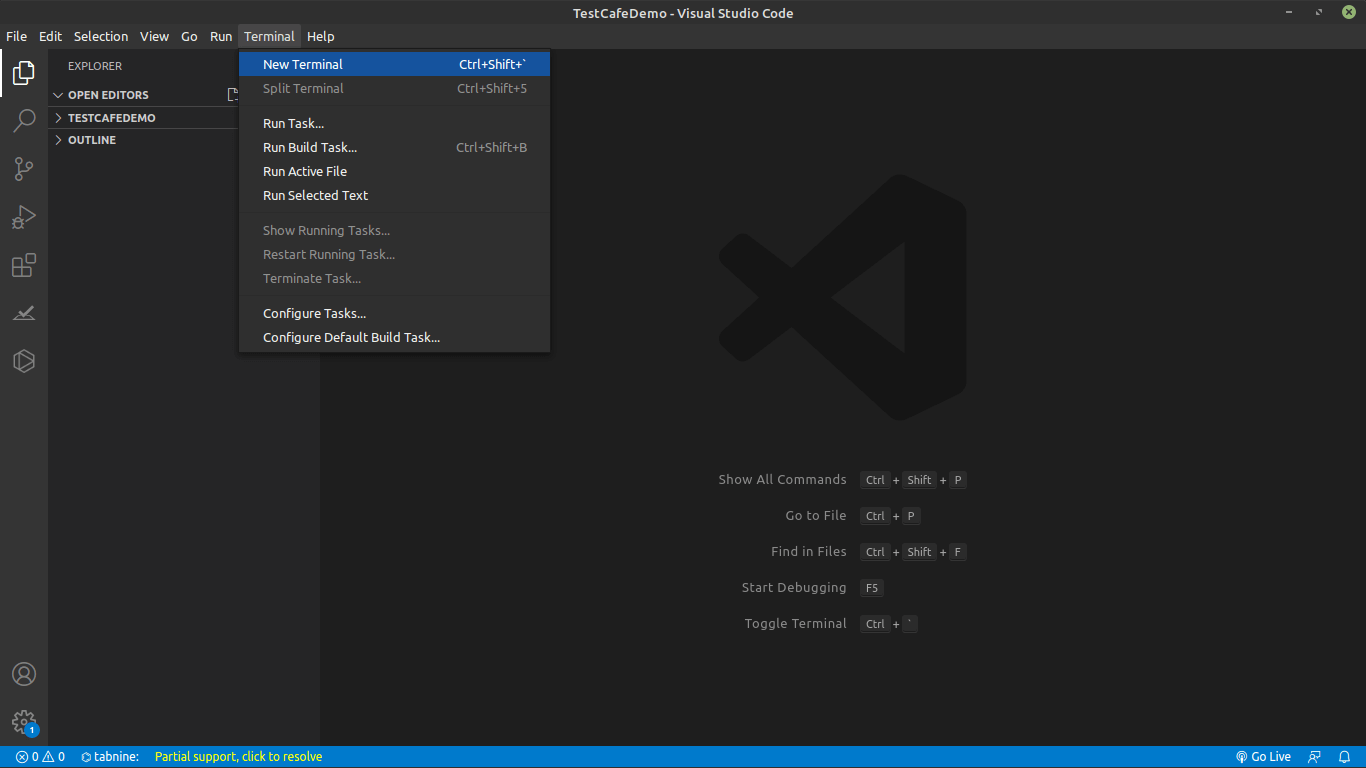
- Open the terminal on VS Code by clicking the Terminal option at the top of your VS Code Window and then select New Terminal as shown below:
- Run the command below on your terminal to install TestCafe.
npm install testcafe.
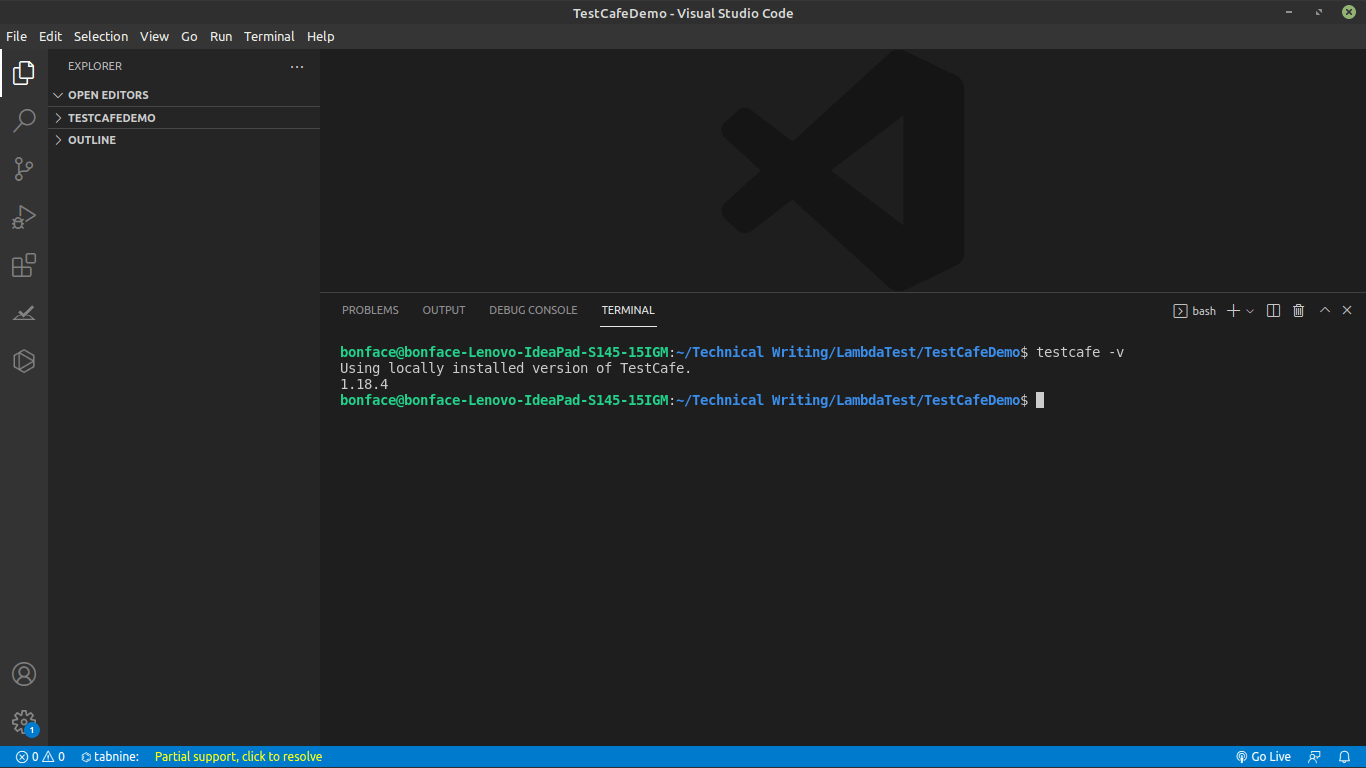
- Once the installation is done, run the command below to see the version of TestCafe installed
testcafe -v
As you can see below, I am using TestCafe version 1.18.4
- Run the command below to create a Package.json file.
npm init
The package.json file represents various metadata relevant to our project. The file also helps NPM identify the project’s information and dependencies.
- Run the command below to add TestCafe as a dependency for our project
npm install testcafe
Now, if you navigate to the package.json file, you will find that TestCafe has been added as one of the dependencies.

How to run Selenium Tests using TestCafe?
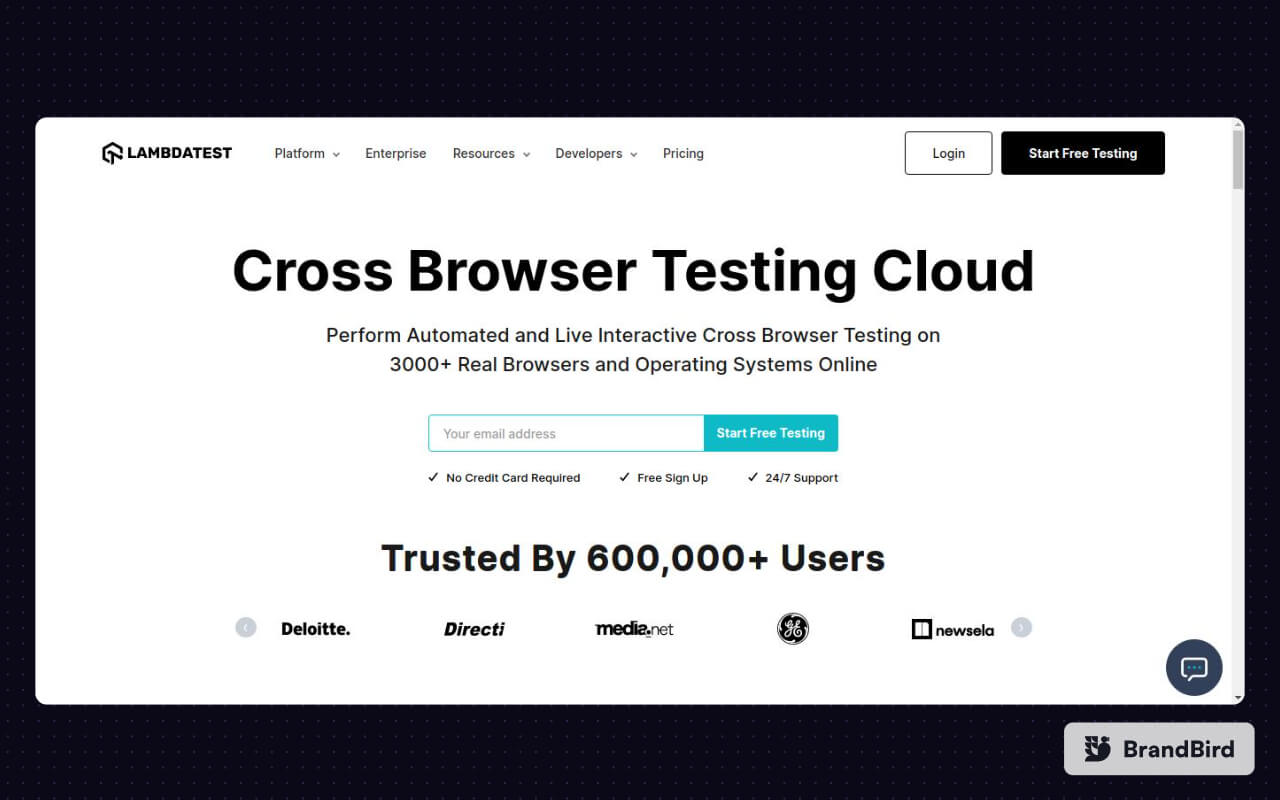
To demonstrate how to perform TestCafe testing using Selenium, I will be using a dummy e-commerce playground from LambdaTest for automating test scenarios. Here, the customers need to create an account to be able to buy something from the website.
To make sure that the registration form works as expected, you can use TestCafe to run an automated test where TestCafe simulates the end-user interaction with the elements in the DOM. The automation will be performed on the Chrome, Firefox, and Safari browsers.
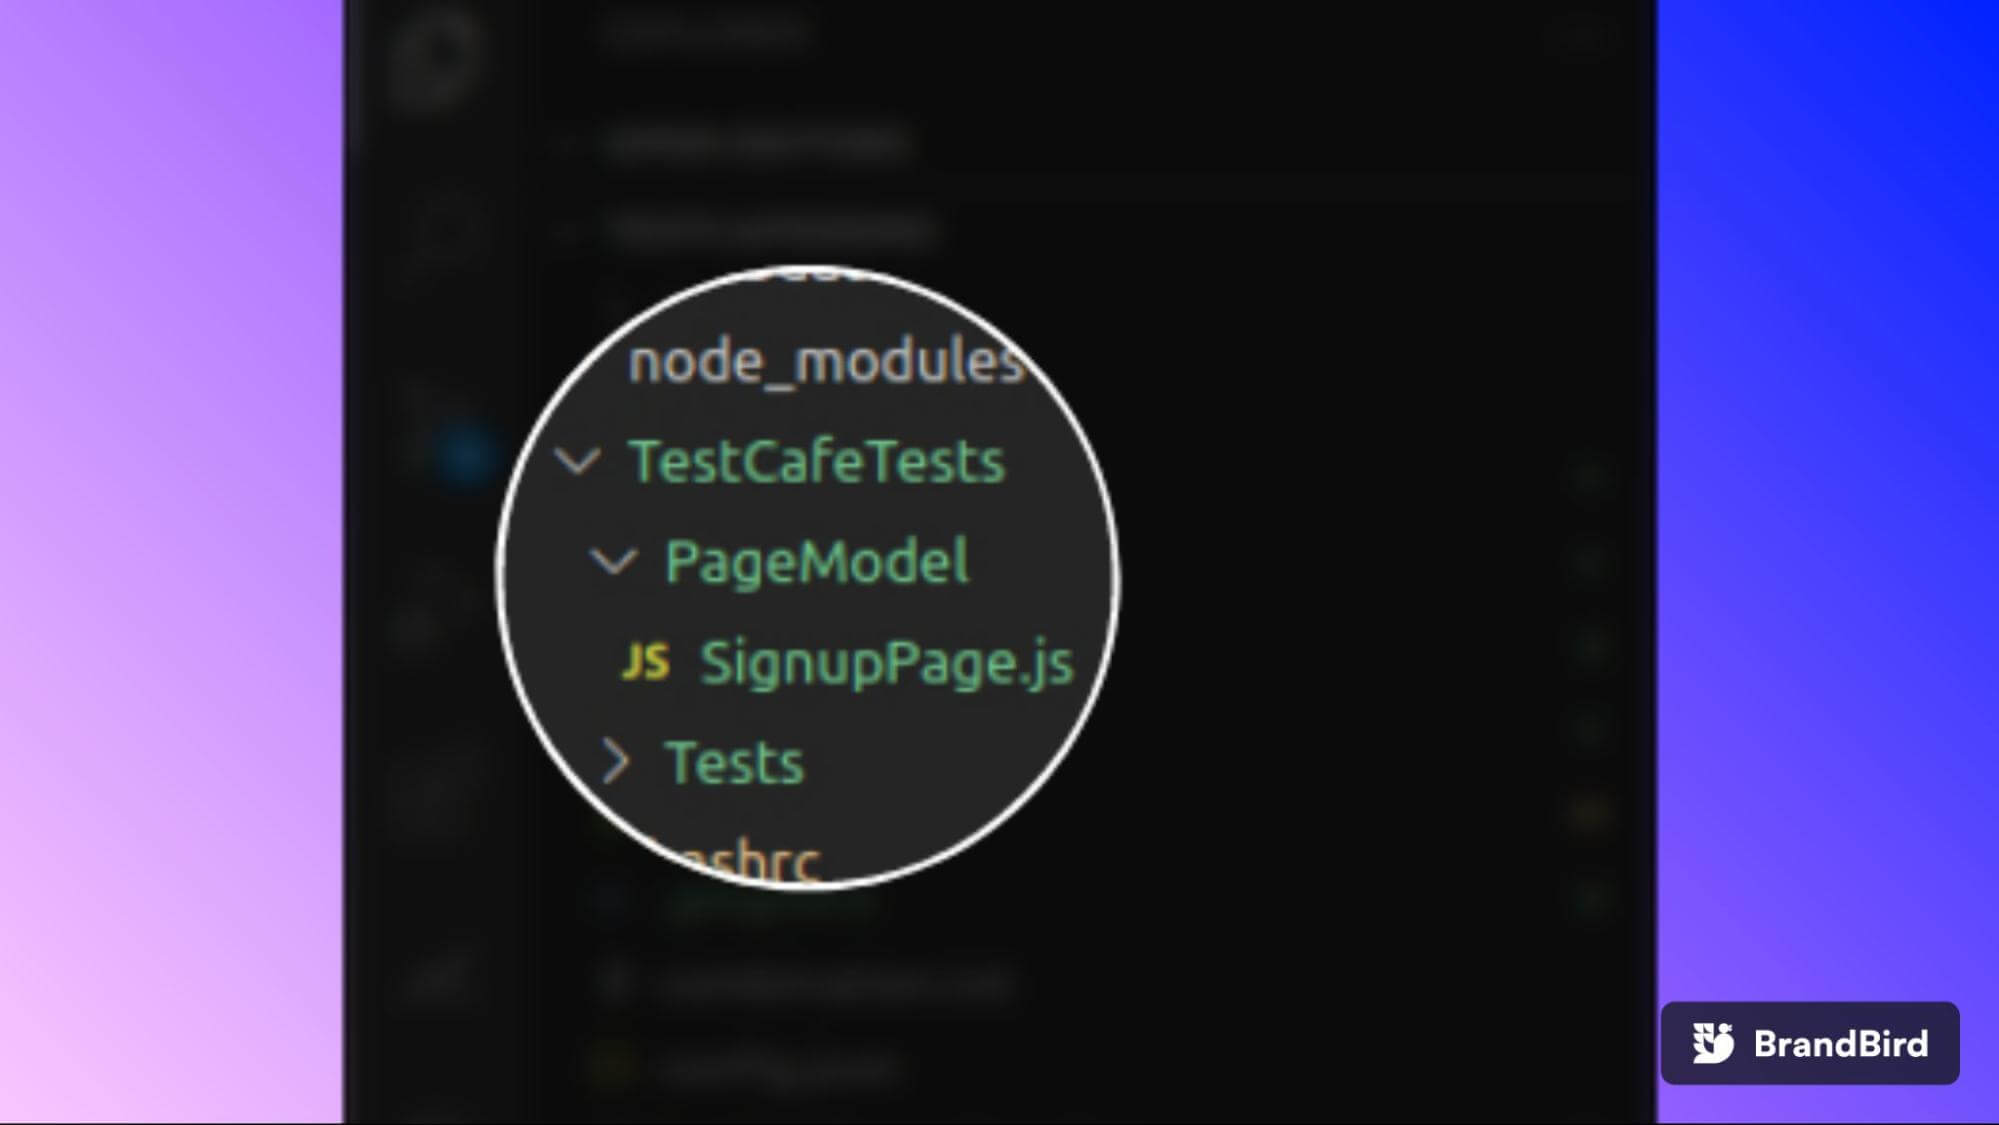
To run the test, we will create a folder called “TestCafeTests”. Inside the folder, we will create two folders called “PageModel” and “Tests”. We will create two folders inside the “TestCafeTests” folder because we will be using Page Object Model in Selenium.
Page Object Model, also known as POM, is a design pattern where an object repository is created for storing the WebElements. POM helps us reduce code duplication and minimizing efforts involved in test case maintenance.
Before running the test, let us see how the test case will run a test on the e-commerce registration page.
Test Scenario (Chrome Browser)
- Navigate to the e-commerce playground.
- Add “John” to the First Name input field.
- Add “Doe” to the Last Name input field.
- Add “johndoe@example.com” to the email input field.
- Add “0712345678” to the telephone input field.
- Add “Qwerty123!” to the password input field.
- Add “Qwerty123!” to the password confirm input field.
- Select the “agree to privacy policy” checkbox.
- Click the “Continue” submit button.
To run TestCafe tests, follow the below mentioned steps:
- Create a new folder in your project and call “TestCafeTests” in this path “TestCafeDemo/TestCafeTests”.

- In the “TestCafeTests” folder, create two other folders called “PageModel” and “Tests”.

- In the “PageModel” folder, let us create a file called “SignUp.js” as shown below.
Setting up POM
You can follow the below mentioned steps to set up POM:
- In this step, we will declare the “SignupPage” class in the “SignupPage.js” file and export its instance as shown below.
class SignupPage {

   constructor(){
   }
}

export default new SignupPage();
- We will need to add WebElements to the “SignupPage” class. These WebElements will be input fields and buttons on the e-commerce website registration page that I mentioned earlier.
- Navigate to the registration page, inspect the web page and get the ID locator of the input fields together with buttons that a user is expected to fill and click when creating an account as shown below.

- Then add “firstname, last name, email, telephone, password, confirm password, Click on agree and continue” ID and Class locators to the model. To do this, we will introduce “firstnameInput, lastnameInput, emailInput, telephoneInput, passwordInput, confirmInput, agreeBtn, and continueBtn ” properties and assign a selector to them. If you wish to learn more about Selenium locators, go through this article on Locators in Selenium WebDriver.
- When inspecting the web page to get the ID locators, you will find out that the “Continue” submit button has no ID assigned to it. For TestCafe to be able to locate it, we will get the submit button class name and add “input.” before the class instead of “#” which represents ID locators.
- To assign a selector to them, we will have to import it at the top of the “SignupPage.js” file from TestCafe. The “SignupPage.js” file should now look as shown below:
FileName – SignupPage.js
import {Selector, t} from 'testcafe';

class SignupPage {

   constructor(){
       this.firstnameInput = Selector('#input-firstname');
       this.lastnameInput = Selector('#input-lastname');
       this.emailInput = Selector('#input-email');
       this.telephoneInput = Selector('#input-telephone');
       this.passwordInput = Selector('#input-password');
       this.confirmInput = Selector('#input-confirm');
       this.agreeBtn = Selector('#input-agree');
       this.continueBtn = Selector('input.btn-primary');
   }
}

export default new SignupPage();
- Let us now create a test that uses the POM design pattern Page that we created earlier. In the “Tests” folder, create a file called “SignupTest.js” as shown below.

- In the “SignupTets.js” file, we will import the page model instance from the “SignupPage.js” file as shown below.
import SignupPage from "../PageModel/SignupPage";
- Let us now create a variable called “url” that will hold the test URL against which the automation tests are run.
import SignupPage from "../PageModel/SignupPage";

const url = 'https://ecommerce-playground.lambdatest.io/index.php?route=account/register'
- Next we will declare a fixture. Fixtures are used to divide the list of test cases into categories. Fixtures in Selenium represent a group of tests that are targeted on one URL. Fixtures help to manage test cases with different test pages. Each fixture can represent tests on the Login Page, Registration Page, or Home Page.
import SignupPage from "../PageModel/SignupPage";

const url = 'https://ecommerce-playground.lambdatest.io/index.php?route=account/register'

fixture('SignUp Page')
   .page(url)
- Now declare a test case named “Registration”, which is an asynchronous function that contains test code with a test controller object (t). All test actions are implemented as an async function of the test controller object t. This object is used to access the test run API.
import SignupPage from "../PageModel/SignupPage";

const url = 'https://ecommerce-playground.lambdatest.io/index.php?route=account/register'

fixture('SignUp Page')
   .page(url)

test("Registration", async t => {

});
- Next we will use the “t.wait” function to wait for the actions to complete. When TestCafe executes a Selector query, it waits for the target element to appear in the DOM.
import SignupPage from "../PageModel/SignupPage";

const url = 'https://ecommerce-playground.lambdatest.io/index.php?route=account/register'

fixture('SignUp Page')
   .page(url)

test("Registration", async t => {
   await t

});
- After that, we will use a method TestCotroller called “.typeText” which takes two parameters. The first parameter is a selector that identifies the WebElement in the DOM to receive input focus. The second parameter is the text that we intend to enter in the recently located WebElement.
- To test the radio button and submit button, we will use a method TestController called “.click”. The “.click” TestController method performs a click on the WebElement, and it takes one parameter – Selector used to identify the WebElement on the page.
- Since we already declared the selectors in the page model and imported the page model to our test file, we can just add the names we gave the selectors as our first parameter in the “.typeText” and “.click” TestController methods as shown below.
File path “TestCafeDemo/TestCafeTests/Tests/SignupTest.js”
import SignupPage from "../PageModel/SignupPage";

const url = 'https://ecommerce-playground.lambdatest.io/index.php?route=account/register'

fixture('SignUp Page')
   .page(url)

test("Registration", async t => {
   await t
       .typeText(SignupPage.firstnameInput, 'John')
       .typeText(SignupPage.lastnameInput, 'Doe')
       .typeText(SignupPage.emailInput, 'johndoe@example.com')
       .typeText(SignupPage.telephoneInput, '0712345678')
       .typeText(SignupPage.passwordInput, 'Qwerty123!')
       .typeText(SignupPage.confirmInput, 'Qwerty123!')
       .click(SignupPage.agreeBtn)
       .click(SignupPage.continueBtn);
});
- To run the test, run the command below on your command line. The command specifies the browser to use and the file that has the tests we want to be performed on the Test Page.
testcafe chrome TestCafeTests/Tests/SignupTest.js
- TestCafe will launch the Chrome browser, navigate to the URL we specified in the fixture, and run all the tests that are a part of the test function. If everything looks good, you should be notified on the terminal that the test ran successfully.

How to run Parallel Tests in TestCafe?
The primary purpose of parallel testing in Selenium is to expedite the test execution time. The main benefits of parallel testing are:
- Accelerated test execution
- Increased test and browser coverage
We can execute tests in parallel using TestCafe by enabling concurrent mode, which runs multiple browser instances simultaneously.
To enable concurrency while performing modern web testing with TestCafe, use the -c command-line option when running a test. To discover other TestCafe command-line options, you can run the following command in the terminal.
testcafe --help
The following command invokes two Chrome instances and runs tests in parallel.
testcafe -c 2 chrome tests/firstTest.js
You can also use concurrency when testing against multiple browsers. When setting the number of browser instances, make sure they are not more than the tests that you are running. The extra browsers will open but end up with an empty page because there are no tests left for those browsers. Extra browsers with empty pages will only lead to the consumption of system resources.
testcafe -c 2 chrome, safari, firefox tests/firstTest.js
As mentioned earlier, the primary benefit of parallel testing is to reduce testing time; if a large number of test scenarios have to be executed on the cloud Selenium Grid. To prove if this is true, we will create another test that checks if customers are able to log in to their accounts. Then we will run a normal test followed by a parallel test to compare.
- Create a new file called “LoginPage.js” in the PageModel folder and a file called “LoginTest.js” in the Tests folder as shown below:
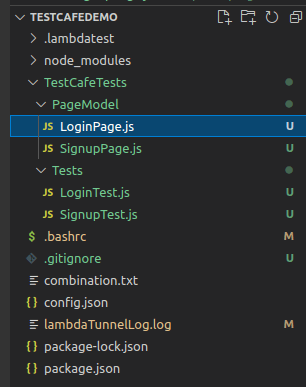
- Set up the Page Object Model in the “LoginPage.js” file as shown below.
import { Selector, t } from 'testcafe';

class LoginPage {

   constructor() {
       this.emailInput = Selector('#input-email');
       this.passwordInput = Selector('#input-password');
       this.loginBtn = Selector('input.btn-primary');
   }
}

export default new LoginPage();
- Create a login test in the “LoginTest.js” file as shown below.
import LoginPage from "../PageModel/LoginPage";

const url = 'https://ecommerce-playground.lambdatest.io/index.php?route=account/login'

fixture('Login Page')
   .page(url)

test("Login", async t => {
   await t
       .typeText(LoginPage.emailInput, 'johndoe@example.com')
       .typeText(LoginPage.passwordInput, 'Qwerty123!')
       .click(LoginPage.loginBtn);
});
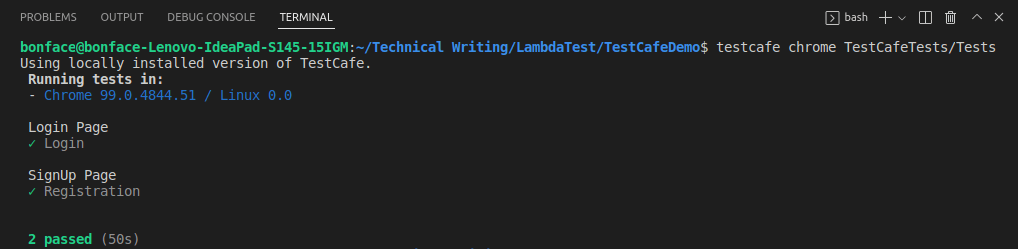
- Let us now run a test using the command below and see how long the tests take to run.
testcafe chrome TestCafeTests/Tests
As you can see from the screenshot, it took 50 seconds to execute the two tests.
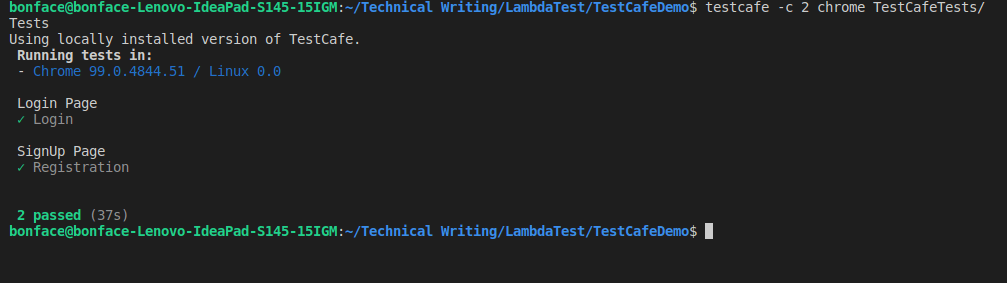
- Let us now see if a parallel test will take less than 50 seconds by using the command below.
testcafe -c 2 chrome TestCafeTests/Tests
- As you can see from the screenshot below, the parallel test took 37 seconds to execute the test. That means the parallel test has saved us 13 seconds. It might not be a lot but imagine how much time it would save you if you were running 100 tests or more.
Test automation is highly beneficial, but sometimes it can be quite expensive, especially when testing at a large scale. To determine if test automation is worth the cost, you will need to calculate the Return On Investment (ROI). One of the metrics for evaluating the ROI of test automation is figuring out how much time you would save running the automatic tests.
How to run Tests in Headless Mode in TestCafe?
In simple terms, headless mode is running a test on a browser without the browser UI starting up or showing, meaning that the test runs in the background. Headless mode testing improves the speed and performance of your tests because the system saves the processing power that would otherwise be used in running the browser instance.
TestCafe allows you to run tests in Google Chrome and Mozilla Firefox. To perform modern web testing with TestCafe in headless mode using Chrome, you can use the following command:
testcafe chrome:headless tests/firstTest.js
To run a test in headless mode using Firefox, you can use the following command:
testcafe firefox:headless tests/firstTest.js
How to run Tests using TestCafe and Cloud Selenium Grid?
In this article on modern web testing with TestCafe, you might have realized that running tests on different browsers and platform versions can be a huge hassle with the local Selenium Grid.
Let’s consider a hypothetical scenario where you have a Windows machine, and you want to run cross-browser tests on (Safari + macOS) or (Firefox + Linux) combination. This is where cloud Selenium testing can be hugely beneficial since it eliminates the need to invest in the maintenance of the in-house test infrastructure continually.
Cloud Selenium Grid provides us with an option to run tests on a range of virtual browsers, browser versions, and operating systems securely over the cloud. LambdaTest is one such platform that provides a secure, scalable, and super reliable cloud-based Selenium Grid infrastructure that lets you run tests at scale.
LambdaTest is a cloud-based cross browser testing platform that allows you to run tests on an online browser farm of 3000+ real browsers and operating systems for mobile, desktop, and tablets. LambdaTest Selenium Grid also allows you to perform parallel testing.

To use LambdaTest Selenium Grid together with TestCafe to run your tests, you will need a LambdaTest account.
- Navigate to the LambdaTest website and log in if you already have an account, or create one if you don’t have an account yet.
- Once you are logged in, navigate to the automation page by clicking automation on the left sidebar of your screen.

- To use TestCafe with LambdaTest Grid, you need LambdaTest credentials (i.e. username and access key). To get the credentials, click the “Access Key” button on the right side of your screen.

- Let us now save the credentials (username and access key) to environment variables LT_USERNAME and LT_ACCESS_KEY in our project.
- To save username to environment variable LT_USERNAME and access key to LT_ACCESS_KEY on Linux/Mac, run the following commands.
$ export LT_USERNAME= insert your username
$ export LT_ACCESS_KEY= insert your access_key
- For Windows, run the following commands
$ set LT_USERNAME= insert your username
$ set LT_ACCESS_KEY= insert your access_key
- To add these credentials to an environment variable in your project, run the following command on the Visual Studio command line.
nano .bashrc
- Then add your credentials as shown below.
$ export LT_USERNAME= insert your username
$ export LT_ACCESS_KEY= insert your access_key
- Make sure you save the file by pressing CTRL + X and then press enter.
- LambdaTest has an npm plugin that allows you to integrate TestCafe with LambdaTest for seamless cross browser compatibility and true test coverage. You can install the plugin by running the following command:
npm install testcafe-browser-provider-lambdatest
- Run the below-mentioned command to have a look at the browsers supported by the LambdaTest Selenium Grid:
testcafe -b lambdatest
- Let us save our TestCafe credentials in our project so that our authentication on LambdaTest Selenium Grid goes through. You can save the credentials by running the commands below.
$ set LT_USERNAME=*insert your username*
$ set LT_ACCESS_KEY=*insert your accesskey*
We are now ready to run our test using TestCafe and LambdaTest Selenium Grid.
Test Case Scenarios
As mentioned earlier, the advantage of using Cloud Selenium Grid is to have an option of testing on multiple browser versions and operating systems. In our case, we will use three test combinations to test whether our e-commerce website registration and login form work as expected. These combinations are:
- Chrome 85.0 + macOS Catalina
- Firefox 78.0 + Windows 10
- Chrome 86.0 + Windows 11
Implementation
- To define your desired set of browser and operating system combinations, you can use LambdaTest Capabilities Generator as shown below:

- After setting your desired combinations, create a file called config.json and add your combinations as shown below without changing the code.
FileName – config.json
{
   "Chrome@85.0:MacOS Catalina": {
       "build": "TestCafe Demo",
       "network": true,
       "visual": true,
       "resolution": "1024x768"
   },


   "Firefox@78.0:Windows 10": {
       "build": "TestCafe Demo",
       "network": true,
       "visual": true,
       "resolution": "1024x768"
   },


   "Chrome@86.0:Windows 11": {
       "build": "TestCafe Demo",
       "network": true,
       "visual": true,
       "resolution": "1024x768"
   }
}
- To run a test on (Chrome 85.0 + MacOS Catalina) combination, run the command below.
testcafe "lambdatest:Chrome@85.0:MacOS Catalina" TestCafeTests/Tests
- To run a test on (Firefox 78.0 + Windows 10) Combination, run the command below.
testcafe "lambdatest:Firefox@78.0:Windows 10" TestCafeTests/Tests
- To run a test on (Chrome 85.0 + Windows 11) Combination, run the command below.
testcafe "lambdatest:Chrome@85.0:Windows 11" TestCafeTests/Tests
- In case there are no issues with the test code, you should have the message on your Visual Studio Code Terminal that the test was successful for each combination.
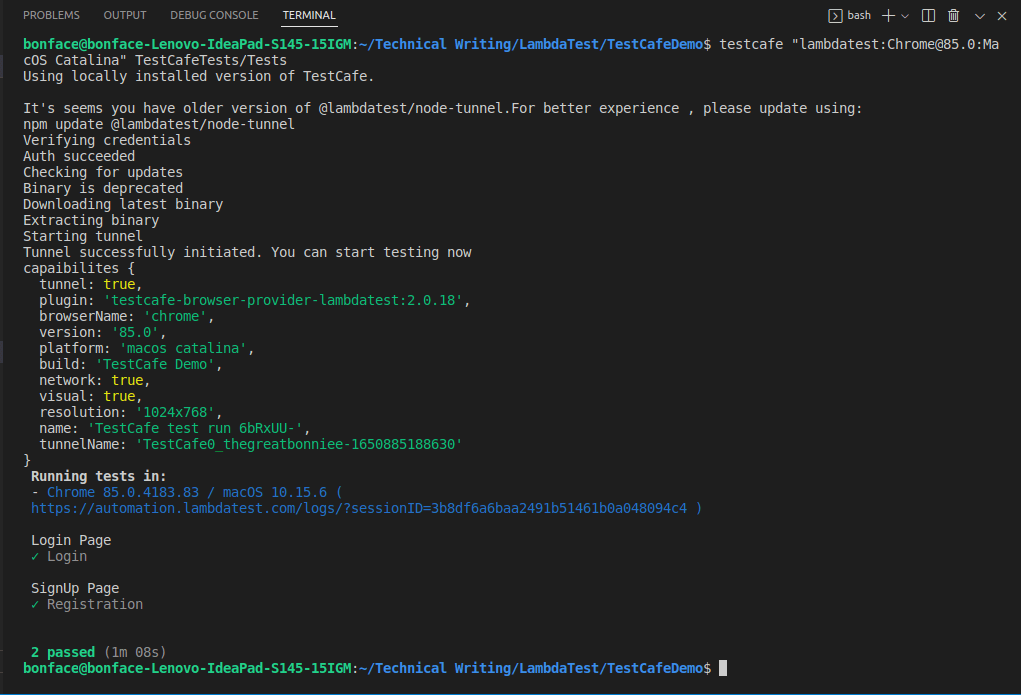
- If you visit your LambdaTest Dashboard on the right side of your screen, you should be able to see your recent tests, as shown below.
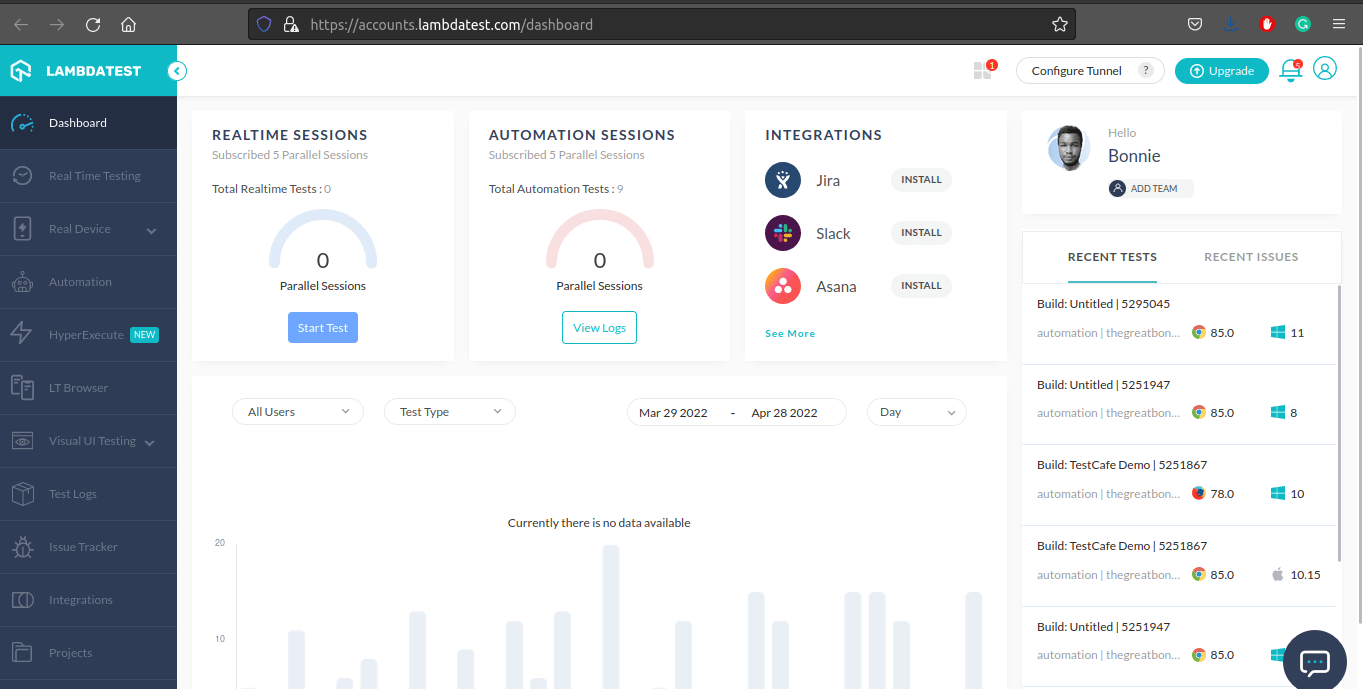
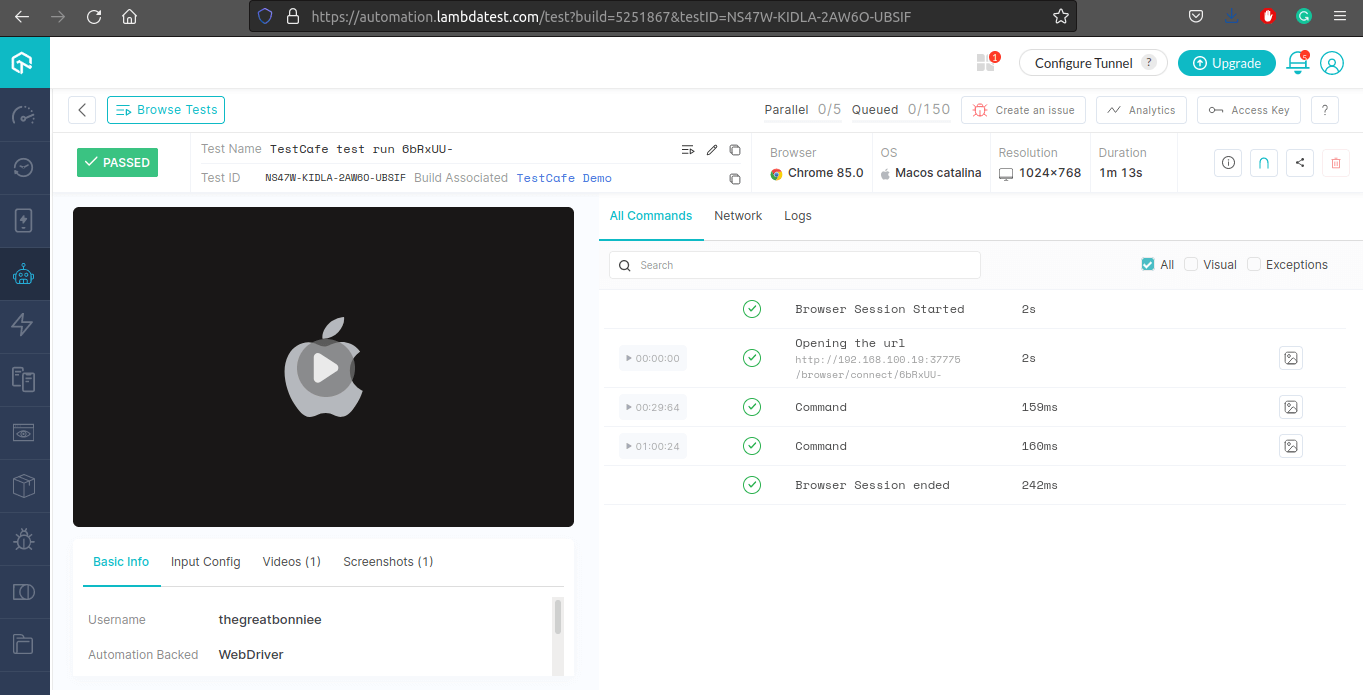
- If you click on one of the tests, you will be redirected to the Automation Dashboard, where all the information about the test is available. This information includes a video and a screenshot that shows you how the test went.

This certification will acknowledge your expertise in the use of JavaScript to create automated browser tests. Here’s a short glimpse of the Selenium JavaScript 101 certification from LambdaTest:
How to run a Parallel Test on TestCafe and Cloud Selenium Grid?
In Selenium, parallel testing can be described as a method of testing that you can use to run tests simultaneously in different environments such as browser versions and operating systems.
One of the main benefits of parallel testing on TestCafe and Cloud Selenium Grid is that it accelerates test execution while saving time, especially when testing at a larger scale. Also, parallel testing in Selenium is cost-effective and has a higher Return On Investment (ROI) compared to sequential testing.
Sequential testing is a tedious process requiring development, maintenance, and keeping the test environment updated all the time. Managing all these factors can be costly compared to parallel testing in Selenium, which is automated and cloud-based.
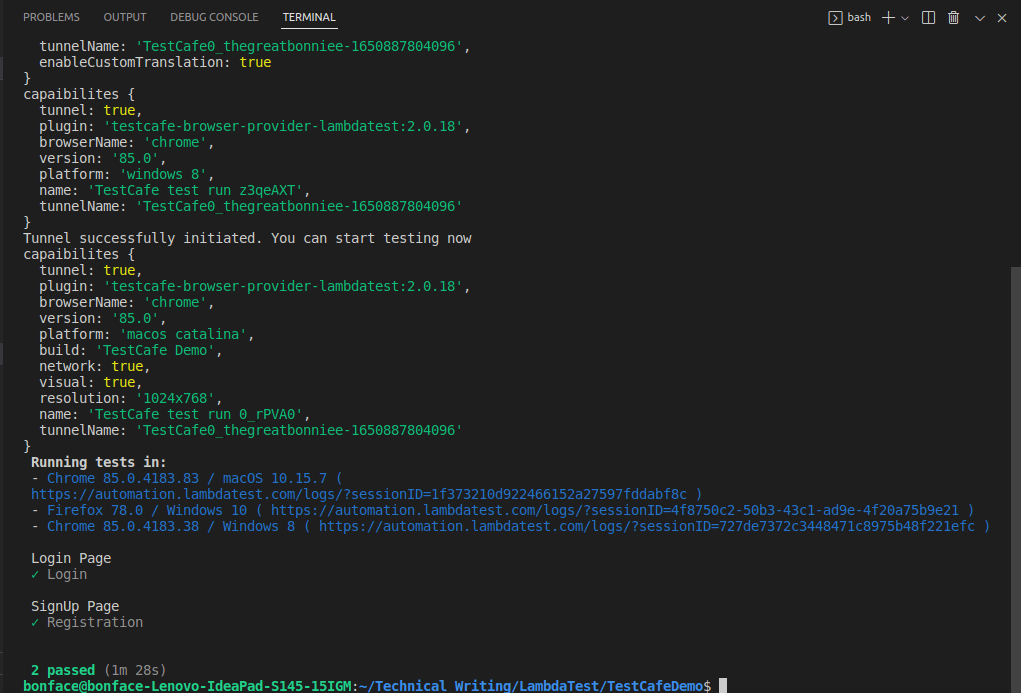
To run a parallel test on LambdaTest Cloud Selenium Grid on browser and operating system combinations that we used earlier, you can run the command below on your Visual Studio Code editor terminal.
testcafe "lambdatest:Chrome@85.0:MacOS Catalina","lambdatest:Firefox@78.0:Windows 10","lambdatest:Chrome@85.0:Windows 11" TestCafeTests/Tests
As you can see from the screenshot below, the tests ran successfully on all combinations.
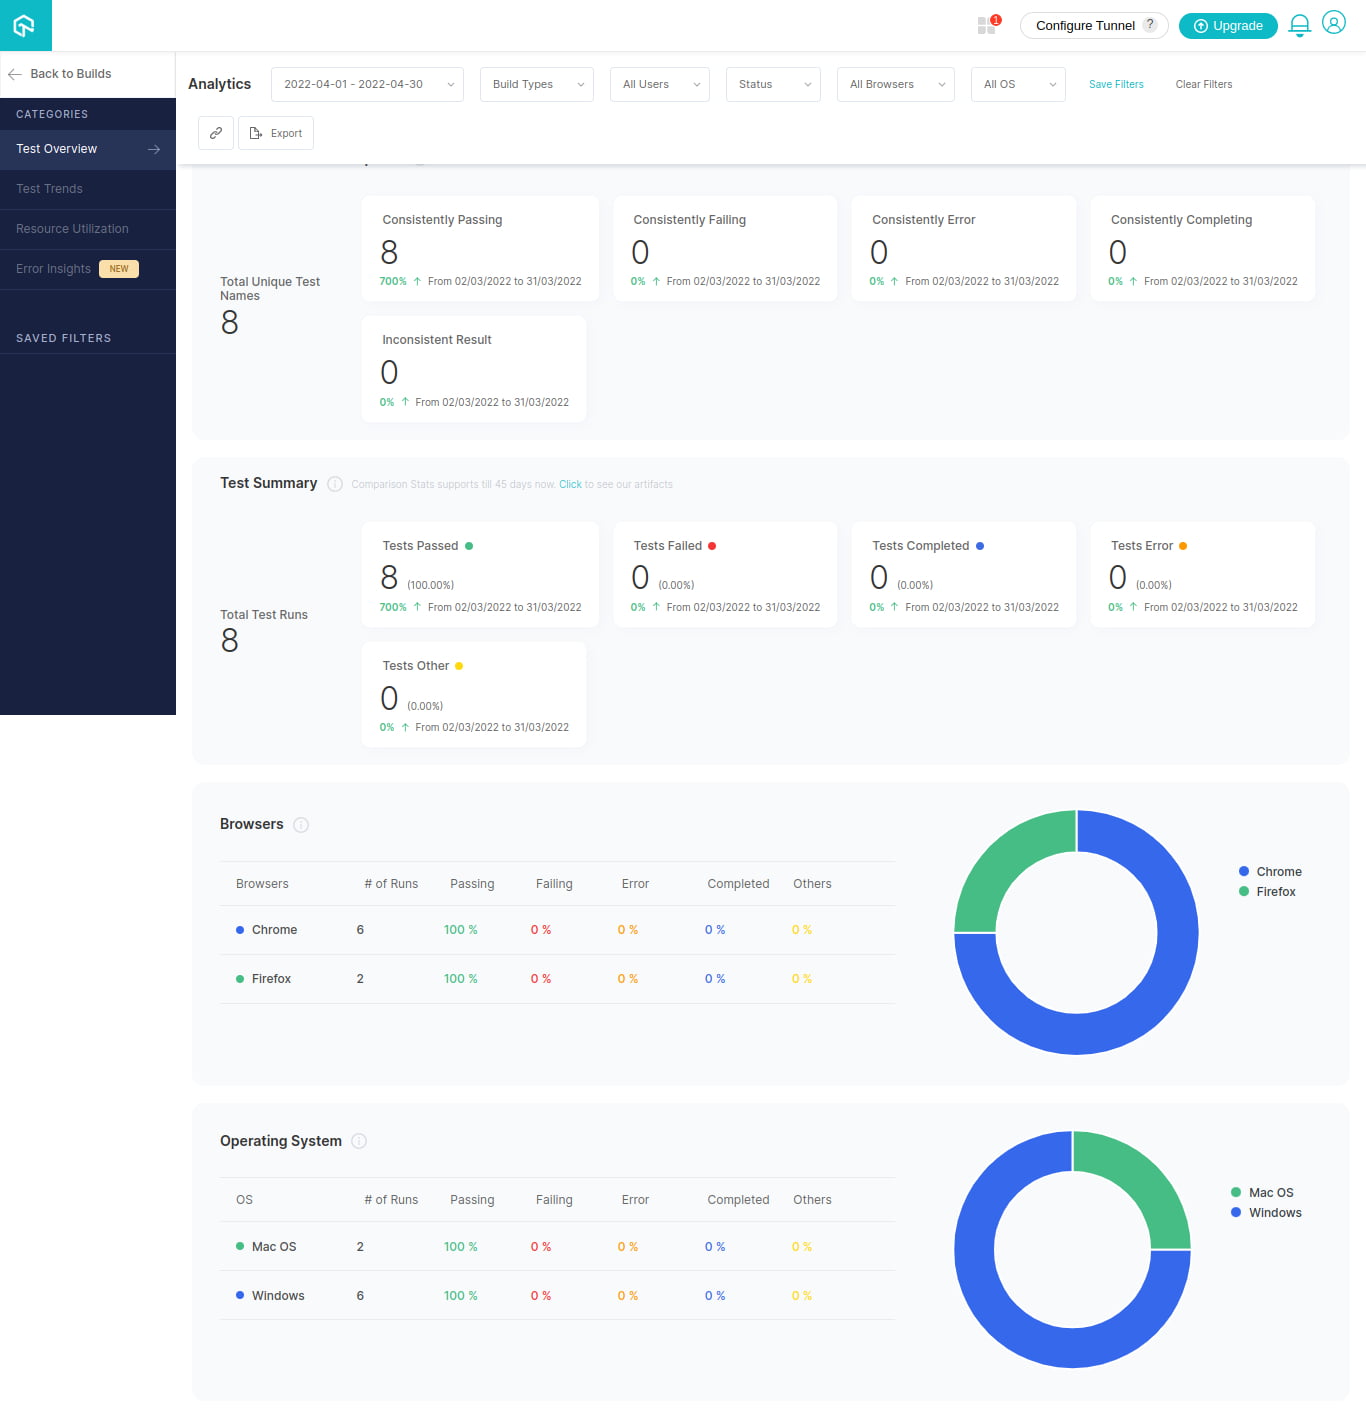
Once the tests have run successfully, log in to LambdaTest Automation Dashboard to check the status of the test execution. You can also access the report on Analytics Dashboard, which shows all the details and metrics related to your tests.
Test Summary gives you a high-level overview of your test performance by showing you how many tests passed and failed. Below is a screenshot with all details and metrics related to tests that I run on Cloud Selenium Grid and TestCafe JavaScript end-to-end web testing.
Conclusion
The idea behind TestCafe is to solve common challenges developers and testers face with testing tools like Selenium. However, the integration of Cloud Selenium Grid and TestCafe JavaScript helps you to scale up your testing environment without spending a lot of money to set up an in-house grid infrastructure. I hope you enjoyed this article on performing modern web testing with TestCafe!
Published on Java Code Geeks with permission by Bonnie, partner at our JCG program. See the original article here: How To Perform Modern Web Testing With TestCafe Using JavaScript And Selenium Opinions expressed by Java Code Geeks contributors are their own. |
