In this post, we’ll take a look at how we can make an API call in flutter and consume a simple REST API.
Checkout some of my other posts on Flutter here:
- Flutter vs React Native
- Understanding BLoC Architecture in Flutter (Highly Recommended)
- Building a ListView (RecyclerView) in Flutter (Recommended)
We’ll be creating a simple application in which I’ll make an API call to: https://jsonplaceholder.typicode.com/posts and print out the title in a list.
This’ll demonstrate how you can make an API call in flutter and decode the json using the convert package. So, let’s start.
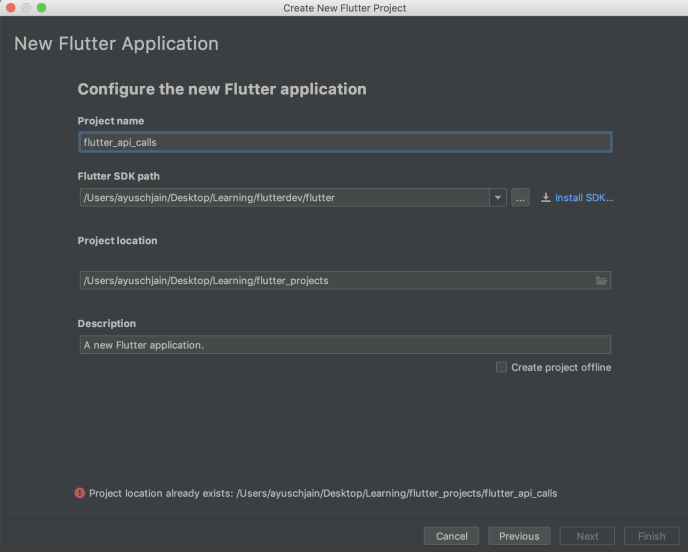
Create a New Project
First things first, create a new flutter project in Android Studio and name it anything you want.
I’ve named mine: flutter_api_calls.
Next, clear all the boilerplate code that you get. We’ll be writing everything from scratch.
Setting up the project
Next, I’ll be setting up the skeleton of the project. This means adding an AppBar, a Scaffold and writing the main function.
Here’s how it looks
01 02 03 04 05 06 07 08 09 10 11 12 13 14 15 16 17 18 19 20 21 22 23 24 25 26 27 28 29 30 31 32 33 34 35 | import 'package:flutter/material.dart';void main() => runApp(MyApp());class MyApp extends StatelessWidget { // This widget is the root of your application. @override Widget build(BuildContext context) { return MaterialApp( title: 'Flutter Demo', theme: ThemeData( primarySwatch: Colors.blue, ), home: MyHomePage(title: 'Flutter Api Call'), ); }}class MyHomePage extends StatefulWidget { MyHomePage({Key key, this.title}) : super(key: key); final String title; @override _MyHomePageState createState() => _MyHomePageState();}class _MyHomePageState extends State<MyHomePage> { @override Widget build(BuildContext context) { return null; } } |
Making an API call in Flutter
First we’ll need to include the http package in pubspec.yaml file. Add this line under dependencies where it shows flutter sdk. Here’s how your pubspec.yaml would look like:
01 02 03 04 05 06 07 08 09 10 11 12 13 14 15 16 17 18 19 20 21 22 23 24 25 26 27 28 29 30 | name: flutter_api_callsdescription: Flutter application to demonstrate api calls.# The following defines the version and build number for your application.# A version number is three numbers separated by dots, like 1.2.43# followed by an optional build number separated by a +.# Both the version and the builder number may be overridden in flutter# build by specifying --build-name and --build-number, respectively.# In Android, build-name is used as versionName while build-number used as versionCode.# Read more about Android versioning at https://developer.android.com/studio/publish/versioning# In iOS, build-name is used as CFBundleShortVersionString while build-number used as CFBundleVersion.# Read more about iOS versioning at# https://developer.apple.com/library/archive/documentation/General/Reference/InfoPlistKeyReference/Articles/CoreFoundationKeys.htmlversion: 1.0.0+1environment: sdk: ">=2.1.0 <3.0.0"dependencies: flutter: sdk: flutter http: ^0.12.0 # The following adds the Cupertino Icons font to your application. # Use with the CupertinoIcons class for iOS style icons. cupertino_icons: ^0.1.2dev_dependencies: flutter_test: sdk: flutter |
Now, import the http package in your main.dart file:
1 | import 'package:http/http.dart' as http; |
Let’s create a function getData() which’ll fetch the data from API.
1 2 3 | Future<String> getData() {} |
Async / Await
We’ll be making an API call which can take some time to return a response. This situation calls for asynchronous programming.
Basically, we’ll need to wait till the api call completes and returns a result. As soon as it does, we’ll display the list.
So, this is what we’re gonna do. We’ll make the api call using http object and wait for it to complete.
01 02 03 04 05 06 07 08 09 10 | Future<String> getData() async { var response = await http.get( headers: {"Accept": "application/json"}); setState(() { data = json.decode(response.body); }); return "Success";} |
To use the await keyword in the function, we’ll need to mark the function async. And any async function has a return type of Future<T> where T can be void, int, string etc.
To decode the data, we’re using :
1 | import 'dart:convert'; |
It provides us with json.decode() method which can be used to deserialize JSON. After we decode the data, we’ll notify the view hierarchy that the data is available and it can populate it into listview.
This was the real meat of the code. Now we’ll need to add a listview to our flutter app.
Adding a ListView
Next, we’ll be adding a listview in our flutter app. If you don’t know how to create a listview in flutter, give a quick read to my other post:
Let’s create a function getList() which’ll return the List if the data is obtained, or a “please wait” message if the response has not yet arrived.
01 02 03 04 05 06 07 08 09 10 11 12 13 14 15 16 17 18 | Widget getList() { if (data == null || data.length < 1) { return Container( child: Center( child: Text("Please wait..."), ), ); } return ListView.separated( itemCount: data?.length, itemBuilder: (BuildContext context, int index) { return getListItem(index); }, separatorBuilder: (context, index) { return Divider(); }, );} |
Note, that we’re using ListView.separated instead of normal ListView.builder. Reason being that this listview has built in support for a divider item. We don’t need to explicitly check the index.
Building the list item for this is very simple. Just create a Text widget and add some styling to it.
01 02 03 04 05 06 07 08 09 10 11 12 13 14 15 16 17 18 19 20 21 22 23 24 25 26 27 28 29 30 | Widget getListItem(int i) { if (data == null || data.length < 1) return null; if (i == 0) { return Container( margin: EdgeInsets.all(4), child: Center( child: Text( "Titles", style: TextStyle( fontSize: 22, fontWeight: FontWeight.bold, ), ), ), ); } return Container( child: Container( margin: EdgeInsets.all(4.0), child: Padding( padding: EdgeInsets.all(4), child: Text( data[i]['title'].toString(), style: TextStyle(fontSize: 18), ), ), ), );} |
You can find the entire code on github: https://github.com/Ayusch/flutter-api-calls
Conclusion
This is a really simple and quick example of how you can get started with making an API call in flutter. I although recommend following a proper architecture for your app and not write all the code in one place.
BLoC Architecture for flutter is really powerful. Check it out here: BLoC Architecture in Flutter . This’ll give you an in-depth look on how to write a robust BLoC Architecture for your flutter apps.
*Important*: Join the AndroidVille SLACK workspace for mobile developers where people share their learnings about everything latest in Tech, especially in Android Development, RxJava, Kotlin, Flutter, and mobile development in general.
Published on Java Code Geeks with permission by Ayusch Jain, partner at our JCG program. See the original article here: How to make an API call in Flutter (REST API) Opinions expressed by Java Code Geeks contributors are their own. |
