The release of the latest Red Hat developer suite version 12 brings with it a name change from Red Hat JBoss Developer Studio to Red Hat CodeReady Studio.
The focus here is not on the Red Hat CodeReady Workspaces, a cloud and container development experience, but on the locally installed developers studio.
The new release brings with it the questions around how to get started with the various Red Hat integration, data, and process automation product tool sets that are not installed out of the box.
This series of articles continues to showcase how to install each set of tools and explains the products they are supporting. The hope is that an easy getting started experience helps you make informed decisions about the tooling you might want to use on your next development project.
There are three different software packs that offer tooling for various Red Hat middleware technologies:
- Red Hat Integration Development
- Red Hat Process Automation Development
- Red Hat Data Virtualization Development
This article will outline how to get started with the Red Hat Data Virtualization tooling with any of the CodeReady Studio version 12 releases.
Installation
Red Hat CodeReady Studio can be obtained through the Customer Portal (login required) or via the early access downloads on developers.redhat.com.
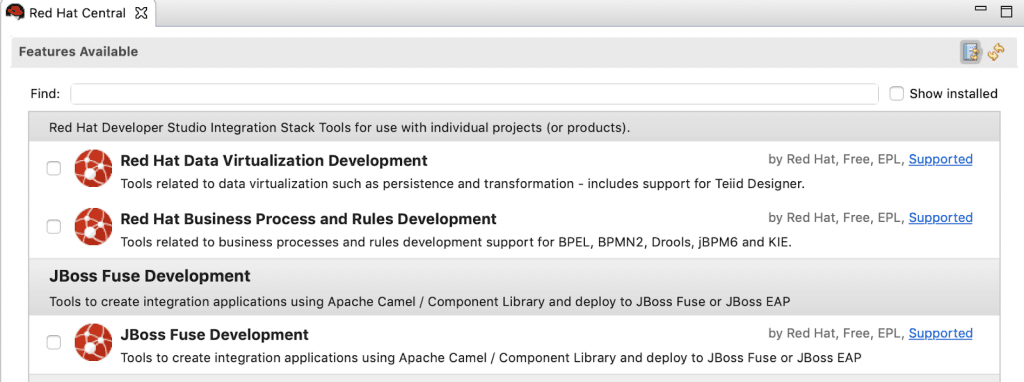
After installation, start it up and you will see a welcoming Red Hat Central tab with at the bottom a tab to look at the available tool sets labeled
Software/Update.
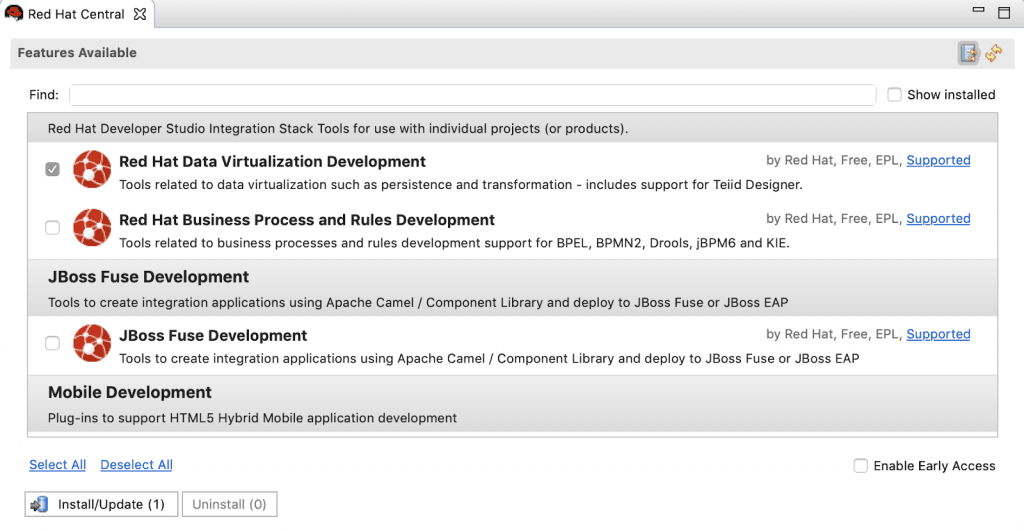
You will notice at the time of this writing that there are several options you can install found on the Software/Update tab. Selecting the Software/Update tab at the bottom reveals the Red Hat Development tooling add-ons. Let’s select Red Hat Data Virtualization Development check box.
Note that if you previously installed any of these tooling add-ons, your list of options shall not include them all.
Clicking on the Install/Update button starts the add-on installation and restarting the CodeReady Studio at the end completes the process.
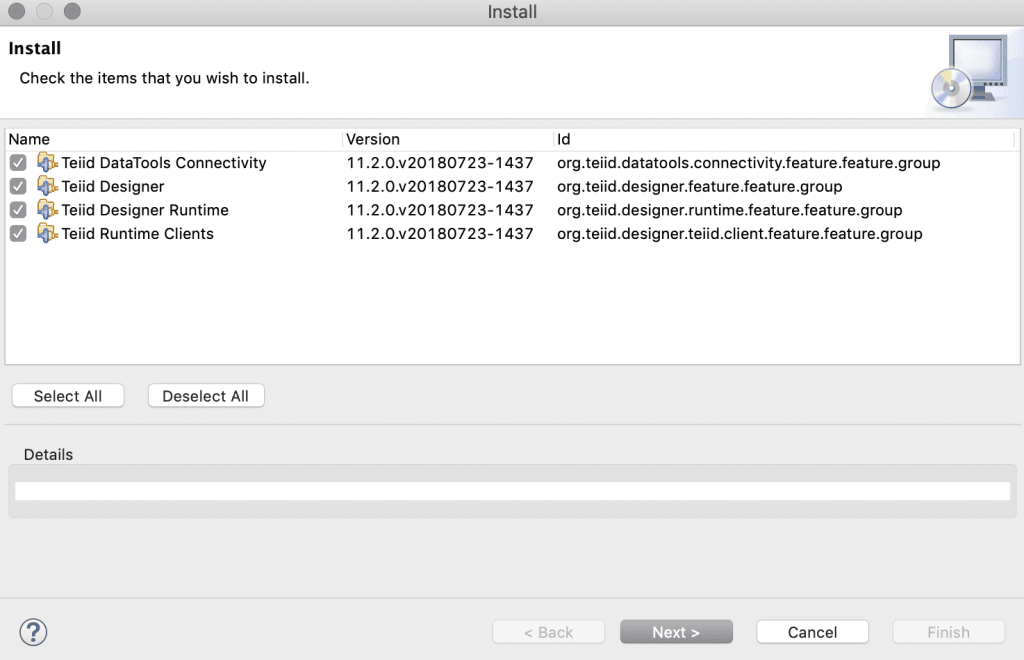
If you are interested in what is being installed, it can be examined by examining the pop-up listing of components and versions. Note this will change as the early access progresses towards final releases.
Stay tuned for more articles in this series that will detail the installation of the remaining
development add-on tooling.
Other options
See below for any development tooling needs on previous versions of the studio:
- How To Setup Process Automation Tooling for CodeReady Studio 12
- How To Setup Data Virtualization Tooling for CodeReady Studio 12
- How To Setup Integration Tooling for CodeReady Studio 12
- How To Setup Fuse Tooling For JBoss Developer Studio 11
- How To Setup BPM and Rules Tooling For JBoss Developer Studio 11
- How To Setup Integration and SOA Tooling For JBoss Developer Studio 11
- How To Setup Fuse Tooling For JBoss Developer Studio 10
- How To Setup BPM and Rules Tooling For JBoss Developer Studio 10
- How To Setup Data Virtualization Tooling For JBoss Developer Studio 10
- How To Setup Integration and SOA Tooling For JBoss Developer Studio 10
- How To Setup Fuse Tooling For JBoss Developer Studio 9
- How To Setup BPM and Rules Tooling For JBoss Developer Studio 9
- How To Setup Big Data Tooling For JBoss Developer Studio 9
- How To Setup SOA 5.x Tooling For JBoss Developer Studio 9
- How To Setup Integration & SOA Tooling For JBoss Developer Studio 9
- How To Setup BPM and Rules Tooling For JBoss Developer Studio 8
- How To Setup Big Data Tooling For JBoss Developer Studio 8
- How To Setup Integration & SOA Tooling For JBoss Developer Studio 8
- How To Setup SOA 5.x Tooling For JBoss Developer Studio 8
- JBoss Developer Studio 7 – how to setup SOA Tools (BRMS example)
- JBoss Developer Studio 6 – how to setup SOA Tools (BRMS example)
- JBoss Developer Studio 5 – how to add Eclipse BPMN2 Modeler as jBPM designer
- JBoss Developer Studio 5 – how to setup SOA Tools (BRMS example)
- JBoss Developer Studio 4.0 – how to add native BPMN2 editor
- JBoss Developer Studio 4.0 – how to add native BPMN editor / Enterprise Architect Savara tooling
- JBoss Developer Studio 4.0 – how to add tech preview BPEL tooling
Published on Java Code Geeks with permission by Eric Schabell, partner at our JCG program. See the original article here: How To Setup Data Virtualization Tooling for CodeReady Studio 12 Opinions expressed by Java Code Geeks contributors are their own. |
