“I love writing authentication and authorization code.” ~ No Java Developer Ever. Tired of building the same login screens over and over? Try the Okta API for hosted authentication, authorization, and multi-factor auth.
Java EE allows you to build Java REST API s quickly and easily with JAX-RS and JPA. Java EE is an umbrella standards specification that describes a number of Java technologies, including EJB, JPA, JAX-RS, and many others. It was originally designed to allow portability between Java application servers, and flourished in the early 2000s. Back then, application servers were all the rage and provided by many well-known companies such as IBM, BEA, and Sun. JBoss was a startup that disrupted the status quo and showed it was possible to develop a Java EE application server as an open source project, and give it away for free. JBoss was bought by RedHat in 2006.
In the early 2000s, Java developers used servlets and EJBs to develop their server applications. Hibernate and Spring came along in 2002 and 2004, respectively. Both technologies had a huge impact on Java developers everywhere, showing them it was possible to write distributed, robust applications without EJBs. Hibernate’s POJO model was eventually adopted as the JPA standard and heavily influenced EJB as well.
Fast forward to 2018, and Java EE certainly doesn’t look like it used to! Now, it’s mostly POJOs and annotations and far simpler to use.
Why Build a Java REST API with Java EE and Not Spring Boot?
Spring Boot is one of my favorite technologies in the Java ecosystem. It’s drastically reduced the configuration necessary in a Spring application and made it possible to whip up REST APIs in just a few lines of code. However, I’ve had a lot of API security questions lately from developers that aren’t using Spring Boot. Some of them aren’t even using Spring!
For this reason, I thought it’d be fun to build a Java REST API (using Java EE) that’s the same as a Spring Boot REST API I developed in the past. Namely, the “good-beers” API from my Bootiful Angular and Bootiful React posts.
Use Java EE to Build Your Java REST API
To begin, I asked my network on Twitter if any quickstarts existed for Java EE like start.spring.io. I received a few suggestions and started doing some research. David Blevins recommended I look at tomee-jaxrs-starter-project, so I started there. I also looked into the TomEE Maven Archetype, as recommended by Roberto Cortez.
I liked the jaxrs-starter project because it showed how to create a REST API with JAX-RS. The TomEE Maven archetype was helpful too, especially since it showed how to use JPA, H2, and JSF. I combined the two to create my own minimal starter that you can use to implement secure Java EE APIs on TomEE. You don’t have to use TomEE for these examples, but I haven’t tested them on other implementations.
If you get these examples working on other app servers, please let me know and I’ll update this blog post.
In these examples, I’ll be using Java 8 and Java EE 7.0 with TomEE 7.1.0. TomEE 7.x is the EE 7 compatible version; a TomEE 8.x branch exists for EE8 compatibility work, but there are no releases yet. I expect you to have Apache Maven installed too.
To begin, clone our Java EE REST API repository to your hard drive, and run it:
git clone https://github.com/oktadeveloper/okta-java-ee-rest-api-example.git javaee-rest-api
cd javaee-rest-api
mvn package tomee:run
Navigate to http://localhost:8080 and add a new beer.
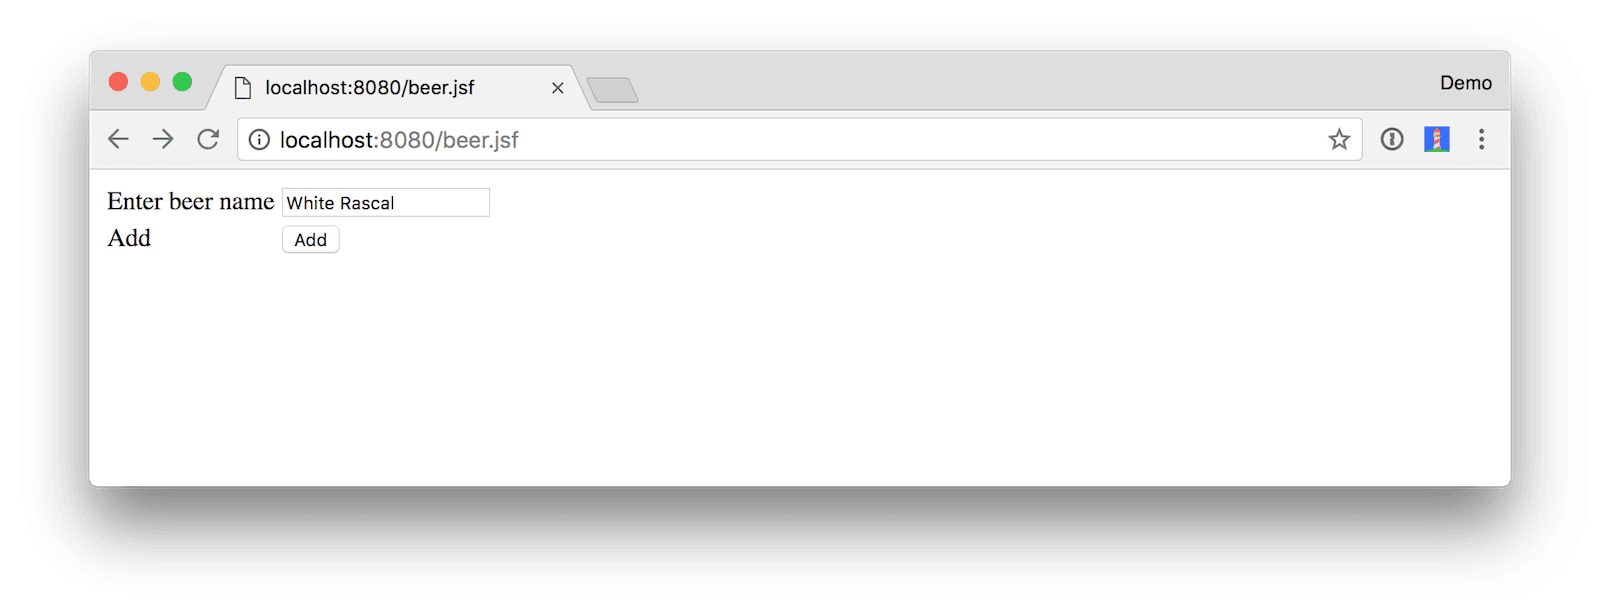
Click Add and you should see a success message.
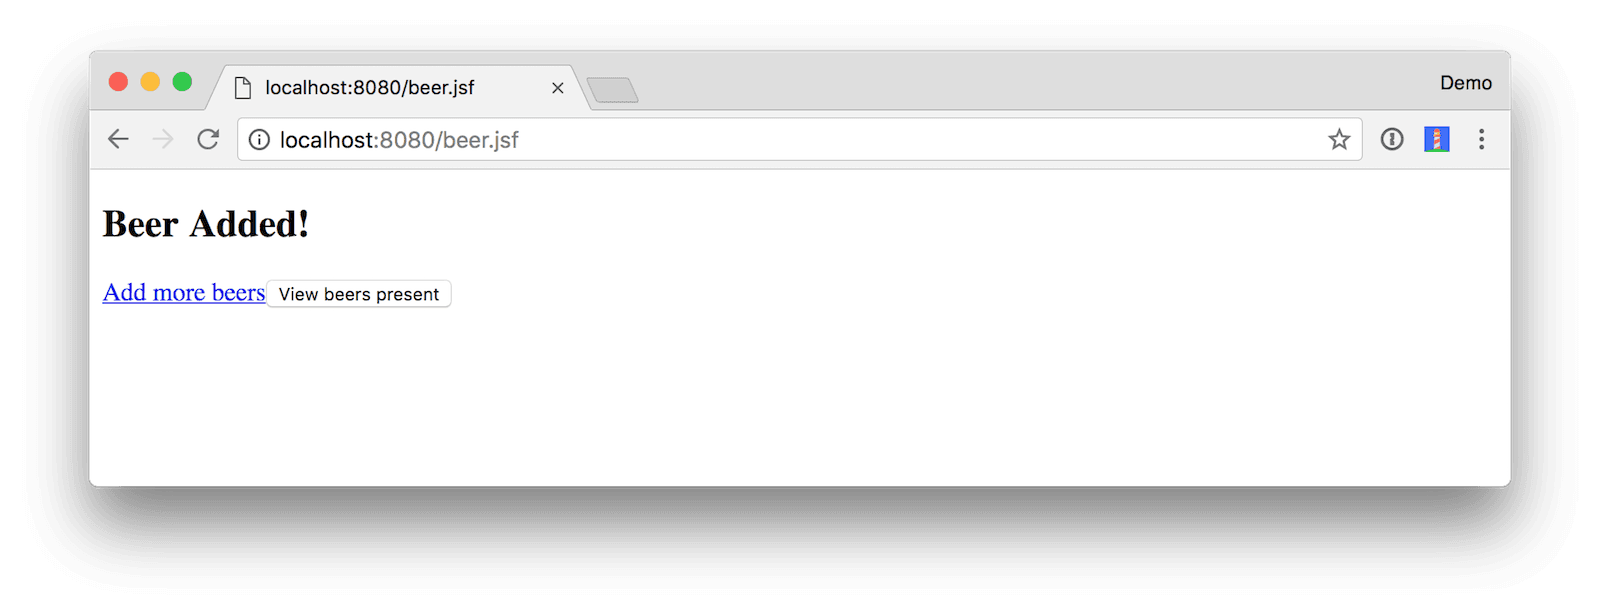
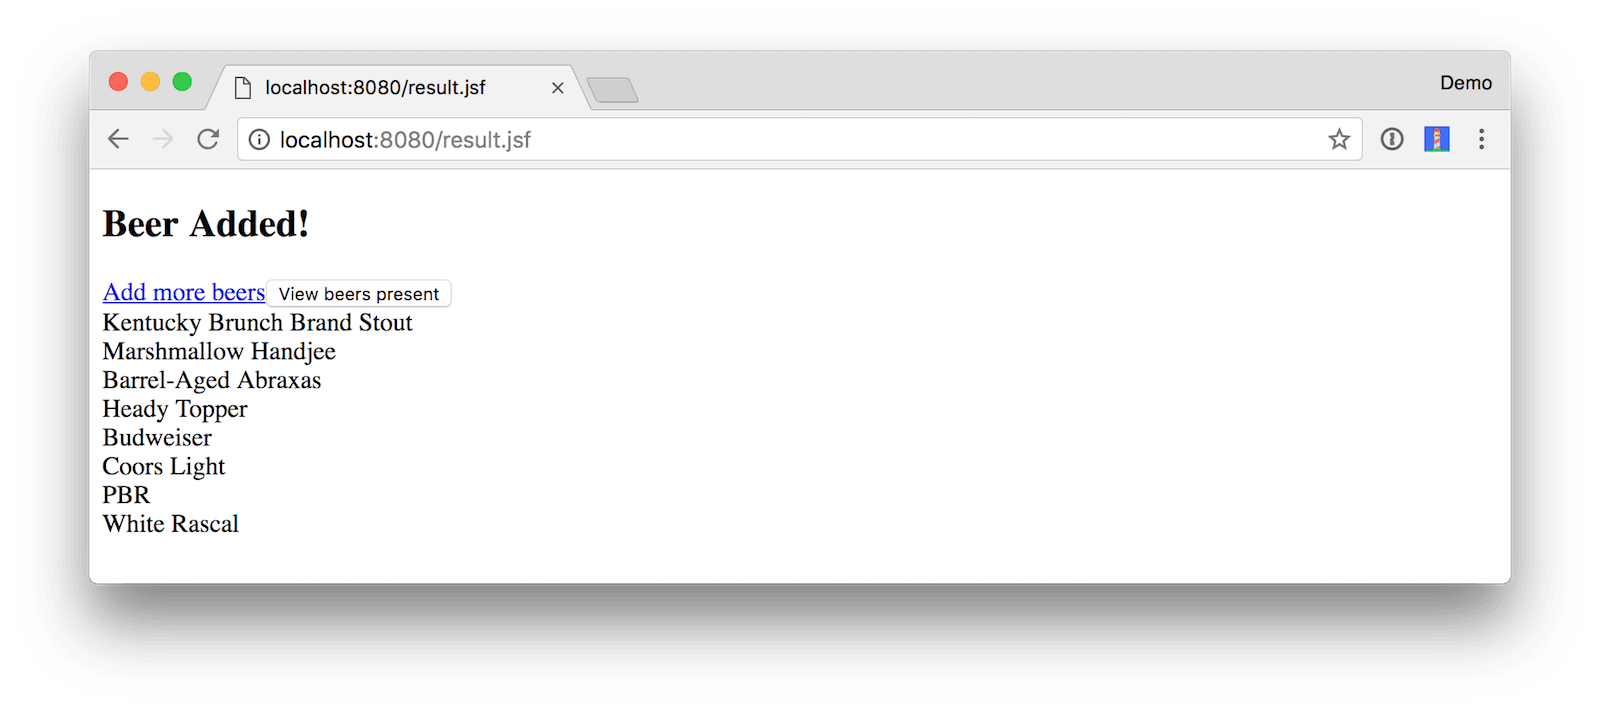
Click View beers present to see the full list of beers.
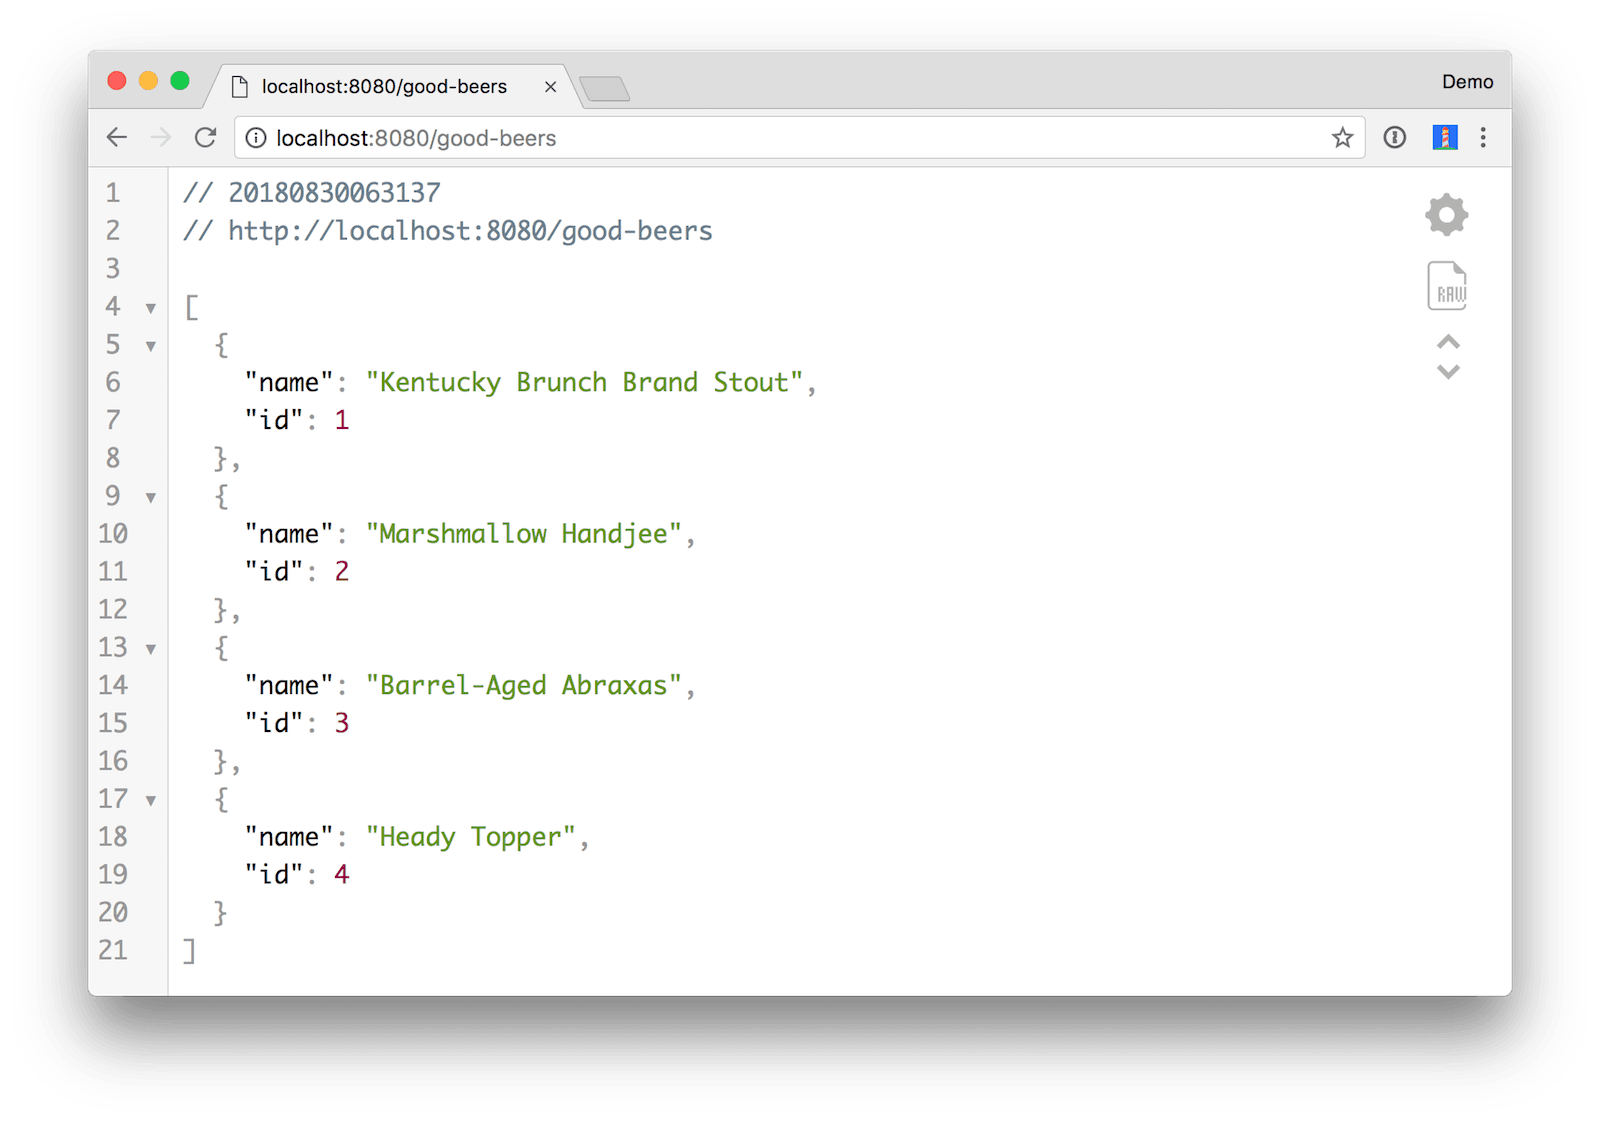
You can also view the list of good beers in the system at http://localhost:8080/good-beers. Below is the output when using HTTPie.
$ http :8080/good-beers
HTTP/1.1 200
Content-Type: application/json
Date: Wed, 29 Aug 2018 21:58:23 GMT
Server: Apache TomEE
Transfer-Encoding: chunked
[
    {
        "id": 101,
        "name": "Kentucky Brunch Brand Stout"
    },
    {
        "id": 102,
        "name": "Marshmallow Handjee"
    },
    {
        "id": 103,
        "name": "Barrel-Aged Abraxas"
    },
    {
        "id": 104,
        "name": "Heady Topper"
    },
    {
        "id": 108,
        "name": "White Rascal"
    }
]
Build a REST API with Java EE
I showed you what this application can do, but I haven’t talked about how it’s built. It has a few XML configuration files, but I’m going to skip over most of those. Here’s what the directory structure looks like:
$ tree .
.
├── LICENSE
├── README.md
├── pom.xml
└── src
    ├── main
    │   ├── java
    │   │   └── com
    │   │       └── okta
    │   │           └── developer
    │   │               ├── Beer.java
    │   │               ├── BeerBean.java
    │   │               ├── BeerResource.java
    │   │               ├── BeerService.java
    │   │               └── StartupBean.java
    │   ├── resources
    │   │   └── META-INF
    │   │       └── persistence.xml
    │   └── webapp
    │       ├── WEB-INF
    │       │   ├── beans.xml
    │       │   └── faces-config.xml
    │       ├── beer.xhtml
    │       ├── index.jsp
    │       └── result.xhtml
    └── test
        └── resources
            └── arquillian.xml

12 directories, 16 files
The most important XML files is the pom.xml that defines dependencies and allows you to run the TomEE Maven Plugin. It’s pretty short and sweet, with only one dependency and one plugin.
<?xml version="1.0" encoding="UTF-8"?>
<project xmlns="http://maven.apache.org/POM/4.0.0" xmlns:xsi="http://www.w3.org/2001/XMLSchema-instance"
         xsi:schemaLocation="http://maven.apache.org/POM/4.0.0 http://maven.apache.org/maven-v4_0_0.xsd">
    <modelVersion>4.0.0</modelVersion>

    <groupId>com.okta.developer</groupId>
    <artifactId>java-ee-rest-api</artifactId>
    <version>1.0-SNAPSHOT</version>
    <packaging>war</packaging>
    <name>Java EE Webapp with JAX-RS API</name>
    <url>http://developer.okta.com</url>

    <properties>
        <project.build.sourceEncoding>UTF-8</project.build.sourceEncoding>
        <project.reporting.outputEncoding>UTF-8</project.reporting.outputEncoding>
        <maven.compiler.target>1.8</maven.compiler.target>
        <maven.compiler.source>1.8</maven.compiler.source>
        <failOnMissingWebXml>false</failOnMissingWebXml>
        <javaee-api.version>7.0</javaee-api.version>
        <tomee.version>7.1.0</tomee.version>
    </properties>

    <dependencies>
        <dependency>
            <groupId>javax</groupId>
            <artifactId>javaee-api</artifactId>
            <version>${javaee-api.version}</version>
            <scope>provided</scope>
        </dependency>
    </dependencies>

    <build>
        <plugins>
            <plugin>
                <groupId>org.apache.tomee.maven</groupId>
                <artifactId>tomee-maven-plugin</artifactId>
                <version>${tomee.version}</version>
                <configuration>
                    <context>ROOT</context>
                </configuration>
            </plugin>
        </plugins>
    </build>
</project>
The main entity is Beer.java.
package com.okta.developer;

import javax.persistence.Entity;
import javax.persistence.GeneratedValue;
import javax.persistence.GenerationType;
import javax.persistence.Id;

@Entity
public class Beer {
    @Id
    @GeneratedValue(strategy = GenerationType.AUTO)
    private int id;
    private String name;

    public Beer() {}

    public Beer(String name) {
        this.name = name;
    }

    public int getId() {
        return id;
    }

    public void setId(int id) {
        this.id = id;
    }

    public String getName() {
        return name;
    }

    public void setName(String beerName) {
        this.name = beerName;
    }

    @Override
    public String toString() {
        return "Beer{" +
                "id=" + id +
                ", name='" + name + '\'' +
                '}';
    }
}
The database (a.k.a., datasource) is configured in src/main/resources/META-INF/persistence.xml.
<?xml version="1.0" encoding="UTF-8"?>
<persistence version="2.0" xmlns="http://java.sun.com/xml/ns/persistence"
             xmlns:xsi="http://www.w3.org/2001/XMLSchema-instance"
             xsi:schemaLocation="http://java.sun.com/xml/ns/persistence http://java.sun.com/xml/ns/persistence/persistence_2_0.xsd">
    <persistence-unit name="beer-pu" transaction-type="JTA">
        <jta-data-source>beerDatabase</jta-data-source>
        <class>com.okta.developer.Beer</class>
        <properties>
            <property name="openjpa.jdbc.SynchronizeMappings" value="buildSchema(ForeignKeys=true)"/>
        </properties>
    </persistence-unit>
</persistence>
The BeerService.java class handles reading and saving this entity to the database using JPA’s EntityManager.
package com.okta.developer;

import javax.ejb.Stateless;
import javax.persistence.EntityManager;
import javax.persistence.PersistenceContext;
import javax.persistence.Query;
import javax.persistence.criteria.CriteriaQuery;
import java.util.List;

@Stateless
public class BeerService {

    @PersistenceContext(unitName = "beer-pu")
    private EntityManager entityManager;

    public void addBeer(Beer beer) {
        entityManager.persist(beer);
    }

    public List<Beer> getAllBeers() {
        CriteriaQuery<Beer> cq = entityManager.getCriteriaBuilder().createQuery(Beer.class);
        cq.select(cq.from(Beer.class));
        return entityManager.createQuery(cq).getResultList();
    }

    public void clear() {
        Query removeAll = entityManager.createQuery("delete from Beer");
        removeAll.executeUpdate();
    }
}
There’s a StartupBean.java that handles populating the database on startup, and clearing it on shutdown.
package com.okta.developer;

import javax.annotation.PostConstruct;
import javax.annotation.PreDestroy;
import javax.ejb.Singleton;
import javax.ejb.Startup;
import javax.inject.Inject;
import java.util.stream.Stream;

@Singleton
@Startup
public class StartupBean {
    private final BeerService beerService;

    @Inject
    public StartupBean(BeerService beerService) {
        this.beerService = beerService;
    }

    @PostConstruct
    private void startup() {
        // Top beers from https://www.beeradvocate.com/lists/top/
        Stream.of("Kentucky Brunch Brand Stout", "Marshmallow Handjee",
                "Barrel-Aged Abraxas", "Heady Topper",
                "Budweiser", "Coors Light", "PBR").forEach(name ->
                beerService.addBeer(new Beer(name))
        );
        beerService.getAllBeers().forEach(System.out::println);
    }

    @PreDestroy
    private void shutdown() {
        beerService.clear();
    }
}
These three classes make up the foundation of the app, plus there’s a BeerResource.java class that uses JAX-RS to expose the /good-beers endpoint.
package com.okta.developer;

import javax.ejb.Lock;
import javax.ejb.Singleton;
import javax.inject.Inject;
import javax.ws.rs.GET;
import javax.ws.rs.Path;
import javax.ws.rs.Produces;
import java.util.List;
import java.util.stream.Collectors;

import static javax.ejb.LockType.READ;
import static javax.ws.rs.core.MediaType.APPLICATION_JSON;

@Lock(READ)
@Singleton
@Path("/good-beers")
public class BeerResource {
    private final BeerService beerService;

    @Inject
    public BeerResource(BeerService beerService) {
        this.beerService = beerService;
    }

    @GET
    @Produces({APPLICATION_JSON})
    public List<Beer> getGoodBeers() {
        return beerService.getAllBeers().stream()
                .filter(this::isGreat)
                .collect(Collectors.toList());
    }

    private boolean isGreat(Beer beer) {
        return !beer.getName().equals("Budweiser") &&
                !beer.getName().equals("Coors Light") &&
                !beer.getName().equals("PBR");
    }
}
Lastly, there’s a BeerBean.java class is used as a managed bean for JSF.
package com.okta.developer;

import javax.enterprise.context.RequestScoped;
import javax.inject.Inject;
import javax.inject.Named;
import java.util.List;

@Named
@RequestScoped
public class BeerBean {

    @Inject
    private BeerService beerService;
    private List<Beer> beersAvailable;
    private String name;

    public String getName() {
        return name;
    }

    public void setName(String name) {
        this.name = name;
    }

    public List<Beer> getBeersAvailable() {
        return beersAvailable;
    }

    public void setBeersAvailable(List<Beer> beersAvailable) {
        this.beersAvailable = beersAvailable;
    }

    public String fetchBeers() {
        beersAvailable = beerService.getAllBeers();
        return "success";
    }

    public String add() {
        Beer beer = new Beer();
        beer.setName(name);
        beerService.addBeer(beer);
        return "success";
    }
}
You now have a REST API built with Java EE! However, it’s not secure. In the following sections, I’ll show you how to secure it using Okta’s JWT Verifier for Java, Spring Security, and Pac4j.
Add OIDC Security with Okta to Your Java REST API
You will need to create an OIDC Application in Okta to verify the security configurations you’re about to implement work. To make this effortless, you can use Okta’s API for OIDC. At Okta, our goal is to make identity management a lot easier, more secure, and more scalable than what you’re used to. Okta is a cloud service that allows developers to create, edit, and securely store user accounts and user account data, and connect them with one or multiple applications. Our API enables you to:
- Authenticate and authorize your users
- Store data about your users
- Perform password-based and social login
- Secure your application with multi-factor authentication
- And much more! Check out our product documentation
Are you sold? Register for a forever-free developer account today! When you’re finished, complete the steps below to create an OIDC app.
- Log in to your developer account on developer.okta.com.
- Navigate to Applications and click on Add Application.
- Select Web and click Next.
- Give the application a name (.e.g.,
Java EE Secure API) and add the following as Login redirect URIs:http://localhost:3000/implicit/callbackhttp://localhost:8080/login/oauth2/code/oktahttp://localhost:8080/callback?client_name=OidcClient
- Click Done, then edit the project and enable “Implicit (Hybrid)” as a grant type (allow ID and access tokens) and click Save.
Protect Your Java REST API with JWT Verifier
To validate JWTs from Okta, you’ll need to add Okta JWT Verifier for Java to your pom.xml.
<properties>
    ...
    <okta-jwt.version>0.3.0</okta-jwt.version>
</properties>

<dependencies>
    ...
    <dependency>
        <groupId>com.okta.jwt</groupId>
        <artifactId>okta-jwt-verifier</artifactId>
        <version>${okta-jwt.version}</version>
    </dependency>
</dependencies>
Then create a JwtFilter.java (in the src/main/java/com/okta/developer directory). This filter looks for an authorization header with an access token in it. If it exists, it validates it and prints out the user’s sub, a.k.a. their email address. If it doesn’t exist, or is in valid, an access denied status is returned.
Make sure to replace {yourOktaDomain} and {clientId} with the settings from the app you created.
package com.okta.developer;
import com.nimbusds.oauth2.sdk.ParseException;
import com.okta.jwt.JoseException;
import com.okta.jwt.Jwt;
import com.okta.jwt.JwtHelper;
import com.okta.jwt.JwtVerifier;
import javax.servlet.*;
import javax.servlet.annotation.WebFilter;
import javax.servlet.http.HttpServletRequest;
import javax.servlet.http.HttpServletResponse;
import java.io.IOException;
@WebFilter(filterName = "jwtFilter", urlPatterns = "/*")
public class JwtFilter implements Filter {
private JwtVerifier jwtVerifier;
@Override
public void init(FilterConfig filterConfig) {
try {
jwtVerifier = new JwtHelper()
.setIssuerUrl("https://{yourOktaDomain}/oauth2/default")
.setClientId("{yourClientId}")
.build();
} catch (IOException | ParseException e) {
System.err.print("Configuring JWT Verifier failed!");
e.printStackTrace();
}
}
@Override
public void doFilter(ServletRequest servletRequest, ServletResponse servletResponse,
FilterChain chain) throws IOException, ServletException {
HttpServletRequest request = (HttpServletRequest) servletRequest;
HttpServletResponse response = (HttpServletResponse) servletResponse;
System.out.println("In JwtFilter, path: " + request.getRequestURI());
// Get access token from authorization header
String authHeader = request.getHeader("authorization");
if (authHeader == null) {
response.sendError(HttpServletResponse.SC_UNAUTHORIZED, "Access denied.");
return;
} else {
String accessToken = authHeader.substring(authHeader.indexOf("Bearer ") + 7);
try {
Jwt jwt = jwtVerifier.decodeAccessToken(accessToken);
System.out.println("Hello, " + jwt.getClaims().get("sub"));
} catch (JoseException e) {
e.printStackTrace();
response.sendError(HttpServletResponse.SC_UNAUTHORIZED, "Access denied.");
return;
}
}
chain.doFilter(request, response);
}
@Override
public void destroy() {
}
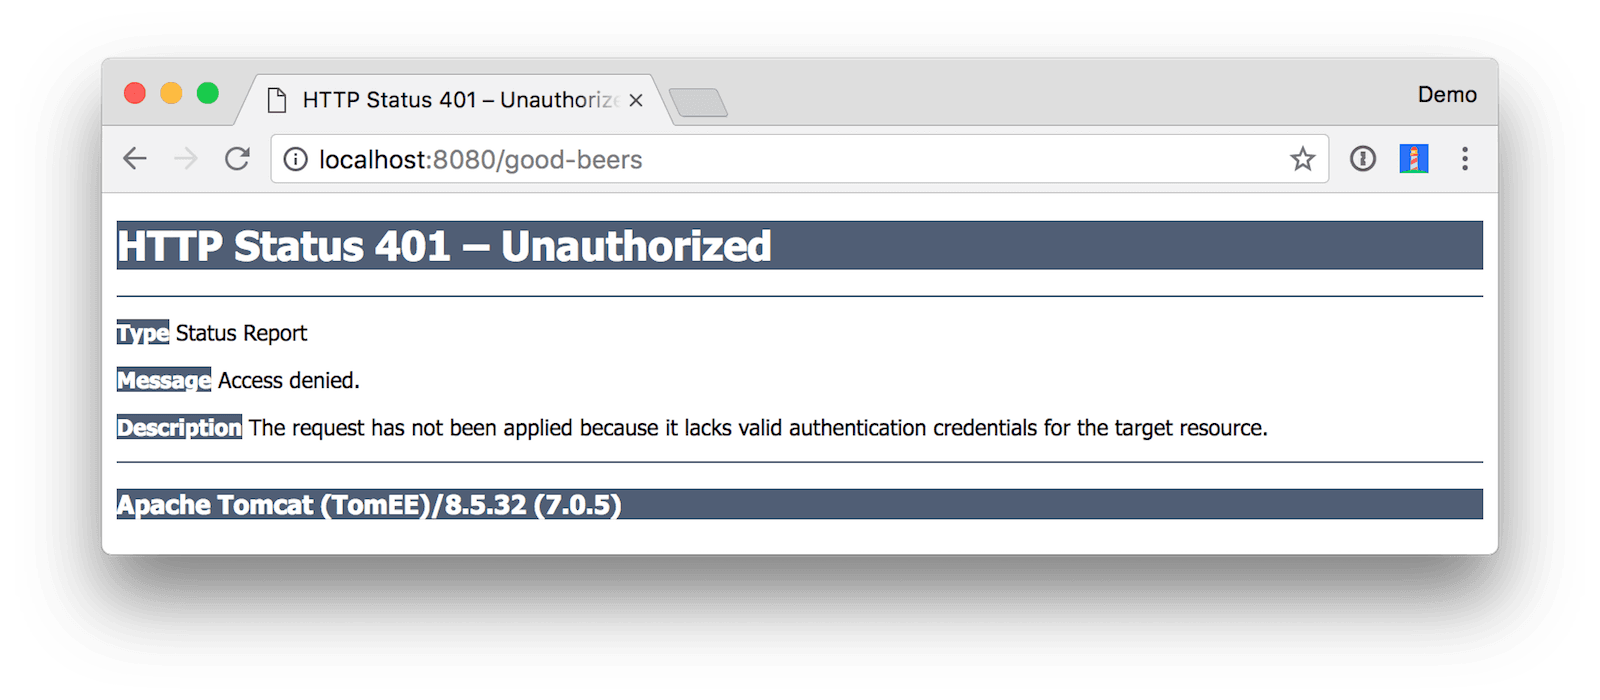
}To ensure this filter is working, restart your app and run:
mvn package tomee:run
If you navigate to http://localhost:8080/good-beers in your browser, you’ll see an access denied error.
To prove it works with a valid JWT, you can clone my Bootiful React project, and run its UI:
git clone -b okta https://github.com/oktadeveloper/spring-boot-react-example.git bootiful-react
cd bootiful-react/client
npm install
Edit this project’s client/src/App.tsx file and change the issuer and clientId to match your application.
const config = {
  issuer: 'https://{yourOktaDomain}/oauth2/default',
  redirectUri: window.location.origin + '/implicit/callback',
  clientId: '{yourClientId}'
};
Then start it:
npm start
You should then be able to login at http://localhost:3000 with the credentials you created your account with. However, you won’t be able to load any beers from the API because of a CORS error (in your browser’s developer console).
Failed to load http://localhost:8080/good-beers: Response to preflight request doesn't pass access control check: No 'Access-Control-Allow-Origin' header is present on the requested resource. Origin 'http://localhost:3000' is therefore not allowed access.
TIP: If you see a 401 and no CORS error, it likely means your client IDs don’t match.
To fix this CORS error, add a CorsFilter.java alongside your JwtFilter.java class. The filter below will allow an OPTIONS request, and send access-control headers back that allow any origin, GET methods, and any headers. I recommend you to make these settings a bit more specific in production.
package com.okta.developer;

import javax.servlet.*;
import javax.servlet.annotation.WebFilter;
import javax.servlet.http.HttpServletRequest;
import javax.servlet.http.HttpServletResponse;
import java.io.IOException;

@WebFilter(filterName = "corsFilter")
public class CorsFilter implements Filter {

    @Override
    public void doFilter(ServletRequest servletRequest, ServletResponse servletResponse, FilterChain chain)
            throws IOException, ServletException {
        HttpServletRequest request = (HttpServletRequest) servletRequest;
        HttpServletResponse response = (HttpServletResponse) servletResponse;
        System.out.println("In CorsFilter, method: " + request.getMethod());

        // Authorize (allow) all domains to consume the content
        response.addHeader("Access-Control-Allow-Origin", "http://localhost:3000");
        response.addHeader("Access-Control-Allow-Methods", "GET");
        response.addHeader("Access-Control-Allow-Headers", "*");

        // For HTTP OPTIONS verb/method reply with ACCEPTED status code -- per CORS handshake
        if (request.getMethod().equals("OPTIONS")) {
            response.setStatus(HttpServletResponse.SC_ACCEPTED);
            return;
        }

        // pass the request along the filter chain
        chain.doFilter(request, response);
    }

    @Override
    public void init(FilterConfig config) {
    }

    @Override
    public void destroy() {
    }
}
Both of the filters you’ve added use @WebFilter to register themselves. This is a convenient annotation, but it doesn’t provide any filter ordering capabilities. To workaround this missing feature, modify JwtFilter so it doesn’t have a urlPattern in its @WebFilter.
@WebFilter(filterName = "jwtFilter")
Then create a src/main/webapp/WEB-INF/web.xml file and populate it with the following XML. These filter mappings ensure the CorsFilter is processed first.
<?xml version="1.0" encoding="UTF-8"?>
<web-app version="3.1"
         xmlns="http://xmlns.jcp.org/xml/ns/javaee"
         xmlns:xsi="http://www.w3.org/2001/XMLSchema-instance"
         xsi:schemaLocation="http://xmlns.jcp.org/xml/ns/javaee http://xmlns.jcp.org/xml/ns/javaee/web-app_3_1.xsd">

    <filter-mapping>
        <filter-name>corsFilter</filter-name>
        <url-pattern>/*</url-pattern>
    </filter-mapping>

    <filter-mapping>
        <filter-name>jwtFilter</filter-name>
        <url-pattern>/*</url-pattern>
    </filter-mapping>
</web-app>
Restart your Java API and now everything should work!

In your console, you should see messages similar to mine:
In CorsFilter, method: OPTIONS
In CorsFilter, method: GET
In JwtFilter, path: /good-beers
Hello, demo@okta.com
Using a filter with Okta’s JWT Verifier is an easy way to implement a resource server (in OAuth 2.0 nomenclature). However, it doesn’t provide you with any information about the user. The JwtVerifier interface does have a decodeIdToken(String idToken, String nonce) method, but you’d have to pass the ID token in from your client to use it.
In the next two sections, I’ll show you how you can use Spring Security and Pac4j to implement similar security. As a bonus, I’ll show you how to prompt the user to login (when they try to access the API directly) and get the user’s information.
Secure Your Java REST API with Spring Security
Spring Security is one of my favorite frameworks in Javaland. Most of the examples on this blog use Spring Boot when showing how to use Spring Security. I’m going to use the latest version – 5.1.0.RC2 – so this tutorial stays up to date for a few months.
Revert your changes to add JWT Verifier, or simply delete web.xml to continue.
Modify your pom.xml to have the necessary dependencies for Spring Security. You’ll also need to add Spring’s snapshot repositories to get the release candidate.
<properties>
    ...
    <spring-security.version>5.1.0.RC2</spring-security.version>
    <spring.version>5.1.0.RC3</spring.version>
    <jackson.version>2.9.6</jackson.version>
</properties>

<dependencyManagement>
    <dependencies>
        <dependency>
            <groupId>org.springframework</groupId>
            <artifactId>spring-framework-bom</artifactId>
            <version>${spring.version}</version>
            <scope>import</scope>
            <type>pom</type>
        </dependency>
        <dependency>
            <groupId>org.springframework.security</groupId>
            <artifactId>spring-security-bom</artifactId>
            <version>${spring-security.version}</version>
            <scope>import</scope>
            <type>pom</type>
        </dependency>
    </dependencies>
</dependencyManagement>

<dependencies>
    ...
    <dependency>
        <groupId>org.springframework</groupId>
        <artifactId>spring-webmvc</artifactId>
    </dependency>
    <dependency>
        <groupId>org.springframework.security</groupId>
        <artifactId>spring-security-web</artifactId>
    </dependency>
    <dependency>
        <groupId>org.springframework.security</groupId>
        <artifactId>spring-security-config</artifactId>
    </dependency>
    <dependency>
        <groupId>org.springframework.security</groupId>
        <artifactId>spring-security-oauth2-client</artifactId>
    </dependency>
    <dependency>
        <groupId>org.springframework.security</groupId>
        <artifactId>spring-security-oauth2-resource-server</artifactId>
    </dependency>
    <dependency>
        <groupId>org.springframework.security</groupId>
        <artifactId>spring-security-oauth2-jose</artifactId>
    </dependency>
    <dependency>
        <groupId>com.fasterxml.jackson.core</groupId>
        <artifactId>jackson-core</artifactId>
        <version>${jackson.version}</version>
    </dependency>
    <dependency>
        <groupId>com.fasterxml.jackson.core</groupId>
        <artifactId>jackson-databind</artifactId>
        <version>${jackson.version}</version>
    </dependency>
</dependencies>

<pluginRepositories>
    <pluginRepository>
        <id>spring-snapshots</id>
        <name>Spring Snapshots</name>
        <url>https://repo.spring.io/libs-snapshot</url>
        <snapshots>
            <enabled>true</enabled>
        </snapshots>
    </pluginRepository>
</pluginRepositories>
<repositories>
    <repository>
        <id>spring-snapshots</id>
        <name>Spring Snapshot</name>
        <url>https://repo.spring.io/libs-snapshot</url>
    </repository>
</repositories>
Create a SecurityWebApplicationInitializer.java class in src/main/java/com/okta/developer:
package com.okta.developer;

import org.springframework.security.web.context.*;

public class SecurityWebApplicationInitializer
   extends AbstractSecurityWebApplicationInitializer {

   public SecurityWebApplicationInitializer() {
       super(SecurityConfiguration.class);
   }
}
Create a SecurityConfiguration.java class in the same directory. This class uses Spring Security 5’s oauth2Login() and registers your Okta app with Spring Security.
package com.okta.developer;

import org.springframework.beans.factory.annotation.Autowired;
import org.springframework.beans.factory.annotation.Value;
import org.springframework.context.annotation.Bean;
import org.springframework.context.annotation.Configuration;
import org.springframework.context.annotation.PropertySource;
import org.springframework.security.config.annotation.web.builders.HttpSecurity;
import org.springframework.security.config.annotation.web.configuration.EnableWebSecurity;
import org.springframework.security.config.annotation.web.configuration.WebSecurityConfigurerAdapter;
import org.springframework.security.config.http.SessionCreationPolicy;
import org.springframework.security.oauth2.client.InMemoryOAuth2AuthorizedClientService;
import org.springframework.security.oauth2.client.OAuth2AuthorizedClientService;
import org.springframework.security.oauth2.client.registration.ClientRegistration;
import org.springframework.security.oauth2.client.registration.ClientRegistrationRepository;
import org.springframework.security.oauth2.client.registration.ClientRegistrations;
import org.springframework.security.oauth2.client.registration.InMemoryClientRegistrationRepository;
import org.springframework.security.web.csrf.CookieCsrfTokenRepository;

@Configuration
@EnableWebSecurity
@PropertySource("classpath:application.properties")
public class SecurityConfiguration extends WebSecurityConfigurerAdapter {
    private final String clientSecret;
    private final String clientId;
    private final String issuerUri;

    @Autowired
    public SecurityConfiguration(@Value("${okta.issuer-uri}") String issuerUri,
            @Value("${okta.client-id}") String clientId,
            @Value("${okta.client-secret}") String clientSecret) {
        this.issuerUri = issuerUri;
        this.clientId = clientId;
        this.clientSecret = clientSecret;
    }

@Override
   protected void configure(HttpSecurity http) throws Exception {
      http
            .sessionManagement()
                .sessionCreationPolicy(SessionCreationPolicy.ALWAYS)
                .and()
           .csrf()
               .csrfTokenRepository(CookieCsrfTokenRepository.withHttpOnlyFalse())
               .and()
           .authorizeRequests()
               .anyRequest().authenticated()
               .and()
           .oauth2Login();
   }

   @Bean
   public OAuth2AuthorizedClientService authorizedClientService() {
       return new InMemoryOAuth2AuthorizedClientService(clientRegistrationRepository());
   }

   @Bean
   public ClientRegistrationRepository clientRegistrationRepository() {
       List<ClientRegistration> registrations = clients.stream()
               .map(this::getRegistration)
               .filter(Objects::nonNull)
               .collect(Collectors.toList());

       return new InMemoryClientRegistrationRepository(registrations);
   }

   @Bean
    public ClientRegistrationRepository clientRegistrationRepository() {
        ClientRegistration okta = getRegistration();
        return new InMemoryClientRegistrationRepository(okta);
    }

    ClientRegistrations.fromOidcIssuerLocation(Objects.requireNonNull(issuerUri))
            .registrationId("okta")
            .clientId(clientId)
            .clientSecret(clientSecret)
            .build();
}
Create src/main/resources/application.properties and fill it with your Okta OIDC app settings.
okta.client-id={clientId}
okta.client-secret={clientSecret}
okta.issuer-uri=https://{yourOktaDomain}/oauth2/default
Thanks to Baeldung for the excellent documentation on Spring Security 5 OAuth.
Because you enabled CSRF, you have to add the following hidden field for CSRF protection inside any <h:form> tags. I added the following to src/main/webapp/beer.xhtml and result.xhtml.
<input type="hidden" value="${_csrf.token}" name="${_csrf.parameterName}"/>Restart your API (mvn clean package tomee:run) and navigate to http://localhost:8080/good-beers. You should be redirected to Okta to log in.

Enter valid credentials and you should see JSON in your browser. Nice looking JSON is provided by the JSON Viewer Chrome Plugin.
Requiring users to login to view your API data is handy, but it’s better to make it a resource server for the React UI example. OAuth 2.0 Resource Server support is new in Spring Security 5.1.0 RC1, so I’ll show you how to use it.
Replace the configure() method in SecurityConfiguration.java with the following code that enables CORS and sets up a resource server.
@Override
protected void configure(HttpSecurity http) throws Exception {
    http
        .sessionManagement()
            .sessionCreationPolicy(SessionCreationPolicy.ALWAYS)
            .and()
        .csrf()
            .csrfTokenRepository(CookieCsrfTokenRepository.withHttpOnlyFalse())
            .and()
        .cors()
            .and()
        .authorizeRequests()
            .anyRequest().authenticated()
            .and()
        .oauth2Login()
            .and()
        .oauth2ResourceServer()
            .jwt();
}

@Bean
JwtDecoder jwtDecoder() {
    return JwtDecoders.fromOidcIssuerLocation(this.issuerUri);
}

@Bean
CorsConfigurationSource corsConfigurationSource() {
    CorsConfiguration configuration = new CorsConfiguration();
    configuration.setAllowCredentials(true);
    configuration.setAllowedOrigins(Collections.singletonList("http://localhost:3000"));
    configuration.setAllowedMethods(Collections.singletonList("GET"));
    configuration.setAllowedHeaders(Collections.singletonList("*"));
    UrlBasedCorsConfigurationSource source = new UrlBasedCorsConfigurationSource();
    source.registerCorsConfiguration("/**", configuration);
    return source;
}
After making these changes, restart your API and verify your React UI can talk to it. Pretty slick, eh?
User Information with Spring Security
Spring Security integrates with the Servlet API, so you can use the following methods to get the current user’s information.
HttpServletRequest.getRemoteUser()HttpServletRequest.getUserPrincipal()
Once you have the Principal, you can get details about the user, including their roles (a.k.a., authorities).
OAuth2Authentication authentication = (OAuth2Authentication) principal;
Map<String, Object> user = (Map<String, Object>) authentication.getUserAuthentication().getDetails();
Please see Spring Security’s Servlet API integration documentation for more information.
Use Pac4j to Lock Down Your Java REST API
The last technique I’d like to show you for securing your Java REST API is using Pac4j, specifically j2e-pac4j.
Revert your changes to add Spring Security.
git reset --hard HEAD
Edit pom.xml to add the Pac4j libraries you’ll need to complete this section.
<properties>
    ...
    <pac4j-j2e.version>4.0.0</pac4j-j2e.version>
    <pac4j.version>3.0.0</pac4j.version>
</properties>

<dependencies>
    ...
    <dependency>
        <groupId>org.pac4j</groupId>
        <artifactId>j2e-pac4j</artifactId>
        <version>${pac4j-j2e.version}</version>
    </dependency>
    <dependency>
        <groupId>org.pac4j</groupId>
        <artifactId>pac4j-oidc</artifactId>
        <version>${pac4j.version}</version>
    </dependency>
    <dependency>
        <groupId>org.pac4j</groupId>
        <artifactId>pac4j-http</artifactId>
        <version>${pac4j.version}</version>
    </dependency>
    <dependency>
        <groupId>org.pac4j</groupId>
        <artifactId>pac4j-jwt</artifactId>
        <version>${pac4j.version}</version>
    </dependency>
</dependencies>
Create a src/main/java/com/okta/developer/CorsFilter.java just like you did for JWT Verifier.
package com.okta.developer;

import javax.servlet.*;
import javax.servlet.annotation.WebFilter;
import javax.servlet.http.HttpServletRequest;
import javax.servlet.http.HttpServletResponse;
import java.io.IOException;

@WebFilter(filterName = "corsFilter")
public class CorsFilter implements Filter {

    @Override
    public void doFilter(ServletRequest servletRequest, ServletResponse servletResponse, FilterChain chain)
            throws IOException, ServletException {
        HttpServletRequest request = (HttpServletRequest) servletRequest;
        HttpServletResponse response = (HttpServletResponse) servletResponse;
        System.out.println("In CorsFilter, method: " + request.getMethod());

        // Authorize (allow) all domains to consume the content
        response.addHeader("Access-Control-Allow-Origin", "http://localhost:3000");
        response.addHeader("Access-Control-Allow-Methods", "GET");
        response.addHeader("Access-Control-Allow-Headers", "*");

        // For HTTP OPTIONS verb/method reply with ACCEPTED status code -- per CORS handshake
        if (request.getMethod().equals("OPTIONS")) {
            response.setStatus(HttpServletResponse.SC_ACCEPTED);
            return;
        }

        // pass the request along the filter chain
        chain.doFilter(request, response);
    }

    @Override
    public void init(FilterConfig config) {
    }

    @Override
    public void destroy() {
    }
}
Create a SecurityConfigFactory.java in the same package. Replace the client ID, secret, and domain placeholders with ones that match your OIDC app.
package com.okta.developer;

import com.fasterxml.jackson.databind.ObjectMapper;
import org.pac4j.core.client.Clients;
import org.pac4j.core.client.direct.AnonymousClient;
import org.pac4j.core.config.Config;
import org.pac4j.core.config.ConfigFactory;
import org.pac4j.core.credentials.TokenCredentials;
import org.pac4j.core.profile.CommonProfile;
import org.pac4j.http.client.direct.HeaderClient;
import org.pac4j.jwt.config.signature.RSASignatureConfiguration;
import org.pac4j.jwt.credentials.authenticator.JwtAuthenticator;
import org.pac4j.jwt.util.JWKHelper;
import org.pac4j.oidc.client.OidcClient;
import org.pac4j.oidc.config.OidcConfiguration;
import org.pac4j.oidc.profile.OidcProfile;

import java.io.IOException;
import java.net.URL;
import java.security.KeyPair;
import java.util.ArrayList;
import java.util.List;
import java.util.Map;

public class SecurityConfigFactory implements ConfigFactory {
    private final JwtAuthenticator jwtAuthenticator = new JwtAuthenticator();
    private final ObjectMapper mapper = new ObjectMapper();

    @Override
    public Config build(final Object... parameters) {
        System.out.print("Building Security configuration...\n");

        final OidcConfiguration oidcConfiguration = new OidcConfiguration();
        oidcConfiguration.setClientId("{yourClientId}");
        oidcConfiguration.setSecret("{yourClientSecret}");
        oidcConfiguration.setDiscoveryURI("https://{yourOktaDomain}/oauth2/default/.well-known/openid-configuration");
        oidcConfiguration.setUseNonce(true);
        final OidcClient<OidcProfile, OidcConfiguration> oidcClient = new OidcClient<>(oidcConfiguration);
        oidcClient.setAuthorizationGenerator((ctx, profile) -> {
            profile.addRole("ROLE_USER");
            return profile;
        });

        HeaderClient headerClient = new HeaderClient("Authorization", "Bearer ", (credentials, ctx) -> {
            String token = ((TokenCredentials) credentials).getToken();
            if (token != null) {
                try {
                    // Get JWK
                    URL keysUrl = new URL("https://{yourOktaDomain}/oauth2/default/v1/keys");
                    Map map = mapper.readValue(keysUrl, Map.class);
                    List keys = (ArrayList) map.get("keys");
                    String json = mapper.writeValueAsString(keys.get(0));

                    // Build key pair and validate token
                    KeyPair rsaKeyPair = JWKHelper.buildRSAKeyPairFromJwk(json);
                    jwtAuthenticator.addSignatureConfiguration(new RSASignatureConfiguration(rsaKeyPair));
                    CommonProfile profile = jwtAuthenticator.validateToken(token);
                    credentials.setUserProfile(profile);
                    System.out.println("Hello, " + profile.getId());
                } catch (IOException e) {
                    System.err.println("Failed to validate Bearer token: " + e.getMessage());
                    e.printStackTrace();
                }
            }
        });

        final Clients clients = new Clients("http://localhost:8080/callback",
                oidcClient, headerClient, new AnonymousClient());
        return new Config(clients);
    }
}
The oidcClient in the code above will make users log in to Okta if they try to directly access your API. The headerClientsets up a resource server that authorizes the user based on their access token.
Create src/main/webapp/WEB-INF/web.xml to map the CorsFilter, as well as Pac4j’s CallbackFilter and SecurityFilter. You can see the SecurityFilter is linked to the SecurityConfigFactory class with its configFactory init-param.
<?xml version="1.0" encoding="UTF-8"?>
<web-app xmlns="http://xmlns.jcp.org/xml/ns/javaee"
         xmlns:xsi="http://www.w3.org/2001/XMLSchema-instance"
         xsi:schemaLocation="http://xmlns.jcp.org/xml/ns/javaee http://xmlns.jcp.org/xml/ns/javaee/web-app_3_1.xsd"
         version="3.1">
    <display-name>javaee-pac4j-demo</display-name>

    <absolute-ordering/>

    <filter-mapping>
        <filter-name>corsFilter</filter-name>
        <url-pattern>/*</url-pattern>
    </filter-mapping>
    <filter>
        <filter-name>callbackFilter</filter-name>
        <filter-class>org.pac4j.j2e.filter.CallbackFilter</filter-class>
        <init-param>
            <param-name>defaultUrl</param-name>
            <param-value>/</param-value>
        </init-param>
        <init-param>
            <param-name>renewSession</param-name>
            <param-value>true</param-value>
        </init-param>
        <init-param>
            <param-name>multiProfile</param-name>
            <param-value>true</param-value>
        </init-param>
    </filter>
    <filter-mapping>
        <filter-name>callbackFilter</filter-name>
        <url-pattern>/callback</url-pattern>
        <dispatcher>REQUEST</dispatcher>
    </filter-mapping>

    <filter>
        <filter-name>OidcFilter</filter-name>
        <filter-class>org.pac4j.j2e.filter.SecurityFilter</filter-class>
        <init-param>
            <param-name>configFactory</param-name>
            <param-value>com.okta.developer.SecurityConfigFactory</param-value>
        </init-param>
        <init-param>
            <param-name>clients</param-name>
            <param-value>oidcClient,headerClient</param-value>
        </init-param>
        <init-param>
            <param-name>authorizers</param-name>
            <param-value>securityHeaders</param-value>
        </init-param>
    </filter>
    <filter-mapping>
        <filter-name>OidcFilter</filter-name>
        <url-pattern>/*</url-pattern>
        <dispatcher>REQUEST</dispatcher>
        <dispatcher>FORWARD</dispatcher>
    </filter-mapping>
</web-app>
To visualize the user’s information a bit better, you’ll need to create a few more files. These JSF-related files are copied from j2e-pac4j-cdi-demo.
NOTE: I tried to get j2e-pac4j-cdi-demo (with no web.xml) running on TomEE, but it fails with an error: Filters cannot be added to context [] as the context has been initialised. It does work when using the Payara Maven plugins.
Create src/main/java/com/okta/developer/ProfileView.java, a JSF managed bean that gathers the user’s information.
package com.okta.developer;

import org.pac4j.core.context.WebContext;
import org.pac4j.core.profile.ProfileManager;
import org.slf4j.Logger;
import org.slf4j.LoggerFactory;

import javax.annotation.PostConstruct;
import javax.enterprise.context.RequestScoped;
import javax.inject.Inject;
import javax.inject.Named;
import java.util.List;

/**
 * Managed bean which exposes the pac4j profile manager.
 *
 * JSF views such as facelets can reference this to view the contents of profiles.
 *
 * @author Phillip Ross
 */
@Named
@RequestScoped
public class ProfileView {

    /** The static logger instance. */
    private static final Logger logger = LoggerFactory.getLogger(ProfileView.class);

    /** The pac4j web context. */
    @Inject
    private WebContext webContext;

    /** The pac4j profile manager. */
    @Inject
    private ProfileManager profileManager;

    /** Simple no-args constructor. */
    public ProfileView() {
    }

    /**
     * Gets the first profile (if it exists) contained in the profile manager.
     *
     * @return a list of pac4j profiles
     */
    public Object getProfile() {
        return profileManager.get(true).orElse(null); // It's fine to return a null reference if there is no value present.
    }

    /**
     * Gets the profiles contained in the profile manager.
     *
     * @return a list of pac4j profiles
     */
    public List getProfiles() {
        return profileManager.getAll(true);
    }

    /** Simply prints some debugging information post-construction. */
    @PostConstruct
    public void init() {
        logger.debug("webContext is null? {}", (webContext == null));
        logger.debug("profileManager is null? {}", (profileManager == null));
    }
}
Add src/main/webapp/oidc/index.xhtml as a JSF template.
<ui:composition xmlns="http://www.w3.org/1999/xhtml"
                xmlns:h="http://java.sun.com/jsf/html"
                xmlns:f="http://java.sun.com/jsf/core"
                xmlns:ui="http://java.sun.com/jsf/facelets"
                template="/WEB-INF/template.xhtml">
    <ui:define name="title">Pac4J Java EE Demo - Protected Area</ui:define>
    <ui:define name="content">
        <div class="ui-g">
            <div class="ui-g-12">
                <div class="ui-container">
                    <h1>Protected Area</h1>
                    <p><h:link value="Back" outcome="/index"/></p>
                </div>
                <ui:include src="/WEB-INF/facelets/includes/pac4j-profiles-list.xhtml"/>
            </div>
        </div>
    </ui:define>
</ui:composition>
Create the pac4j-profiles-list.xhtml file it includes in WEB-INF/facelets/includes.
<ui:composition xmlns="http://www.w3.org/1999/xhtml"
                xmlns:h="http://java.sun.com/jsf/html"
                xmlns:f="http://java.sun.com/jsf/core"
                xmlns:ui="http://java.sun.com/jsf/facelets">
    <div class="ui-container">
        <p>Found  <h:outputText value="#{profileView.profiles.size()}"/> profiles.</p>
        <h:panelGroup layout="block" rendered="#{profileView.profiles.size() > 0}">
            <p>First profile:  <h:outputText value="#{profileView.profile}"/></p>
        </h:panelGroup>
    </div>

    <h:panelGroup layout="block" rendered="#{not empty profileView.profile}">
        <h2>Profile Details</h2>
        <p><h:outputText value="Id: #{profileView.profile.id}"/></p>
        <p><h:outputText value="Type Id: #{profileView.profile.typedId}"/></p>
        <p><h:outputText value="Remembered: #{profileView.profile.remembered}"/></p>
        <h3>Attributes (<h:outputText value="#{profileView.profile.attributes.size()}"/>)</h3>
        <h:panelGroup layout="block" rendered="#{profileView.profile.attributes.size() > 0}">
            <ul>
                <ui:repeat value="#{profileView.profile.attributes.keySet().toArray()}" var="attributeName">
                    <li><h:outputText value="#{attributeName}"/>: <h:outputText value="#{profileView.profile.attributes.get(attributeName)}"/> </li>
                </ui:repeat>
            </ul>
        </h:panelGroup>
        <h3>Roles (<h:outputText value="#{profileView.profile.roles.size()}"/>)</h3>
        <h:panelGroup layout="block" rendered="#{profileView.profile.roles.size() > 0}">
            <ul>
                <ui:repeat value="#{profileView.profile.roles.toArray()}" var="role">
                    <li><h:outputText value="#{role}"/></li>
                </ui:repeat>
            </ul>
        </h:panelGroup>
        <h3>Permissions (<h:outputText value="#{profileView.profile.permissions.size()}"/>)</h3>
        <h:panelGroup layout="block" rendered="#{profileView.profile.permissions.size() > 0}">
            <ul>
                <ui:repeat value="#{profileView.profile.permissions.toArray()}" var="permission">
                    <li><h:outputText value="#{permission}"/></li>
                </ui:repeat>
            </ul>
        </h:panelGroup>
    </h:panelGroup>
</ui:composition>
The oidc/index.xhtml template uses WEB-INF/template.xhtml, so you’ll need to create that too.
<!DOCTYPE html>
<html xmlns="http://www.w3.org/1999/xhtml"
      xmlns:h="http://java.sun.com/jsf/html"
      xmlns:f="http://java.sun.com/jsf/core"
      xmlns:ui="http://java.sun.com/jsf/facelets">

    <h:head>
        <f:facet name="first">
            <meta http-equiv="X-UA-Compatible" content="IE=edge" />
            <meta http-equiv="Content-Type" content="text/html; charset=UTF-8" />
            <meta name="viewport" content="width=device-width, initial-scale=1.0, maximum-scale=1.0, user-scalable=0"/>
            <meta name="apple-mobile-web-app-capable" content="yes" />
        </f:facet>
        <title><ui:insert name="title">Pac4J Java EE Demo</ui:insert></title>
        <ui:insert name="head"/>
    </h:head>

    <h:body styleClass="main-body">
        <div class="layout-wrapper">
            <div class="layout-main">
                <ui:insert name="content"/>
            </div>
        </div>
    </h:body>
</html>
After adding these files, rebuild your project and restart TomEE.
mvn clean package tomee:run
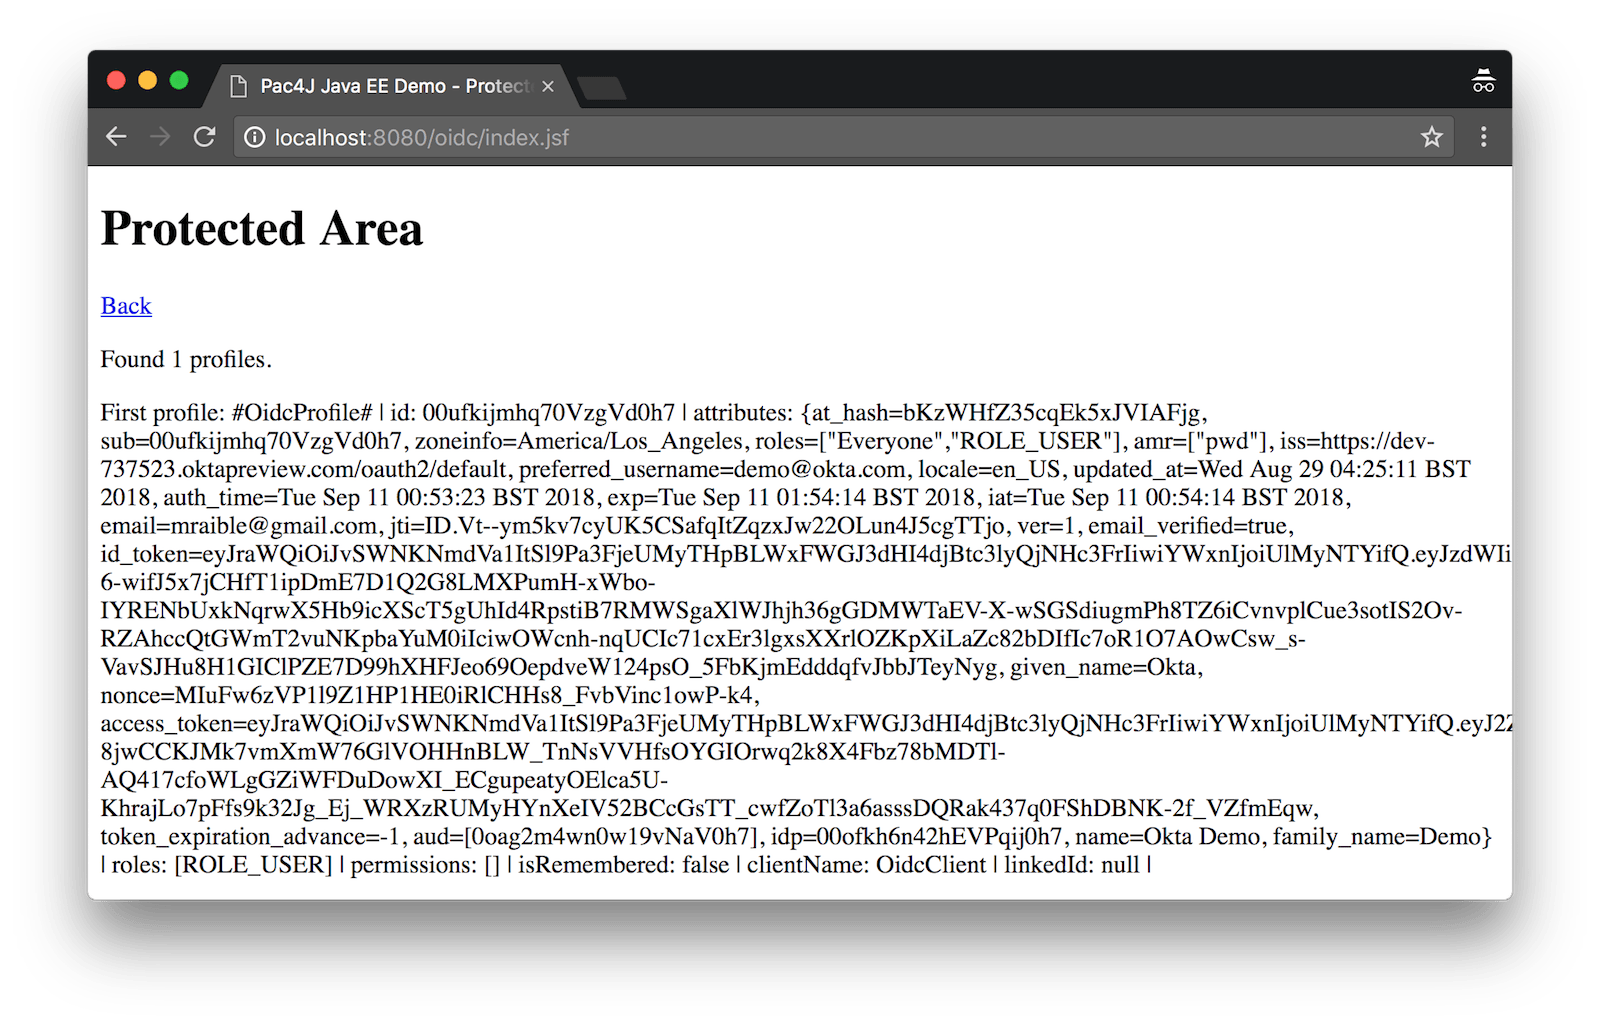
Navigate to http://localhost:8080/oidc/index.jsf and you’ll be redirected to Okta to login. If it doesn’t work on your first try, restart your browser and use an incognito window. You should see your user’s profile information.
Try your React client at http://localhost:3000; it should work too!
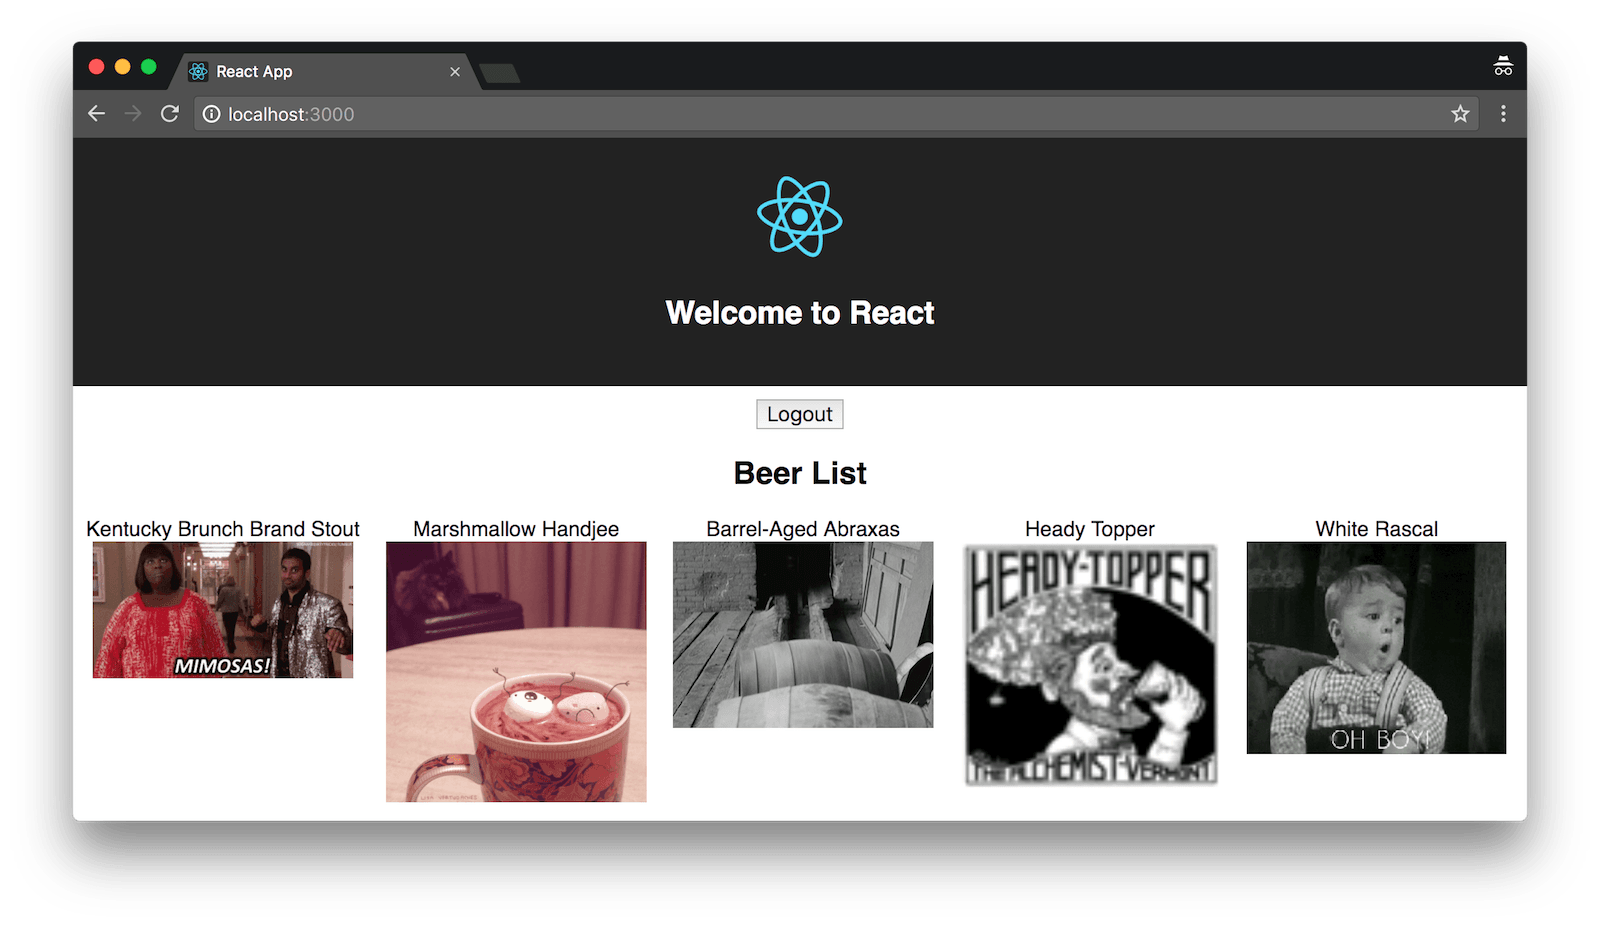
If you’re wondering why the images aren’t stacked, it’s because I changed the beer list’s JSX in the React app’s BeerList.tsxto be inline.
<h2>Beer List</h2>
{beers.map((beer: Beer) =>
  <span key={beer.id} style={{float: 'left', marginRight: '10px', marginLeft: '10px'}}>
    {beer.name}<br/>
    <GiphyImage name={beer.name}/>
  </span>
)}
What About Jakarta EE?
You might’ve heard that Java EE has become open source (much like OpenJDK for Java SE) and its new name is Jakarta EE. David Blevins is a good friend and heavily involved in Java EE / Jakarta EE. For proof, see his Twitter bio: A founder of the Apache TomEE, OpenEJB and Geronimo projects. Member of Apache, JCP EC, EE4J PMC, Jakarta EE WG, MicroProfile, Eclipse Board. CEO @Tomitribe.
I asked David when there would be a usable release of Jakarta EE.
David: The main focus right now is to create a version of Jakarta EE that is compatible with Java EE 8. We hope to have that out by the end of the year. After that’s released, we’ll start working on Jakarta EE 9 and iterating as needed.
Jakarta EE has a working group that decides the direction of the platform.
Learn More about Secure REST APIs, Java EE, Jakarta EE, and OIDC
I hope you’ve enjoyed this tour that showed you how to build and secure a Java EE REST API with JWT and OIDC. If you’d like to see the source code for each completed section, I’ve put them in branches in the GitHub repo. You can clone the different implementations with the commands below:
git clone -b jwt-verifier https://github.com/oktadeveloper/okta-java-ee-rest-api-example.git
git clone -b spring-security https://github.com/oktadeveloper/okta-java-ee-rest-api-example.git
git clone -b pac4j https://github.com/oktadeveloper/okta-java-ee-rest-api-example.git
As I mentioned previously, most of the Java tutorials we have on this blog show how to use Spring Boot. In case you’re interested in learning Spring Boot, here are some tutorials I’ve written that will show you the gist of things.
- Get Started with Spring Boot, OAuth 2.0, and Okta
- Use React and Spring Boot to Build a Simple CRUD App
- Build a Basic CRUD App with Angular 7.0 and Spring Boot 2.1
If you’re new to OIDC, I’d recommend you check out the following posts:
- Get Started with Spring Security 5.0 and OIDC
- Identity, Claims, & Tokens – An OpenID Connect Primer, Part 1 of 3
- OIDC in Action – An OpenID Connect Primer, Part 2 of 3
- What’s in a Token? – An OpenID Connect Primer, Part 3 of 3
For more about Java REST APIs and TomEE, I recommend these sources:
- David Blevins – Deconstructing REST Security, Iterate 2018
- Antonio Goncalves – Securing JAX-RS Endpoints with JWT
- TomEE: Running with Systemd
If you’ve made it this far, I suspect you might be interested in seeing future blog posts. Follow me and my whole team on Twitter, like us on Facebook, or check out our YouTube channel. For questions, please leave a comment below, or post it to our Developer Forums.
“I love writing authentication and authorization code.” ~ No Java Developer Ever. Tired of building the same login screens over and over? Try the Okta API for hosted authentication, authorization, and multi-factor auth.
Build a Java REST API with Java EE and OIDC’ was originally published on the Okta developer blog on September 12, 2018.

Very thorough article. Thank you! Okta seems to be becoming an essential skill, so it’s great to see an example of how to integrate with it.