Data is a core resource for many activities. One important challenge for handling data is storing the data in the right way. We need to choose a format that makes easy solving the problem at hand. When multiple problems are being solved using the same data, that could mean that the same data has to be provided in different formats. There are potentially different actors who could use the same piece of data; they could be persons or programs. And these might prefer or need to use different formats, and in that case we need to convert the data between them.

For example, you may have a program that generates some data in an XML file, but you need to process that same data using an API that expect JSON. Or you need to share some data your department produces with other departments. The problem is that your colleagues from Department A want the data in a certain format, while the ones in Department B insist you provide the data in another format…
So you need to convert between different formats. It is an issue that is common and usually solvable, but it is a repetitive task with a few subtleties to pay attention to.
As engineers, we know that all boring, error-prone tasks are just begging for a smart solution. Let’s try to provide one.
Handling Data in Multiple Formats
Converting between different formats can be tricky for a few reasons:
- parsing a new format can be hard, if there is no ready-to-use library
- if you want to support several formats the number of possible conversions necessary explode rapidly. For example, if you support four formats you could need 12 different conversions to handle. If then you add just a new format you now have 20 different conversions to support
- different formats could handle the same type of data in slightly different ways. For instance, a string is always between double quotes (
") in a JSON format, but it may or may not be between double quotes in a CSV format. In different formats the rule for escaping characters could be similar but slightly different. Getting all these details exactly right require a significant amount of work. - not all formats are compatible with each other. For example, you can convert CSV data to JSON, but vice versa is not always possible. This is the case because CSV files are intended to represent a list of homogeneous elements. JSON instead could contain other data structures, like collections of heterogeneous elements
These are the problems. Now, imagine that you can create a generic service that can convert between different formats. This approach get you a few advantages over doing an ad-hoc conversion every time.
Once you create a service to convert between different formats you have an assembly line that permit to move from one format to another abstracting the simpler but tricky details. You could also configure this assembly line of yours to do all sorts of useful things, such as:
- enforce specific rules in the output produced. As an example, you may want to specify all numbers with a specific number of decimal digits
- you could combine data that is expressed in multiple files in format A in a single file in format B, or vice versa
- you could apply filtering rules on the data (e.g, consider only certain rows in a CSV file for the conversion to JSON)
In this article we are going to create only a simple version of this service, but this can give you an idea of what is possible.
The Design
We will create a simple REST API, that will be used to receive files and convert them to specified format. To limit the number of conversions we need to handle we are going to rely on an internal intermediate representation. In this way we will need to write conversions only to and from the intermediate representation. So, for instance, we are not going to convert directly from CSV to JSON. Instead we are going to convert from CSV to our internal data structure and from our internal data structure to JSON.
This approach allows more flexibility, because to implement a new format we only need to interact with our intermediate representation and not any specific format.
We are not going to do it in this tutorial, but another benefit is that using an intermediate representation we could easily merge different data sources in one output file.
So, the workflow is like the following:
- the set of input files (typically just one) get converted into the generic data structure
- the generic data structure is converted in the requested output format (e.g, JSON), producing one or more output files (typically one)
Our internal data format is quite simple, basically at the base there is DataItem which represent a generic element of our data:
DataArrayrepresents a list of values (e.g.,["one", "two"]but also[ {"name": "john"}, {"name": "mike"} ]DataObjectrepresents a series of pairs of a field name with values (e.g.,{"name": "john"}but also{"names": ["mike", "pike", "kite"]}DataValueis made to contain individual values (e.g.,5,"john"). This will be booleans, numbers, and strings
So, the complex classes, like DataArray and DataObject can contain other elements and essentially allow a tree-like organization.
A Note on a Physical Intermediate Format
Now, you may ask yourself, it is one thing to create a custom representation in memory, but should we also create a custom format? Well we do not need it in our tutorial. However, if we were building a production system, depending on the requirements, we may want to create a custom format, i.e., a specially designed way to store efficiently the data for our purposes.
This physical intermediate format could be useful if, for some reason, the conversion process cannot be implemented in a single process, sharing memory. For example, if we want different executables or different web services to perform the parsing and the serialization of the desired output, then we need to make these components to communicate. In this case they may need a physical intermediate format.
You may ask: is not XML perfectly fine to represent arbitrary data structures? Well, it is true that for the cases considered in a simple tutorial like this one, JSON or XML would have worked fine as custom intermediate format. However, this might not be true or optimal to represent all formats and features of our hypothetical service.
Different formats are designed for different things: the same image might be represented in different formats, but the resulting file will have different characteristics (e.g., a JPEG will be smaller than a PNG). By designing our custom representation we can better control the process, avoid any quirks of a specific existing format and save any data in the optimal way for our service.
For example, we can have a format designed to easily handle transformations on data (e.g., by storing the different operations made on the data). Designing a custom format does not necessarily means messing with bytes: OpenDocument is a bunch of compressed files with data stored in XML files with specific attributes and values.
And that is it for the design considerations. Let’s see some code.
Setting Up the Project
We are going to create a new ASP.NET Web Api Project using the command line dotnet program.
dotnew new webapi
Then we are going add the necessary packages to deal with JSON and parsing things.
dotnet add package Newtonsoft.Json
dotnet add package Antlr4.Runtime.Standard
dotnet add package Microsoft.CodeAnalysis.CSharp.Scripting
Of course we are going to use ANTLR, to parse the files. Since we are using Visual Studio Code, we also setup the awesome Visual Code extension to automatically generate an ANTLR parser whenever we save our grammar. Just put this values in your settings for the project.
.vscode/settings.json
{
    "antlr4.generation": {
        "language": "CSharp",
        "listeners": false,
        "visitors": false,
        "outputDir": "../",
        "package": "ParsingServices.Parsers"
    }
}
If you use another editor, you need to give to the ANTLR tool the right options:
- we create the parser inside the namespace (package in Java terminology)
ParsingServices.Parsers - we generate a C# project
- we do not create neither listeners nor visitors
- we generate the parsers in the directory above the grammar
If you do not know how to use ANTLR we have written plenty of tutorials, you can read Getting started with ANTLR in C#, if you want a short introduction, or our ANTLR Mega Tutorial if you want to know a lot.
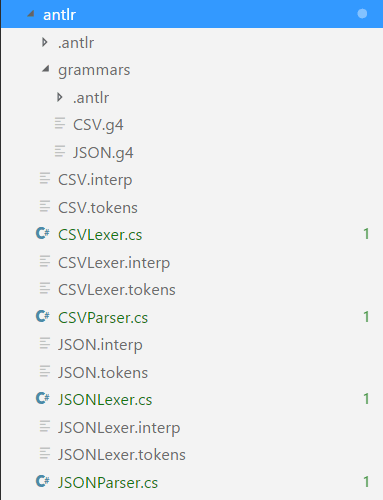
These options means that our grammars will be inside a antlr/grammars folder, while the parsers will be generation inside the antlr folder. This makes for a clean structure, separating grammars from generated code.
Grammars
Speaking of ANTLR grammars: we have two, one for JSON and the other for CSV. Both are taken from the repository of ANTLR grammars, but we have modified them for clarity and consistency.
CSV.g4
grammar CSV;

csv     : hdr row+ ;
hdr     : row ;

row     : field (',' field)* '\r'? '\n' ;

field   : TEXT
        | STRING
        |
        ;

TEXT    : ~[,\n\r"]+ ;
STRING  : '"' ('""'|~'"')* '"' ; // quote-quote is an escaped quote
We have the JSON grammar also to facilitate our job in the rest of the program. We created a distinct case to differentiate simple values (e.g. "number" : 5) from complex values (e.g., "numbers" : [5, 3] or "number" : { "value": 1, "text": "one" }).
JSON.g4
grammar JSON;

json                    : complex_value ;

obj                     : '{' pair (',' pair)* '}'
                        | '{' '}'
                        ;

pair                    : STRING ':' (value | complex_value) ;

array                   : '[' composite_value (',' composite_value)* ']'
                        | '[' ']'
                        ;

composite_value         : value
                        | complex_value
                        ;

value                   : TRUE
                        | FALSE
                        | NULL
                        | STRING
                        | NUMBER
                        ;

complex_value           : obj
                        | array
                        ;

TRUE                    : 'true' ;
FALSE                   : 'false' ;
NULL                    : 'null' ;

STRING                  : '"' (ESC | SAFECODEPOINT)* '"' ;

fragment ESC            : '\\' (["\\/bfnrt] | UNICODE) ;

fragment UNICODE        : 'u' HEX HEX HEX HEX ;

fragment HEX            : [0-9a-fA-F] ;

fragment SAFECODEPOINT  : ~ ["\\\u0000-\u001F] ;

NUMBER                  : '-'? INT ('.' [0-9] +)? EXP? ;

fragment INT            : '0' | [1-9] [0-9]* ;

// no leading zeros

fragment EXP            : [Ee] [+\-]? INT ;

// \- since - means "range" inside [...]

WS                      : [ \t\n\r] + -> skip ;
The Data Classes
Before seeing how the conversion is implemented let’s take at the Data* classes that form the structure of our data format. We already explained their general design before, so here we mostly look at code.
Data.cs (partial)
public class DataItem { }

public class DataValue : DataItem
{
    public string Text { get; set; } = "";
    public ValueFormat Format { get; set; } = ValueFormat.NoValue;
}

public class DataField : DataItem
{
    public string Text { get; set; } = "";
    public DataItem Value { get; set; } = null;
}

public class DataObject : DataItem
{
    public IList<DataField> Fields { get; set; } = new List<DataField>();

    [..]
}

public class DataArray : DataItem
{
    public IList<DataItem> Values { get; set; } = new List<DataItem>();

    [..]
}
We removed the methods, because they are superfluous to understand how the classes are connected. As you can see, they are quite intuitive and probably look how you expected them.
Data.cs (partial)
public enum ValueFormat
{
    Bool,
    Integer,
    Numeric,
    String,
    NoValue
}
ValueFormat is an enum that is supposed to represent the actual type of the data. That is because we treat every value as a string to simplify the input and output phase, since a string can accept any type of input. But we know that in actuality there are different types of data. So, we try to understand the different formats here.
Data.cs (partial)
public class DataValue : DataItem
{
    private string _text = "";
    public string Text
    {
        get {
            return _text;
        }
        set {
            Format = DataValue.DetermineFormat(value);

            _text = DataValue.PrepareValue(Format, value);
        }
    }
    public ValueFormat Format { get; private set; } = ValueFormat.String;

    private static ValueFormat DetermineFormat(string text)
    {
        ValueFormat format = ValueFormat.String;

        text = text.Trim().Trim('"');

        int intNum;

        bool isInt = int.TryParse(text, out intNum);

        if(isInt)
            return ValueFormat.Integer;

        double realNum;

        bool isNum = double.TryParse(text, out realNum);

        if(isNum)
            return ValueFormat.Numeric;

        bool boolean;

        bool isBool = bool.TryParse(text, out boolean);

        if(isBool)
            return ValueFormat.Bool;

        return format;
    }
}
To understand the real type of the data that we are managing, we try to parse each value until we found a match. If there is no match for any type, it means that we have a string. We need to find out the real type because each type can be represented differently in a specific format. For instance, in JSON a number can be written without the enclosing double quotes while a string always need them. So, this information will be used when we output the data in a specific format.
We solve the issue that different formats may represent the same data differently in the input phase, when we convert the original format in our own intermediate one. For instance, a string is always between double quotes (") in a JSON format, but it may or may not be between double quotes in a CSV format. We have to clean all the data in input, so to have a standard representation in our custom data format.
This part would be the ideal location where to perform any standard editing of the data, like ensuring that all numbers use one specific decimal separator. Since we want to keep things simple we just trim the string of any whitespace.
Data.cs (partial)
private static String PrepareValue(string text)
{
    text = text.Trim();

    return text;
}
The Convert Controller
Now that we have explained the way the data is represented, we can see how it enters our program, by looking at the main controller.
Our main controller is the ConvertController. It contains the core dispatching logic for our API.
[Route("api/[controller]")]
public class ConvertController : Controller
{
    private IDataRepository _dataRepository;
    public ConvertController(IDataRepository dataRepository)
    {
        _dataRepository = dataRepository;
    }

    [HttpGet]
    public IActionResult Get()
    {
        IEnumerable<InfoData> files =_dataRepository.All();

        return View(files);
    }

    [HttpGet("{id}/{format?}", Name = "GetData")]
    public IActionResult Get(Guid id, string format = "")
    {
        InfoData data = _dataRepository.Get(id);
        Pipeline pipeline = new Pipeline();

        if(!String.IsNullOrEmpty(format))
            data.Format = Enum.Parse<Format>(format);

        string converted = Pipeline.Convert(data.Data, data.Format);

        if(String.IsNullOrEmpty(converted))
             return NoContent();
        else
            return Content(converted);
    }

    [HttpPost]
    public IActionResult Post(InputData value)
    {
        InfoData result = _dataRepository.Save(value);

        return new JsonResult(result);
    }

    [HttpDelete("{id}")]
    public IActionResult Delete(Guid id)
    {
        _dataRepository.Delete(id);

        return Ok();
    }
}
The whole controller is simple and intuitive. We use dependency injection to pass a IDataRepository object to the controller. Dependency injection is provided by ASP.NET and we are going to setup it later.
The only interesting part is the Get method, where we call our pipeline to convert the file. First, we get the data corresponding to the id from the repository (line 21), at this point the field data.Format contains the original format of the file. If the user provided a value for format, we change data.Format to the specified format.
Whether the format is different, or the original one, we always pass the data and the format we need to the pipeline. By doing this way, all data passes through our pipeline. So, for instance, we could return the data in the same format, but after having performed some operation on it (e.g., we ensure the use of a standard decimal separator).
So, let’s see how the pipeline works.
A Very Simple Pipeline
In this tutorial we are going to create a very simple pipeline. Our pipeline will:
- receive data in our internal representation
- execute all operations specified in the pipeline
- will return the data converted in the requested format (if the format can handle the data)
The idea of this tutorial is to create a generic system that could handle converting files between different formats. In order to do that well we need to have a pipeline that could perform simple cleaning operations on data, like merging values, ordering them, etc.
Discussing the Design
If we were willing to modify the code each time, we could simply create an interface and using delegates to perform custom operations. Something like this.
List<Func<DataItem, DataItem>> operations;
operations = new List<Func<DataItem, DataItem>>();
operations.Add(new Func<DataItem, DataItem>(operation));

// later

foreach(var operation in operations)
{
     operation(data);
}
However this would make the service a bit cumbersome to use, unless we always wanted to perform the same standard operations.
This would be the ideal scenario in which to use a DSL, since we have a limited scope (manipulating data) that could be drastically improved with a tool that facilitate the few operations we need to do. However, this is outside the scope of this tutorial.
So, a good alternative solution is to include a way to automatically discover and perform operations defined by the user. There are several potential ways to do that:
- an expression interpreter for C#, like Dynamic Expresso
- the full Roslyn compiler
- A scripting solution
An expression interpreter is too simple for the things we want to do. The full Roslyn compiler would be the way to go, if we wanted to give users the full power of the language. However, aside from the security risks, it would probably be too much freedom that the user would not need and would require a bit of setup work each time.
So, we opt for the middle ground and use a scripting solution. In practice, we are going to use the scripting engine included in Roslyn, but we are going to setup everything and the user would just add its own scripts.
The Pipeline
We start with the simple Convert function that we have seen the ConvertController call.
Pipeline.cs (partial)
public String Convert(DataItem data, Format format)
{
    IConverter<DataItem> converter = null;
    String converted = String.Empty;

    if(data != null)
    {
        data = PerformOperations(data);

        switch(format)
        {
            case Format.JSON:
                converter = new ParsingServices.Models.JsonConverter();
            break;
            case Format.CSV:
                converter = new ParsingServices.Models.CSVConverter();
            break;
            default:
                break;
        }

        if(converter.IsValid(data))
        {
            converted = converter.ToFile(data);
        }
    }

    return converted;
}
The function performs all the operations on the data and then, after having checked that the target format can support the data, converts the data into the requested format.
The processing of the operations happens in the method PerformOperations, which might be simpler than what you expect.
Pipeline.cs
public DataItem PerformOperations(DataItem data)


{
    foreach(var file in Directory.EnumerateFiles($"{Location}{Path.DirectorySeparatorChar}"))
    {
        GlobalsScript item = new GlobalsScript { Data = data };

        var script = CSharpScript.EvaluateAsync<DataItem>(
            System.IO.File.ReadAllText(file),
            Microsoft.CodeAnalysis.Scripting.ScriptOptions.Default
            .WithReferences(typeof(ParsingServices.Models.DataItem).Assembly)
            .WithImports("System.Collections.Generic")
            .WithImports("System.Linq"),
            globalsType: item.GetType(), globals: item);

        script.Wait();
        data = script.Result;
    }

    return data;
}
The method collects all operations defined in files inside the proper location and then execute them one by one. The operations are specified inside files that could be uploaded, just like the files to be converted are uploaded. In the repository, there is a OperationsController and a couple of methods in the Pipeline class to manage the creation of operations, but we do not show it here because that code is elementary.
It all happens with the method EvaluateAsync. This methods accepts code as a string, together with an object (globals) that contains the data that the script can access. We have also have to specify the assemblies required by the code. This is the critical step that could make our scripting solution fragile. Since it is only here, and not inside the scripts, that we can setup assemblies we have to make sure to include all the assemblies that we will need. This way each script has everything it needs.
We can also use using statement (i.e., the WithImports method) inside the script, but it is handy if we do it here for the ones that we will always need.
We cannot use all C# code inside the scripts, but we can do a fair bit. The following is an example script, which is also included in the repository.
order.scs
using ParsingServices.Models;

if(Data is DataArray)
{
    bool simpleValues = true;
    foreach(var v in (Data as DataArray).Values)
    {
        if(!(v is DataValue))
            simpleValues = false;
    }

    if(simpleValues)
    {
        (Data as DataArray).Values = (Data as DataArray).Values.OrderByDescending(v => (v as DataValue).Text).ToList();
    }
}

return Data;
The script orders the values, if the item is an array and all the values are simple values (e.g., 5 or hello).
The argument we pass as globals in EvaluateAsync it is accessible directly, i.e., we use Data and not globals.Data. A nice thing is that we do not need to wrap the code in a class or method, it is just a sequence of statements.
Storing the Data
Now let’s see the DataRepository class. This class stores the files that are uploaded to our service. Obviously there is no need to store a file if we just want to convert it. However, if it makes sense to create a conversion service sense, it is probably useful to automatically serve the converted file when needed. To provide such feature we want to save the file for simplicity. So we have to upload the file one time and we can request it as needed.
We do not save data on a database, but on a directory. Many databases do support storing files, but the simplest approach is enough in this case. We are going to just see the method Save since the rest does not show anything challenging. As always, you can see the whole file in the repository.
DataRepository.cs
public InfoData Save(InputData value)
{
    var id = Guid.NewGuid();
    Directory.CreateDirectory($"{Location}{Path.DirectorySeparatorChar}{id}{Path.DirectorySeparatorChar}");
    IConverter<DataItem> converter = null;
    DataItem data = new DataItem();

    switch(value.Format)
    {
        case Format.JSON:
            converter = new ParsingServices.Models.JsonConverter();
        break;
        case Format.CSV:
            converter = new ParsingServices.Models.CSVConverter();
        break;
        default:
            break;
    }

    using(FileStream fs = new FileStream($"{Location}{Path.DirectorySeparatorChar}{id}{Path.DirectorySeparatorChar}file.{value.Format}", FileMode.OpenOrCreate)) {
        value.File.CopyTo(fs);
    }

    using(FileStream fs = new FileStream($"{Location}{Path.DirectorySeparatorChar}{id}{Path.DirectorySeparatorChar}file.{value.Format}", FileMode.Open)) {
        data = converter.FromFile(fs);
    }

    var infoData = new InfoData() {
        Id = id,
        Format = value.Format,
        LocationFile = $"{Location}{Path.DirectorySeparatorChar}{id}{Path.DirectorySeparatorChar}file.{value.Format}",
        Data = data
    };

    JsonSerializerSettings settings = new JsonSerializerSettings();
    settings.ReferenceLoopHandling = ReferenceLoopHandling.Ignore;
    settings.Formatting = Formatting.Indented;

    System.IO.File.WriteAllText($"{Location}{Path.DirectorySeparatorChar}{id}{Path.DirectorySeparatorChar}data.json", JsonConvert.SerializeObject(infoData, settings));

    return infoData;
}
We create a new directory (line 4) corresponding to a new id inside Location (a field of the class whose declaration is not shown). After having created the proper *Converter for the requested format, we both copy the file inside our directory (line 20-22) and create the generic data format from the file itself. Finally, we save the InfoData object inside a data.json file that is going to be next to the uploaded file.
We are not actually going to use the value stored in the Data field that is saved on the data.json file. Instead, when we are requested to load data for a specific id, we simply use again the proper *Converter to recreate the data directly. We store it here for debugging purposes, in case we want to check how a problematic file is converted.
To activate dependency injection for the DataRepository class, we just add a line in the method ConfigureServices of the Startup.cs file.
Startup.cs
public void ConfigureServices(IServiceCollection services)
{
    services.AddMvc();

    // we tell ASP.NET that DataRepository implement IDataRepository
    services.AddTransient<IDataRepository, DataRepository>();
}
Converting to CSV
Now that the general structure is clear, we can see where the magic happens: how we convert to and from a specific format to our intermediate representation. We are going to start with CSV.
CSVConverter.cs (partial)

public class CSVConverter : IConverter<DataItem>
{
    [..]

    public string ToFile(DataItem data)
    {
        if(IsValidObjects(data))
            return FromObjectsToFile(data);

        if(IsValidValues(data))
            return FromValuesToFile(data);

        return String.Empty;
    }

    public String FromObjectsToFile(DataItem data)
    {
        List<List<string>> rows = new List<List<string>>();

        StringBuilder text = new StringBuilder();

        List<string> headRow = new List<string>();

        if(data is DataArray)
        {
            foreach(var dataRow in (data as DataArray).Values)
            {
                if(dataRow is DataObject)
                {
                    foreach(var item in (dataRow as DataObject).Fields)
                    {
                        if(!headRow.Contains(item.Text))
                            headRow.Add(PrepareForCSV(item.Text));
                    }
                }
            }

            rows.Add(headRow);

            foreach(var dataRow in (data as DataArray).Values)
            {
                List<string> row = new List<string>();

                foreach(var head in headRow)
                {
                    if((dataRow as DataObject).ContainsName(head))
                    {
                        var item = (dataRow as DataObject).GetByName(head);
                        if(item.Value is DataValue)
                            row.Add(PrepareForCSV((item.Value as DataValue).Text));
                    }
                    else
                        row.Add(String.Empty);
                }

                rows.Add(row);
            }

            foreach(var row in rows)
            {
                text.AppendJoin(",", row.ToArray());
                text.AppendLine();
            }
        }

        return text.ToString();
    }

    [..]
}
Converting the generic data format into a CSV file is generally easy. The main issue is that not all data is convertible to the CSV format. So, we have to perform some basic analysis to determine whether the data is compatible before attempting to do it.
Essentially we can convert data into CSV only if:
- the main item is a
DataArray - every value of the array is a
DataObjector a simple value (no mixing of the two)
So, we first check whether the data follows either of these two templates and, if that is true, then we use the proper method to convert the data to CSV. Let’s see how to convert objects to CSV.
We first collect all the values for the header of the CSV file. The header is the first line, that contains the names of the fields in a CSV file. In practice, what we do between lines 30-34 is to add all names of an element that appear on a specific object, even if they do not appear in the other objects.
Fixing the Data Structure
Imagine we want to convert this JSON file to CSV.
[
	{"mark_id":"1"},
	{"mark_id":"2", "name":"john"},
	{"mark_id":"3", "tag": "awesome"}
]
This file can be converted to CSV, even if the individual objects are different. We can collect all unique names for the fields and then just add an empty field, if a certain row does not contain that specific field.
The corresponding CSV file would be the following.
mark_id,name,tag
"1",,
"2","john",
"3",,"awesome"
The header contains all the unique names for the fields, even if they appear in just one object. If a certain object does not have a specific field, the corresponding element of the CSV row is empty. In this example, the second object is the only one with the name field, so it is the only one which has a non-empty element in the CSV row.
We accomplish this on the lines 44-54: for each element of the array, we walk through all the collected fields in the header and then we add the proper value. If it exists an element of the array with a name corresponding to the current field of the header, we add its value, otherwise we add the empty string.
After that, we just join all the values of the rows, and then all the rows (lines 59-63).
Here we show only the method to convert objects to CSV, FromObjectsToFile. The process to convert values is also simple, the only thing we have to remember is to add ourselves a head row, since we cannot deduct its elements from the names of the fields.
Preparing the Data Values
You will have noticed that, before writing the data, we call PrepareForCSV. That is to prepare the data to being wrote in the CSV format. The data is given to the CSV Converter in a clean state: all quirks specific of the original format (e.g., escaping) were removed beforehand. However, these quirks must be taken care of in output. This is what the function does for CSV.
CSVConverter.cs (partial)
public class CSVConverter : IConverter<DataItem>
{
    private string PrepareForCSV(string text)
    {
        // escape any double quotes
        if(text.Contains("\""))
            text = text.Replace("\"","\"\"");

        // we add enclosing double quotes if necessary
        if(Regex.IsMatch(text, @"(,|""|^[ \t]|[ \t]$)"))
            text = $"\"{text}\"";

        return text;
    }

    [..]
}
We escape any double quotes present and add enclosing double quotes, if it is necessary.
Converting from CSV
Converting a CSV file in our data format looks more straightforward.
CSVConverter.cs (partial)
[..]

    public DataItem FromFile(Stream dataFile)
    {
        ICharStream chars = CharStreams.fromStream(dataFile);
        CSVLexer csvLexer = new CSVLexer(chars);
        CommonTokenStream commonTokenStream = new CommonTokenStream(csvLexer);
        CSVParser csvParser = new CSVParser(commonTokenStream);
        CSVConverterVisitor visitor = new CSVConverterVisitor();

        try
        {
            return visitor.VisitCsv(csvParser.csv());
        }
        catch
        {
            return new DataItem();
        }
    }
}
It is a move in two phases: first we parse the file, then we use our custom visitor to convert the CSV file in a DataItem. Of course there is a bit of work to do that, but it is hidden inside the visitor.
The CSV Visitor
CSVConverterVisitor.cs
public class CSVConverterVisitor
{
    public DataArray VisitCsv(CSVParser.CsvContext context)
    {
        DataArray arr = new DataArray();

        List<string> names = new List<string>();

        foreach(var n in context.hdr().row().field())
        {
            names.Add(n.GetText());
        }

        foreach(var r in context.row())
        {
           arr.AddValue(VisitRow(names, r));
        }

        return arr;
    }

    public DataItem VisitRow(List<string> names, CSVParser.RowContext context)
    {
        DataObject item = new DataObject();

        if(names.Count != context.field().Length)
            throw new Exception("Wrong number of elements");

        for(int a = 0; a < names.Count; a++)
        {
            item.AddField(names[a], new DataValue(){ Text = CleanField(context.field()[a].GetText())});
        }

        return item;
    }

    private String CleanField(string text)
    {
        // we trim any enclosing quotes
        text = text.Trim('\"');

        // we remove escaping from double quotes
        if(text.Contains("\"\""))
            return text.Replace("\"\"","\"");
        else
            return text;
    }
}
The visitor is hardly complicated: we first collect all the names, that is to say all the elements of the first row, then for each row we pair an element with the corresponding name.
Our visitor contain minimal error checking: we only make sure that each row has the same number of elements, but that’s it. For simplicity we do not do that, but in a real application we would have to check if the first row is actually an header row or just a simple row. In fact, the header row is optional, so it might not be present. The issue is that there is not a 100% sure way to do it automatically. A simple way to check whether the first line is actually an header would be:
- to check that the type of each element of the first line is always a string
- to check that the types of the elements of the first line are different from the types of the elements of the subsequent lines
One thing that we do is cleaning the value data from any artifact of the CSV format. For instance, we remove escaped double quotes. What we are doing in the CleanField is essential because any format has its quirks, so we have to deal with them to. This is the right place to ensure that the data enters our assembly line in its true value.
Converting to JSON
The conversion from and to JSON is similar, but there are differences because we use the popular library Newtonsoft.Json.
The FromFile method is not shown since it is equivalent to the one for the CSV format.
JSONConverter.cs
public class JsonConverter : IConverter<DataItem>
{

    public string ToFile(DataItem data)
    {
        JContainer container = null;
        if(data is DataArray)
        {
            container = ConvertToJsonArray(data as DataArray);
        }
        else if(data is DataObject)
        {
            container = ConvertToJsonObject(data as DataObject);
        }

        JsonSerializerSettings settings = new JsonSerializerSettings();
        settings.ReferenceLoopHandling = ReferenceLoopHandling.Ignore;
        settings.Formatting = Formatting.Indented;

        return JsonConvert.SerializeObject(container, settings);
    }

    [..]
}
Most of the work is done by the functionalities provided by the library. We created two different methods to call depending on whether the root element is DataArray or a DataObject.
We are going to see only the one for the DataObject, since they are very similar.
JSONConverter.cs
private JObject ConvertToJsonObject(DataObject data)
{
    JObject obj = new JObject();
    JProperty prop = null;

    foreach(var field in data.Fields)
    {
        if(field.Value is DataArray == false && field.Value is DataObject == false)
        {
            prop = GetProperty(field.Text, field.Value as DataValue);
        }
        else if(field.Value is DataArray)
        {
            prop = new JProperty(field.Text, ConvertToJsonArray(field.Value as DataArray));
        }
        else if(field.Value is DataObject)
        {
            prop = new JProperty(field.Text, ConvertToJsonObject(field.Value as DataObject));
        }

        obj.Add(prop);
    }

    return obj;
}
Basically, we determine the type of the Fields of the object and then we act accordingly. If the field is a complex type, we call recursively the proper function to convert the DataObject or the DataArray, otherwise we directly add the value to the element. Once we have a full object, we return it to the caller.
Just like for CSV we use a function, GetProperty (not shown), to ensure that the data is outputted in the correct way, for the JSON format. This way depends on the type of the data. Using the NewtonSoft library this would be done automatically if we had the data in the right type. But we do not. We have all the data stored in the String type for simplicity, so we must do the conversion here.
The JSON Visitor
JSONConverterVisitor.cs (partial)
public class JSONConverterVisitor
{
    public DataItem VisitJson(JSONParser.JsonContext context)
    {
        return VisitComplex_value(context.complex_value());
    }

    public DataItem VisitComplex_value(JSONParser.Complex_valueContext context)
    {
        if(context.obj() != null)
            return VisitObj(context.obj());
        else if(context.array() != null)
            return VisitArray(context.array());
        else
            return new DataItem();
    }
The JSON Converter visitor follows the same general principle: we recursively call the method that is necessary to convert an object, array or value. The root of every JSON file is either an array or an object, so we start with visiting a complex_value element. The VisitComplex_value method is the one that we are going to call each time we find something that could be either an object or an array. In turn, this method will call the proper method to deal with either of the two.
Let’s see the VisitObj method, since they both works on the same principles.
JSONConverterVisitor.cs (partial)
public DataObject VisitObj(JSONParser.ObjContext context)
{
    if(context.pair() != null && context.pair().Length > 0)
    {
        DataObject obj = new DataObject();

        foreach(var p in context.pair())
        {
            if(p.value() != null)
                obj.AddField(VisitPair(p));
            else
                obj.AddField(p.STRING().GetText().Trim('"'), VisitComplex_value(p.complex_value()));
        }

        return obj;
    }
    else
    {
        return new DataObject();
    }
}

public DataField VisitPair(JSONParser.PairContext context)
{
    return new DataField(){ Text = context.STRING().GetText().Trim('"'),
                            Value = new DataValue() { Text = JToken.Parse(context.value().GetText()).ToString() } };
}
Basically for each pair of the object (e.g., "name": "value" or "name": []) we determine if the value of the pair is a simple value or it contains a complex element, like an array or another object. If the pair contains a simple value, we can directly call a field (by calling VisitPair). Otherwise, we get the name of the field from the pair and then call the VisitComplex_value method to determine the proper value of the field.
This is a very simple and common pattern, but it is effective, thanks to the power of recursion.
One interesting thing is that, on lines 12 and 25, we trim any delimiting quotes present in the name of the field. That is because the JSON standard requires the name to be enclosed between quotes, but the quotes are not really part of the name. We use a function of a the NewtonSoft library to perform the operation on the actual value of the field.
Summary
We have a created a simple, but effective service to convert between different formats. We have seen some of the challenges and the opportunities that comes with it. When choosing this road, you have to solve the problem once, but you also have to solve the general (i.e., the harder) version of the problem. So, it is has both advantages and drawbacks.
In this tutorial we have developed a simple version of what you can do, in order to keep the amount of information manageable, however we think the code can be easily expanded in what you need. The code in the repository also include a basic HTML interface to simplify playing with the service.
| Published on Java Code Geeks with permission by Federico Tomassetti, partner at our JCG program. See the original article here: So Much Data, So Many Formats: a Conversion Service Opinions expressed by Java Code Geeks contributors are their own. |

Have not as yet worked through the whole tutorial, but it is a great idea and well presented. I will definitely be working on this in the near future.