“I love writing authentication and authorization code.” ~ No Java Developer Ever. Tired of building the same login screens over and over? Try the Okta API for hosted authentication, authorization, and multi-factor auth.
Kotlin was recently given official Android support status by Google, but it remains difficult to understand for many developers. The best way to start is by creating a complete app yourself, which you’ll do in this tutorial. In this tutorial, you’ll use Spring Boot for the API that powers your Android (+ Kotlin) mobile app. Spring Boot is a great way to create a robust REST API with a minimal amount of code.
I’m going to assume you have some Java experience and have at least played around with creating an Android app. If you don’t have any Android experience you should be able to follow along but you might have to Google a few things here and there.
Here is the complete code if you rather go straight to the end.
Before we start, let’s talk a bit about Kotlin.
Kotlin vs Java
Kotlin looks strange to newcomers. It resembles other languages you may have seen but some things look off, often because it is so concise!
Don’t panic – because it is so extensible there are many ways to write the same code, and many shortcuts that aren’t available in other languages. For example, often you’ll see curly brackets used as function parameters:
dialogBuilder.setPositiveButton("Delete", { dialog, whichButton ->
    deleteMovie(movie)
})
This is actually creating an anonymous function (a lambda) and passing it in. This function takes in two parameters which are here inferred. Take a look at the equivalent (pre-JRE 8) Java code:
dialogBuilder.setPositiveButton("Delete",
    new DialogInterface.OnClickListener() {
        public void onClick(DialogInterface dialog, int which) {
            deleteMovie(movie);
        }
    }
);
(Of course, now Java 8 has lambdas too).
Here is another example of some code we will use in a bit:
class MovieViewHolder(val view: View) : RecyclerView.ViewHolder(view)
In order to understand this you have to know several things:
Declaring a class with parentheses (i.e. (view: View)) means you are declaring the class’s primary constructor (and yes – there are secondary constructors as well). The colon : is similar to implements or extends but really is about Interfaces. Anything declared in the primary constructor is automatically declared as a property (member variable).
For clarity, this is the equivalent Java:
public static class MovieViewHolder extends RecyclerView.ViewHolder {
    public final View view;
    public MovieViewHolder(View v) {
        super(v);
        view = v;
   }
}
As a last example, look at the following bean:
package demo

data class Movie( val id: Int, val name: String )
That is the complete file. It declares a class with a constructor, two read-only properties (member variables), and assigns those in the constructor. Then data creates getters and setters for all our member variables, as well as equals(), toString() and others (see here if you want to see it in it’s full Java glory).
Now that you’ve got some background, let’s get started!
Create the Spring Boot API for Your Android + Kotlin Project
The official Spring Boot tutorials suggest you use the Initializr Website to create a starting skeleton but I find it easier to build projects from scratch.
To start, initialize an empty directory with Gradle (make sure you’ve installed Gradle and that it’s available on the command line).
C:\Users\Karl\Kotlin-Spring>gradle init

BUILD SUCCESSFUL in 3s
2 actionable tasks: 2 executed
C:\Users\Karl\Kotlin-Spring>
You should have two folders and four files.
.
+-- build.gradle
+-- gradle
¦   L-- wrapper
¦       +-- gradle-wrapper.jar
¦       L-- gradle-wrapper.properties
+-- gradlew
+-- gradlew.bat
L-- settings.gradle

2 directories, 6 files
Now change build.gradle to the following:
buildscript {
    ext.kotlin_version = '1.2.61' // Required for Kotlin integration
    ext.spring_boot_version = '2.0.2.RELEASE'
    repositories {
        jcenter()
    }
    dependencies {
        // Required for Kotlin integration
        classpath "org.jetbrains.kotlin:kotlin-gradle-plugin:$kotlin_version"
        // See https://kotlinlang.org/docs/reference/compiler-plugins.html#kotlin-spring-compiler-plugin
        classpath "org.jetbrains.kotlin:kotlin-allopen:$kotlin_version"
        classpath("org.jetbrains.kotlin:kotlin-noarg:$kotlin_version")
        classpath "org.springframework.boot:spring-boot-gradle-plugin:$spring_boot_version"
    }
}

// Required for Kotlin integration
apply plugin: 'kotlin'
// See https://kotlinlang.org/docs/reference/compiler-plugins.html#kotlin-spring-compiler-plugin
apply plugin: "kotlin-spring"
apply plugin: 'kotlin-jpa'
apply plugin: 'org.springframework.boot'
apply plugin: 'io.spring.dependency-management'

jar {
    baseName = 'kotlin-demo'
    version = '0.1.0-SNAPSHOT'
}

repositories {
    jcenter()
}

dependencies {
    // Required for Kotlin integration
    compile "org.jetbrains.kotlin:kotlin-stdlib:$kotlin_version"
    compile "org.jetbrains.kotlin:kotlin-reflect" // For reflection
    compile 'org.springframework.boot:spring-boot-starter-data-rest'
    compile 'org.springframework.boot:spring-boot-starter-data-jpa'
    compile 'com.h2database:h2'
}
Here the Kotlin and Spring Boot plugins are imported, external repositories are declared, and dependency libraries are added.
If you haven’t used Spring Boot before you should know that it (or rather the Spring Framework) uses dependency injection at runtime. This means the entire application is wired up automatically based on the libraries you import. For example, at the end of our build.gradle you’ll see the Data REST and Data JPA libraries. Spring Boot will automatically configure your application as a REST server when it sees two these libraries. Furthermore, since you included the H2 database library Spring will use the H2 database engine to persist any of our REST data coming in and out of queries.
All you need to have a complete REST application, is to define a class with the @SpringBootApplication annotation. You don’t even need to specify it’s path – Spring will search for it!
Put the following into src/main/kotlin/demo/Application.kt:
package demo

import org.springframework.boot.SpringApplication
import org.springframework.boot.autoconfigure.SpringBootApplication

@SpringBootApplication
class Application

fun main(args: Array) {
    SpringApplication.run(Application::class.java, *args)
}
Now if you run gradlew bootRun (./gradlew bootRun on *nix) everything should build (and download) and you should see somewhere in the enormous log Started Application. Now run curl in another window to see what is happening.
C:\Users\Karl>curl localhost:8080
{
  "_links" : {
    "profile" : {
      "href" : "http://localhost:8080/profile"
    }
  }
}
Amazingly, you’ve created a fully compliant REST server with Kotlin, all by editing just two files!
Add Objects with Kotlin
To create objects you just need the entity class and a repository.
Next to Application.kt put the following into Model.kt
package demo

import javax.persistence.*

@Entity
data class Movie(@Id @GeneratedValue(strategy = GenerationType.IDENTITY)
                 val Id: Long,
                 val name: String)
Here you’ve used the data idiom to create getters and setters for all the properties, as well as JPA annotations to specify how to generate the ids for your entity.
Note: The Id field must start with a capital I. If it doesn’t, the server won’t return the id field when doing queries. This will give you trouble down the line when hooking up to the client app.
Now put this into Repository.kt:
package demo

import org.springframework.data.repository.CrudRepository

interface ItemRepository : CrudRepository<Movie, Long>
And you’ve done it! Incredibly, we can now perform any CRUD operation on this server and it will work, persisting all changes to the database.
C:\Users\Karl>curl -X POST -H "Content-Type:application/json" -d " {\"name\":\"The 40 Year Old Virgin\"} " localhost:8080/movies
{
  "name" : "The 40 Year Old Virgin",
  "_links" : {
    "self" : {
      "href" : "http://localhost:8080/movies/1"
    },
    "item" : {
      "href" : "http://localhost:8080/movies/1"
    }
  }
}
C:\Users\Karl>curl localhost:8080/movies/1
{
"name" : "The 40 Year Old Virgin",
"_links" : {
"self" : {
"href" : "http://localhost:8080/movies/1"
},
"item" : {
"href" : "http://localhost:8080/movies/1"
}
}
}Load Initial Data in your Kotlin App
To finish up, let’s load some data. Again, as with Spring Boot everything can be done simply. Just put the following into src/main/resources/data.sql and it will be run on boot.
INSERT INTO movie (name) VALUES
  ('Skyfall'),
  ('Casino Royale'),
  ('Spectre');
To confirm it works, restart the server and run curl localhost:8080/movies.
And you are done with the back-end. Time to build out the client.
Build Your Android App with Kotlin
This will require a couple of steps: First you’ll create an empty Kotlin app with Android Studio. You’ll then create a list view (with add, edit and delete buttons) using RecyclerView, populating it with hard-coded data. Finally, you’ll use Retrofit to wire the view to the REST back-end you’ve just created.
Create a project in Android Studio. Make sure you’re using at least version Android Studio 3. Use the default values for each window except make sure you include Kotlin support. Name the project whatever you want – I called mine “Kotlin Crud”. At the end, select an Empty Activity.
When you press Play on the top icon bar you should see Hello World when you run it (you can either plug in your phone or run it on an emulator. Check online for how to set this up).
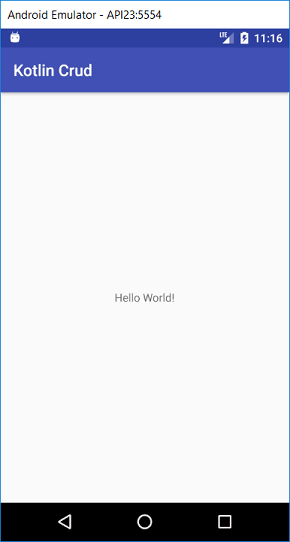
If you’ve made an Android app before using Java you’ll notice the only difference is the main activity: it’s called MainActivity.kt, not MainActivity.java, and the code looks a bit different.
package demo

import android.support.v7.app.AppCompatActivity
import android.os.Bundle

class MainActivity : AppCompatActivity() {

   override fun onCreate(savedInstanceState: Bundle?) {
       super.onCreate(savedInstanceState)
       setContentView(R.layout.activity_main)
   }
}
Here are the differences:
- The class is not specified as
public(in Kotlin this is the default) - Types are specified with a colon
:– the class is of typeAppCompatActivity(or rather it implementsAppCompatActivity, as you would say in Java) and thesavedInstanceStateis of typeBundle - Methods are just called
funinstead of function overrideis not an annotation- The question mark means a parameter is optional (which is not possible in Java)
The last point is one of the most talked about when discussing the importance of Kotlin vs Java: it’s one of the various ways the language ensures null safety.
Import Additional Android Libraries
You need to add extra libraries to your application’s build.gradle file: one for the recycler view (which you’ll use in a second), one for the card view, and another for the floating action button. Place these next to the others in the dependencies section.
implementation 'com.android.support:design:27.1.1'
implementation 'com.android.support:cardview-v7:27.1.1'
implementation 'com.android.support:recyclerview-v7:27.1.1'
Android Studio should ask you to Sync Now. Click that and see that everything builds without error.
Note: Make sure the version is the same as the other support libraries (e.g. appcompat-v7:27.1.1). Also, because you’ll be using built-in icons (which you should avoid doing in the future) you need to put the following into the defaultConfig section of your build.gradle as well.
vectorDrawables.useSupportLibrary = true
Add Icons in Kotlin
You’ll need some icons for buttons – one for add and another for refresh. Go to the Material Icons site and select the one you like. I’m choosing the add button half the way down. When you click on it a grey and blue download section should appear on the button left. Click the grey box Selected Icons control to open the download options. Now there should be a drop-down where you can select Android as the type.
![]()
Change the color to white and download the PNG option. Extract the contents of the ZIP file to app/src/main (you should see the ZIP file has a res folder in it).
Now you can use the new icons in your layouts. They’re called things like baseline_add_white_36.
Finally do the same thing for the loop icon, also white.
Create the View XML
You need an XML view for each list item. Place the following into src/main/res/layout/list_item.xml.
<?xml version="1.0" encoding="utf-8"?>
<android.support.v7.widget.CardView
    xmlns:android="http://schemas.android.com/apk/res/android"
    xmlns:card_view="http://schemas.android.com/apk/res-auto"

    android:id="@+id/card_view"
    android:layout_width="match_parent"
    android:layout_height="wrap_content"
    android:layout_marginBottom="3dp"
    android:layout_marginLeft="5dp"
    android:layout_marginRight="5dp"
    android:layout_marginTop="5dp"
    android:padding="3dp"
    card_view:cardElevation="2dp"
    card_view:cardMaxElevation="2dp">

    <RelativeLayout
        android:layout_width="match_parent"
        android:layout_height="wrap_content"
        android:padding="5dp">

        <TextView
            android:id="@+id/name"
            android:layout_width="wrap_content"
            android:layout_height="wrap_content"
            android:padding="5dp"
            android:text="lastname"
            android:textSize="16dp" />

        <TextView
            android:id="@+id/btnDelete"
            android:layout_width="wrap_content"
            android:layout_height="35dp"
            android:layout_alignParentRight="true"
            android:drawableLeft="@android:drawable/ic_delete"
            android:padding="5dp" />

        <TextView
            android:id="@+id/btnEdit"
            android:layout_width="wrap_content"
            android:layout_height="35dp"
            android:layout_marginRight="2dp"
            android:layout_toLeftOf="@+id/btnDelete"
            android:drawableLeft="@android:drawable/ic_menu_edit"
            android:padding="5dp" />
    </RelativeLayout>

</android.support.v7.widget.CardView>
Here you’re using a Card View which is the popular way of creating lists in Android. Almost all of the XML is layout settings to ensure proper alignment. Note the android:id values which you use to connect these to our Kotlin files. Also, I’ve used some built in Android icons for our edit and delete buttons.
Note: this is not the recommended way of doing it since those icons can change between Android Studio versions – rather download the icons as we did previously !
Now for the main activity XML. Here is what src/main/res/layout/activity_main.xml should look like.
<?xml version="1.0" encoding="utf-8"?>
<RelativeLayout xmlns:android="http://schemas.android.com/apk/res/android"
    xmlns:tools="http://schemas.android.com/tools"
    android:layout_width="match_parent"
    android:layout_height="match_parent"
    xmlns:app="http://schemas.android.com/apk/res-auto">

    <android.support.v7.widget.RecyclerView
        android:id="@+id/rv_item_list"
        android:layout_width="match_parent"
        android:layout_height="match_parent" />

    <android.support.design.widget.FloatingActionButton
        android:id="@+id/fab"
        android:layout_width="wrap_content"
        android:layout_height="wrap_content"
        android:src="@drawable/baseline_add_white_36"
        android:layout_gravity="bottom|end"
        app:elevation="6dp"
        android:layout_alignParentBottom="true"
        android:layout_alignParentRight="true"
        android:layout_alignParentEnd="true"
        android:layout_margin="20dp"/>

</RelativeLayout>
It’s pretty straight forward. You’ve now got a recycle view and a floating action button inside of a relative layout and have assigned baseline_add_white_36 as the source for the button. Note that the id of the recycler view is rv_list_item (you’ll be using this soon).
Add Refresh to the Action Bar
To fill things out lets put a refresh button on the action bar. This requires a new piece of XML in res/menu/buttons.xml:
<menu xmlns:android="http://schemas.android.com/apk/res/android"
      xmlns:app="http://schemas.android.com/apk/res-auto">

    <item
        android:id="@+id/refresh"
        android:icon="@drawable/baseline_loop_white_48"
        android:title="@string/refresh"
        app:showAsAction="ifRoom"/>

</menu>
Note it has an id called refresh. Also, I’ve used the loop icon from the Android Icons site (the white variant) – you’ll have to download this as before. Also, I’m using a string from the resources so you’ll have to change res/values/strings.xml:
<resources>
    <string name="app_name">Kotlin Crud</string>
    <string name="refresh">Refresh</string>
</resources>
Display Lists in Kotlin
Now to display a list of item using our views. The canonical way of doing this is the relatively new RecyclerView which supplanted the original ListView. The basic idea of a RecyclerView is to create only enough views to show on screen – if the screen can fit five items then only five are created. As you scroll through the list these views are re-used (recycled), replacing their contents with the appropriate (new) values.
How do you get started with this ? The first thing you need is a bean. Let’s call it Movie.kt.
package demo

data class Movie( val id: Int, val name: String )
Note: for all the following classes make sure the package matches that of MainActivity.kt.
Was that not easy? Next, you need an Adapter. This is a class with three methods: one to return how many items in total are being displayed (getItemCount()), one that creates an Android View control for a particular item (onCreateViewHolder()), and one that populates an existing view with an instance of your data (onBindViewHolder()).
Put this into MovieAdapter.kt.
class MovieAdapter : RecyclerView.Adapter() {

    var movies: ArrayList = ArrayList()

    init { refreshMovies() }

    class MovieViewHolder(val view: View) : RecyclerView.ViewHolder(view)

    override fun onCreateViewHolder(parent: ViewGroup,
                                    viewType: Int): MovieAdapter.MovieViewHolder {

        val view = LayoutInflater.from(parent.context)
                .inflate(R.layout.list_item, parent, false)

        return MovieViewHolder(view)
    }

    override fun onBindViewHolder(holder: MovieViewHolder, position: Int) {
        holder.view.name.text = movies[position].name
    }

    override fun getItemCount() = movies.size

    fun refreshMovies() {
        movies.clear()

        movies.add(Movie(0, "Guardians of the Galaxy"))
        movies.add(Movie(1, "Avengers: Infinity War"))
        movies.add(Movie(2,"Thor: Ragnorok"))

        notifyDataSetChanged()
    }
}
When you paste this into Android Studio it will highlight certain things as red. You need to ALT-ENTER (Option + Enter on Mac) several times to pull in the imports you need. Eventually this is the list of imports you should have:
import android.support.v7.widget.RecyclerView
import android.view.LayoutInflater
import android.view.View
import android.view.ViewGroup
import kotlinx.android.synthetic.main.list_item.view.*
A lot is going on in MovieAdapter.kt. Besides just implementing the three methods needed to implement RecylcerView.Adapter, you created a property called movies, a list, and initialise it in the init{} constructor. Also, you declared an inner class called MovieViewHolder. That is what gets instantiated for each view needed to be displayed (in the example discussed, five views). As you can see, onCreateViewHolder actually returns an object of this type. The class is quite simple – it takes into its constructor a View (which is now also a property), and returns a Holder type object. This object is what you then use when you fill in data using onBindViewHolder – in our case, setting the text of our display.
This does seem complicated at first. It good way to look at all this is the following: how does this connect to your main code class (i.e. MainActivity.kt), and how does it connect to the views you’ve defined in XML ?
For the first part, this is what main activity should now look like:
class MainActivity : AppCompatActivity() {

    lateinit var adapter:MovieAdapter

    override fun onCreate(savedInstanceState: Bundle?) {
        super.onCreate(savedInstanceState)
        setContentView(R.layout.activity_main)

        adapter = MovieAdapter()

        rv_item_list.layoutManager = LinearLayoutManager(this)
        rv_item_list.adapter = adapter
    }
}
So here you’ve defined the adapter as a lateinit variable – lateinit is telling Kotlin that you want to initialize this at some stage after creation, not the default in Kotlin classes – normally you have to initialize things immediately.
In the constructor you assign an instance of your adapter to this property (note you don’t need to use new in Kotlin) and assign two things to rv_item_list – a LayoutManager (which is used for positioning), and an Adapter (which we’ve just created).
We should talk about rv_item_list. This is just the id of a control inside of activity_main.xml, specifically the recyclerview. Normally you would need to use findViewById (a pain for Android developers) but with Kotlin you can just specify its name. When Android Studio complains about imports and you ALT-ENTER (or your platform equivalent) it will automatically import kotlinx.android.synthetic.main.activity_main.*, bringing in all the ids into the namespace.
Lastly, add the following two functions to MainActivity:
override fun onCreateOptionsMenu(menu: Menu): Boolean {
    val inflater = menuInflater
    inflater.inflate(R.menu.buttons, menu)
    return true
}

override fun onOptionsItemSelected(item: MenuItem) = when (item.itemId) {
    R.id.refresh -> {
        adapter.refreshMovies()
        Toast.makeText(this.baseContext, "Refreshed", Toast.LENGTH_LONG).show())
        true
    }
    else -> {
        super.onOptionsItemSelected(item)
    }
}
That will inflate the menu xml you defined as well as tying the button to your adapter’s refresh function (and give a convenience toast to say it worked).
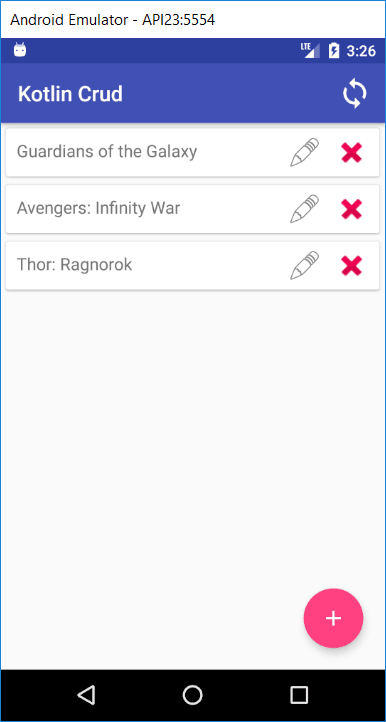
That should be it ! Run our code and you should see the following.
Wiring Your Android + Kotlin App Up
Next you need to replace the hard-coded values with data coming from your API server, as well as wiring the different buttons to their respective API calls. For that you will be using Square’s Retrofit library.
Start by adding the following to your build.gradle dependencies:
implementation 'com.squareup.retrofit2:retrofit:2.3.0'
implementation 'com.squareup.retrofit2:converter-gson:2.3.0'
implementation 'com.squareup.retrofit2:adapter-rxjava2:2.3.0'
implementation 'io.reactivex.rxjava2:rxandroid:2.0.1'
implementation 'com.squareup.okhttp3:logging-interceptor:3.9.1'
Now take a look at what happens when you call your server for a list of movies:
C:\Users\Karl>curl http://localhost:8080/movies
{
  "_embedded" : {
    "movies" : [ {
      "name" : "Skyfall",
      "id" : 1,
      "_links" : {
        "self" : {
          "href" : "http://localhost:8080/movies/1"
        },
        "movie" : {
          "href" : "http://localhost:8080/movies/1"
        }
      }
    }
I’ve only shown one since it’s quite long (Spring follows something called HATEOAS which adds links to json responses). As you can see, the response is wrapped in an _embedded object, and your movies come as a list in movies. You need to represent this in your Kotlin model so Retrofit can know what to expect. Change Movie.kt to this:
import com.google.gson.annotations.SerializedName

data class Movie( val id: Int, val name: String )
data class MovieList (
    @SerializedName("movies" )
    val movies: List
)
data class MovieEmbedded (
    @SerializedName("_embedded" )
    val list: MovieList
)
Now you need to create a new class to setup Retrofit. Let’s call it MovieApiClient.kt:
import io.reactivex.Completable
import io.reactivex.Observable
import retrofit2.Retrofit
import retrofit2.adapter.rxjava2.RxJava2CallAdapterFactory
import retrofit2.converter.gson.GsonConverterFactory
import retrofit2.http.*

interface MovieApiClient {

    @GET("movies") fun getMovies(): Observable
    @POST("movies") fun addMovie(@Body movie: Movie): Completable
    @DELETE("movies/{id}") fun deleteMovie(@Path("id") id: Int) : Completable
    @PUT("movies/{id}") fun updateMovie(@Path("id")id: Int, @Body movie: Movie) : Completable

    companion object {

        fun create(): MovieApiClient {

            val retrofit = Retrofit.Builder()
                    .addCallAdapterFactory(RxJava2CallAdapterFactory.create())
                    .addConverterFactory(GsonConverterFactory.create())
                    .baseUrl("http://10.0.2.2:8080/")
                    .build()

            return retrofit.create(MovieApiClient::class.java)
        }
    }
}
Here you define all the endpoints using annotations as well as their expected return types (Completable, part of RxJava, just means nothing is returned). You also declare a companion object (which is like a static class) which instantiates a Retrofit builder with the details of our API. Note the base url uses the IP 10.0.2.2 which allows emulators to connect to localhost.
Now in MovieAdapter change the header to include a context property (so you can attach toasts for our API results) as well as adding a lazy client property initialized with your previous create() method.
class MovieAdapter(val context: Context) :  RecyclerView.Adapter() {

    val client by lazy { MovieApiClient.create() }
    var movies: ArrayList = ArrayList()
Lazy takes in a function (note the curly brackets) and says “when someone first tries to use this property, run this function and assign it”.
To initialize the context, change the adapter initialize statement to include the main activity context:
adapter = MovieAdapter(this.baseContext)
Now change refreshMovies() in the adapter to the following:
fun refreshMovies() {
    client.getMovies()
        .subscribeOn(Schedulers.io())
        .observeOn(AndroidSchedulers.mainThread())
        .subscribe({ result ->
                movies.clear()
                movies.addAll(result.list.movies)
                notifyDataSetChanged()
        },{ error ->
                Toast.makeText(context, "Refresh error: ${error.message}", Toast.LENGTH_LONG).show()
                Log.e("ERRORS", error.message)
        })
}
So you’re using the client’s getMovies() function which is declared at the top of MovieApiClient.kt. To understand what is going on here is an entire discussion on it’s own. Basically it’s using Reactive Programming which is a new way to wire things that are asynchronous (like calling out to an external API) together.
For the rest of the access methods, put the following after refreshMovies():
fun updateMovie(movie: Movie) {
    client.updateMovie(movie.id, movie)
        .subscribeOn(Schedulers.io())
        .observeOn(AndroidSchedulers.mainThread())
        .subscribe({ refreshMovies() }, { throwable ->
                Toast.makeText(context, "Update error: ${throwable.message}", Toast.LENGTH_LONG).show()
        })
}

fun addMovie(movie: Movie) {
    client.addMovie(movie)
        .subscribeOn(Schedulers.io())
        .observeOn(AndroidSchedulers.mainThread())
        .subscribe({ refreshMovies() }, { throwable ->
                Toast.makeText(context, "Add error: ${throwable.message}", Toast.LENGTH_LONG).show()
        })
}

fun deleteMovie(movie: Movie) {
    client.deleteMovie(movie.id)
        .subscribeOn(Schedulers.io())
        .observeOn(AndroidSchedulers.mainThread())
        .subscribe({ refreshMovies() }, { throwable ->
                Toast.makeText(context, "Delete error: ${throwable.message}", Toast.LENGTH_LONG).show()
        })
    }
Here you use the Retrofit reactive calls as before, but instead just call refreshMovies() when things return successfully (and make a toast of the error if they do not).
Show Dialogs in Kotlin
The last thing you need is to show dialogs for the various input situations: delete, edit, and add. Here you’ll do this manually so you don’t have to create any new XML.
In MainActivity.kt add the following function:
fun showNewDialog() {
val dialogBuilder = AlertDialog.Builder(this)
val input = EditText(this@MainActivity)
val lp = LinearLayout.LayoutParams(
LinearLayout.LayoutParams.MATCH_PARENT,
LinearLayout.LayoutParams.MATCH_PARENT)
input.layoutParams = lp
dialogBuilder.setView(input)
dialogBuilder.setTitle("New Movie")
dialogBuilder.setMessage("Enter Name Below")
dialogBuilder.setPositiveButton("Save", { dialog, whichButton ->
adapter.addMovie(Movie(0,input.text.toString()))
})
dialogBuilder.setNegativeButton("Cancel", { dialog, whichButton ->
//pass
})
val b = dialogBuilder.create()
b.show()
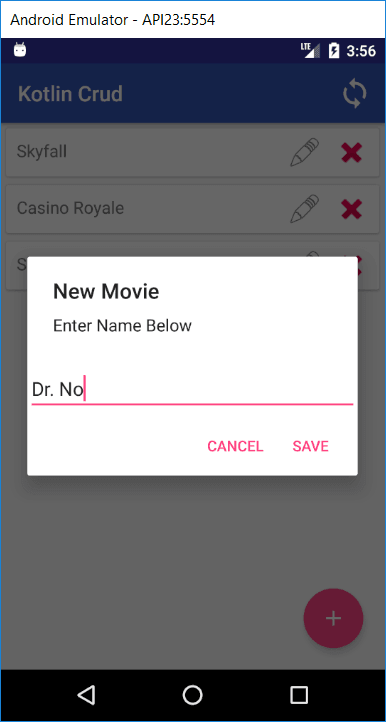
}Here the Dialog Builder is used to show a standard pop-up. You’ve also manually added in an EditText control so the user can enter in a new name. Listeners are made for the Positive and Negative buttons (see the Adding Buttons section of the previous link), and when Positive happens (a dialog confirmation) the adapter’s addMovie function is called.
To make sure this dialog pops up when you click the action button, put the following at the bottom of MainActivity.onCreate() function:
fab.setOnClickListener{ showNewDialog() }Here is the code for the other dialogs, which we’ll put intoMovieAdapter:
fun showUpdateDialog(holder: MovieViewHolder, movie: Movie) {
    val dialogBuilder = AlertDialog.Builder(holder.view.context)

    val input = EditText(holder.view.context)
    val lp = LinearLayout.LayoutParams(
             LinearLayout.LayoutParams.MATCH_PARENT,
             LinearLayout.LayoutParams.MATCH_PARENT)
    input.layoutParams = lp
    input.setText(movie.name)

    dialogBuilder.setView(input)

    dialogBuilder.setTitle("Update Movie")
    dialogBuilder.setPositiveButton("Update", { dialog, whichButton ->
        updateMovie(Movie(movie.id,input.text.toString()))
    })
    dialogBuilder.setNegativeButton("Cancel", { dialog, whichButton ->
        dialog.cancel()
    })
    val b = dialogBuilder.create()
    b.show()
}

fun showDeleteDialog(holder: MovieViewHolder, movie: Movie) {
    val dialogBuilder = AlertDialog.Builder(holder.view.context)
    dialogBuilder.setTitle("Delete")
    dialogBuilder.setMessage("Confirm delete?")
    dialogBuilder.setPositiveButton("Delete", { dialog, whichButton ->
        deleteMovie(movie)
    })
    dialogBuilder.setNegativeButton("Cancel", { dialog, whichButton ->
        dialog.cancel()
    })
    val b = dialogBuilder.create()
    b.show()
}
To wire them up, add the following to the onBindViewHolder method:
holder.view.btnDelete.setOnClickListener { showDeleteDialog(holder, movies[position]) }
holder.view.btnEdit.setOnClickListener { showUpdateDialog(holder, movies[position]) }
You’re almost done. You just need to give your app permission to access the outside server (the internet). Add the following above the <application> node in your AndroidManifest.xml.
<?xml version="1.0" encoding="utf-8"?>
<android.support.constraint.ConstraintLayout xmlns:android="http://schemas.android.com/apk/res/android"
    xmlns:app="http://schemas.android.com/apk/res-auto"
    xmlns:tools="http://schemas.android.com/tools"
    android:layout_width="match_parent"
    android:layout_height="match_parent"
    tools:context=".LoginActivity">

    <LinearLayout
        android:layout_width="fill_parent"
        android:layout_height="fill_parent"
        android:orientation="vertical"
        android:gravity="center">

        <TextView
            android:id="@+id/auth_message"
            android:layout_width="wrap_content"
            android:layout_height="wrap_content"
            android:layout_gravity="center"
            android:paddingBottom="8pt"
            android:text="Initializing authorization"
            style="@style/Base.TextAppearance.AppCompat.Medium"/>

        <ProgressBar
            android:id="@+id/progress_bar"
            style="@style/Widget.AppCompat.ProgressBar.Horizontal"
            android:layout_width="match_parent"
            android:layout_height="wrap_content"
            android:indeterminate="true"/>

        <Button
            android:id="@+id/auth_button"
            style="@style/Widget.AppCompat.Button.Colored"
            android:text="Login"
            android:layout_width="wrap_content"
            android:layout_height="wrap_content"
            android:layout_gravity="center"
            android:visibility="gone" />

    </LinearLayout>
</android.support.constraint.ConstraintLayout>
Now run your app. You should be able to add, edit and delete, all persisted to the back-end and each action with a dialog to confirm or with details. You’ve just made a complete CRUD client-app solution!
Add Authentication for a Secure Mobile App with Android and Kotlin
Most modern apps require some level of security, so it’s worthwhile to know how to add authentication quickly and easily. For this, you’ll use the OktaAppAuth wrapper library.
Why Okta?
Okta’s goal is to make identity management a lot easier, more secure, and more scalable than what you’re used to. Okta is a cloud service that allows developers to create, edit, and securely store user accounts and user account data, and connect them with one or multiple applications. Our API enables you to:
- Authenticate and authorize your users
- Store data about your users
- Perform password-based and social login
- Secure your application with multi-factor authentication
- And much more! Check out our product documentation
Register for a forever-free developer account, and when you’re done, create a new Native Application and make note of the client id and redirect URI.
Add an OAuth 2.0 Authorization Server
First you need to turn your server into an OAuth resource (managed by Okta). Add the following to your build.gradle.
compile 'com.okta.spring:okta-spring-boot-starter:0.5.0'
compile 'org.springframework.boot:spring-boot-starter-security'
compile 'org.springframework.security.oauth:spring-security-oauth2:2.2.0.RELEASE'
compile 'org.springframework.security.oauth.boot:spring-security-oauth2-autoconfigure:2.0.1.RELEASE'
Now add the following import to your Application.kt.
import org.springframework.security.oauth2.config.annotation.web.configuration.EnableResourceServer
Also annotate the class with @EnableResourceServer. Then create a file called src/main/resource/application.properties:
okta.oauth2.issuer=https://{yourOktaDomain}/oauth2/default
okta.oauth2.clientId={clientId}
You can get the client ID value in the Applications tab in the Okta management website when you login.
Now when you restart Spring Boot and try access your API anonymously, you will get an authorization error.
C:\Users\Karl>curl localhost:8080/movies
{"error":"unauthorized","error_description":"Full authentication is required to access this resource"}
Add the Android AppAuth Plugin
To make our app use Okta you need to use the AppAuth plugin for Android. Start by creating a new activity to house the login process.
Go to New -> Activity -> Empty Activity and call it LoginActivity. Inside of the created activity_login.xml place the following:
<?xml version="1.0" encoding="utf-8"?>
<android.support.constraint.ConstraintLayout xmlns:android="http://schemas.android.com/apk/res/android"
    xmlns:app="http://schemas.android.com/apk/res-auto"
    xmlns:tools="http://schemas.android.com/tools"
    android:layout_width="match_parent"
    android:layout_height="match_parent"
    tools:context=".LoginActivity">

    <LinearLayout
        android:layout_width="fill_parent"
        android:layout_height="fill_parent"
        android:orientation="vertical"
        android:gravity="center">

        <TextView
            android:id="@+id/auth_message"
            android:layout_width="wrap_content"
            android:layout_height="wrap_content"
            android:layout_gravity="center"
            android:paddingBottom="8pt"
            android:text="Initializing authorization"
            style="@style/Base.TextAppearance.AppCompat.Medium"/>

        <ProgressBar
            android:id="@+id/progress_bar"
            style="@style/Widget.AppCompat.ProgressBar.Horizontal"
            android:layout_width="match_parent"
            android:layout_height="wrap_content"
            android:indeterminate="true"/>

        <Button
            android:id="@+id/auth_button"
            style="@style/Widget.AppCompat.Button.Colored"
            android:text="Login"
            android:layout_width="wrap_content"
            android:layout_height="wrap_content"
            android:layout_gravity="center"
            android:visibility="gone" />

    </LinearLayout>
</android.support.constraint.ConstraintLayout>
Now inside of AndroidManifest.xml swap the names of the login activity and main activity so that it’s the login which is launched on startup.
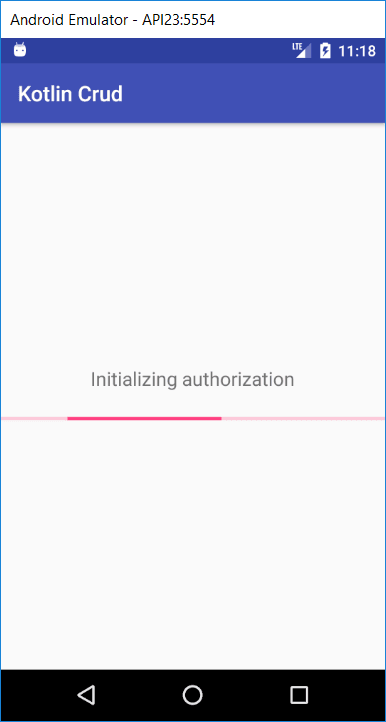
You’ve added a progress bar which will stay until the authorization connection to Okta has been made. Once it is complete you’ll hide that and then show a login button. To do that you need to change LoginActivity.kt. But first, add the following to your build.gradle.
implementation 'com.okta.android:appauth-android:0.1.0'
That will pull in the Okta AppAuth library for Android. You also need to change the support lib version to 25.3.1 so that it’s compatible with this library, so change any references to the other versions (e.g. 27.1.1) to that version. Also, change the minSdkVersion to 16 and the target SDK to 25. Finally, add the following to defaultConfig:
android.defaultConfig.manifestPlaceholders = [
    // match the protocol of your "Login redirect URI"
    "appAuthRedirectScheme": "com.oktapreview.dev-628819"
]
Now everything should build fine.
Next, change the contents of LoginActivity.kt to the following:
class LoginActivity : AppCompatActivity() {

    private var mOktaAuth: OktaAppAuth? = null

    override fun onCreate(savedInstanceState: Bundle?) {
        super.onCreate(savedInstanceState)

        mOktaAuth = OktaAppAuth.getInstance(this)

        setContentView(R.layout.activity_login)

        mOktaAuth!!.init(
                this,
                object : OktaAppAuth.OktaAuthListener {
                    override fun onSuccess() {
                        auth_button.visibility = View.VISIBLE
                        auth_message.visibility = View.GONE
                        progress_bar.visibility = View.GONE
                    }

                    override fun onTokenFailure(ex: AuthorizationException) {
                        auth_message.text = ex.toString()
                        progress_bar.visibility = View.GONE
                        auth_button.visibility = View.GONE
                    }
                }
        )

        val button = findViewById(R.id.auth_button) as Button
        button.setOnClickListener { v ->
                val completionIntent = Intent(v.context, MainActivity::class.java)
                val cancelIntent = Intent(v.context, LoginActivity::class.java)

                cancelIntent.flags = Intent.FLAG_ACTIVITY_CLEAR_TOP

                mOktaAuth!!.login(
                        v.context,
                        PendingIntent.getActivity(v.context, 0, completionIntent, 0),
                        PendingIntent.getActivity(v.context, 0, cancelIntent, 0)
                )
        }
    }
}
This will try initialize Okta authentication and hide both the progress bar and the message when done, showing a login button. Right now you’ll see an error if you try to run it. We need to add in the Okta app details to our project
Configure Your Okta App
Create app/src/main/res/raw/okta_app_auth_config.json and place the following inside:
{
  "client_id": "{clientId}",
  "redirect_uri": "{redirectUriValue}",
  "scopes": ["openid", "profile", "offline_access"],
  "issuer_uri": "https://{yourOktaDomain}/oauth2/default"
}
The clientId and redirectUriValues you should get from your application in the Okta management console.
Now when you restart your app you should see a login button.
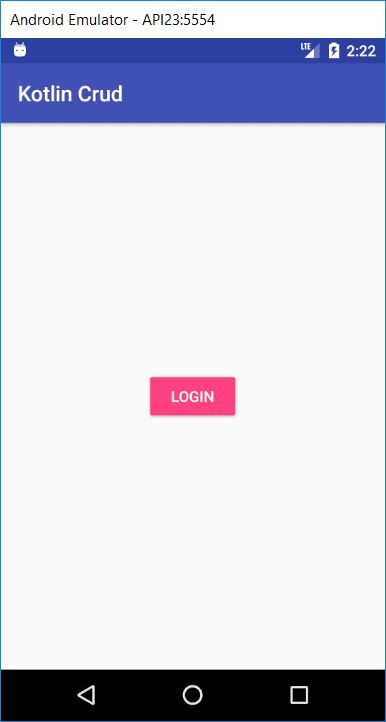
Pressing it will take you to a pre-build Okta login screen. If you login using credentials on your Okta account you’ll be let through to our main activity but the list will be empty – and you should get a 401 error toast popup (unauthorized access).
Add Authorization to Retrofit
You need to get the access token out of the AppAuth library and pass it to Retrofit when API calls are made. Inside of MainActivity.kt add the following function:
fun readAuthState(): AuthState {
    val authPrefs = getSharedPreferences("OktaAppAuthState", Context.MODE_PRIVATE)
    val stateJson = authPrefs.getString("state", "")
    return if (!stateJson!!.isEmpty()) {
        try {
            AuthState.jsonDeserialize(stateJson)
        } catch (exp: org.json.JSONException) {
            Log.e("ERROR",exp.message)
            AuthState()
        }

    } else {
        AuthState()
    }
}
It uses shared preferences to pull out the authorization data stored by Okta.
Now change the header of your adapter so that it accepts an access token as a string.
class MovieAdapter(val context: Context, val token: String?)
Then when you instantiate it in MainActivity pass in the token from the auth state object.
adapter = MovieAdapter(this.baseContext, readAuthState().accessToken)
Now you need to change the get call for movies in MovieApiClient.kt to include an authorization header.
@GET("movies") fun getMovies(@Header("Authorization") token:String): ObservableBack in the adapter, change refreshMovies() to use this new header – with the new token and a Bearer prefix:
fun refreshMovies() {
    client.getMovies("Bearer $token")
}
You’ll need to do the same changes to the other methods (add, delete, update) in order for those functions to work with your authenticated back-end.
That should be it. Redeploy the app and you should get through to a list as before – this time it is authenticated!
Congratulations! You’ve just made a complete client-server solution, with a robust and compliant REST back-end, and an Android application on the front using the latest technologies, all with central, industry-standard authentication. You can find the example created in this tutorial on GitHub.
Learn More about Android, Java, and Secure Authentication
We’ve written some other cool Spring Boot and Android tutorials, check them out if you’re interested.
- Get Started with Spring Boot, OAuth 2.0, and Okta
- Bootiful Development with Spring Boot and React
- Create a Basic Android App without an IDE
Finally, if you want to learn more about Kotlin a great place to look once you’ve worked with it for a bit is the Kotlin idioms page.
If you have any questions, please don’t hesitate to leave a comment below, or ask us on our Okta Developer Forums. Follow us on Twitter @oktadev if you want to see more tutorials like this one!
“I love writing authentication and authorization code.” ~ No Java Developer Ever. Tired of building the same login screens over and over? Try the Okta API for hosted authentication, authorization, and multi-factor auth.
‘Build a Basic CRUD App in Android with Kotlin’ was originally published on the Okta developer blog on September 11, 2018.

Wow, that’s a great tutorial. I have no experience developing in Kotlin but I feel like this tutorial is very helpful for when I get started. I like how you’ve added more than just a “hello world”, you’ve added buttons and dialogs and so on. Thanks!
Thanks, Ben. Glad to hear it helped
First and foremost a very nice tutorial!
In the very first part of your demo you have ‘src/main/kotlin/demo/Application.kt’
However in the code on this page it has a typo in main or maybe the page isn’t displaying properly, it has this:
fun main(args: Array) {
SpringApplication.run(Application::class.java, *args)
}
Should be :
fun main(args: Array<String>) {
SpringApplication.run(Application::class.java, *args)
}