This article explores how to use Android Nearby showing how to integrate Android and Android Things. There are several strategies we can use to integrate Android and Android Things, Android Nearby technology is one of them. Android provides a set of API that simplifies the data exchange between two different devices. One interesting aspect is the Android Nearby supports also iOS operating system.
Android Nearby is a technology that supports three different strategies to integrate Android devices:
- Android Nearby Messages: This uses a publisher/subscriber paradigm to exchange simple payload between two different Android devices.
- Android Nearby Connections: It is a peer-to-peer network that enables apps to discover, connect and exchange data between devices. This kind of strategy supports high-bandwidth and it can be useful in several scenarios (Gaming, file sharing and so on)
- Android Nearby Notification: This technology enables users to receive notifications around them using apps or websites
This article discovers how to use Android Nearby Connections to integrate Android and Android Things devices. The main goal is showing how to send data from an Android smartphone to an Android Things device and display this information using an LCD display connected to Android Things.
Table Of Contents
Android Nearby Connections
Android Nearby connections is a peer-to-peer network. There are two main roles in this network:
- The Advertiser that advertises itself waiting for incoming connections
- The Discoverer that looks for an Advertiser to connect
Once the Discoverer has found an Advertiser they can establish a connection and exchange data. Under the hood, Android Nearby API uses a set of technology to establish the connection between different devices. It can be Bluetooth or Wifi. The API leverages the strength of each type of technology to guarantee a reliable connection. The developer and the user do not have to worry about it, it is completely transparent.
In this tutorial, the Android Things device plays the role of the Advertiser that waits for incoming Discoverer. The Android device is the Discoverer that looks for an Advertiser to connect to. In order to complete this tutorial is necessary to implement two different apps:
- Android Things app that receives data and handles the LCD display
- Android app that sends the data to Android Things
Moreover, Android Nearby connections supports different strategies for discovering and advertising. Generally speaking, these two strategies are:
- P2P_Cluster that supports a M-to-N network topology where each device can accept incoming connections and initiate new connections toward other devices
- P2P_STAR this is a classic start topology network where one device plays as the advertiser and other devices are the discovers
In this Android Things tutorial, we will use P2P_STAR topology. Let us start implementing the advertiser.
Android Nearby Advertiser using Android Things
The first step is implementing the advertiser using an Android Thing device. In this case, we will use Raspberry Pi 3 but you can use other prototyping board compatible with Android Things.
To implement an Android Nearby advertiser there are three different steps we have to follow:
- Start advertising
- Accept incoming connections
- Listen for incoming payload
The fourth step is optional and it is managing the LCD display connected to Android Things so that the Android Things app will show the payload content on the LCD display.
Start Advertising using Android Things
The first thing is creating a new class that will handle all the Nearby connections details. Let us call this class named NearbyAdvManager. In the constructor, the Android Thing app starts advertising:
private ConnectionsClient client;
..
client = Nearby.getConnectionsClient(ctx);
client.startAdvertising("AndroidThings",
        SERVICE_ID,
        connectionLifeCycleCB,
        new AdvertisingOptions(Strategy.P2P_STAR))
         .addOnSuccessListener(
           new OnSuccessListener<Void>() {
              @Override
              public void onSuccess(Void aVoid) {
                Log.i(TAG, "OnSuccess...");
              }
           }
        )
        .addOnFailureListener(new OnFailureListener() {
            @Override
            public void onFailure(@NonNull Exception e) {
               Log.e(TAG, "OnFailure 1");
               e.printStackTrace();
            }
      });
}
where "Android Things" is a nickname while SERVICE_ID is the id of our service. Usually, the SERVICE_ID is the package name of our application. The other parameter connectionLifeCycleCB is a callback class.
Tip
Notice that Android Nearby has a new set of APIs. When we create the advertiser we do not need to use the GoogleApiClient anymore.
It is time to implement te connection callback so that the Android Things app get notified about the connections. To this purpose, let us add this code to the manager:
private ConnectionLifecycleCallback connectionLifeCycleCB =
   new ConnectionLifecycleCallback() {
     @Override
     public void onConnectionInitiated(String s,
                   ConnectionInfo connectionInfo) {
       Log.i(TAG, "Connection initiated. Endpont ["+s+"]");
       // Let us accept the connection

     }

     @Override
     public void onConnectionResult(String s,
            ConnectionResolution connectionResolution) {
            Log.i(TAG, "Connection result. Endpont ["+s+"]");
      }

      @Override
      public void onDisconnected(String s) {
          Log.i(TAG, "Disconnected. Endpont ["+s+"]");
      };
    };
Accepting incoming connections in Android Things app
Once the Android Things app starts advertising, it is necessary to handle the incoming connections. As we have seen previously, in the connection callback interface we have the change to handle the connections. The onConnectionInitiated is called when the discoverer wants to start a new connection to the advertiser. In this method add this line:
Nearby.getConnectionsClient(ctx)
          .acceptConnection(s, payloadCallback);
Using this code the Android Things app accepts all the incoming connection without using an authentication mechanism. It is possible to authenticate the client so that we can apply some security policies.
The last step is incoming the payloadCallback so the app can handle the incoming payload.
Handling the Android Nearby payload
This is the last step of the Android Nearby advertiser. The Android Things app has to implement the PayloadCallback interface to read the incoming payload.
private PayloadCallback payloadCallback = new PayloadCallback() {
    @Override
    public void onPayloadReceived(String s, Payload payload) {
        Log.i(TAG, "Payload received");
        byte[] b = payload.asBytes();
        String content = new String(b);
        Log.i(TAG, "Content ["+content+"]");
    }

    @Override
    public void onPayloadTransferUpdate(String s,
           PayloadTransferUpdate payloadTransferUpdate) {
       Log.d(TAG, "Payload Transfer update ["+s+"]");

      }
};
In the onPayloadReceived, we will handle the LCD display to show the payload content.
Implementing the Android Things Nearby app
Once the manager is ready, it is time to implement the Android Things Nearby app. Let us create MainActivity class:
@Override
protected void onCreate(Bundle savedInstanceState) {
  super.onCreate(savedInstanceState);
  Log.i(TAG, "Starting Android Things app...");
  NearbyAdvManager advManager = new NearbyAdvManager(this);
}
Later, we will handle the LCD display connected to Android Things so that it can show the payload content.
Tip
Do not forget to close the connection and stopping advertising when destroying the app
Finally, we can require the permissions to the AndroidManifest.xml
<uses-permission android:name="android.permission.BLUETOOTH" />
<uses-permission android:name="android.permission.BLUETOOTH_ADMIN" />
<uses-permission android:name="android.permission.ACCESS_WIFI_STATE" />
<uses-permission android:name="android.permission.CHANGE_WIFI_STATE" />
<uses-permission android:name="android.permission.ACCESS_COARSE_LOCATION" />
You are ready to start the app. To this purpose, you can use a compatible Android Things device. In this tutorial, we will use an Raspberry Pi 3 running Android Things 1.0.3.
Tip
When starting the Android Things app be sure this is the first app otherwise you can get some errors
Implementing the Android app using Nearby
In this paragraph, we will describe how to implement the Android app that plays the discoverer role and sends data to the Android Things app. The steps to implement this app are almost the same used previously to implement the Android Things Nearyby app. Let us start creating a class named NearbyDsvManager. This class will manage all the details to discover, connect and exchange data with the Android Things app.
Add this constructor to the this class:
public NearbyDsvManager(Context ctx, final EventListener listener) {
    this.listener = listener;
    this.ctx = ctx;

    Log.i(TAG, "NearbyDsvManager");
    Nearby.getConnectionsClient(ctx)
         .startDiscovery(SERVICE_ID,
            endpointDiscoveryCB,
            new DiscoveryOptions(Strategy.P2P_STAR))
            .addOnSuccessListener(
                 new OnSuccessListener<Void>() {
                    @Override
                    public void onSuccess(Void aVoid) {
                        Log.i(TAG, "OnSuccess...");
                         listener.startDiscovering();
                     }
                 }
            )
           .addOnFailureListener(new OnFailureListener() {
               @Override
               public void onFailure(@NonNull Exception e) {
                  Log.e(TAG, "OnFailure", e);
                  e.printStackTrace();
               }
       });
}
This class does almost the same things described previously. It starts discovering trying to find out an advertiser ready to exchange data. Moreover, in this class, it is defined a callback interface used to inform the caller (MainActivity) about the events during the discovering and connection process. This callback interface is:
public interface EventListener {
   public void onDiscovered();
   public void startDiscovering();
   public void onConnected();
}
Moreover, the Nearby API uses another callback interface to inform the caller about the discovering status. In the code above the lister is endpointDiscoveryCB:
private EndpointDiscoveryCallback endpointDiscoveryCB = new EndpointDiscoveryCallback() {
    @Override
    public void onEndpointFound(String s, DiscoveredEndpointInfo discoveredEndpointInfo) {
       Log.i(TAG, "Endpoint found ["+s+"]. Connecting....");
       listener.onDiscovered();
       getConnection(s);
     }

    @Override
    public void onEndpointLost(String s) {
       Log.e(TAG, "Endpoint lost ["+s+"]");
    }
 };
Connecting the Nearby discoverer to the Nearby advertiser
Once the discoverer has found a valid endpoint (provided by the advertiser), the discoverer tries to start a connection getConnection(s) where s is the endpoint discovered:
private void getConnection(String endpointId) {
   Nearby.getConnectionsClient(ctx)
       .requestConnection(endpointId, endpointId,connectionLifecycleCallback)
        .addOnSuccessListener(new OnSuccessListener<Void>() {
            @Override
            public void onSuccess(Void aVoid) {
               Log.d(TAG, "Requesting connection..");
            }
        })
       .addOnFailureListener(new OnFailureListener() {
            @Override
            public void onFailure(@NonNull Exception e) {
               Log.e(TAG, "Error requesting connection", e);
         }
  });
}
In this method the discoverer requests a new connection using the endpointId discovered in the previous step. Moreover, it adds a new callback interface to know when the connection is established or there is an error.
private ConnectionLifecycleCallback connectionLifecycleCallback =
  new ConnectionLifecycleCallback() {
    @Override
    public void onConnectionInitiated(String s, ConnectionInfo connectionInfo) {
       Log.i(TAG, "Connected to endpoint ["+s+"]");
       NearbyDsvManager.this.currentEndpoint = s;
       Nearby.getConnectionsClient(ctx).acceptConnection(s, payloadCallback);
   }

   @Override
   public void onConnectionResult(String s, ConnectionResolution connectionResolution) {
     switch (connectionResolution.getStatus().getStatusCode()) {
          case ConnectionsStatusCodes.STATUS_OK:
             listener.onConnected();
             break;
          case ConnectionsStatusCodes.STATUS_CONNECTION_REJECTED:
             Log.i(TAG, "Connection rejected");
             break;
          case ConnectionsStatusCodes.STATUS_ERROR:
              Log.i(TAG, "Connection error");
               break;
       }
   }

   @Override
   public void onDisconnected(String s) {  }
};
When the connection is established and both parties accepted the connection the process finishes and the apps are ready to send data. This is the method that will send the payload from the Android app to the Android Things app:
public void sendData(String data) {
   Log.i(TAG, "Sending data ["+data+"]");
   Log.i(TAG, "Current endpoint ["+currentEndpoint+"]");
   if (currentEndpoint != null) {
      Log.d(TAG, "Sending data to ["+data+"]");
      Payload payload = Payload.fromBytes(data.getBytes());
      Nearby.getConnectionsClient(ctx).sendPayload(currentEndpoint, payload);
    }
}
That’s all.
Implementing the Android app UI
This last step implements the Android app UI so that the user can insert the payload and send it to the Android Things app (the Nearyby advertiser). The UI is very simple:
<?xml version="1.0" encoding="utf-8"?>
<android.support.constraint.ConstraintLayout
    xmlns:android="http://schemas.android.com/apk/res/android"
    xmlns:app="http://schemas.android.com/apk/res-auto"
    xmlns:tools="http://schemas.android.com/tools"
    android:layout_width="match_parent"
    android:layout_height="match_parent"
    tools:context=".MainActivity">

    <TextView
        android:layout_width="wrap_content"
        android:layout_height="wrap_content"
        android:text="Content"
        app:layout_constraintLeft_toLeftOf="parent"
        app:layout_constraintTop_toTopOf="parent"
        android:layout_marginTop="8dp"
        android:id="@+id/txt"/>

    <EditText
        android:layout_width="wrap_content"
        android:layout_height="wrap_content"
        android:hint="text here"
        android:maxLength="40"
        android:id="@+id/ed"
        app:layout_constraintTop_toBottomOf="@id/txt"
        android:layout_marginTop="8dp"/>

    <Button
        android:layout_width="wrap_content"
        android:layout_height="wrap_content"
        app:layout_constraintBottom_toBottomOf="parent"
        app:layout_constraintLeft_toRightOf="parent"
        app:layout_constraintRight_toLeftOf="parent"
        android:id="@+id/btn"
        android:text="Send"/>

</android.support.constraint.ConstraintLayout>
And finally:
@Override
protected void onCreate(Bundle savedInstanceState) {
super.onCreate(savedInstanceState);
setContentView(R.layout.activity_main);
btn = findViewById(R.id.btn);
et = (EditText) findViewById(R.id.ed);
btn.setOnClickListener(new View.OnClickListener() {
@Override
public void onClick(View v) {
String txt = et.getText().toString();
Log.d(TAG, "Txt ["+txt+"]");
dsvManager.sendData(txt);
}
});
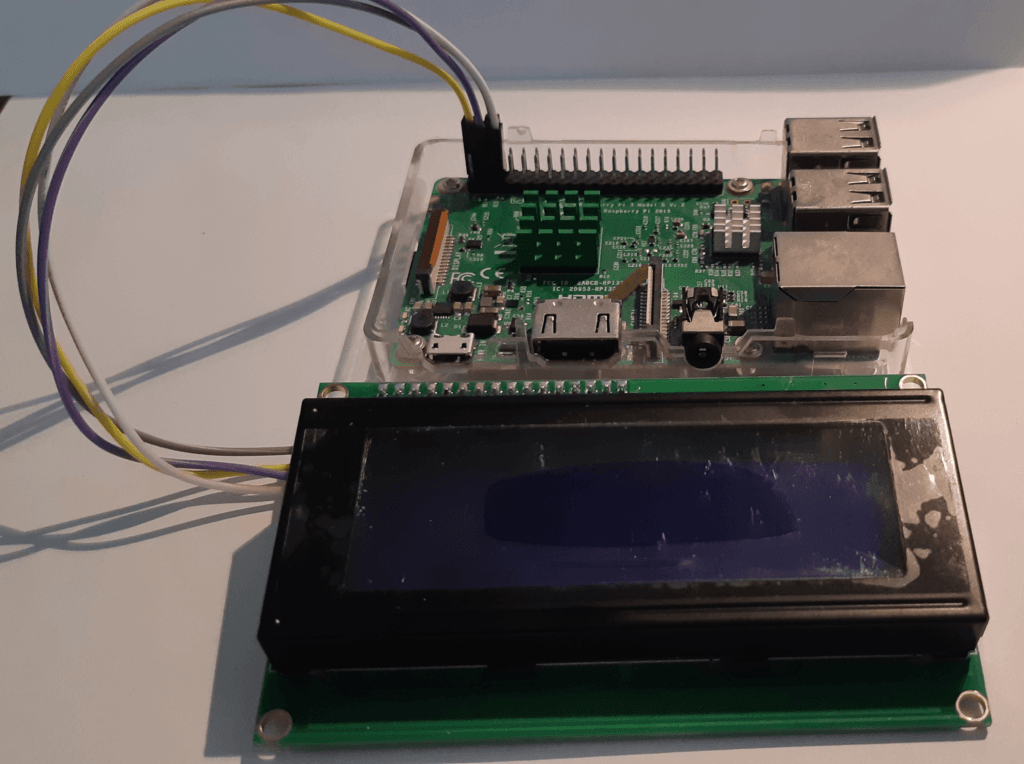
}Connecting the LCD display to Android Things
This step is optional because it describes how to connect the LCD display to Android Things to show the content payload sent from the Android app. This Android Things tutorial uses a Hd44780 LCD. In more details, this LCD is built on HD44780 chip and PCF8574. There are several version with different display size, the one of this example is a 20×4. This is a I2C peripherals that uses 4 different pins to connect to Android Things board:
- Vcc (+5V)
- GND
- SDA
- CLK
The connection schema is shown in the picture below:
To manage this LCD it is necessary to import a driver. Let us add this line to build.gradle:
implementation 'com.leinardi.android.things:driver-hd44780:<version>'
Moreover, it is necessary to create a new class that will handle the LCD connection details and all the step to display data.
public class ManageLCD {

private Hd44780 mLcd;

public void displayString(data) {
   try {
     Log.d("LCd", "Writing");
     if (mLCD == null)
       mLcd  = new Hd44780("I2C1", 0x27, Hd44780.Geometry.LCD_20X4);
     mLcd.setBacklight(true);
     mLcd.cursorHome();
     mLcd.clearDisplay();
     mLcd.setText(data);
    } catch (Exception e) {
      e.printStackTrace();
    }
  }
}
You have to invoke this class in the MainActivity of the Android Things app when a new payload is received.
Summary
At the end, this article showed how to use Android Nearby to connect different Android devices. This tutorial used Android Nearby to connect an Android app and an Android Things app so that they can exchange data. Moreover, Android Things uses an LCD connected to it to show the payload coming from the Android app. Hopefully, you gained the knowledge about how to use Android Nearby advertiser and the discoverer and how to connect them following the Android Nearby specification.
| Published on Java Code Geeks with permission by Francesco Azzola, partner at our JCG program. See the original article here: Android Nearby: How to integrate Android and Android Things Opinions expressed by Java Code Geeks contributors are their own. |
