Hello Friends,
In this tutorial, we will see step by step, how we can create a Spring Boot project in STS (Spring Tool Suite).

Step 1:
Download Spring tool suite, if you don’t have already from the following link for your respective operating system :
https://spring.io/tools/sts/all
Step 2 :
Extract and Open Spring tool suite by click on its icon, which looks like as below

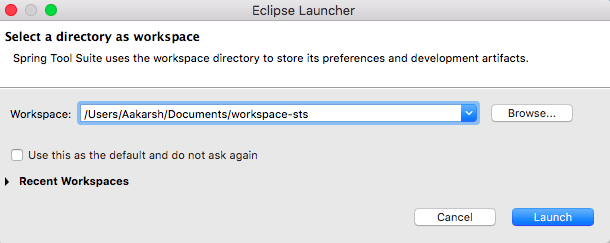
Step 3:
Choose the path where you want to create Workspace and click on Launch.
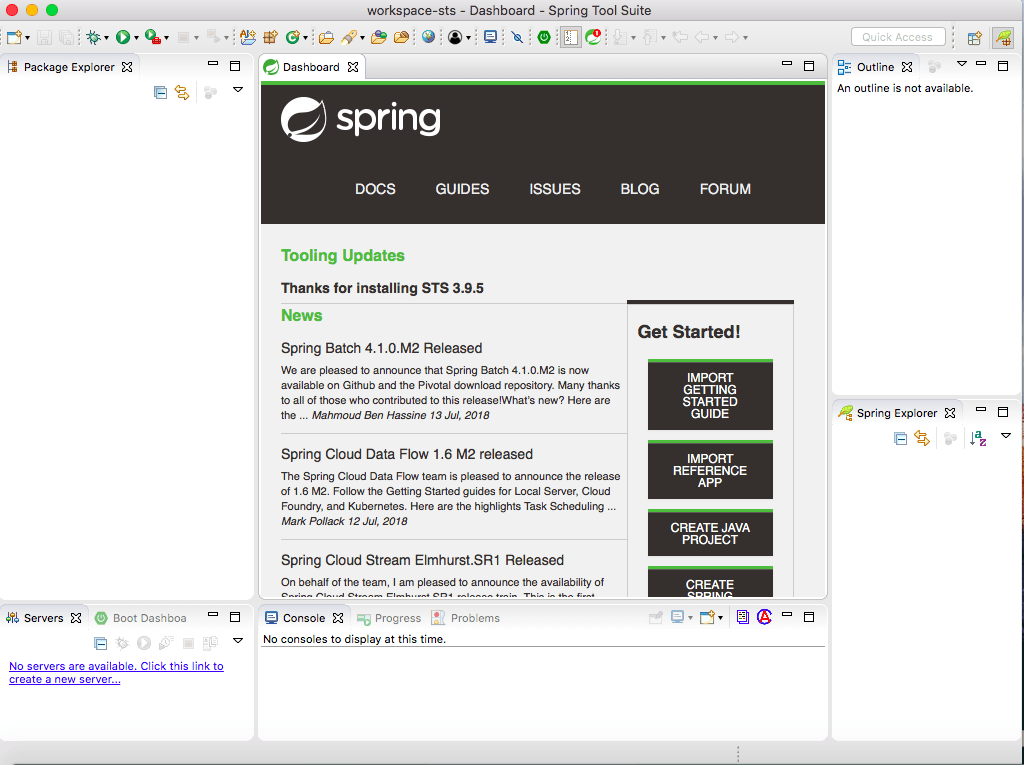
Step 4:
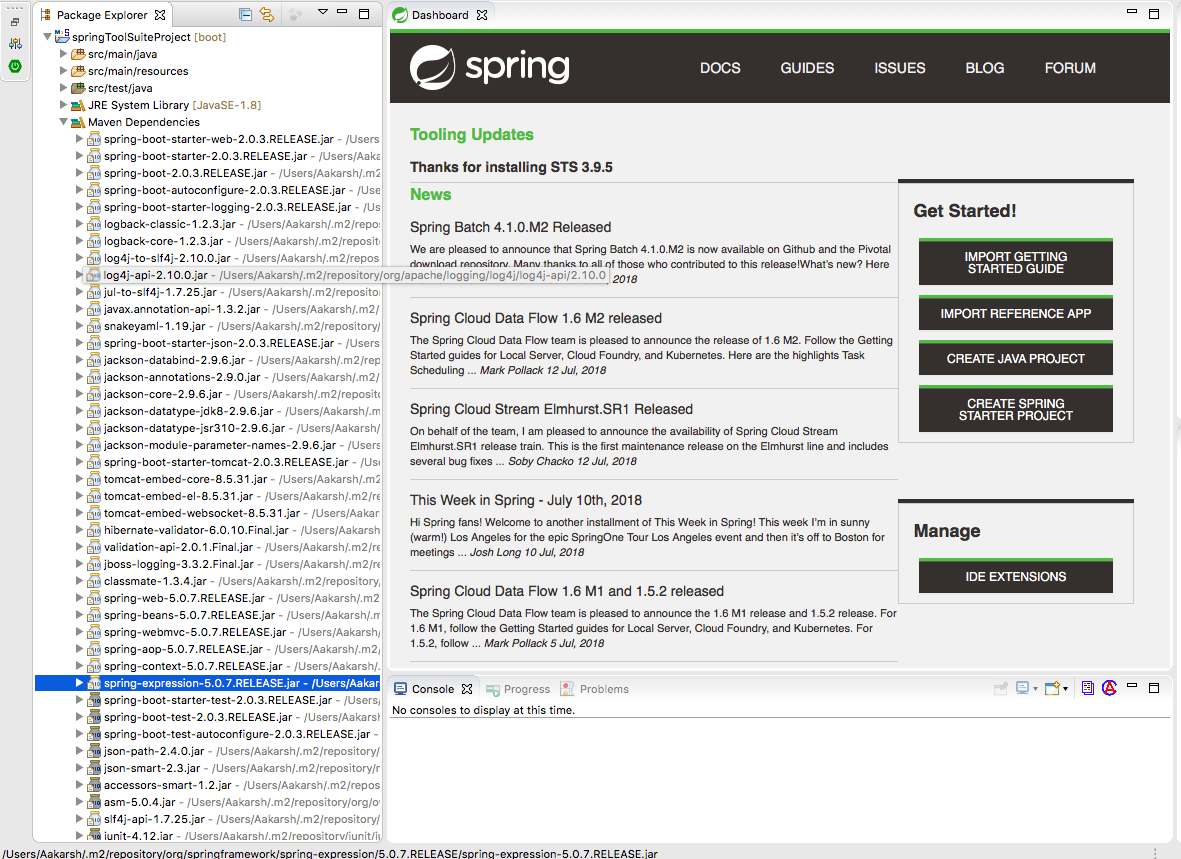
Spring tool suite will be launched with the following screen :
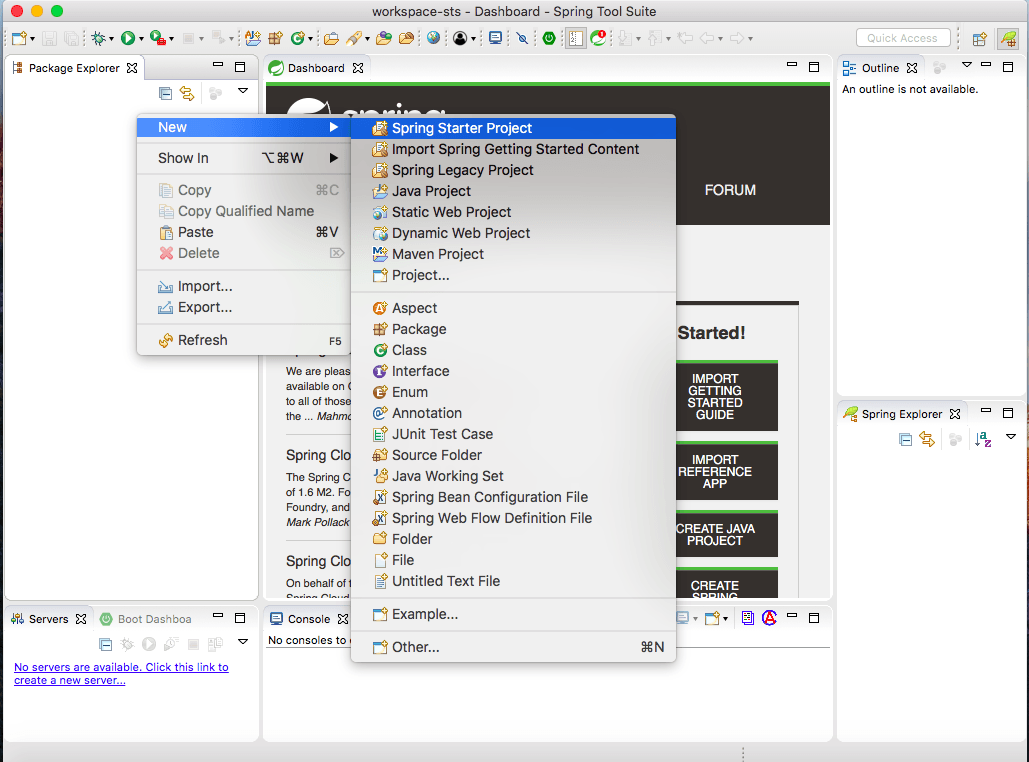
Step 5 :
Right-click in the package explorer and select New -> Spring Starter Project as below :
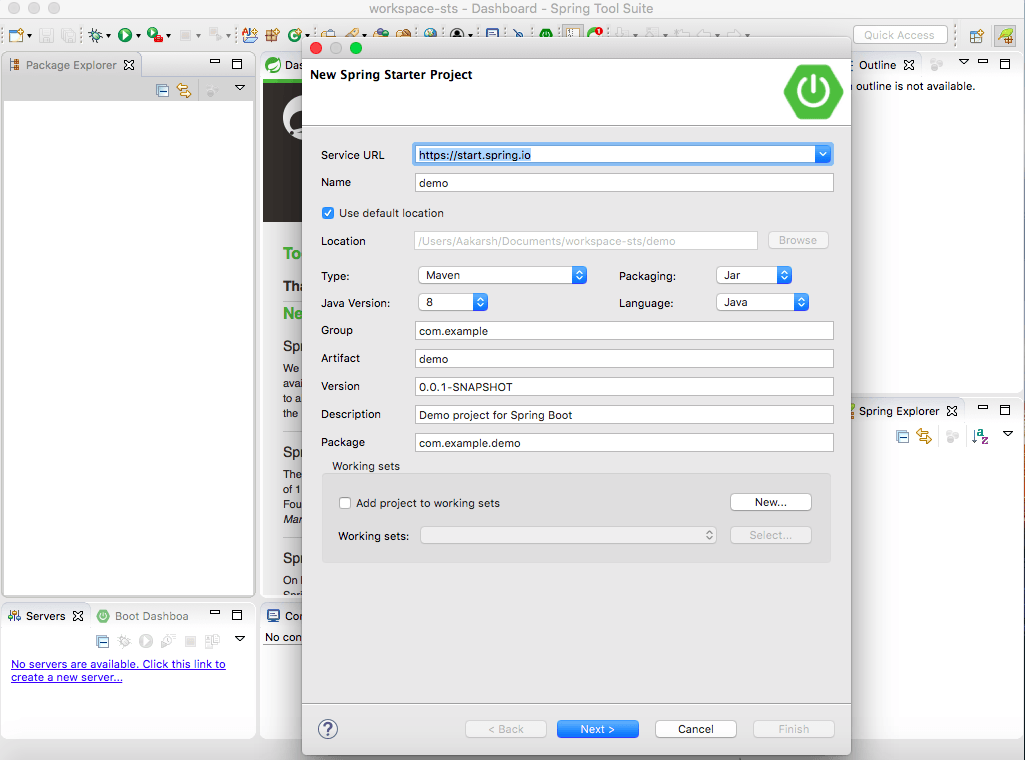
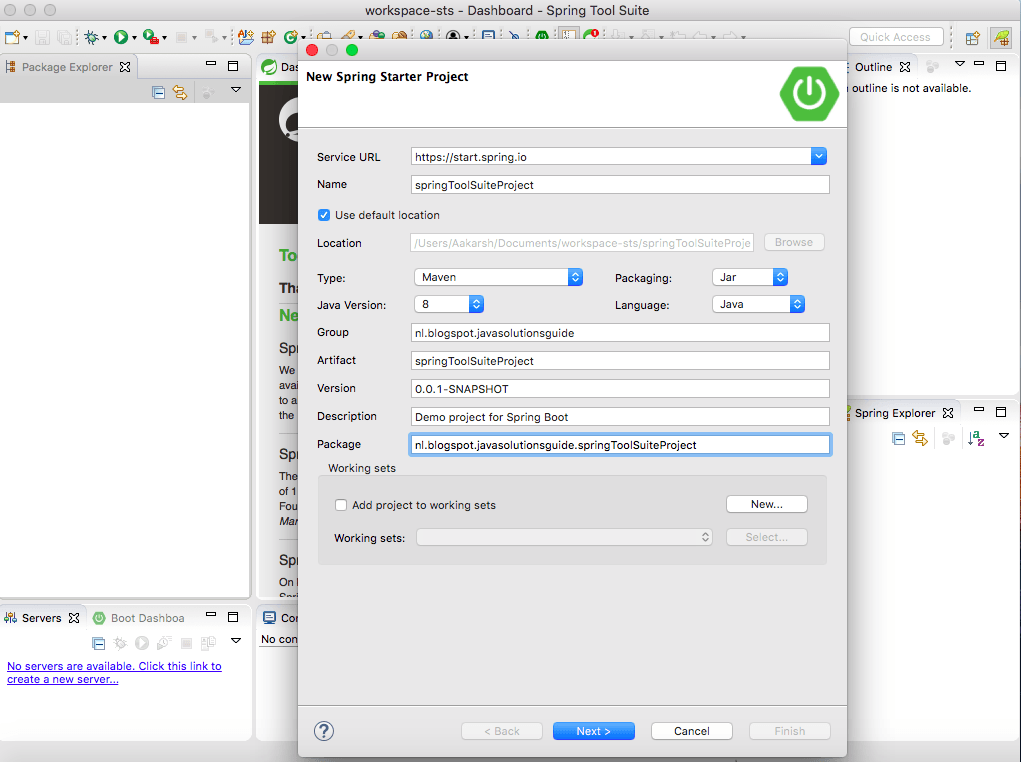
Step 6 :
Next screen that will show up is the following :
Step 7 :
In the screen mentioned in Step 6, we can Change the “Name” to whatever name we want to give to our project. Also, we can change group id, artifact and package name.
I am going to change to following :
Name : springToolSuiteProject
Group : nl.blogspot.javasolutionsguide
Artifact : springToolSuiteProject
Package :nl.blogspot.javasolutionsguide. springToolSuiteProject
Leave following as is :
Service Url : https://start.spring.io
Type: Maven
Note: If you want to use Gradle as a build tool, then you are free to choose Gradle.
Packaging: Jar
Note: Can be changed to War as per requirement.
Java Version: 8
Note: Can be changed to 10 as well as of writing this tutorial.
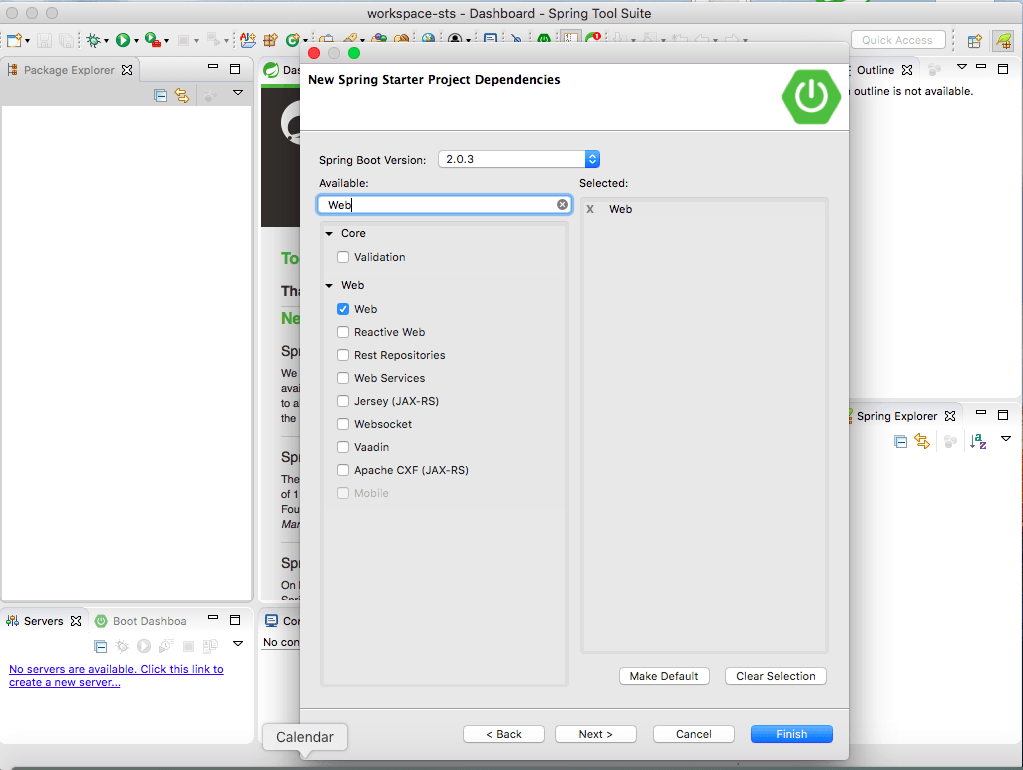
Step 8 :
Click Next and we will see the following screen :
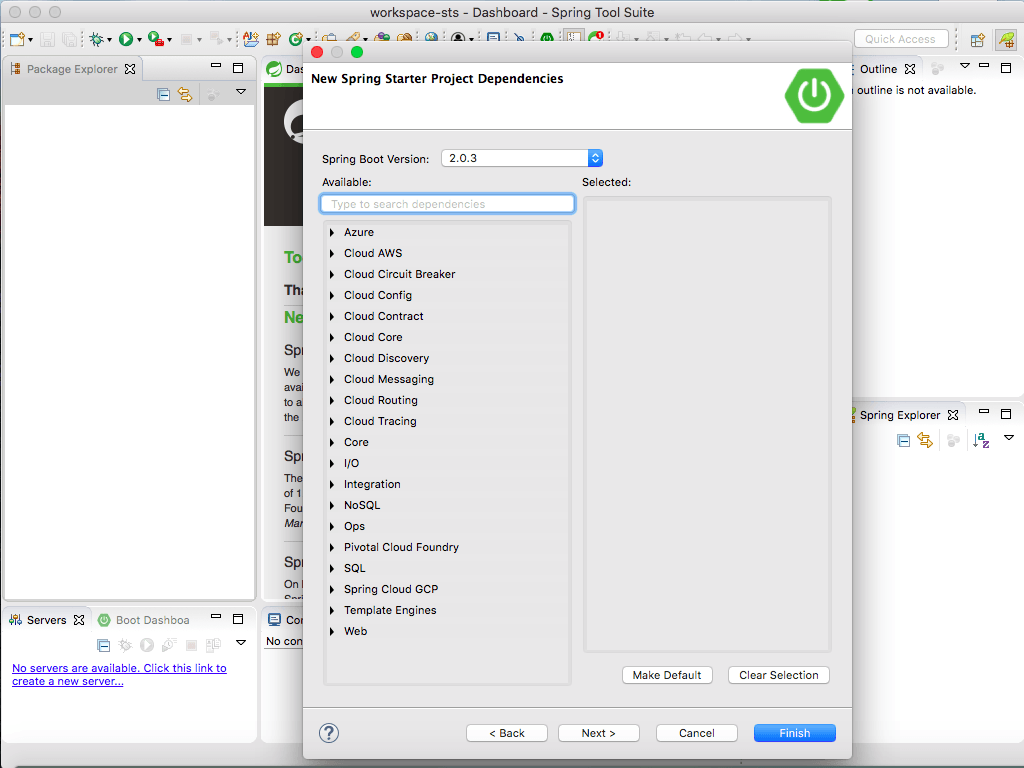
Step 9 :
As of writing this tutorial, the Latest release version of Spring Boot is 2.0.3, which is selected by default, so leave it as is.
Add dependencies as per requirement. I am going to add only Web here.
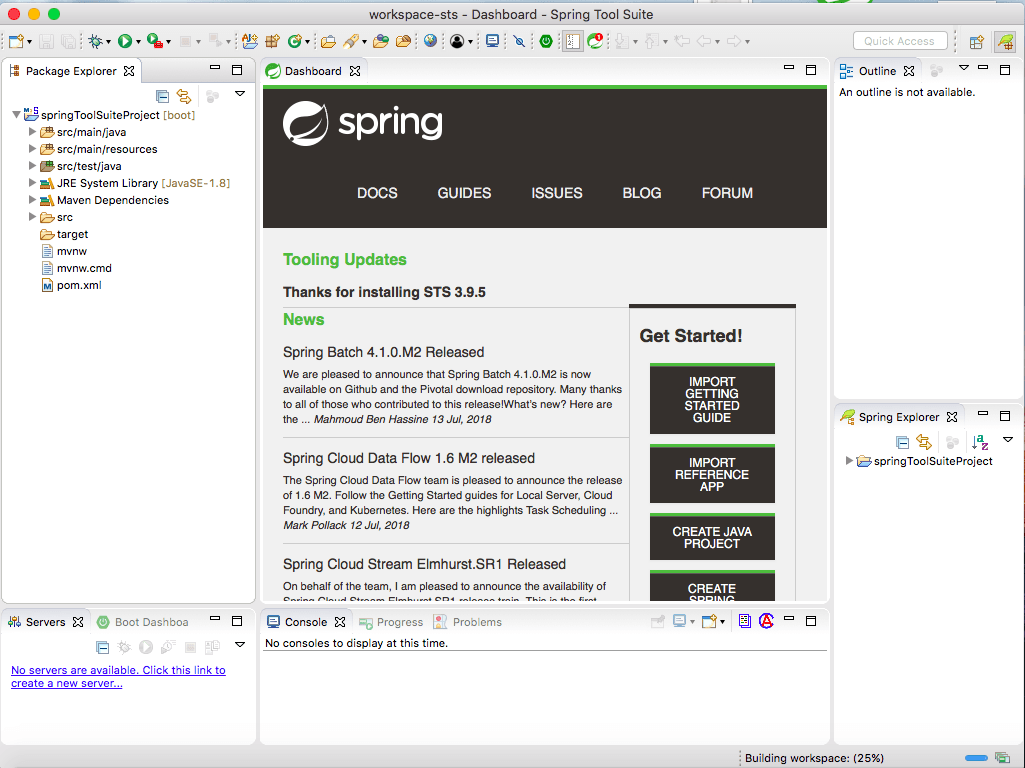
Step 10 :
Click Finish. As you can see in the following screenshot, a Maven project with name springToolSuiteProject is added in the STS :
Step 11 :
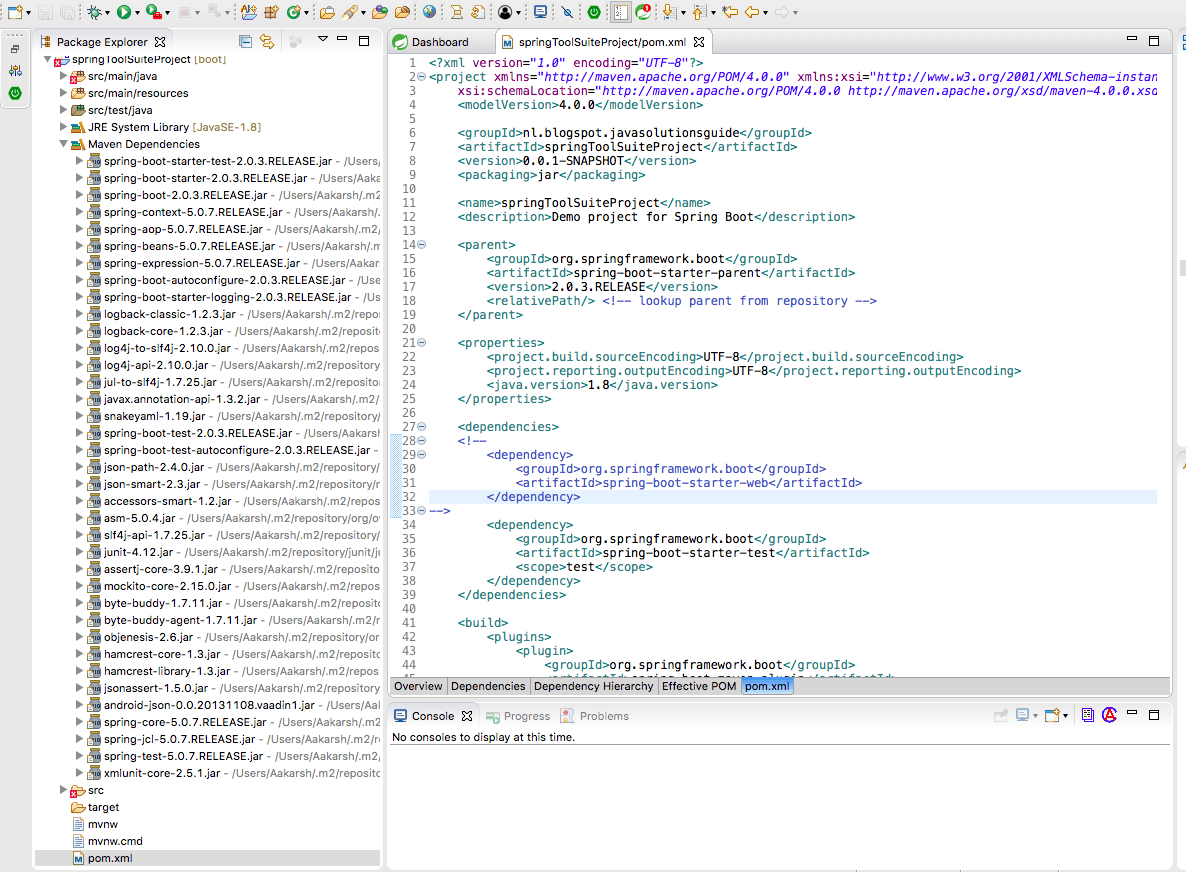
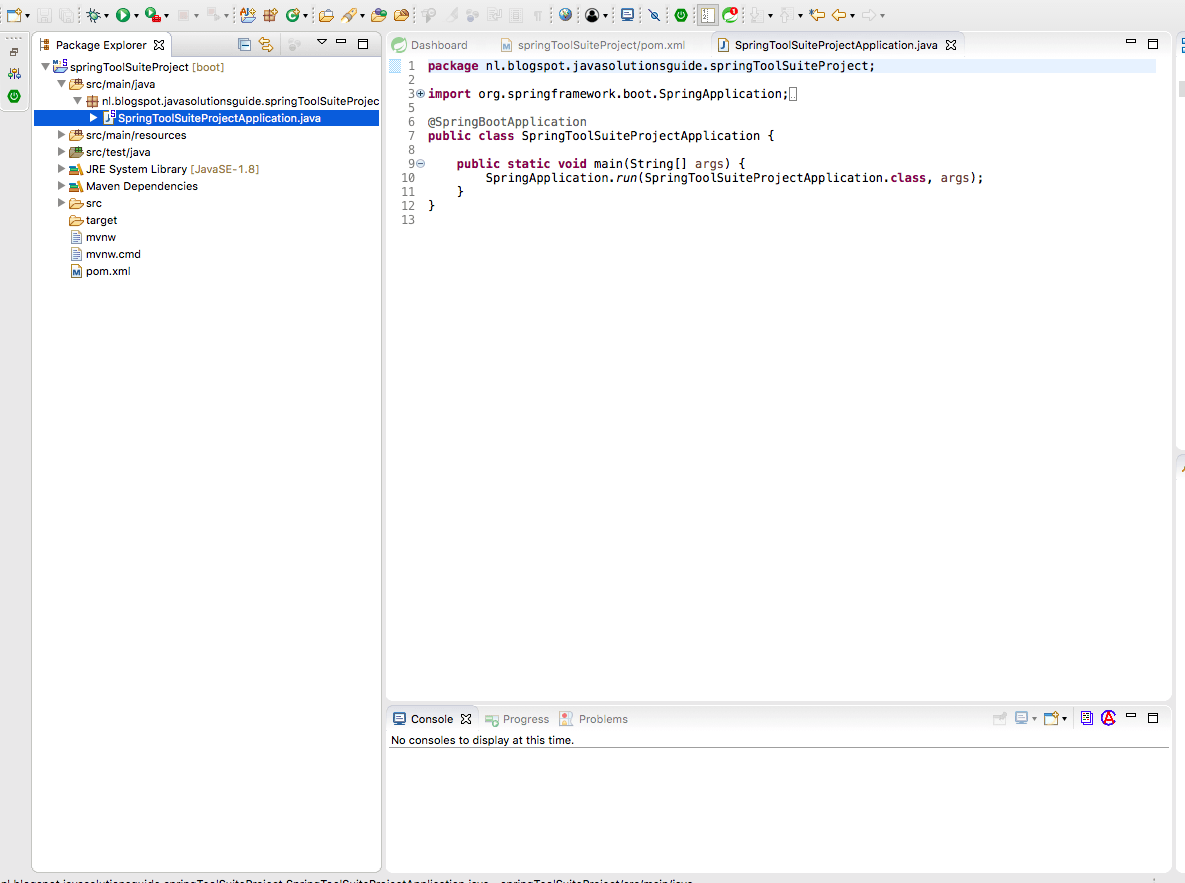
Let us expand this project and see what Spring Boot has added to it.
As we can see in below screenshot, Spring boot has added lots of required dependencies on its own.
Before the introduction of Spring Boot, we have to add all these dependencies on our own and considering compatibility between different jar versions, it was really chaotic thing, but now we need not worry about it. Spring Boot takes care of all necessary dependencies. We just need to tell Spring Boot only at a high level that which kind of dependencies we want to add, just like in this case we told spring boot about adding Web dependencies and Spring Boot will add all web related dependencies along with other core dependencies.
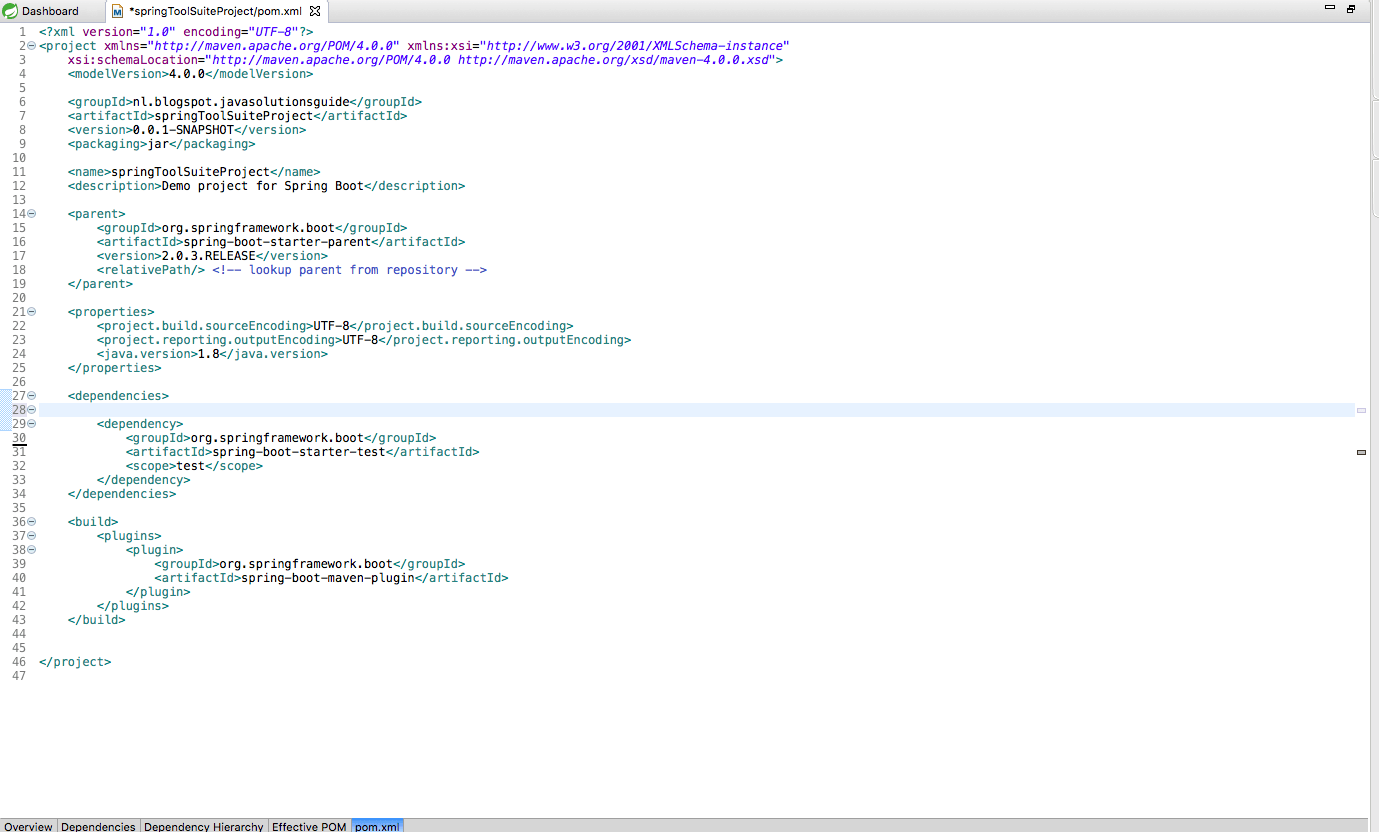
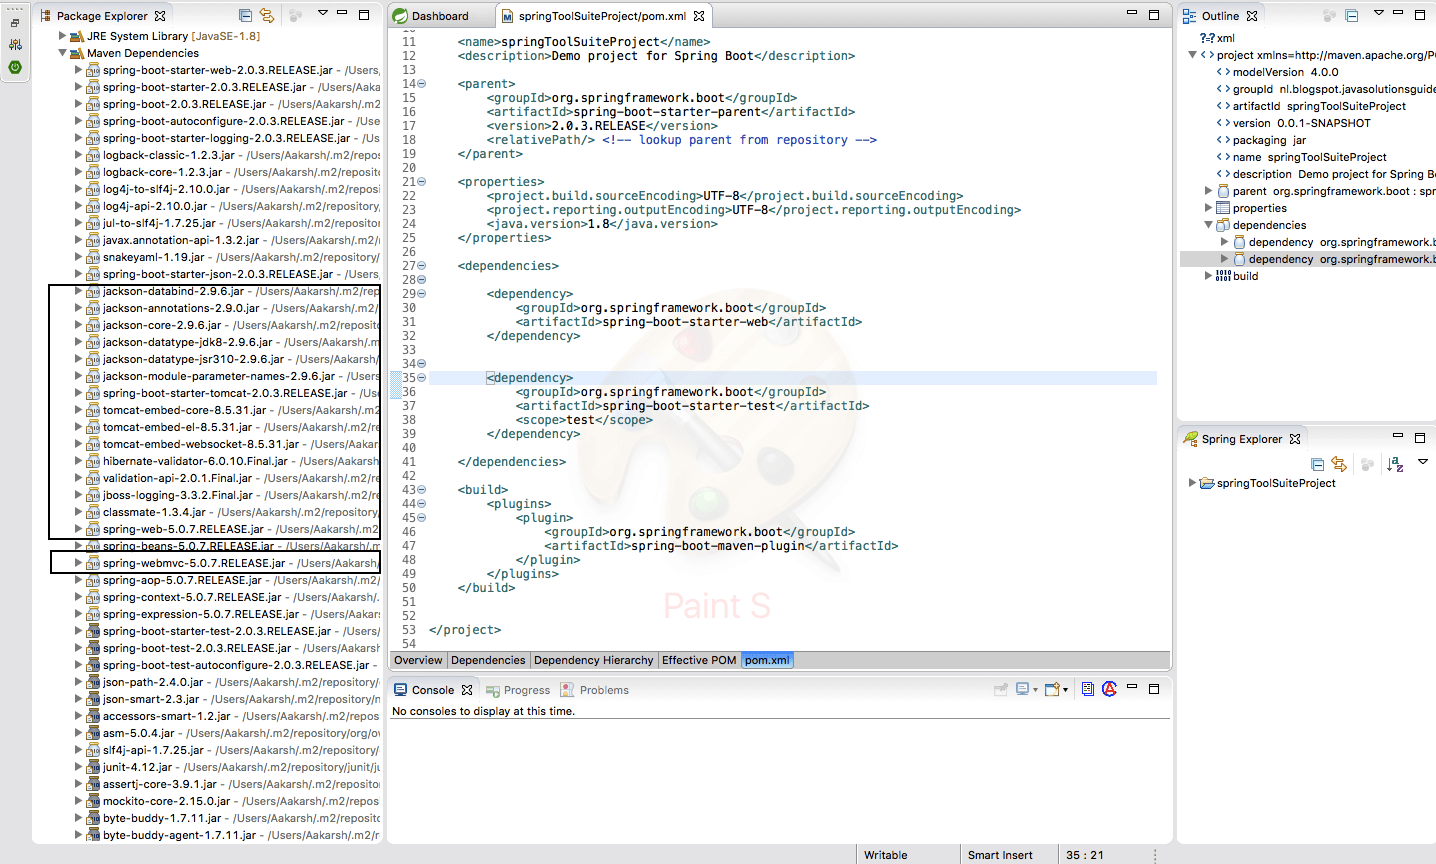
Following is how pom.xml of this project looks like :
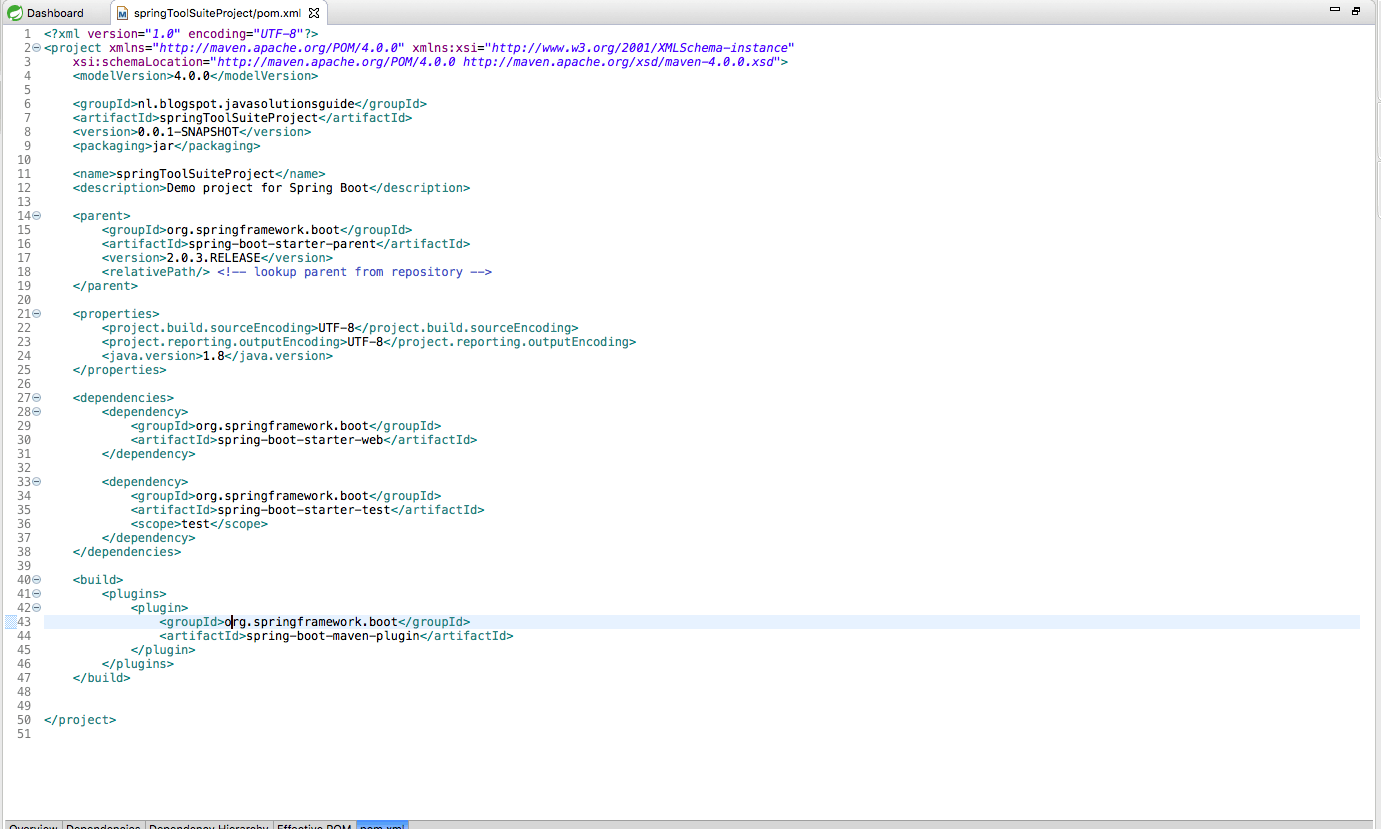
Following dependencies are added in POM for a standard Spring Boot project, even when we have not added any additional dependencies (example Web).
spring-boot-starter-parent makes sure that all necessary basic Spring dependencies are added, as can be seen in below screenshot :
spring-boot-starter-web dependency is added additionally as we selected Web dependency while creating project.
![]()
On adding spring-boot-starter-web, we can see that lots of additional dependencies which are required for web project are added to the build path. This includes embedded tomcat dependencies as well, such that we need not install and configure Tomcat separately to deploy Spring Boot application:
Also, Spring Boot has added the following class, which acts as a starting point for the Spring Boot Application.
– The @SpringBootApplication annotation used at the class level above is basically equivalent to combined following three annotations :
@Configuration
@EnableAutoConfiguration
@ComponentScan
– From the main method of SpringToolSuiteProjectApplication, SpringApplicaiton class’s run method is called. This method makes sure that Spring application’s applicationContext(the Spring Container) is initialized. Spring boot uses AnnotaionConfigApplicationContext.
Step 12 :
Run the main method of SpringToolSuiteProjectApplication and you will notice that jar is automatically deployed to embedded Tomcat server and Tomcat server has been started at port 8080.
Check Console log of eclipse:
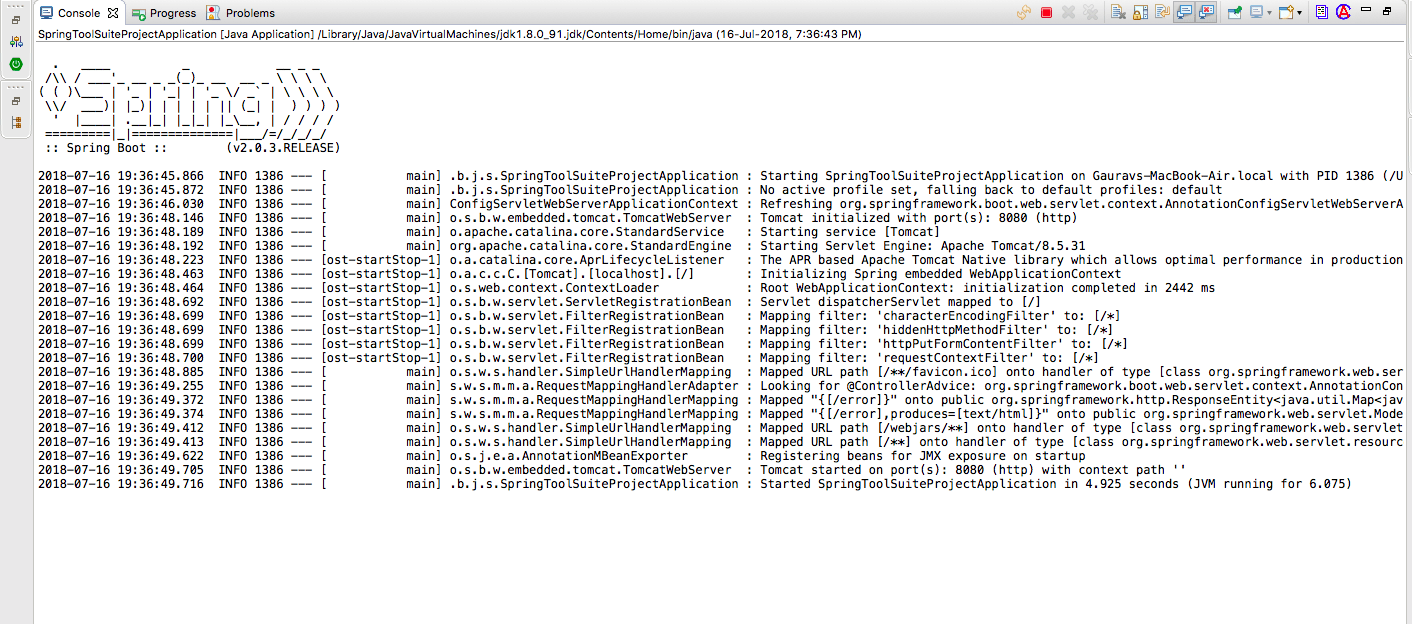
With this,we saw that How we can Create a Spring Boot Project in sts tool and how we can deploy and run it on embedded Tomcat server.
Thanks for reading. If it helped you, share it with others to help others.
| Published on Java Code Geeks with permission by Gaurav Bhardwaj, partner at our JCG program. See the original article here: How to Create Spring Boot Project in STS Opinions expressed by Java Code Geeks contributors are their own. |

Hi I followed the steps and got the below message in console also.
Tomcat started on port(s): 8080 (http) with context path ”
2018-07-25 22:06:11.059 INFO 4976 — [ main] com.example.demo.DemoApplication : Started DemoApplication in 18.275 seconds (JVM running for 27.093)
b
But how can I access it via browser.Please help
http://localhost:8080/
What are the requirements?
To install maven and tomcat?
Failed to configure a DataSource: ‘url’ attribute is not specified and no embedded datasource could be configured. 2019-10-04 11:27:00.103 INFO 14523 — [ main] o.s.b.w.embedded.tomcat.TomcatWebServer : Tomcat initialized with port(s): 8080 (http) 2019-10-04 11:27:00.128 INFO 14523 — [ main] o.apache.catalina.core.StandardService : Starting service [Tomcat] 2019-10-04 11:27:00.129 INFO 14523 — [ main] org.apache.catalina.core.StandardEngine : Starting Servlet engine: [Apache Tomcat/9.0.26] 2019-10-04 11:27:00.250 INFO 14523 — [ main] o.a.c.c.C.[Tomcat].[localhost].[/] : Initializing Spring embedded WebApplicationContext 2019-10-04 11:27:00.251 INFO 14523 — [ main] o.s.web.context.ContextLoader : Root WebApplicationContext: initialization completed in 1401 ms 2019-10-04 11:27:00.320 WARN 14523 — [ main] ConfigServletWebServerApplicationContext : Exception encountered during context… Read more »