This tutorial provides a complete implementation of Spring Boot, Angular 5 and spring data to build an end to end single page java web application with example.We will be using spring boot 1.5 to expose REST APIs and angular5 with routing to build our client that will be consuming the APIs exposed by the server.Also, we will be integrating MySql database with the backend code for CRUD operation.We will be using angular CLI to generate angular project and spring boot initializers to generate spring boot project.At the end of this article, you will be able to build a user management application with CRUD operation that can either be deployed to a standalone tomcat or deploy client and server to different servers with cross origin requests.
In the next article, we will look into different ways to package spring boot and angular 5 application together in a single war file with maven and deploy to standalone tomcat. Also you might be interested in integrating this application with Angular5 JWT Authentication with Spring Boot Security
Angular 5 Features
1. Angular 5 is more faster, lighter and easy to use.
2. Material design capabilities and improved compiler with build optimizer
3. New HttpClientModule is introduced which is a complete rewrite of the existing HttpModule.
4. TypeScript 2.4 support.
5. Reactive Forms Support
Environment Setup
We have two different part, client and server, of the application that we are going to build and hence, the environment set up is also specific to each part.
Angular5 Environment SetUp
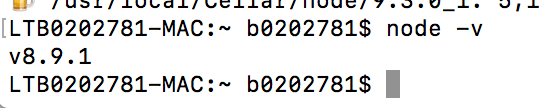
Angular 5 provides a beautiful tool – Angular CLI to get started with Angular. Here, we will be using the same tool to generate a sample angular app and then modify it to match our requirement.To get started with Angular CLI, it is required to have node installed so that we can use the NPM tool. You can check if node is installed or not on your machine by hitting node -v. On my machine I get following result.
If not installed visit NodeJs official website to install it first.Now, once it is done, traverse to your workspace location and execute following commands to install angular cli and generate a sample angular project.
npm install -g @angular/cli
ng new portal-app
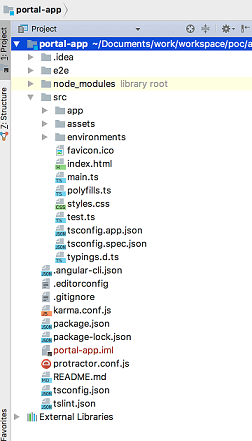
Once this is done, you can traverse to the location and see a folder portal-app is created that contains all the files and folders generated by angular cli command to get started with angular 5.Now you can open your favourite editor to import the project.I imported this project in IntellijIdea and got the structure as below:

One thing to check here is that if you have installed your NodeJs with sudo command, then you might get some permission issue as below while installing angular cli.To avoid these kind of situation, it is always recommended to use brew command while installing any new software.
If you face this issue then provide read/write access to the folder – /usr/local/lib/node_modules or follow the instruction here – Mac Support
For windows user, you can use git command line or cygwin for the installation.
Spring Boot Environment SetUp
Spring boot team has really made spring boot environment setup easy by providing default initializers.Open the url https://start.spring.io/ and generate the project as follow.
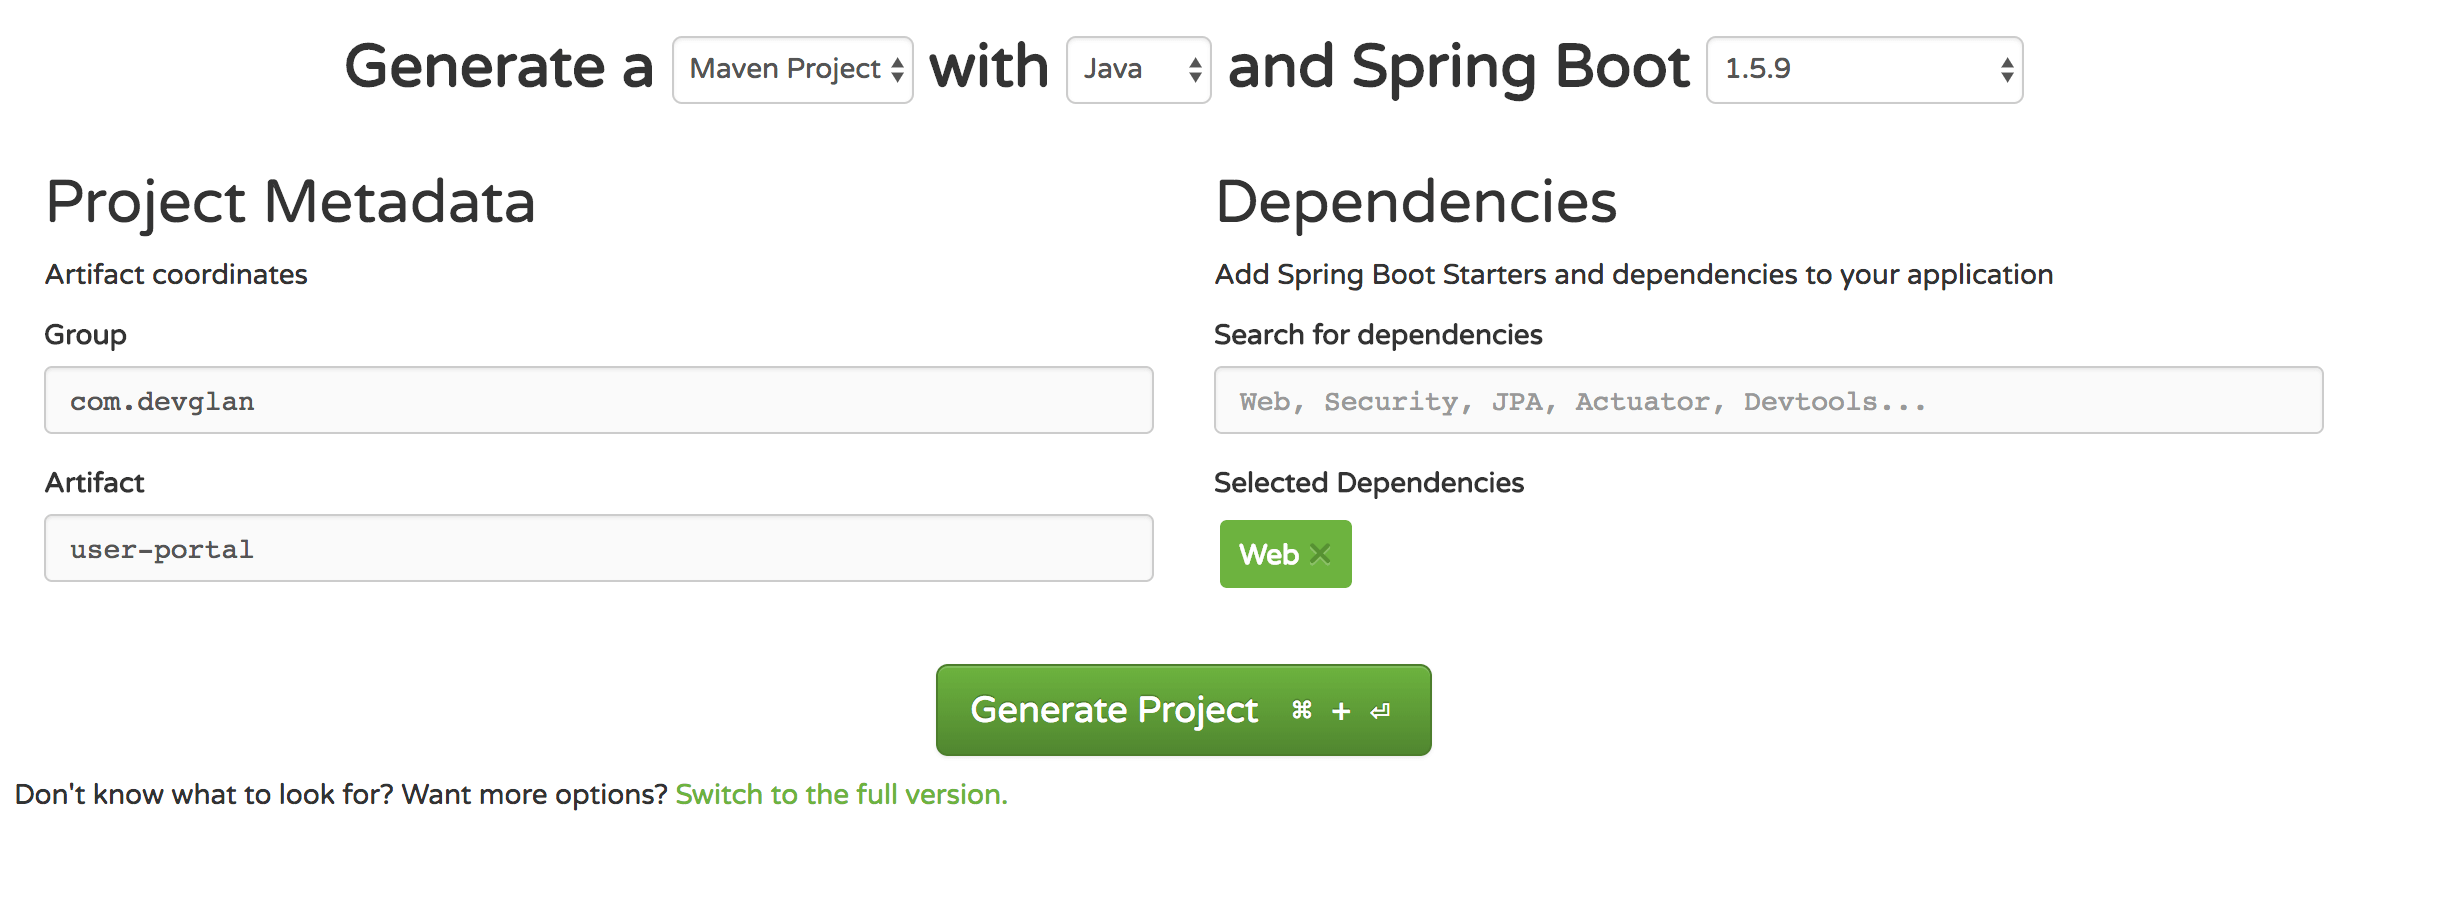
Now unzip user-portal.zip and import into java IDE. Following will be the final structure.
Default Files Generated by CLI command
Now let us try to understand the different files generated.
Modules – Modules break up the application into logical pieces of code. Each piece of code or module is designed to perform a single task.All the modules are loaded by main.ts.
Component – Component is used to bring the modules together.
tsconfig.json – The presence of tsconfig.json file in a directory indicates that the directory is the root of a typescript project.This file specifies the root files and typescript compiler motions required to compile typescript.
package.json – It contains all the dependencies defined for the angular project.Once, we do nom install, these dependencies are automatically downloaded.
karma.conf.json – Config file for karma unit tests.
The file .angular-cli.json will have all the application configurations such as info about the root and out directory.The welcome or main html file along with the main ts file. All the other environment related information will be present here.
Now it’s time to run the dfault generated application and see it in the browser. If you are using IntellijIdea then you can run ng serve command from Terminal inside it and if not hit following command in the terminal.
cd portal-app
 ng serve
After this open your browser and hit the url – http://localhost:4200/ and the angular app is up. Now we can start modifying the app to create a user management portal.
Spring Boot Rest APIs
Now, let’s start by creating our APIs first.We have UerController where all the APIs for CRUD operation is exposed.The @CrossOrigin is used to allow Cross-Origin Resource Sharing (CORS) so that our angular application running on different server can consume these APIs from a browser.We can also configure the proxy in angular side using proxy.config.json which has been discussed in the subsequent topic.
UserController.java
package com.devglan.userportal;

import org.springframework.beans.factory.annotation.Autowired;
import org.springframework.web.bind.annotation.*;

import java.util.List;

@CrossOrigin(origins = "http://localhost:4200", maxAge = 3600)
@RestController
@RequestMapping({"/api"})
public class UserController {

    @Autowired
    private UserService userService;

    @PostMapping
    public User create(@RequestBody User user){
        return userService.create(user);
    }

    @GetMapping(path = {"/{id}"})
    public User findOne(@PathVariable("id") int id){
        return userService.findById(id);
    }

    @PutMapping
    public User update(@RequestBody User user){
        return userService.update(user);
    }

    @DeleteMapping(path ={"/{id}"})
    public User delete(@PathVariable("id") int id) {
        return userService.delete(id);
    }

    @GetMapping
    public List findAll(){
        return userService.findAll();
    }
}
Spring Boot Service Implementation
The service class has no extra logic here and it’s a very a simple implementation.
UserServiceImpl.java
@Service
public class UserServiceImpl implements UserService {

    @Autowired
    private UserRepository repository;

    @Override
    public User create(User user) {
        return repository.save(user);
    }

    @Override
    public User delete(int id) {
        User user = findById(id);
        if(user != null){
            repository.delete(user);
        }
        return user;
    }

    @Override
    public List findAll() {
        return repository.findAll();
    }

    @Override
    public User findById(int id) {
        return repository.findOne(id);
    }

    @Override
    public User update(User user) {
        return null;
    }
}
Spring Data Implementation
We will be using Spring data JPA implementation for ORM related solution.To know inside implementation of Spring data you can visit my other post – Spring Boot JPA and Spring Boot Hibernate implementation.
UserRepository.java
package com.devglan.userportal;

import org.springframework.data.repository.Repository;

import java.util.List;

public interface UserRepository extends Repository {

    void delete(User user);

    List findAll();

    User findOne(int id);

    User save(User user);
}
Spring Boot Datasource Configuration
application.properties
server.contextPath=/user-portal
spring.datasource.url=jdbc:mysql://localhost:3306/testdb
spring.datasource.username=root
spring.datasource.password=root
spring.datasource.driver-class-name=com.mysql.jdbc.Driver
spring.jpa.show-sql=true
spring.jpa.hibernate.naming.implicit-strategy=org.hibernate.boot.model.naming.ImplicitNamingStrategyLegacyHbmImpl
spring.jpa.hibernate.naming.physical-strategy=org.springframework.boot.orm.jpa.hibernate.SpringPhysicalNamingStrategy
Default Scripts
CREATE TABLE user(id INT NOT NULL AUTO_INCREMENT,email VARCHAR(255),first_name VARCHAR(255),last_name VARCHAR(255),PRIMARY KEY (id))ENGINE=InnoDB;
Create Angular Component
Angular CLI has generate command to create component.Hit the command ng generate component user and it will create a user folder inside app folder.This user folder will have all the required files for user module.
At first we will modify app.component.html to include 2 links for list users and add users.All our views willl be loaded inside router-outlet.
app.component.html
<div class="container-fluid">
<div class="col-md-offset-1">
  <h1>
    Welcome to {{title}}!
  </h1>
</div>

<a routerLink="/users"> List Users</a>
<a style="margin-left:10px" routerLink="/add">Add User</a>
<br/>
<router-outlet></router-outlet>
</div>
Since, we have two routes defined above, we require two different views(user.component.html, add-user.component.html) and components(user.component.ts, add-user.component.ts) to render on each click.Now let us implement the code for user.component.ts.Here, the method ngOnInit() will be invoked when this component is loaded and it will fetch all the user records and the html page will be populated.
user.compnent.ts
import { Component, OnInit } from '@angular/core';
import { Router } from '@angular/router';

import { User } from '../models/user.model';
import { UserService } from './user.service';

@Component({
  selector: 'app-user',
  templateUrl: './user.component.html',
  styles: []
})
export class UserComponent implements OnInit {

  users: User[];

  constructor(private router: Router, private userService: UserService) {

  }

  ngOnInit() {
    this.userService.getUsers()
      .subscribe( data => {
        this.users = data;
      });
  };

  deleteUser(user: User): void {
    this.userService.deleteUser(user)
      .subscribe( data => {
        this.users = this.users.filter(u => u !== user);
      })
  };

}
Similarly we have add-user.component.ts
import { Component } from '@angular/core';
import { Router } from '@angular/router';

import { User } from '../models/user.model';
import { UserService } from './user.service';

@Component({
  templateUrl: './add-user.component.html'
})
export class AddUserComponent {

  user: User = new User();

  constructor(private router: Router, private userService: UserService) {

  }

  createUser(): void {
    this.userService.createUser(this.user)
        .subscribe( data => {
          alert("User created successfully.");
        });

  };

}
user.model.ts
export class User {

  id: string;
  firstName: string;
  lastName: string;
  email: string;
}
user.service.ts
import {Injectable} from '@angular/core';
import { HttpClient, HttpHeaders } from '@angular/common/http';

import { User } from '../models/user.model';


const httpOptions = {
  headers: new HttpHeaders({ 'Content-Type': 'application/json' })
};

@Injectable()
export class UserService {

  constructor(private http:HttpClient) {}

  private userUrl = 'http://localhost:8080/user-portal/api';

  public getUsers() {
    return this.http.get(this.userUrl);
  }

  public deleteUser(user) {
    return this.http.delete(this.userUrl + "/"+ user.id);
  }

  public createUser(user) {
    return this.http.post(this.userUrl, user);
  }

}
Create Angular Views
As discussed we have two views – user.component.html and add-user.component.html
user.component.html
<div class="col-md-6">
<h2> User Details</h2>

<table class="table table-striped">
  <thead>
  <tr>
    <th class="hidden">Id</th>
    <th>FirstName</th>
    <th>LastName</th>
    <th>Email</th>
    <th>Action</th>
  </tr>
  </theadv
  <tbody>
  <tr *ngFor="let user of users">
    <td class="hidden">{{user.id}}</td>
    <td>{{user.firstName}}</td>
    <td>{{user.lastName}}</td>
    <td>{{user.email}}</td>
    <td><button class="btn btn-danger" (click)="deleteUser(user)"> Delete User</button></td>
  </tr>
  </tbody>
</table>
</div>
add-user.component.html
<div class="col-md-6">
  <h2 class="text-center">Add User</h2>
<form>
  <div class="form-group">
    <label for="email">Email address:</label>
    <input type="email" [(ngModel)]="user.email" placeholder="Email" name="email" class="form-control" id="email">
  </div>

  <div class="form-group">
    <label for="firstName">First Name:</label>
    <input [(ngModel)]="user.firstName" placeholder="First Name" name="firstName" class="form-control" id="firstName">
  </div>

  <div class="form-group">
    <label for="lastName">Last Name:</label>
   <input [(ngModel)]="user.lastName" placeholder="Last name" name="lastName" class="form-control" id="lastName">
  </div>

  <button class="btn btn-success" (click)="createUser()">Create</button>
</form>
</div>
Angular Routing
Now it’s time to configure routing in angular.In this configuration, we will configure the path and corresponding component to load which will in turn load the respective view.Following is our routing configuration.
app.routing.module.ts
import { NgModule } from '@angular/core';
import { RouterModule, Routes } from '@angular/router';

import { UserComponent } from './user/user.component';
import {AddUserComponent} from './user/add-user.component';

const routes: Routes = [
  { path: 'users', component: UserComponent },
  { path: 'add', component: AddUserComponent }
];

@NgModule({
  imports: [
    RouterModule.forRoot(routes)
  ],
  exports: [
    RouterModule
  ],
  declarations: []
})
export class AppRoutingModule { }
Angular Module
Now we are almost done with our application.We only need to include all the above implementation in our main module.
app.module.ts
import { BrowserModule } from '@angular/platform-browser';
import { NgModule } from '@angular/core';
import { FormsModule } from '@angular/forms';

import { AppComponent } from './app.component';
import { UserComponent } from './user/user.component';
import { AppRoutingModule } from './app.routing.module';
import {UserService} from './user/user.service';
import {HttpClientModule} from "@angular/common/http";
import {AddUserComponent} from './user/add-user.component';

@NgModule({
  declarations: [
    AppComponent,
    UserComponent,
    AddUserComponent
  ],
  imports: [
    BrowserModule,
    AppRoutingModule,
    HttpClientModule,
    FormsModule
  ],
  providers: [UserService],
  bootstrap: [AppComponent]
})
export class AppModule { }
Angular CLI Proxy Configuration
To configure proxy in angular CLI, we need to create proxy.config.json file in the root of the angular project and edit the start script in package.json.
proxy.config.json
{
  "/api/*": {
    "target": "http://localhost:8080/user-portal",
    "secure": false
  }
}
The value of target here is the context root of the application and api is the endpoint for user API.
package.json
"start": "ng serve --proxy-config proxy.config.json",
Now make sure to change the userUrl value to ‘/api’ in user.service.ts file and comment @CrossOrigin in UserController.java.Once this done use ng serve –proxy-config proxy.config.json or npm start to start the angular app.
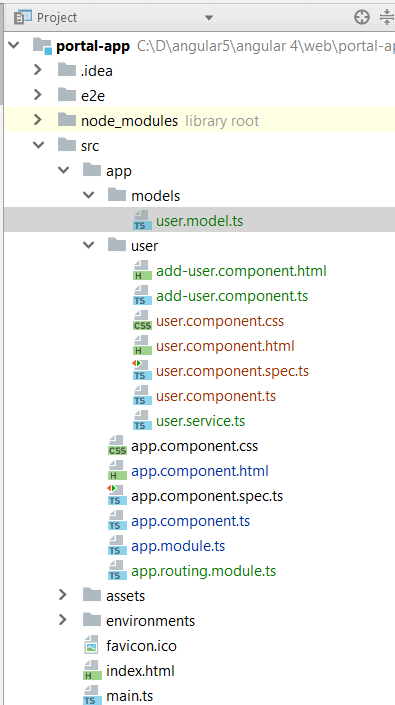
Final Application Structure
Running Spring Boot Application
We will be using spring boot embedded tomcat feature to deploy application.For more on this feature check this.
UserPortalApplication.java
package com.devglan.userportal;

import org.springframework.boot.SpringApplication;
import org.springframework.boot.autoconfigure.SpringBootApplication;

@SpringBootApplication
public class UserPortalApplication {

	public static void main(String[] args) {
		SpringApplication.run(UserPortalApplication.class, args);
	}
}
Run Angular App
Now the server is up.Hit ng serve to deploy angular application and let’s test the application.
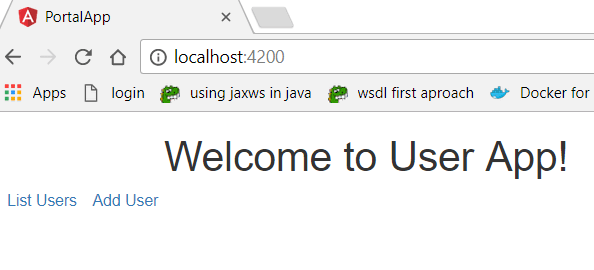
Hit the url – http://localhost:4200/ and you can see following result.
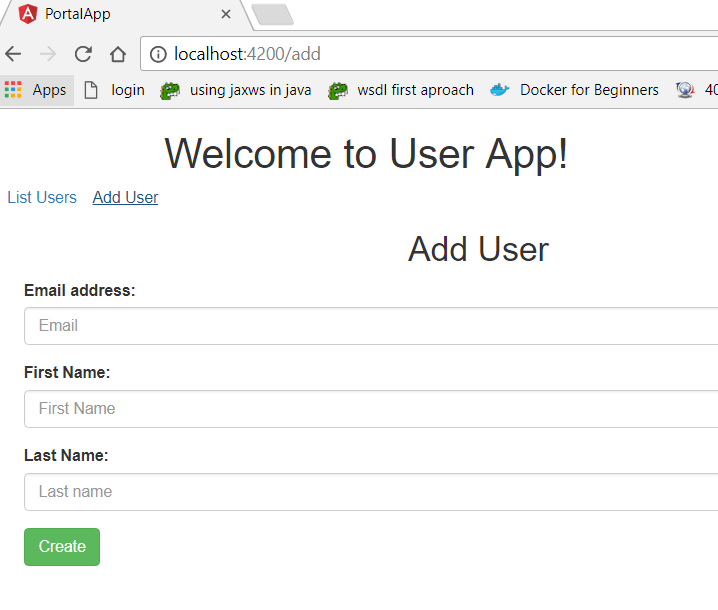
Now, click on the Add User link and following form will appear to add user.
Now, click on the list user after adding multiple users.

Conclusion
This is pretty much about spring boot and angular 5 integration tutorial.In the next article, we will look into deploying this application in a single war file with maven and tomcat. You can download the source from here.If time permits, we will try to integrate spring security with it.Please let me know your comments below.
| Published on Java Code Geeks with permission by Dhiraj Ray, partner at our JCG program. See the original article here: Spring Boot + Angular 5 +Spring Data + Rest Example(CRUD) Opinions expressed by Java Code Geeks contributors are their own. |

Amazing. Thank you
Tutorial very incomplete. At the beginning, image after angular import and after Spring boot import are exactly the same.
Does not work, useless.
The app fails for me:
ERROR in src/app/user/user.component.ts(24,9): error TS2322: Type ‘Object’ is not assignable to type ‘User[]’.
The ‘Object’ type is assignable to very few other types. Did you mean to use the ‘any’ type instead?
src/app/user/user.component.ts(24,9): error TS2322: Type ‘Object’ is not assignable to type ‘User[]’.
The ‘Object’ type is assignable to very few other types. Did you mean to use the ‘any’ type instead?
Property ‘includes’ is missing in type ‘Object’.
I checked my code against your source and they are identical.
In userservice.ts It should be like this. Due to html tags sorrounding User[], it did not appear in the sample code here. Please check out this – http://www.devglan.com/spring-boot/spring-boot-angular-example
public getUsers() {
return this.http.get(this.userUrl);
}