This installation needs to have the Red Hat Middleware product streams installed (pre-configured container options) and all the extras like source to image and .Net Core containers.Since the release of the OpenShift Container Platform it has been my desire to provide a simple, fully configured and easy to use installation.
Since I last updated this project, OpenShift Container Platform 3.7 was released.
As of today you can now install this new release in just minutes on your laptop, machine or where ever you might like if you have the time and inclination.
Bit of history
A few months back I showed you how to go from no cloud to fully cloud enabled with a container based application development platform in just over two minutes with OpenShift Container Platform 3.4.
Next up we supported you with a newer version 3.5 with many new features you wanted to get your hands on.
For version 3.6 you got a tech preview of the all new service catalog, a way to use templated containers.
Now it’s time to embrace the latest version of OpenShift Container Platform 3.7 and start enjoying the new features it brings.
If you’ve been following my journey through the application development phases of storytelling, it’s fairly obvious I’m a fan of cloud based solutions like OpenShift. This is how application development goes from local resources and moves on to remote resources, while developers continue to work locally in the same manner as always.
It is so simple, I believe that anyone can set this up in just minutes, so let’s take a look at how to get you started:
Install in 3 simple steps…
- Download and unzip.
- Run ‘init.sh’, ‘init.bat’ or ‘init-win10.bat’ file, then sit back. (Note: ‘init.bat’ and ‘init-win10.bat’ must be run with Administrative privileges.)
- Follow displayed instructions to log in to your brand new OpenShift Container Platform!
- Still want more help installing? Try these instructions (part of an online workshop) that explain the installation in detail.
You need to download and unzip the project, then run the installation script, sit back until you see the output at the end showing you where to log in to your brand new
OpenShift Container Platform.
Also note, that if this installation ran before, it’s setup to always give a clean running installation by fixing anything that is left running or blocking a new installation. No intervention should be required by you.It checks automatically for the required dependencies, if missing a pointer is provided for downloading these requirements. This means no worries about finding out what’s needed, just run the installation relax.
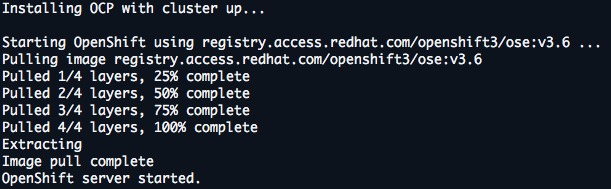
In figure 1, the installation started and container layers are being pulled for setup.
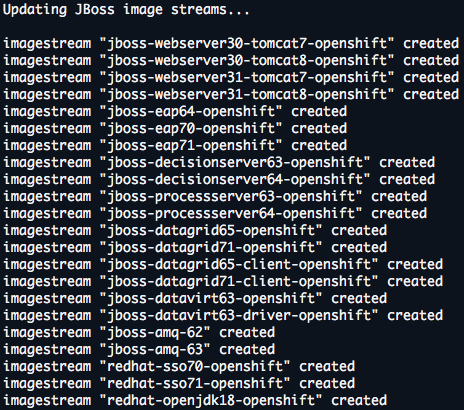
Validation is shown in figure 2, where the IP address of the OpenShift Container Platform log in console is presented. I make sure your OpenShift Container Platform has the latest greatest JBoss middleware streams loaded, a .NET stream is added and I also update the RHEL 7 streams.
Now it’s almost ready, it just needs to show how to log in.
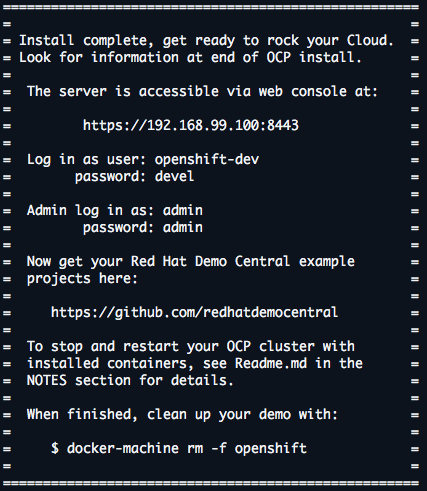
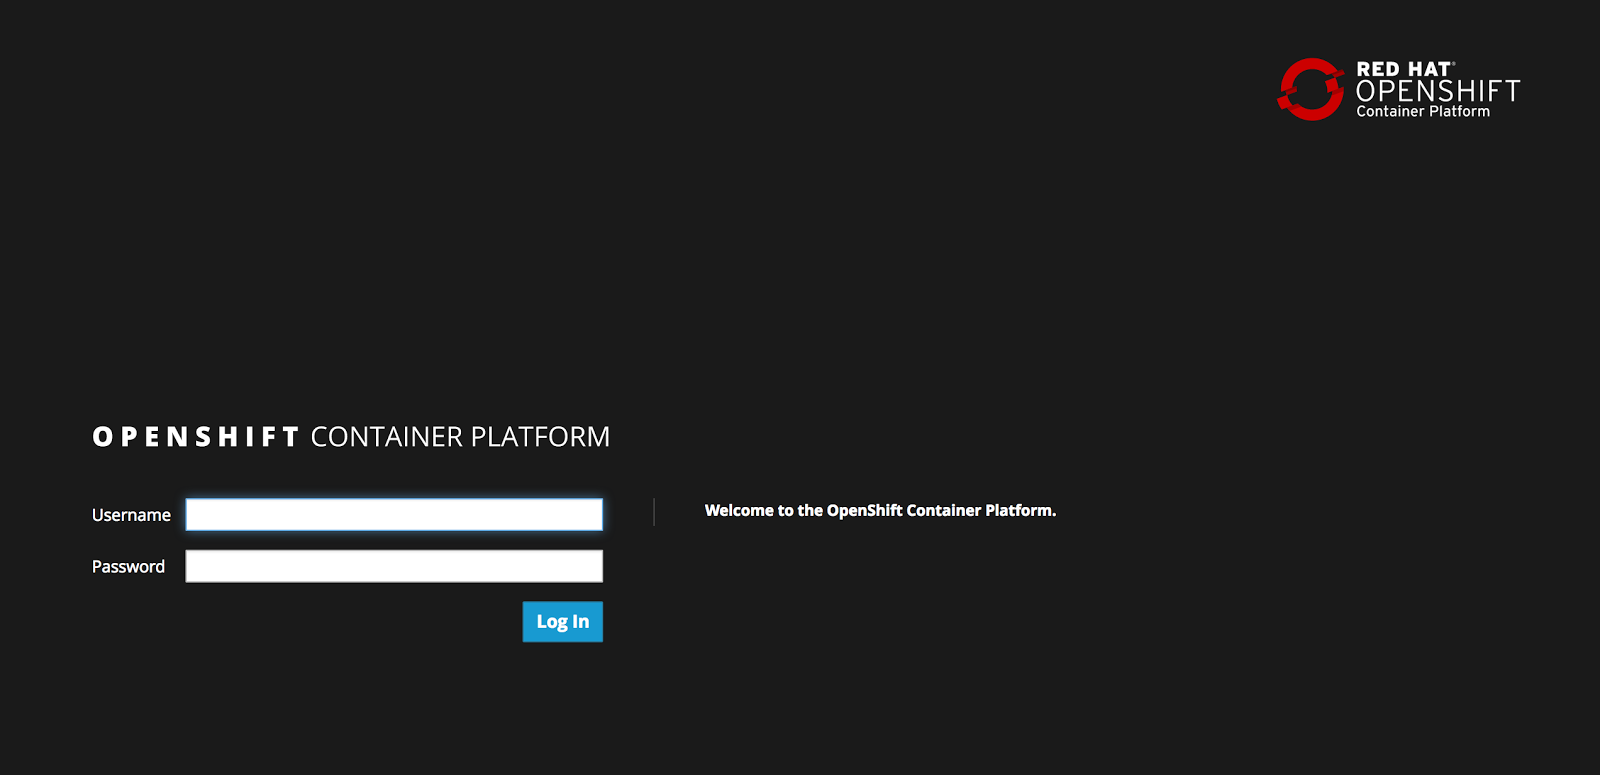
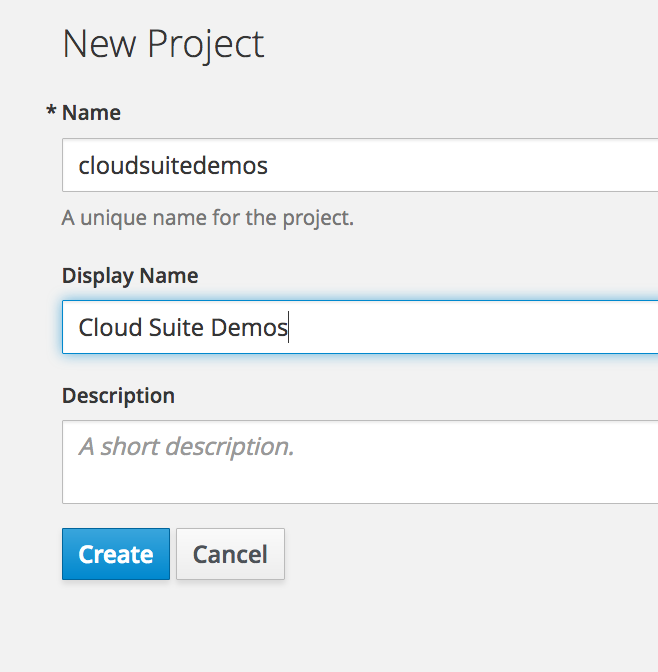
As I have updated the image streams, it takes some time for them to be pulled into OpenShift Container Platform and appear in your lists of available platforms. Log in, as shown in figure 4, with admin user and create a project by clicking on the New Project button.Figure 3 shows the address that was dynamically created (in my case it is showing https://192.168.99.100:8443), just paste it into a browser and log in with any of the given users. Also note the final command shown, it helps to completely clean up this demo.
Fill in the form shown in figure 5 any way you like, but I choose to line it up as the project that’s going to hold all the goodness you find in Red Hat Cloud demo projects.
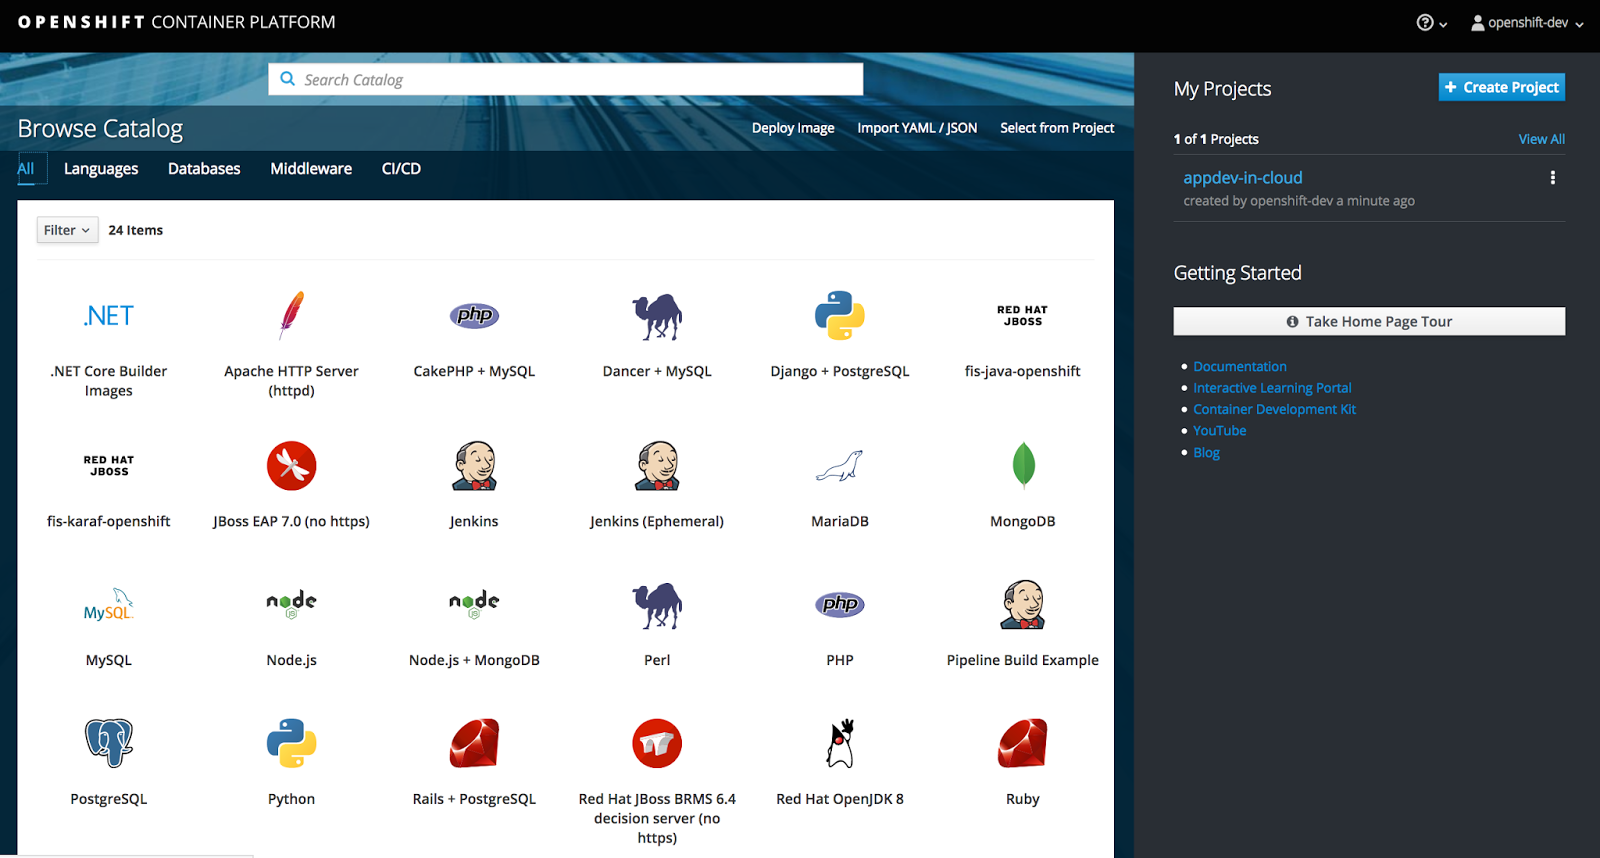
Once the form is submitted, an overview of the product templates appears for your projects that I installed above (remember, it might take a few minutes for them all to appear, so take a sip of coffee now as it is your only chance in this process).
This concludes the installation of OpenShift Container Platform and you’re ready to start containerized application development.Start by using the catalog containing the JBoss middleware product templates to develop applications on the OpenShift Container Platform cloud.
I assume you can find more information online if you’re interested in getting started with the basics of container development on OpenShift Container Platform, so I won’t go into that here.
Here’s wishing you many happy days of containerized application development in the cloud!Looking for some deeper examples of running JBoss middleware on OpenShift Container Platform? Check out the examples collection at Red Hat Demo Central and for something really special, check out the AppDev in the Cloud free online workshop.
| Published on Java Code Geeks with permission by Eric Schabell, partner at our JCG program. See the original article here: Cloud Happiness – How to install new OpenShift Container Platform 3.7 in minutes Opinions expressed by Java Code Geeks contributors are their own. |
