Wondering how to get started with Java EE Microservices? It only takes a few quick steps to deploy a Microservice using Java EE APIs. Many think that Java EE is too heavyweight for use with Microservices, but that is simply not the case…especially if you only utilize the Java EE specifications that are required by your service. In this brief post, I’ll demonstrate how to quickly develop a Microservice with Java EE and then deploy to Payara Micro.
To download the example project, please go to GitHub: https://github.com/juneau001/SimpleService
For the purposes of this example, I will utilize NetBeans, but any Java IDE will suffice. To get started, create a Maven web application and name it SimpleService. Next, create two Java packages: org.simpleservice and org.simpleservice.entity. Once complete, the project should resemble the following figure:

Now many believe that a Microservice should not connect to an enterprise database, but I will leave that for those who wish to debate. In this example, I will connect this service to a central Apache derby database to obtain data because I believe this to be a very likely scenario in many organizations. In this case, we’ll create a “Suggested Name” database web service, which will query a database table of suggested names for the upcoming EE4J platform. To create the infrastructure, connect to a local Apache Derby database and create it using the following SQL:
create table SUGGESTED_NAME (
id numeric primary key,
name varchar(150));

insert into suggested_name values(1, 'Open EE');
insert into suggested_name values(2, 'Open JOE');
insert into suggested_name values(3, 'Cappucino');
Next, open the Maven POM file for the SimpleService project and add the following dependencies:
<dependencies>
        <dependency>
            <groupId>javax.ws.rs</groupId>
            <artifactId>javax.ws.rs-api</artifactId>
            <version>2.1</version>
            <scope>provided</scope>
        </dependency>
        <dependency>
            <groupId>javax.persistence</groupId>
            <artifactId>javax.persistence-api</artifactId>
            <version>2.2</version>
            <scope>provided</scope>
        </dependency>
        <dependency>
            <groupId>javax.validation</groupId>
            <artifactId>validation-api</artifactId>
            <version>2.0.0.Final</version>
        </dependency>
        <dependency>
            <groupId>javax.ejb</groupId>
            <artifactId>javax.ejb-api</artifactId>
            <version>3.2</version>
            <type>jar</type>
        </dependency>
        <dependency>
            <groupId>org.eclipse.persistence</groupId>
            <artifactId>eclipselink</artifactId>
            <version>2.5.2</version>
        </dependency>
        <dependency>
            <groupId>org.eclipse.persistence</groupId>
            <artifactId>org.eclipse.persistence.jpa.modelgen.processor</artifactId>
            <version>2.5.2</version>
            <scope>provided</scope>
        </dependency>
        <dependency>
            <groupId>org.apache.derby</groupId>
            <artifactId>derbyclient</artifactId>
            <version>10.14.1.0</version>
        </dependency>
    </dependencies>
Note that there is no Java EE dependency. This is because I am utilizing only those dependencies that are required for the service. Each dependency is added separately.
Next, create a package org.simpleservice.entity, and create an entity class named SuggestedName within it. For brevity, I’m not going into all of the sources here, but you can check the sources out on GitHub (https://github.com/juneau001/SimpleService).
We’ll need to implement our JAX-RS web service class next. To configure the Java EE application for JAX-RS, let’s create a class named ApplicationConfig and place it within the org.simpleservice package:
import java.util.Set;
import javax.ws.rs.core.Application;

/**
 *
 * @author Juneau
 */
@javax.ws.rs.ApplicationPath("rest")
public class ApplicationConfig extends Application {
    @Override
    public Set<Class<?>> getClasses() {
        Set<Class<?>> resources = new java.util.HashSet<>();
        resources.add(org.simpleservice.SuggestedNameService.class);
        return resources;
    }
}
Next, I’ll create the JAX-RS web service class itself, and I will name it SuggestedNameService. Here are the sources for the SuggestedNameService class. Note that I have injected a Persistence Unit. I will get to that next.
@Stateless
@Path("suggestedNameService")
public class SuggestedNameService {
@PersistenceContext(unitName = "SimpleService_1.0PU")
private EntityManager em;
@GET
@Path("{id}")
@Produces({MediaType.APPLICATION_XML, MediaType.APPLICATION_JSON})
public SuggestedName find(@PathParam("id") BigDecimal id) {
SuggestedName suggestedName = null;
try {
suggestedName = (SuggestedName)
em.createQuery("select object(o) from SuggesetedName o " +
"where o.id = :id")
.setParameter("id", id)
.getSingleResult();
} catch (NoResultException ex){
System.out.println("Error: " + ex);
}
return suggestedName;
}
@GET
@Produces({MediaType.APPLICATION_XML, MediaType.APPLICATION_JSON})
public List<SuggestedName> findAll() {
List<SuggestedName> suggestedNames = null;
try {
suggestedNames = em.createQuery("select object(o) from SuggestedName o")
.getResultList();
} catch (NoResultException ex){
System.out.println("Error: " + ex);
}
return suggestedNames;
}
protected EntityManager getEntityManager() {
return em;
}
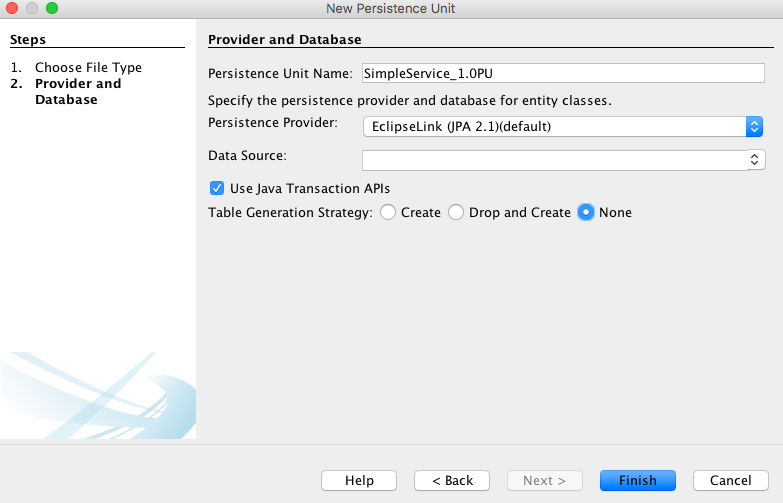
}Since this service will connect to a database, I will create a persistence unit for the project. This can be easily done in NetBeans by right-clicking the project and choosing New->Persistence->Persistence Unit. Name the persistence unit SimpleService_1.0PU and use EclipseLink as the provider. Do not add a data source at this point.
Once created, open the Persistence Unit and add the connection information. In this case, I will connect to a JTA data source that I’ll define next. The data source is named DerbyDataSource, so the content of the Persistence Unit (persistence.xml) should look as follows:
<?xml version="1.0" encoding="UTF-8"?>


<persistence version="2.1" xmlns="http://xmlns.jcp.org/xml/ns/persistence" xmlns:xsi="http://www.w3.org/2001/XMLSchema-instance" xsi:schemaLocation="http://xmlns.jcp.org/xml/ns/persistence http://xmlns.jcp.org/xml/ns/persistence/persistence_2_1.xsd">

  <persistence-unit name="AuthorService_1.0PU" transaction-type="JTA">

    <jta-data-source>java:global/DerbyDataSource</jta-data-source>

    <exclude-unlisted-classes>false</exclude-unlisted-classes>

    <properties/>

  </persistence-unit>

</persistence>
Create a web.xml deployment descriptor for the project. If doing this within NetBeans, simply right-click the project and choose New->Web->”Standard Deployment Descriptor (web.xml) and click Finish. Once the web.xml deployment descriptor has been generated, add the data source to it.
<web-app xmlns="http://xmlns.jcp.org/xml/ns/javaee"


         xmlns:xsi="http://www.w3.org/2001/XMLSchema-instance"

         xsi:schemaLocation="http://xmlns.jcp.org/xml/ns/javaee http://xmlns.jcp.org/xml/ns/javaee/web-app_3_1.xsd"

         version="3.1">

    <session-config>

        <session-timeout>

            30

        </session-timeout>

    </session-config>


<data-source>

        <name>java:global/DerbyDataSource</name>

        <class-name>org.apache.derby.jdbc.ClientDriver</class-name>

        <server-name>localhost</server-name>

        <port-number>1527</port-number>

        <url>jdbc:derby://localhost:1527/acme</url>

        <user>acmeuser</user>

        <password>yourpassword</password>

    </data-source>


</web-app>
That’s it for the Java EE application. You should now be able to compile the project into a WAR file and deploy to GlassFish, Payara, or another Java EE application server of your choice. In this case, let’s deploy to Payara Micro.
To begin, download the latest Payara Micro JAR file from the website: https://www.payara.fish/payara_micro
Once downloaded, the server can be started up by opening a command prompt and executing the JAR with your local Java runtime by typing:
java -jar payara-micro-4.1.2.174.jar
To deploy the application (microservice) that we’ve created, simply utilize the –deploy option when executing the Payara Micro JAR, and point it to the SimpleService WAR file:
java -jar payara-micro-4.1.2.174.jar --deploy SimpleService-1.0.war
The SimpleService microservice can now be accessed via the following URL: http://localhost:8080/SimpleService-1.0/rest/suggestedNameService
| Published on Java Code Geeks with permission by Josh Juneau, partner at our JCG program. See the original article here: Easy Java EE Microservices with Payara Micro Opinions expressed by Java Code Geeks contributors are their own. |
