In my previous post I described how I started a continuous delivery stack with one simple command. The next step is to prepare the stack to build and deploy an application in an automated way. In this post I describe how to configure the stack so it is ready for processing a simple Spring Boot application. Although I have the components running as Docker containers they still need configuration to have them work together, especially Jenkins.
When I open the console for the fresh Jenkins install at http://localhost:8080 I get the following screen in which I can enter the generated password:
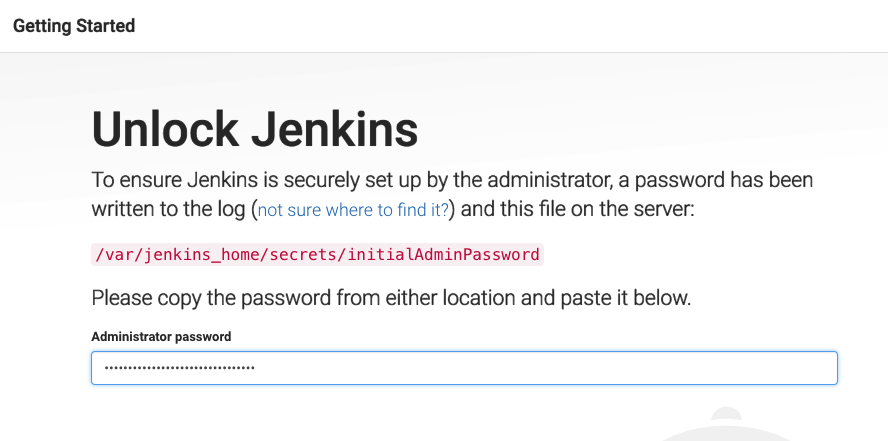
The password can be found on the Docker container in the file shown in the screen or you can find it in the console output of the docker-compose terminal:

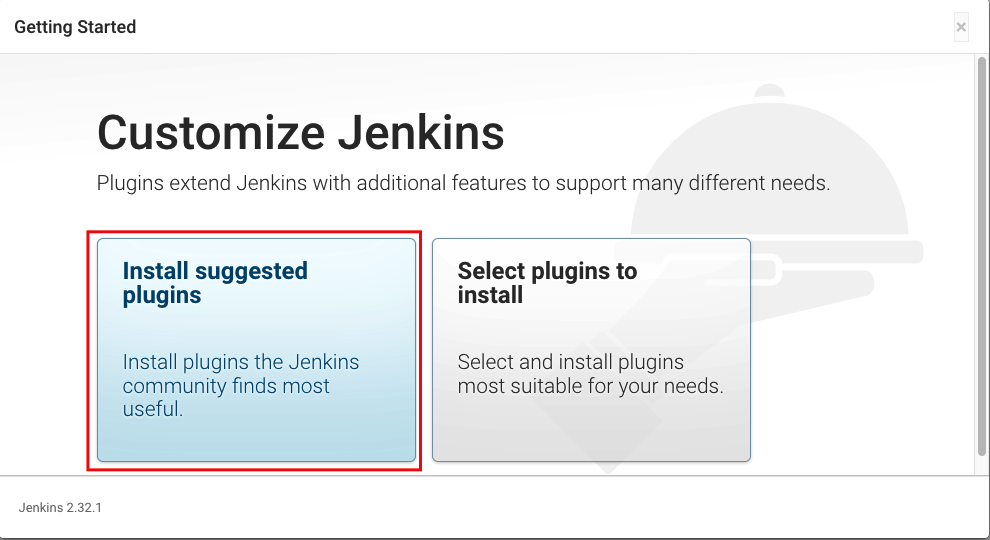
After filling in the pasword I get the choice to install the ‘default’ plugins or select them myself. For my use case I can simply select the default one (the Jenkins image I use already contain the necessary non-default plugin I need):
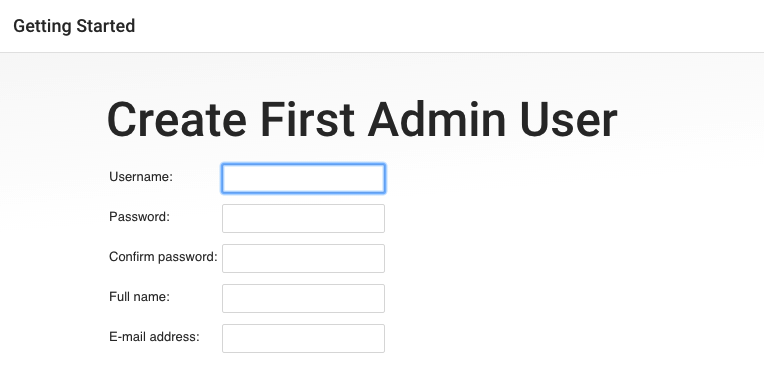
Installing the plugins may take a while but after that I create the Admin user in the next screen:
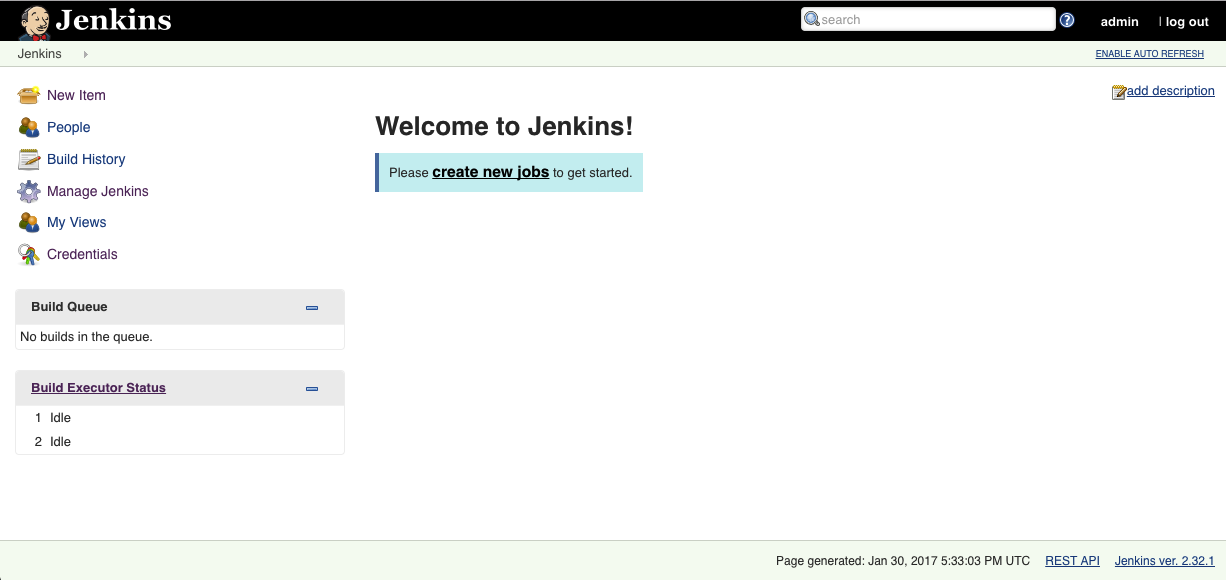
After this screen I get the Jenkins Dashboard:
Before I add my first job there are some things that I want to fix first:
- Configure the Gitlab plugin
- Add a Maven installation
- Configure Nexus as Maven mirror
- Configure the Gitlab plugin
To give Jenkins access to the Git server I create a new user called ‘jenkins’ that is able to clone repositories. To create the new user go to http://localhost:8082 with a browser. Using my docker-compose stack I can login with user ‘root’ and the password ‘admin123’. Next I click on the ‘wrench’ to go to the admin area:

In this Admin area I create a new user called ‘jenkins’:

As you can see it says the password will be mailed but since I didn’t configure the mailserver in the Gitlab Docker this will not happen. After the user is created, I select it to edit it. I can then fill in the password manually. Now I log out to start a new session and log in as this new user ‘jenkins’. The first time I have to reset the password and login again. Finally when I am logged in as ‘jenkins’ user I go to the ‘Profile Settings’ of the ‘jenkins’ user and open the tab ‘Account’. Here I see the Private token for this user, as shown here:
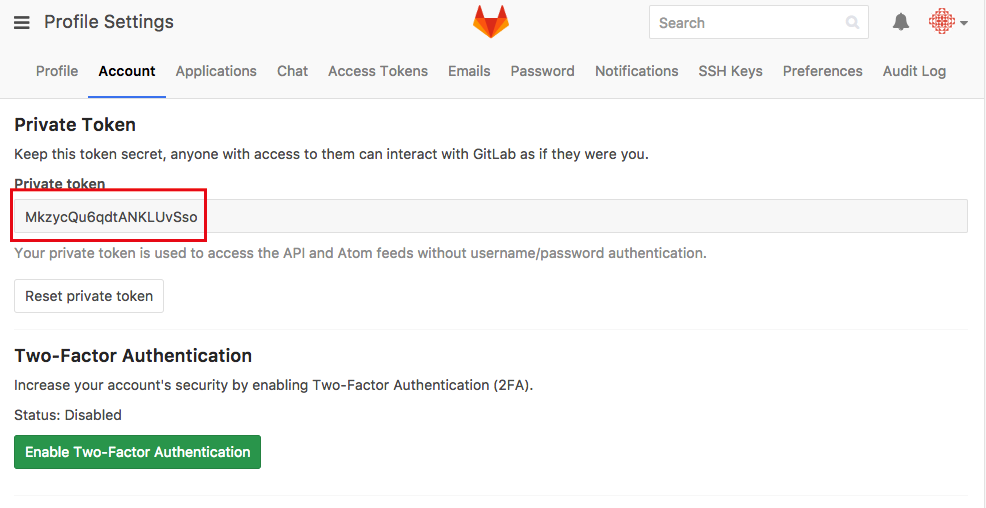
I copy this so I can use it in the Jenkins configuration.
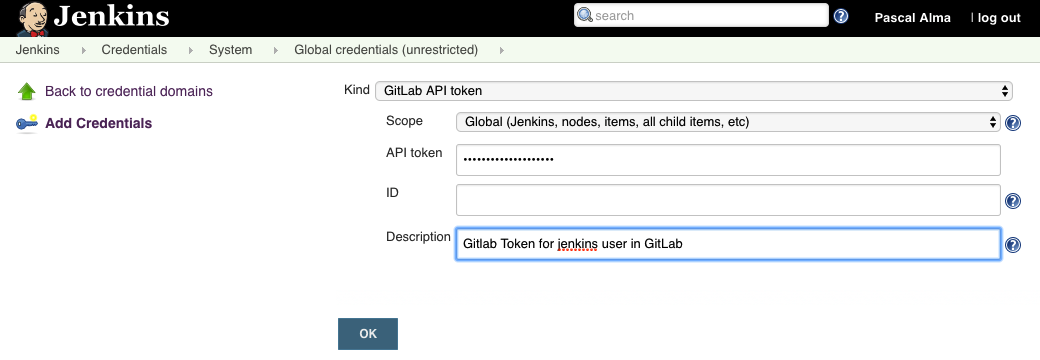
Back in the Jenkins Dashboard I go to ‘Manage Jenkins‘ and add a new Credential of the ‘Gitlab Api Key’ type like this:
Next I go to the ‘Configure System‘ and create a GitLab connection like this:
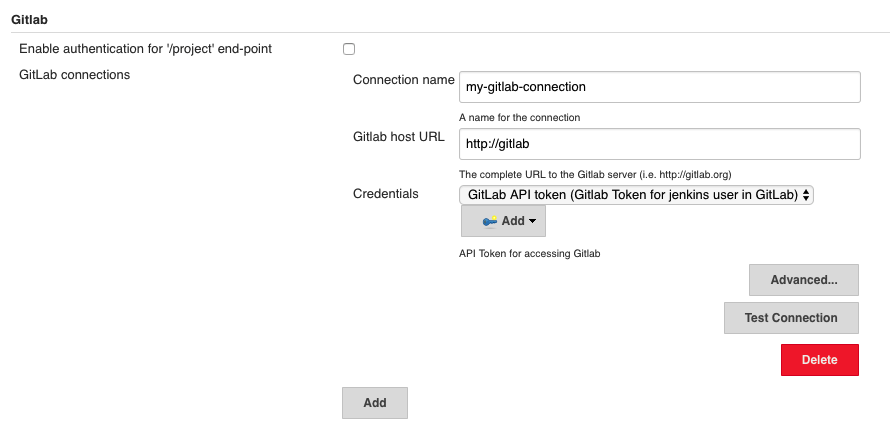
This API Access key is used by the Gitlab plugin that will be used to checkout the Git code in the ‘pipeline’ job.
- Add a Maven installation
In the Dashboard go to ‘Manage Jenkins’ and choose ‘Global Tool Configuration‘. Click ‘Add Maven’ and name the installation ‘M3’ like this:
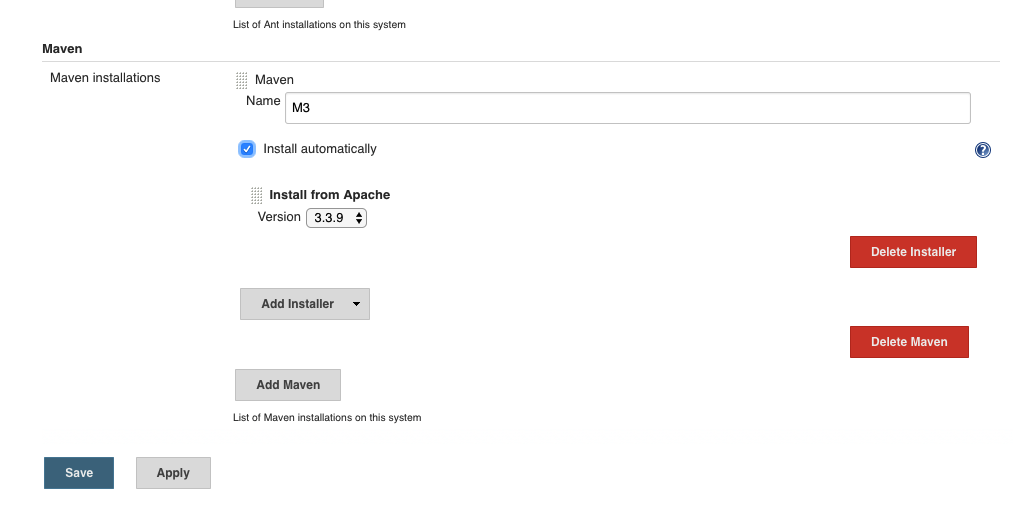
The name of this Maven installation will be used in the Jenkinsfile that describes the pipeline job.
- Configure Nexus as Maven mirror
To define a global Maven settings file for the Maven installation I use the Config File Provider plugin. To add a ‘settings.xml‘ file go to ‘Manage Jenkins‘ and select ‘Managed files’ in the main menu:

Choose ‘Add a new Config‘ and select the ‘Global Maven settings.xml’ as file type. In the content part I add my Nexus installation as mirror like this:
<?xml version="1.0" encoding="UTF-8"?>
<settings xmlns="http://maven.apache.org/SETTINGS/1.0.0"
          xmlns:xsi="http://www.w3.org/2001/XMLSchema-instance"
          xsi:schemaLocation="http://maven.apache.org/SETTINGS/1.0.0 http://maven.apache.org/xsd/settings-1.0.0.xsd">
 <mirrors>
    <mirror>
      <!--This sends everything else to /public -->
      <id>nexus</id>
      <mirrorOf>*</mirrorOf>
      <url>http://nexus:8081/repository/maven-public/</url>
    </mirror>
  </mirrors>
  <profiles>
    <profile>
      <id>nexus</id>
      <!--Enable snapshots for the built in central repo to direct -->
      <!--all requests to nexus via the mirror -->
      <repositories>
        <repository>
          <id>central</id>
          <url>http://central</url>
          <releases><enabled>true</enabled></releases>
          <snapshots><enabled>true</enabled></snapshots>
        </repository>
      </repositories>
     <pluginRepositories>
        <pluginRepository>
          <id>central</id>
          <url>http://central</url>
          <releases><enabled>true</enabled></releases>
          <snapshots><enabled>true</enabled></snapshots>
        </pluginRepository>
      </pluginRepositories>
    </profile>
  </profiles>
  <activeProfiles>
    <!--make the profile active all the time -->
    <activeProfile>nexus</activeProfile>
  </activeProfiles>
</settings>
Notice the ID of the Configuration File. I refer to it in my pipeline code. Since this pipeline is executed separately from the Jenkins installation I use the plugin ‘Pipeline Maven plugin‘ to have the pipeline make use of the same Maven settings.
That’s it for now. The stack is now running and ready to build my Spring Boot project. I will show this in the next post.
| Reference: | Configure Jenkins for Continuous Delivery of a Spring Boot application from our JCG partner Pascal Alma at the The Pragmatic Integrator blog. |
