Need a little spring in your step? Tired of all those heavy web servers and deploying WAR files? Well you’re in luck. Spring Boot takes an opinionated view of building production-ready Spring applications. Spring Boot favors convention over configuration and is designed to get you up and running as quickly as possible.
In this blog, I will walk you through the step-by-step process for getting Spring Boot going on your machine.
Just put them on and lace them up…
Spring Boot makes it easy to create stand-alone, production-grade Spring-based applications that you can “just run.” You can get started with minimum fuss due to the it taking an opinionated view of the Spring platform and third-party libraries. Most Spring Boot applications need very little Spring configuration.
These boots are made for walking…maybe running
So the greatest thing about Spring Boot is the ability to be up and running in very little time. You don’t have to install a web server like JBoss, Websphere, or even Tomcat for that matter. All you need to do is pull in the proper libraries, annotate, and fire away. If you are going to do a lot of Spring Boot projects, I would highly suggest using the Spring Tool Suite that is available. It has some great features for making Boot projects really easy to manage.
You can of course choose between Maven or Gradle to manage dependencies and builds. My examples will be in Maven as it is what I am familiar with. It’s all about your configuration preference.
Many different styles to choose from
One of the things that makes Spring Boot great is that it works really well with other Spring offerings. Wow, go figure? You can use Spring MVC, Jetty, or Thymeleaf just by adding them to your dependencies and Spring Boot automatically adds them in.
Every day boots
Spring Boot wants to make things easy for you. You can do a whole host of things with it. Here is a list of some of the highlights.
- Spring Boot lets you package up an application in a standalone JAR file, with a full Tomcat server embedded
- Spring Boot lets you package up an application as a WAR still.
- Configuration is based on what is in the classpath (MySQL DB in the path, it’ll set it up for you)
- It has defaults set (so you don’t have to configure them)
- Easily overridden by adding to the classpath (add H2 dependency and it’ll switch)
- Let’s new devs learn the ropes in a hurry and make changes later as they learn more.
Baby boots
But remember, the aim of this blog is just to get you familiar with how to get Spring Boot going on your machine. It is going to be fairly straightforward and vanilla. The goal is to get you started. We’re not trying to code a new Uber app or something here. Baby steps folks! We just want to get your feet warm. We all know those tutorials that throw tons of stuff at us and just gloss over things. Not here.
So to get started the easiest way is to pull down the tutorial code from Spring itself. It has a great getting-started point. It is a good for you to see what is happening without throwing the whole Spring library at you.
Clone boots…watch your aim!
First off, let’s clone the Spring example found here.
git clone https://github.com/spring-guides/gs-spring-boot.git
We won’t go into the steps of setting it up in an IDE as everyone will have their own preference.
Construction Boots
Let’s break things down a bit. What are these annotations about?
@SpringBootApplication is a convenience annotation that adds all of the following:
@Configurationtags the class as a source of bean definitions for the application context.@EnableAutoConfigurationtells Spring Boot to start adding beans based on classpath settings, other beans, and various property settings.- Normally you would add
@EnableWebMvcfor a Spring MVC app, but Spring Boot adds it automatically when it seesspring-webmvcon the classpath. This flags the application as a web application and activates key behaviors such as setting up aDispatcherServlet. @ComponentScantells Spring to look for other components, configurations, and services in the the hello package, allowing it to find the controllers.
Wow, I have always liked quality built-ins when looking for a new home! But what’s really happening behind these shiny new items?
The main() method calls out Spring Boot’s SpringApplication.run() method to launch.
Did we mention (or did you notice) that you didn’t have to mess around with XML? What a bonus! No more web.xml file nonsense. No more wondering if I put the right tag in the file and wondering what the problem is with the paragraph of unreadable error message telling you just about nothing any longer. This is 100% pure Java. No configuration or plumbing needed. They have done it for you. How nice of them!
Once it is set up and ready for you to begin editing, let’s take a quick look at the Application.java file. Here you will find a runnable main class. It has an annotation of @SpringBootApplication. This is the key annotation that makes this application a Boot app.
package hello;
import java.util.Arrays;
import org.springframework.boot.CommandLineRunner;
import org.springframework.boot.SpringApplication;
import org.springframework.boot.autoconfigure.SpringBootApplication;
import org.springframework.context.ApplicationContext;
import org.springframework.context.annotation.Bean;
@SpringBootApplication
public class Application {
public static void main(String[] args) {
SpringApplication.run(Application.class, args);
}
@Bean
public CommandLineRunner commandLineRunner(ApplicationContext ctx) {
return args -> {
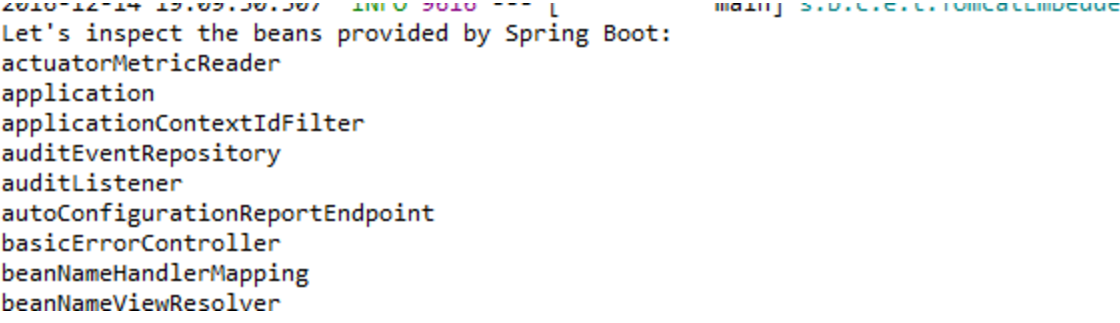
System.out.println("Let's inspect the beans provided by Spring Boot:");
String[] beanNames = ctx.getBeanDefinitionNames();
Arrays.sort(beanNames);
for (String beanName : beanNames) {
System.out.println(beanName);
}
};
}
}Now to run it! If you are using the STS suite (and properly built it), you will see it in your Boot Dashboard. For everyone else, either right click in the IDE and Run As => Java Application, or head to your favorite command line tool. Use the following commands.
Maven:
mvn package && java -jar target/gs-spring-boot-0.1.0.jar
Gradle:
./gradlew build && java -jar build/libs/gs-spring-boot-0.1.0.jar
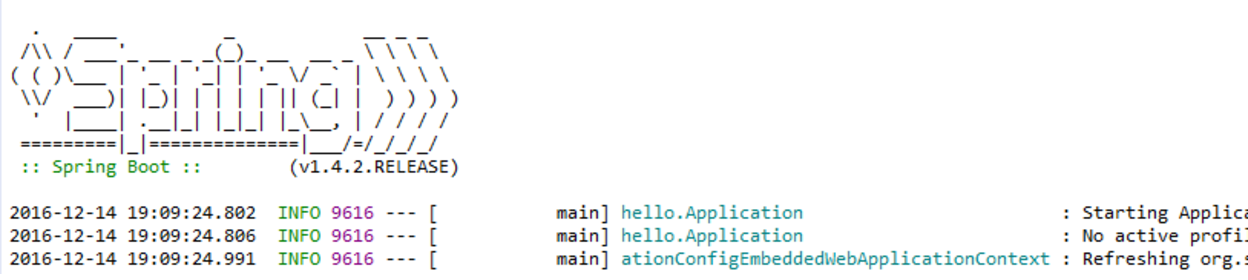
The output will show the normal Spring startup of the embedded server and then it will loop over all the beans and write them out for you!
You did it! You tied your first pair of Spring Boots.
Boots on display
To make the sale or just to get your eyes on the prize, this example throws in a CommandLineRunner method marked as a @Bean and this runs on startup. It retrieves all the beans that were created either by your app or were automatically added thanks to Spring Boot. It sorts them and prints them out. You can put other startup information or do some other little bit of work if you would like.
Boots online
While shopping for the right boot, we want the nice ones that will go with our favorite pair of jeans or for the ladies a nice skirt, right? Well Boot provides a simple way to get your boots out to the world for others to see. Well, we need to employ a Controller to do so. How convenient: the Spring code we downloaded has one already for us.
package hello;

import org.springframework.web.bind.annotation.RestController;
import org.springframework.web.bind.annotation.RequestMapping;

@RestController
public class HelloController {

    @RequestMapping("/")
    public String index() {
        return "Greetings from Spring Boot!";
    }

}
The two things that are most important here are the @RestController and the @RequestMapping annotations you see.
The @RestController is a subliminal message that it is nap time. Errr, wait sorry, I was getting sleepy. No, it means we have a RESTful controller waiting, watching, listening to our application’s call to it.
The @RequestMapping is the url designation that calls the particular method. So in the case of the given example, it is the “index” of the application. The example here is simply returning text. Here’s the cool thing; we can return just about anything here that you want to return.
Did JSON have nice boots on the Argo?
Finally, what I think most adventurers into Spring Boot are doing now is using it as an endpoint to their applications. There are a whole host of different options as to how you can accomplish this. Either by JSON provided data or XML solutions. We’ll just focus on one for now. Jackson is a nice lightweight tool for accomplishing JSON output to the calling scenario.
Jackson is conveniently found on the classpath of Spring Boot by default. Check it out for yourself:
mvn dependency:tree`
or
./gradlew dependencies
Let’s add some pizazz to these boots, already! Add a new class wherever you would like to in your source. Just a POJO.
public class Greeting {

    private final long id;
    private final String content;

    public Greeting(long id, String content) {
        this.id = id;
        this.content = content;
    }

    public long getId() {
        return id;
    }

    public String getContent() {
        return content;
    }

}
Now, head back to your Controller and paste this in:
private static final String template = "Ahoy, %s!";
private final AtomicLong counter = new AtomicLong();

@RequestMapping(method=RequestMethod.GET)
    public @ResponseBody Greeting sayHello(@RequestParam(value="name", required=false, defaultValue="Argonaut") String name) {
        return new Greeting(counter.incrementAndGet(), String.format(template, name));
    }
Now restart your Boot app. Go back to a browser and instead of /, go to hello-world. You should see some awesome JSON output. If you did, then you are well on your way to creating endpoints in Spring Boot and Jackson.
The Argo needs another port
Since a lot of folks are writing endpoints and have multiple sites going on, you’ll probably want to change the default port of 8080 to something else. So the easiest and most straightforward way is to add an application.properties file to src/main/resources.
All that is need is this:
server.port = 8090
Easy peasy. Weigh anchor and set sail!
Boot camp conclusion
So you can see how easy it is to get things going with Spring Boot. We didn’t have to do much in the way of configuration to actually get up and running in a hurry. We avoided the dreaded XML files and only added a small properties file. The built-ins are extremely nice to already have in the stack. Jackson provides an easy to use JSON conversion for those of us wanting to provide endpoints for our shiny frontends.
Again, Spring seems to find a way to make life simpler for the developer. This blog was kept simple on purpose. There are many different avenues to venture down in our new boots. Whether you want to leverage microservices, build a traditional monolith, or some other twist that may be out there, you can see how Spring Boot can get you started in a hurry.
| Reference: | Spring Boot – The Right Boot for you! from our JCG partner Matt McCandless at the Keyhole Software blog. |
