Building Identity Management, including authentication and authorization? Try Stormpath! Our REST API and robust Java SDK support can eliminate your security risk and can be implemented in minutes. Sign up, and never build auth again!
Today, in less than 30 seconds or so, I was able to set up a Twilio account and send myself a text message using httpie. Another few minutes work (fewer than 5) and I had a Spring Boot application doing the same.
In about the same five minutes, you can get set up with Stormpath’s Identity Management as a service platform and learn to love auth.
We are truly living in a golden age of not-on-my-computer (cloud) services.
Just about anything you can imagine having done with computers or other devices over the last 15 years you can now sign-up for and get a proof of concept going in minutes. I remember sometime around 2007 (post iPhone 1) having a conversation with an SMS broker. After filling out a sheaf of paperwork, waiting about four months and being on the hook for lots of money, we were ready to write code against the SMS gateway. This was some arcane stuff way back then.
Ever try to roll your own identity management? Did you salt your hashes? Or, just admit it – you stored passwords in plaintext like everyone else back then.
In this post, we’ll put Stormpath and Twilio together. Here’s the scenario: When a user logs in from a new device, we want to send them an SMS notification to let them know. This is a common practice today to keep people informed about activity on their accounts. If I get a notification that a login from a new address has occurred and it wasn’t me, then I know that my account has been compromised.

For the purposes of this demonstration, we’ll consider new IP address access from a new device.
The code for this post can be found here.
Set Up Stormpath
The first step is to create a Stormpath account. You can follow our Quickstart docs here. These are the basic steps:
- Register at Stormpath.com
- Click the link in the confirmation email
- Create an API Key to use for API access (Save it to:
~/.stormpath/apiKey.properties)
Set up the Stormpath Spring Boot Integration
The source code for this example can be found here.
For now, don’t worry about the Twilio stuff – it’s disabled by default. In the next section, we will integrate and enable Twilio.
The Stormpath Spring Boot integration makes it easy to trigger additional actions before and after a user logs in. It’s this mechanism that we use to send Twilio messages later on. For now, we will just make sure that the post-login handler is working.
To use the Stormpath Spring Boot integration you need only include a single dependency:
<dependency>
    <groupId>com.stormpath.spring</groupId>
    <artifactId>stormpath-thymeleaf-spring-boot-starter</artifactId>
    <version>${stormpath.version}</version>
</dependency>
In this case, we are using the Spring Boot + Web MVC + Thymeleaf integration so that we can return Thymeleaf templates.
To set up our postLoginHandler, we simply need to create a Spring Boot configuration that exposes a bean:
@Configuration
public class PostLoginHandler{

    ...

    @Bean
    @Qualifier("loginPostHandler")
    public WebHandler defaultLoginPostHandler() {
        return (HttpServletRequest request, HttpServletResponse response, Account account) -> {
            log.info("Hit default loginPostHandler with account: {}", account.getEmail());
            return true;
        };
    }
}
You can fire up the Spring Boot app like so:
mvn clean install
mvn spring-boot:run
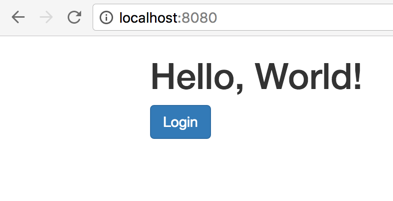
Now, you can browse to: http://localhost:8080/register to create an account in Stormpath. You can then browse to: http://localhost:8080/login. You should see something like this in the log output:
2016-09-14 22:37:18.078 ... : Hit default loginPostHandler with account: micah@stormpath.com
Huzzah! Our post-login hook is working.
A Word on CustomData
The use case we are modeling in this example is to send a text message (SMS) to a user whenever they login from a new location. In order to do that we need the user’s phone number. We also need to store an array of locations they’ve logged in from so we can determine if they are logging in from a new location.
Enter Stormpath CustomData. We knew early on that we couldn’t capture all the use cases for user data that our customers might have. So, we attached 10MB of free-form JSON data to every first-class Stormpath object, including user accounts. That’s CustomData.
We store the information for the user like so:
{
  "loginIPs": [
    "0:0:0:0:0:0:0:1",
    "104.156.228.126",
    "104.156.228.136"
  ],
  "phoneNumber": "+15556065555"
}
Here’s what it looks like in the Stormpath Admin Console:

We’ll get back to how this CustomData is set up once we work Twilio into the mix.
Set Up Twilio
Twilio has a QuickStart that will get you up and running very quickly.
The basic steps are these:
- Enter some basic registration information
- Enter your phone number
- Provision a Twilio phone number
- Test that you can send a message from your Twilio phone number to your phone number
Make sure that you run the tests and can send messages. You can test it from the command line yourself using curl or httpie:
http -f POST \
https://api.twilio.com/2010-04-01/Accounts/<account sid>/Messages.json \
To=<recipient +1...> From=<your twilio phone # - +1...>  Body="Hello there..." \
--auth <account sid>:<auth token>
Now that you know you can use your Twilio account, adding it as a dependency to the Spring Boot application is a snap:
<dependency>
    <groupId>com.twilio.sdk</groupId>
    <artifactId>twilio-java-sdk</artifactId>
    <version>(6.0,6.9)</version>
</dependency>
Tie It All Together
Earlier, we set up the Spring Boot application to perform an action after a user has successfully logged in. That action was simply to log some information. Now, we are going to integrate the ability to send a Twilio message using this same post-login handler.
@Bean
@Qualifier("loginPostHandler")
public WebHandler twilioLoginPostHandler() {
    return (HttpServletRequest request, HttpServletResponse response, Account account) -> {
        log.info("Account Full Name: " + account.getFullName());

        CustomData customData = account.getCustomData();
        String toNumber = (String) customData.get(phoneNumberIdentifier);
        List<String> loginIPs = getLoginIPs(customData);

        String ipAddress = getIPAddress(request);

        if (loginIPs.contains(ipAddress)) {
            // they've already logged in from this location
            log.info("{} has already logged in from: {}. No message sent.", account.getEmail(), ipAddress);
        } else {
            boolean messageSent = TwilioLoginMessageBuilder
                .builder()
                .setAccountSid(twilioAccountSid)
                .setAuthToken(twilioAuthToken)
                .setFromNumber(twilioFromNumber)
                .setToNumber(toNumber)
                .send("New login for: " + account.getEmail() + ", from: " + ipAddress);

            // only save the ip address if the twilio message was successfully sent
            if (messageSent) {
                saveLoginIPs(ipAddress, loginIPs, customData);
            }
        }

        return true;
    };
}
Lines 8 and 9 retrieve the user’s phone number and the list of addresses that the user has logged in from before. It pulls this information from the user’s CustomData.
Assuming they are logging in from a new location, line 18 saves the new address back to CustomDataand line 20 fires off the Twilio message.
The TwilioLoginMessageBuilder is defined in the sample and uses a fluent interface.
The send method used on line 26 above first checks to make sure that Twilio is configured properly and, if so, attempts to send the message:
TwilioRestClient client = new TwilioRestClient(accountSid, authToken);

List<NameValuePair> params = new ArrayList<>();
params.add(new BasicNameValuePair("To", toNumber));
params.add(new BasicNameValuePair("From", fromNumber));
params.add(new BasicNameValuePair("Body", msg));

MessageFactory messageFactory = client.getAccount().getMessageFactory();
try {
    Message message = messageFactory.create(params);
    log.info("Message successfuly sent via Twilio. Sid: {}", message.getSid());
    return true;
} catch (TwilioRestException e) {
    log.error("Error communicating with Twilio: {}", e.getErrorMessage(), e);
    return false;
}
Let’s fire up the app and see it in action!
mvn clean install

TWILIO_ACCOUNT_SID=<your twilio account sid> \
TWILIO_AUTH_TOKEN=<your twilio auth token> \
TWILIO_FROM_NUMBER=<your twilio phone number> \
TWILIO_ENABLED=true \
java -jar target/*.jar
Hitting the front door, http://localhost:8080, you have the opportunity to log in. If you look at the log, you’ll see that the first time you log in, you don’t get a message because there’s no phone number for you on file.
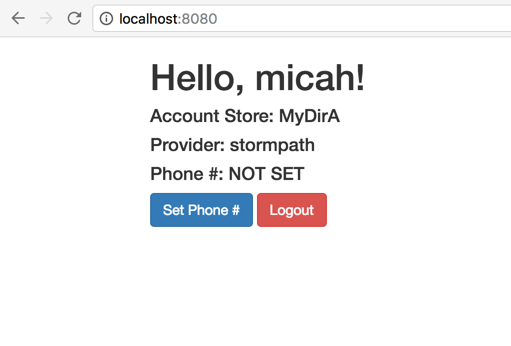
2016-09-15 16:48:31.621  INFO: Account Full Name: micah silverman
2016-09-15 16:48:31.750  WARN: No toNumber set. Cannot proceed.
The next thing to do is to set a phone number:

Now, you can log out and log in again and you should receive the Twilio notification:

2016-09-15 16:53:44.599  INFO: Account Full Name: micah silverman
2016-09-15 16:53:46.080  INFO: Message successfully sent via Twilio. Sid: SM9cd7fdfa3f8f463dbdd8f16662c13b5b

Synergy!
In this post, we’ve taken Stormpath’s post-login handler capability and coupled it with Twilio’s SMS capability to produce new functionality greater than the two of these platforms could do separately.
Definitely a golden-age for services.
In the code repo for this post, there’s some more Spring Boot magic that’s used including dynamically loading the defaultLoginPostHandler or twilioLoginPostHandler based on config settings. To use the Twilio handler, simply set the twilio.enabled=true property in the application.properties file.
Now, go forth and glue some services together for fun and profit!
Learn More
Interested in learning more about user authentication with Spring Boot and Stormpath? We have some other great resources you can review:
- OAuth 2.0 Token Management wth Spring Boot and Stormpath
- Single Sign-On for Java in 20 Minutes with Spring Boot and Heroku
- 5 Practical Tips for Building Your Spring Boot API
Building Identity Management, including authentication and authorization? Try Stormpath! Our REST API and robust Java SDK support can eliminate your security risk and can be implemented in minutes. Sign up, and never build auth again!